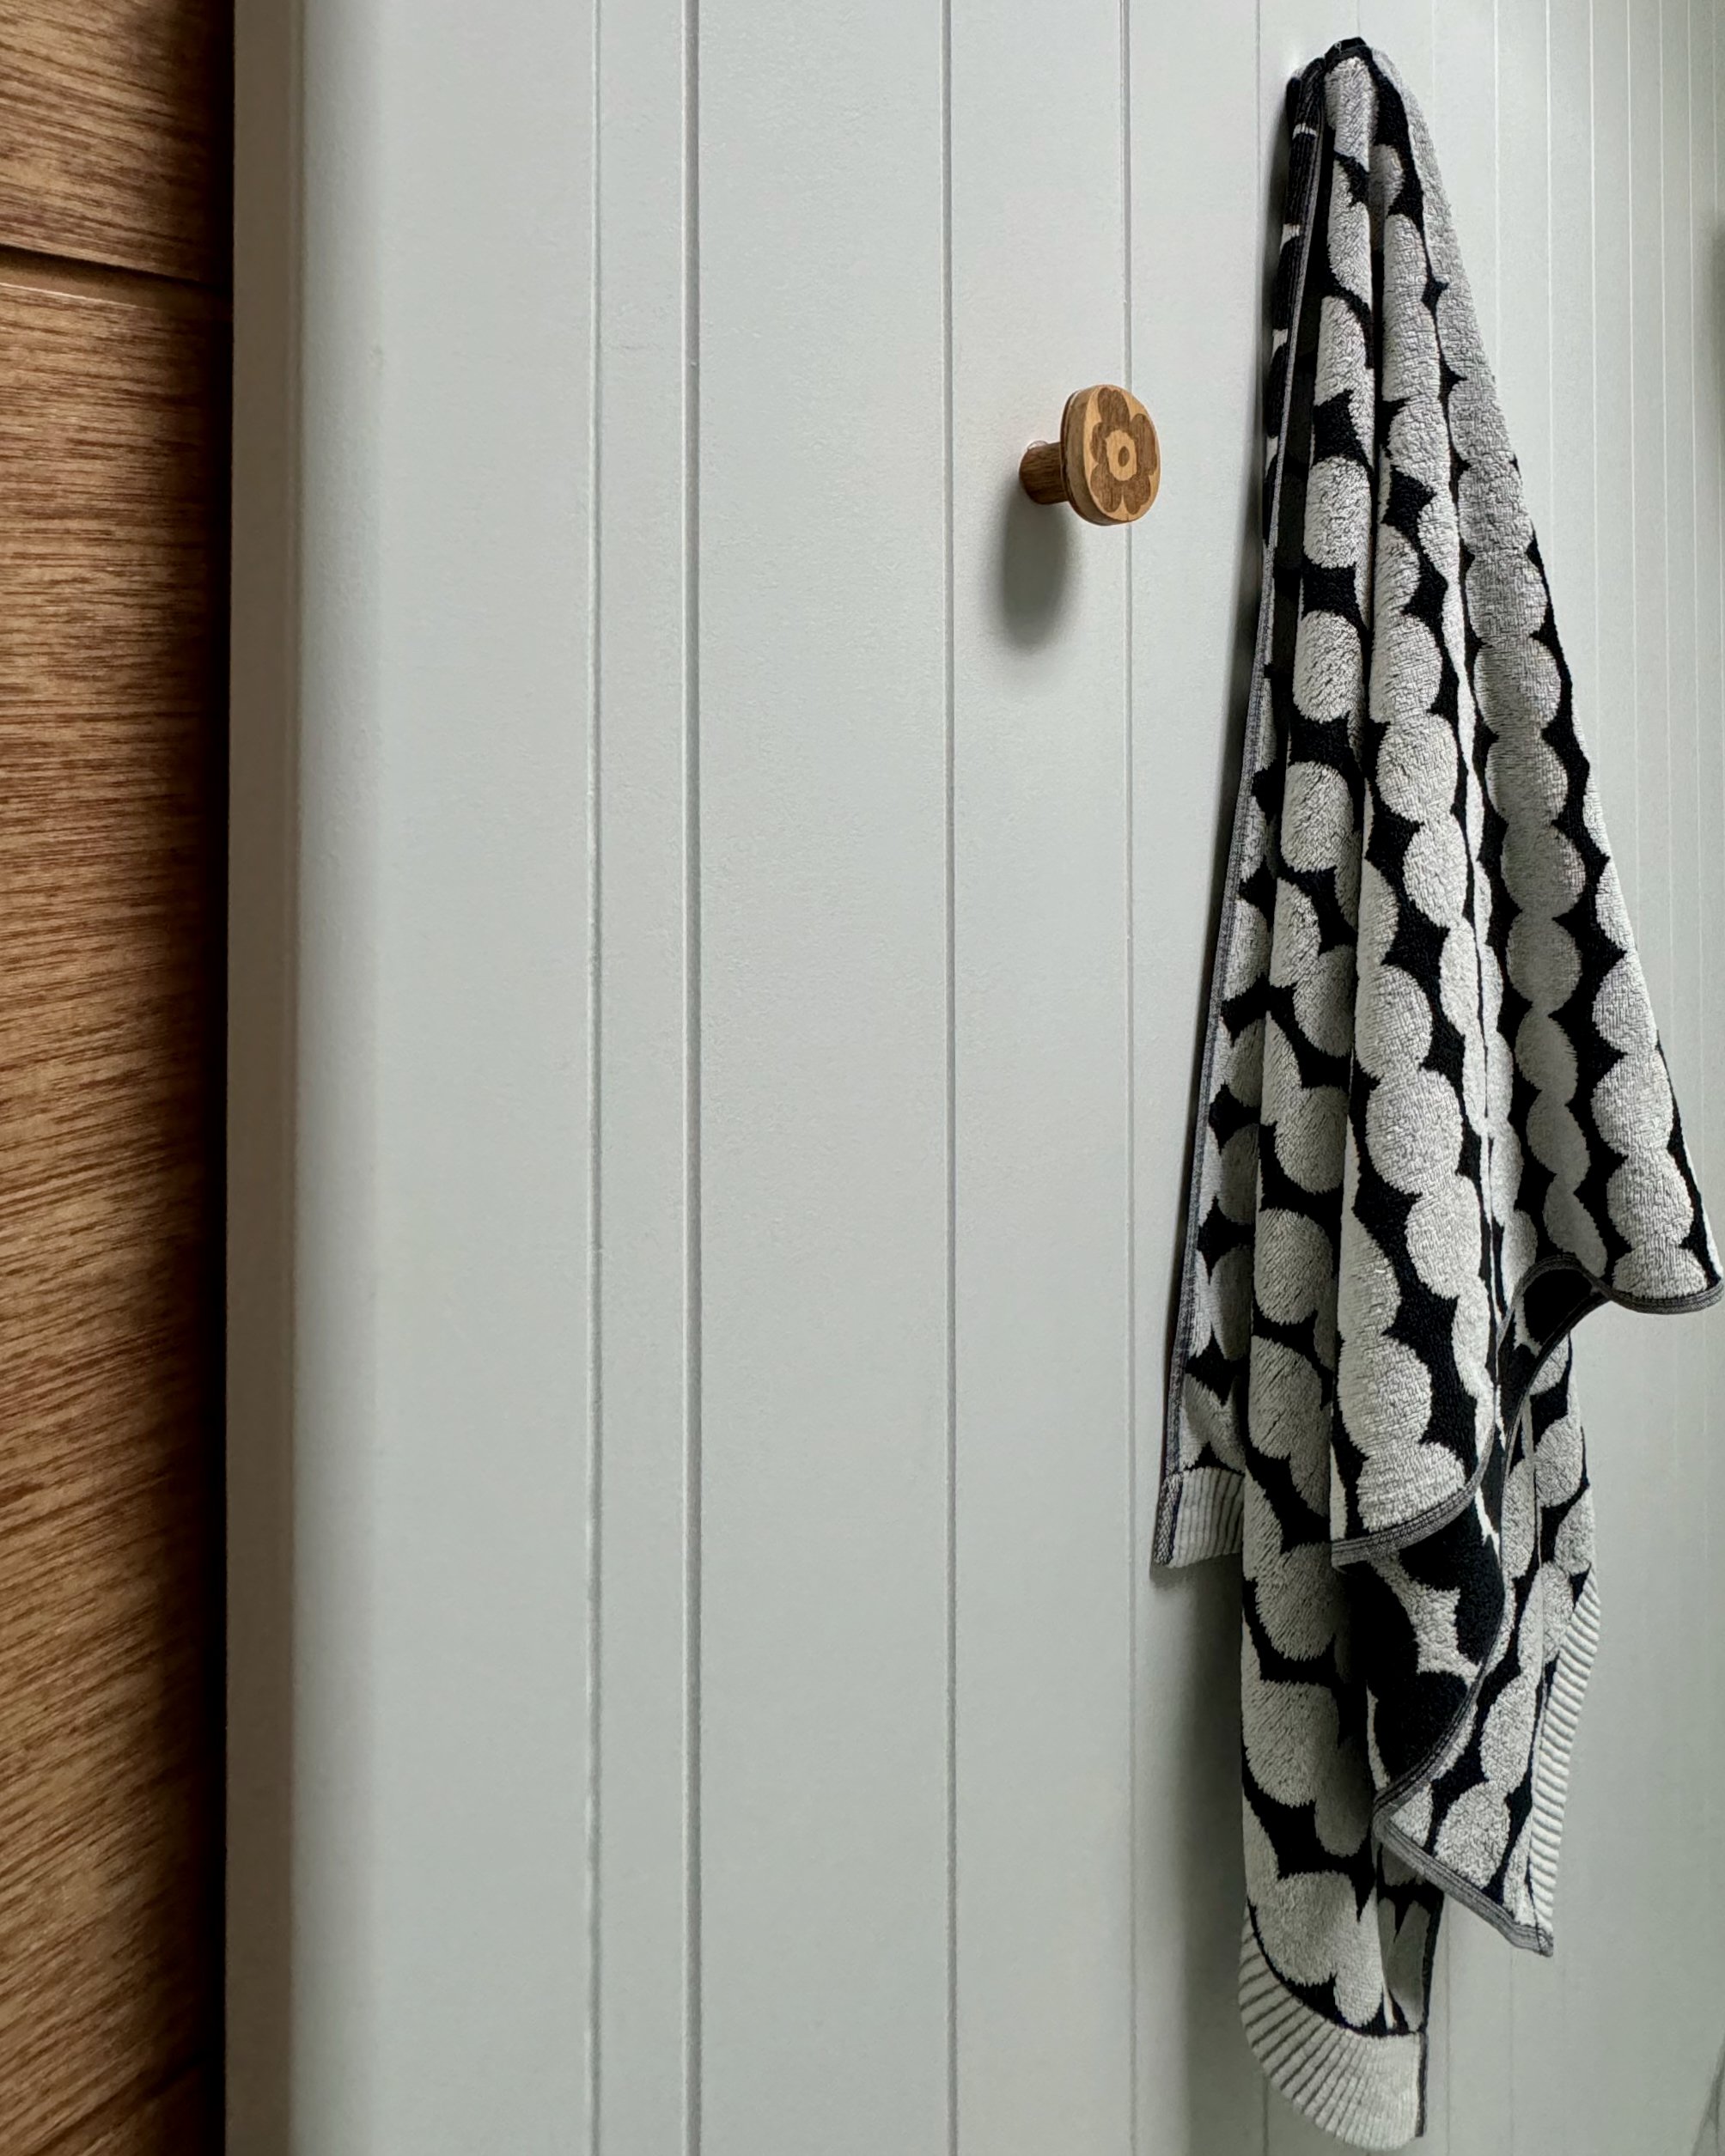
Mid-Century Hat Rack
Alun Machin
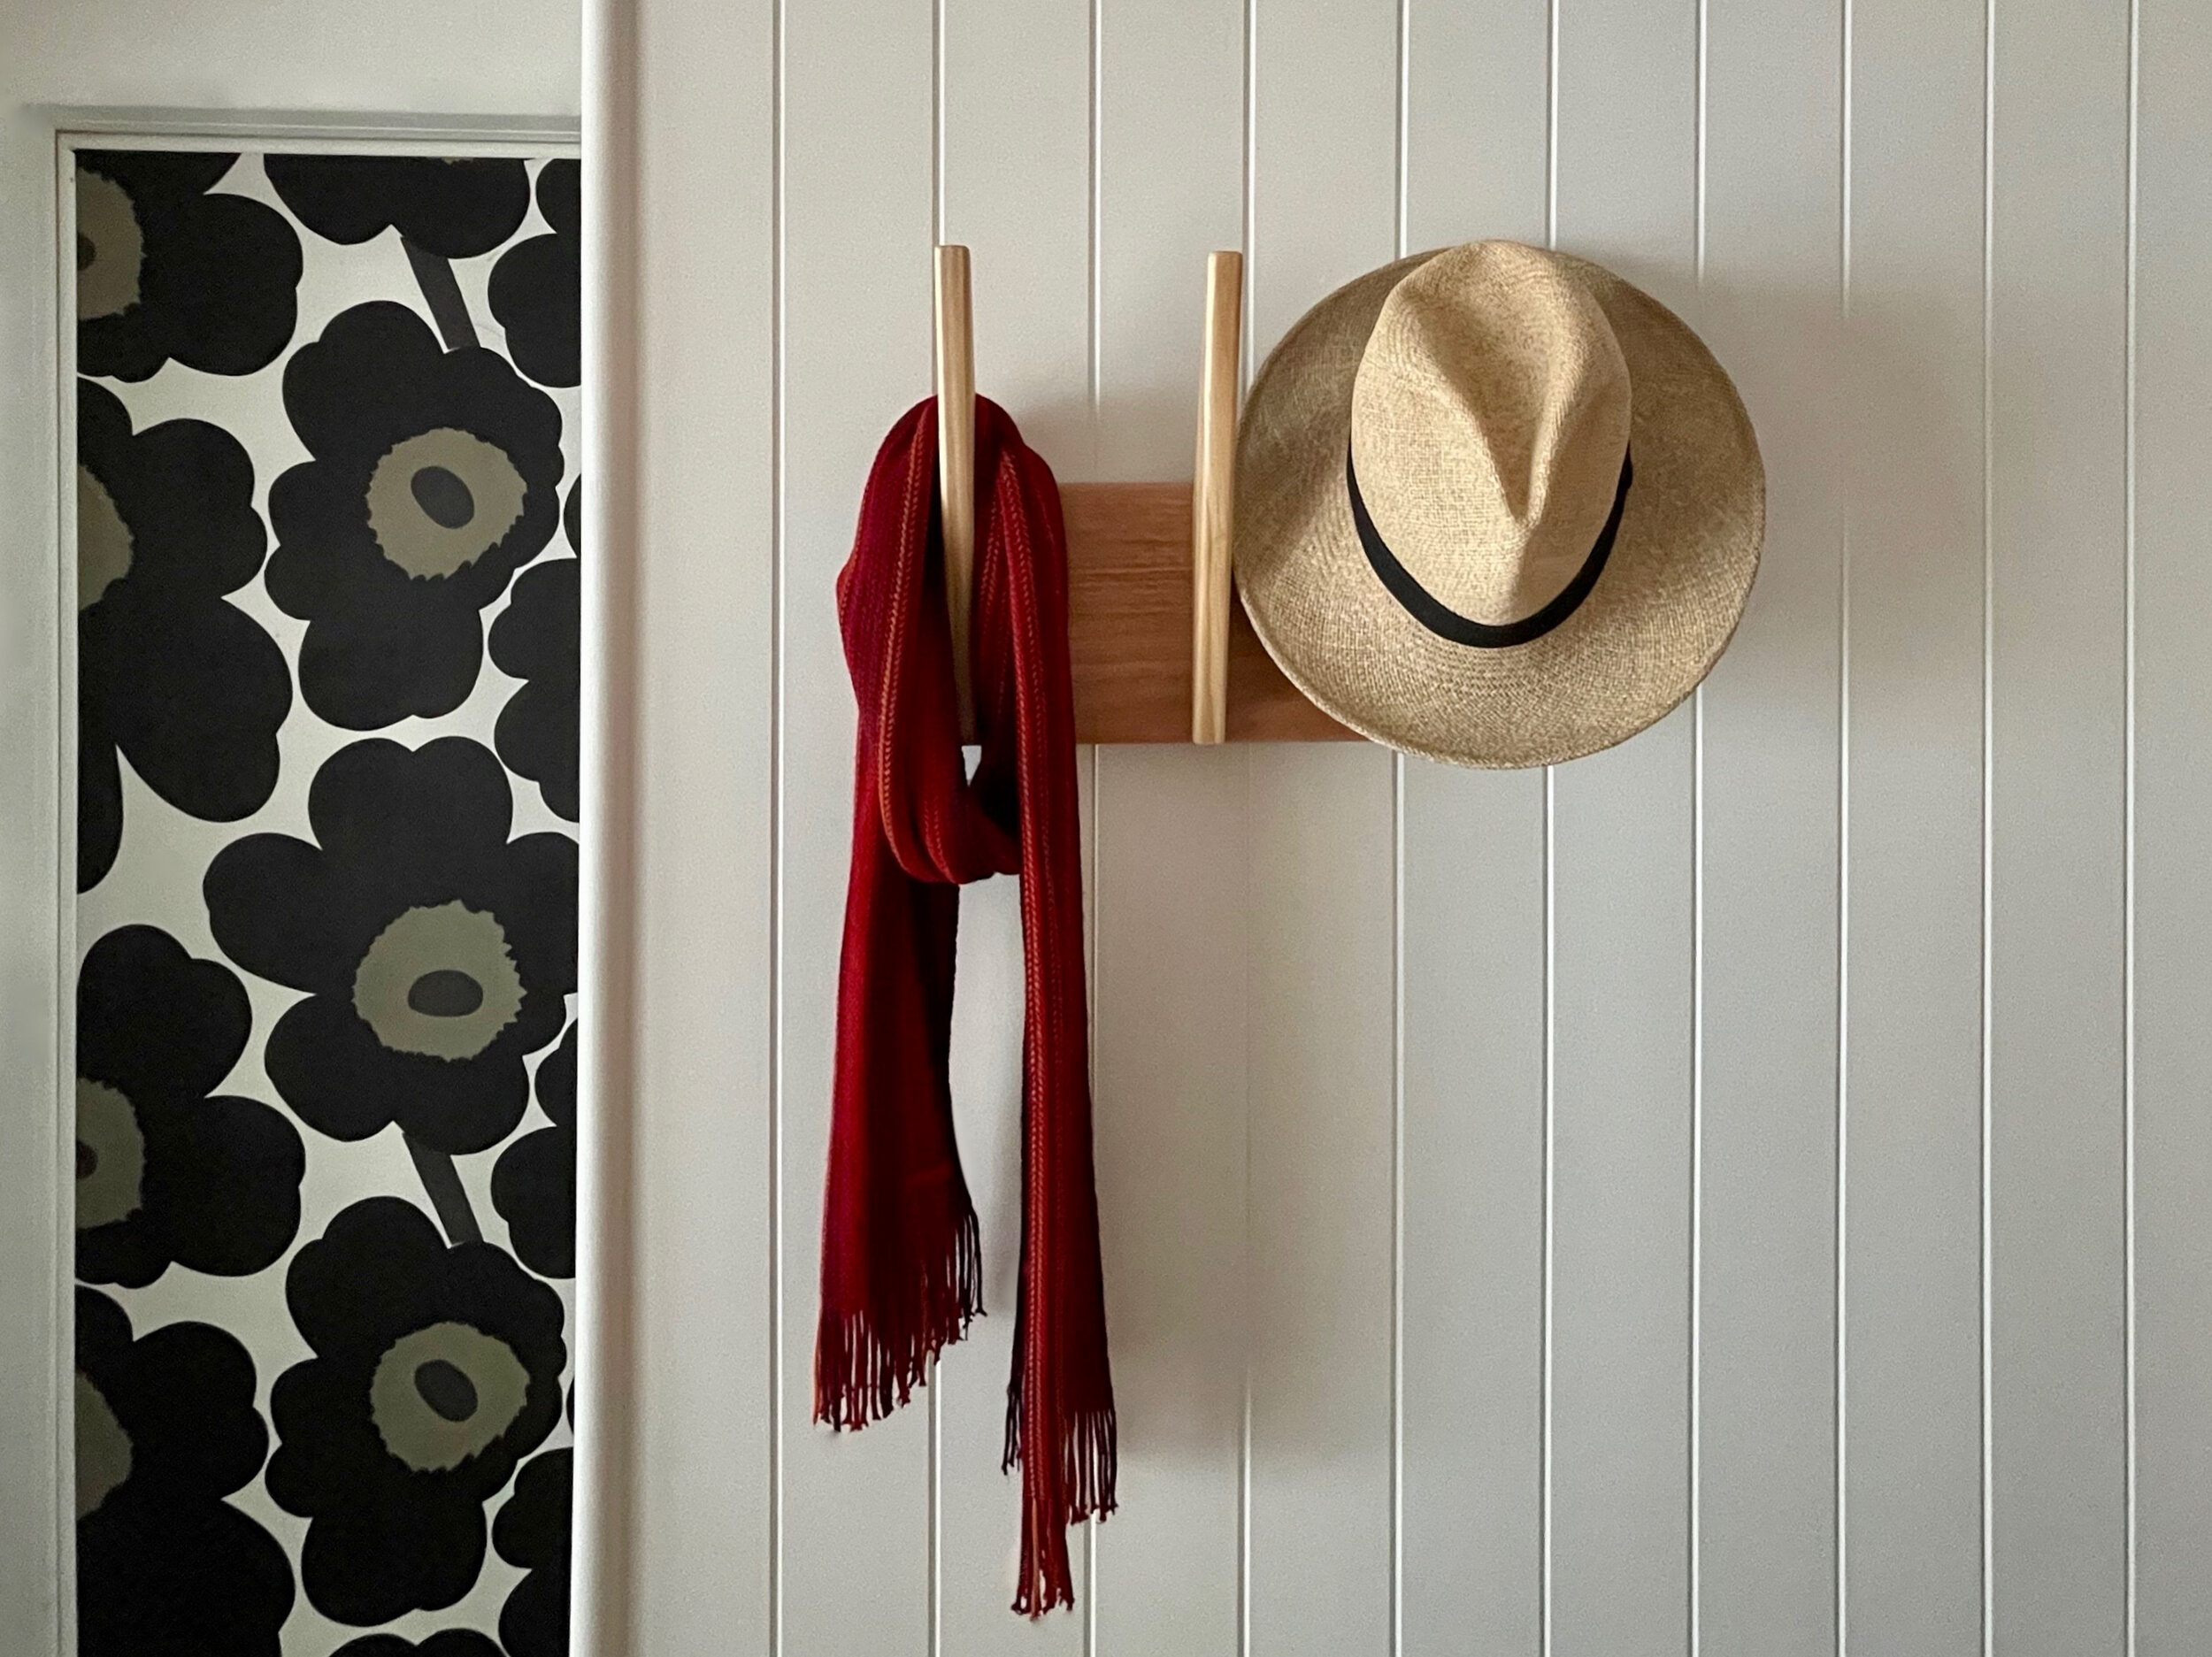
In designing this rack, I was inspired by mid-century furniture that tends to be angular, but with curved edges and elegantly narrowed tips, such as these popular cigar-shaped coffee table legs and wood-turned sofa arms.
TIP Hang this in an entryway to tidy hats and coats, position it in a bathroom for towels or a walk-in robe to keep scarves and bags neat.
“In true mid-century style, I’ve contrasted a darker hardwood backing with a lighter timber for the hooks. Pine is also soft, which makes it easier to cut and round-over the ends.”

DIY MATERIALS
Two 300mm lengths of 188mm x 235mm-wide DAR pine
A 400mm length of 18mm x 165mm-wide hardwood (cut from a timber panel)
8G x 35mm timber screws
8G x 50mm timber screws
Zenith 125mm SureHook Timber Frame Picture Hanging Rail with supplied screws
Cloths
Disposable gloves
DIY TOOLS
Measuring tape and pencil
Random orbital sander with 180-grit abrasive disc
Drill with driver bit

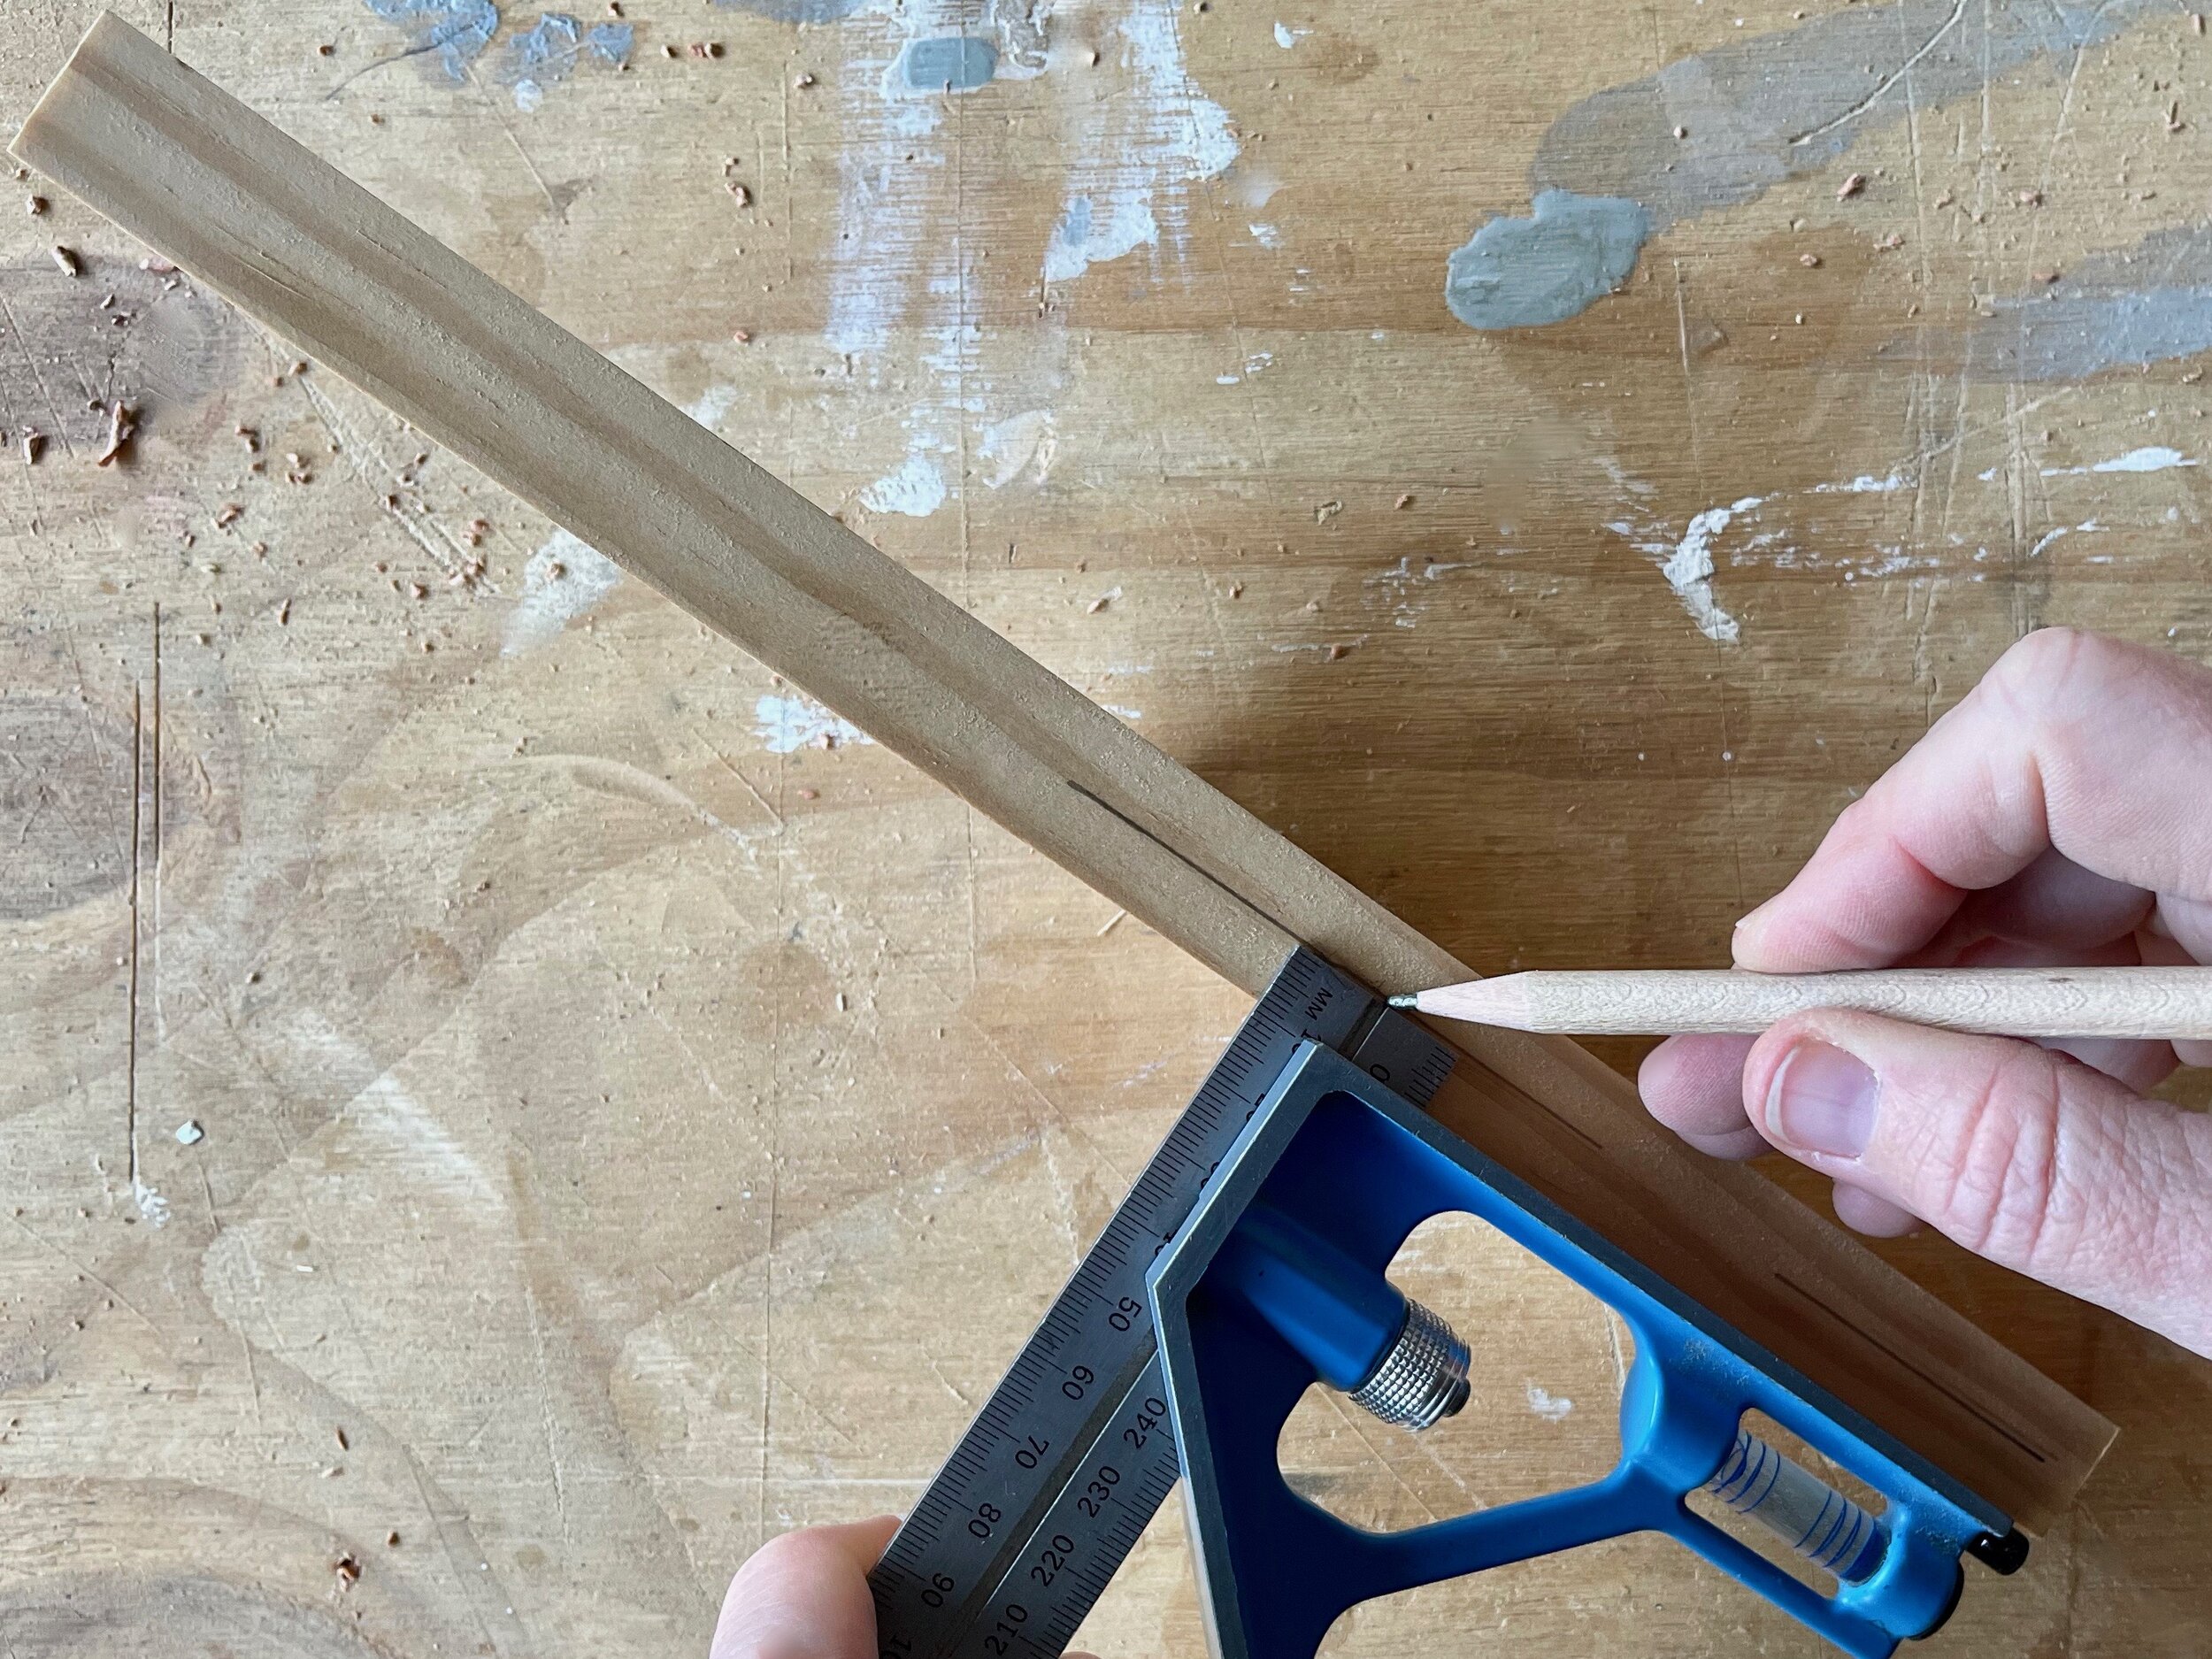
To mark up the hooks, I cut two lengths of 235mm-wide pine to 300mm long. On each piece, I used a combination square to find the centre (150mm from the ends), marking a line widthways. Along this line, I marked 55mm in from each side. At the ends, I marked 15mm in from each side and joined the marks with dotted lines to indicate the diagonal cuts.

I set my mitre saw to cut 15° to the right, positioned the pine against the fence and plunge-cut along the diagonal that matched the saw angle. Then I flipped the piece to cut the second diagonal. I changed the setting to 15° to the left, plunge-cut the diagonal line that matched the saw and flipped the pine to make the last cut.
TIP Don’t extend the plunge-cuts to cut past the corner of the hook, just cut along the marked lines.

To cut the base of the hooks at an angle, I set the saw to cut 15° to the right, then positioned the hooks with the long straight sides against the fence to trim about 5mm from the end. I pencilled these ends with a B (to indicate ‘Base’). I sanded the hooks all over with 180-grit abrasive paper to remove pencil marks, round-over the edges and smooth the tops.
I cut a piece of hardwood to 165mm wide and 400mm long to be the backing. Working on the reverse of the backing, I measured halfway along (200mm) and 50mm in from the ends to set the hooks 150mm apart (measured from centre to centre). I measured in 35mm from the edges and drilled the holes right through using an 8G combination countersinking bit, then sanded all over.

Down the back edge of the hooks, I marked a centreline using a combination square (9mm in from either side). Then positioned each hook sideways to transfer the holes onto the pine and drilled into them about 3mm deep.
TIP Ensure the hooks are flat, with the base flush to the backing, when marking up.
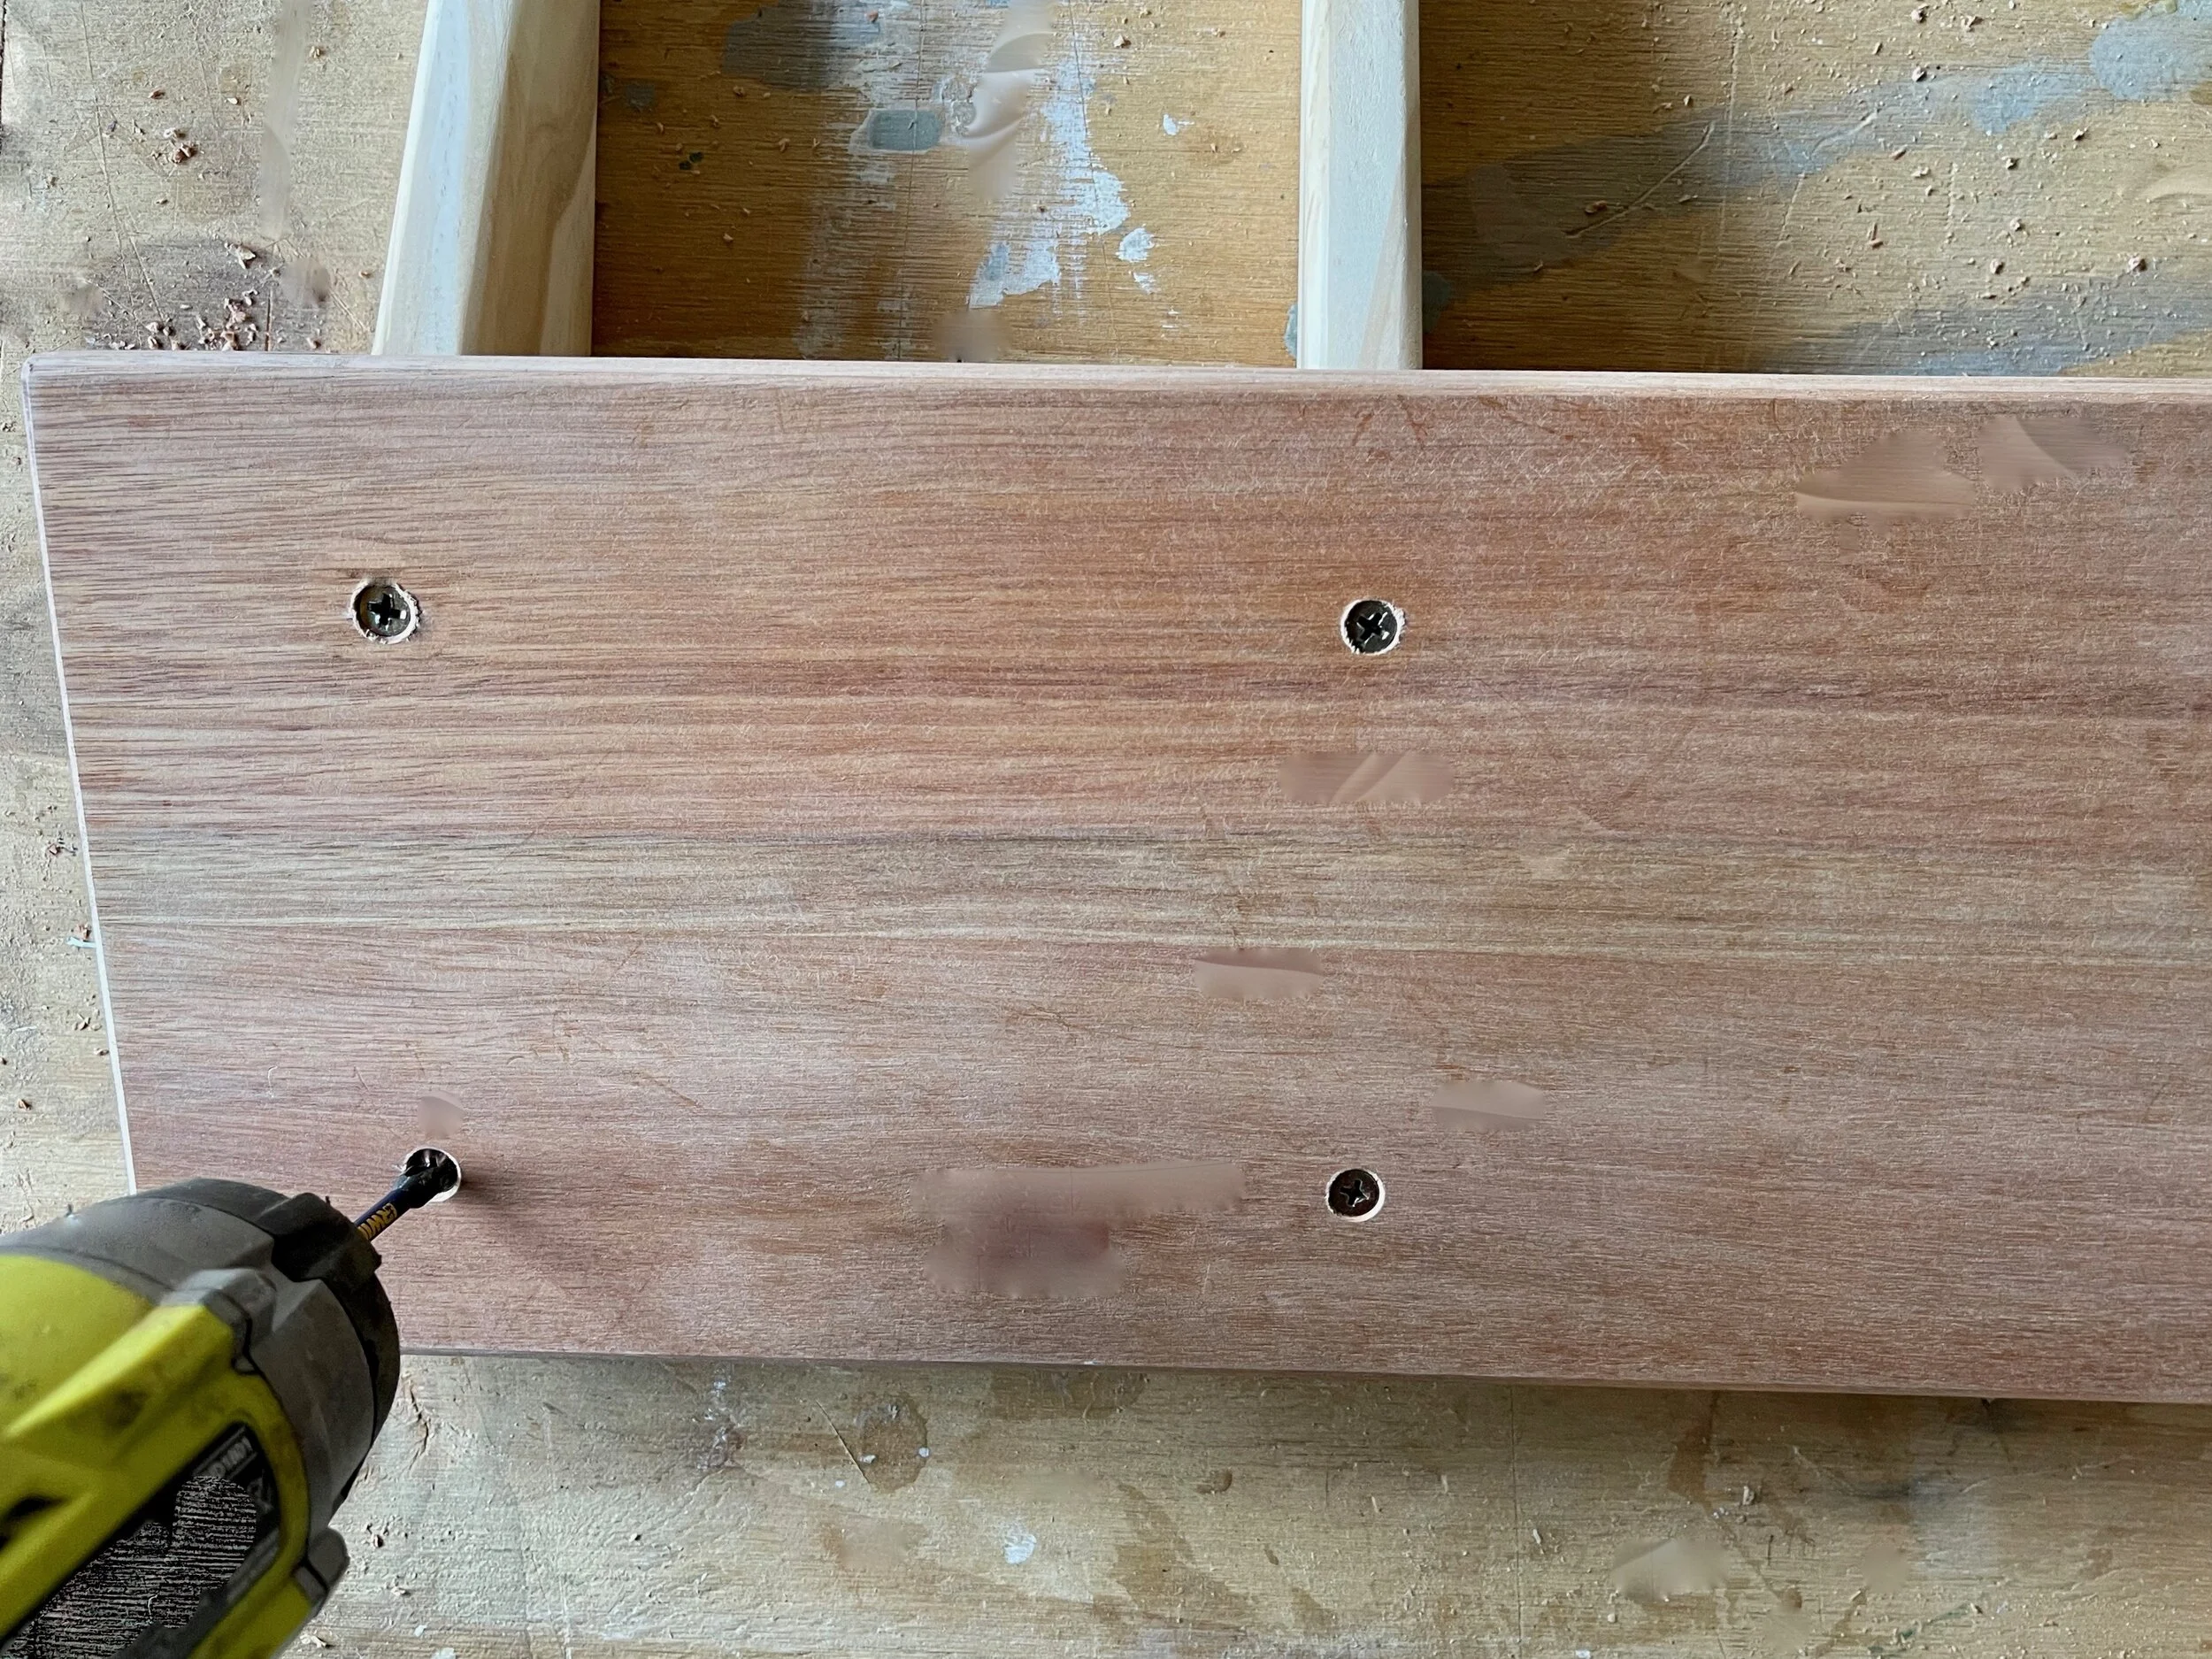
On the reverse of the backing, I installed 45mm-long screws into the top holes and 35mm-long screws into the base holes so they protruded about 3mm from the front. I positioned the hooks onto the protruding screws, held them flat against the backing to flip it over to tighten the screws.
TIP Attach one hook at a time, beginning with the centre, checking it’s pulled tight against the backing.
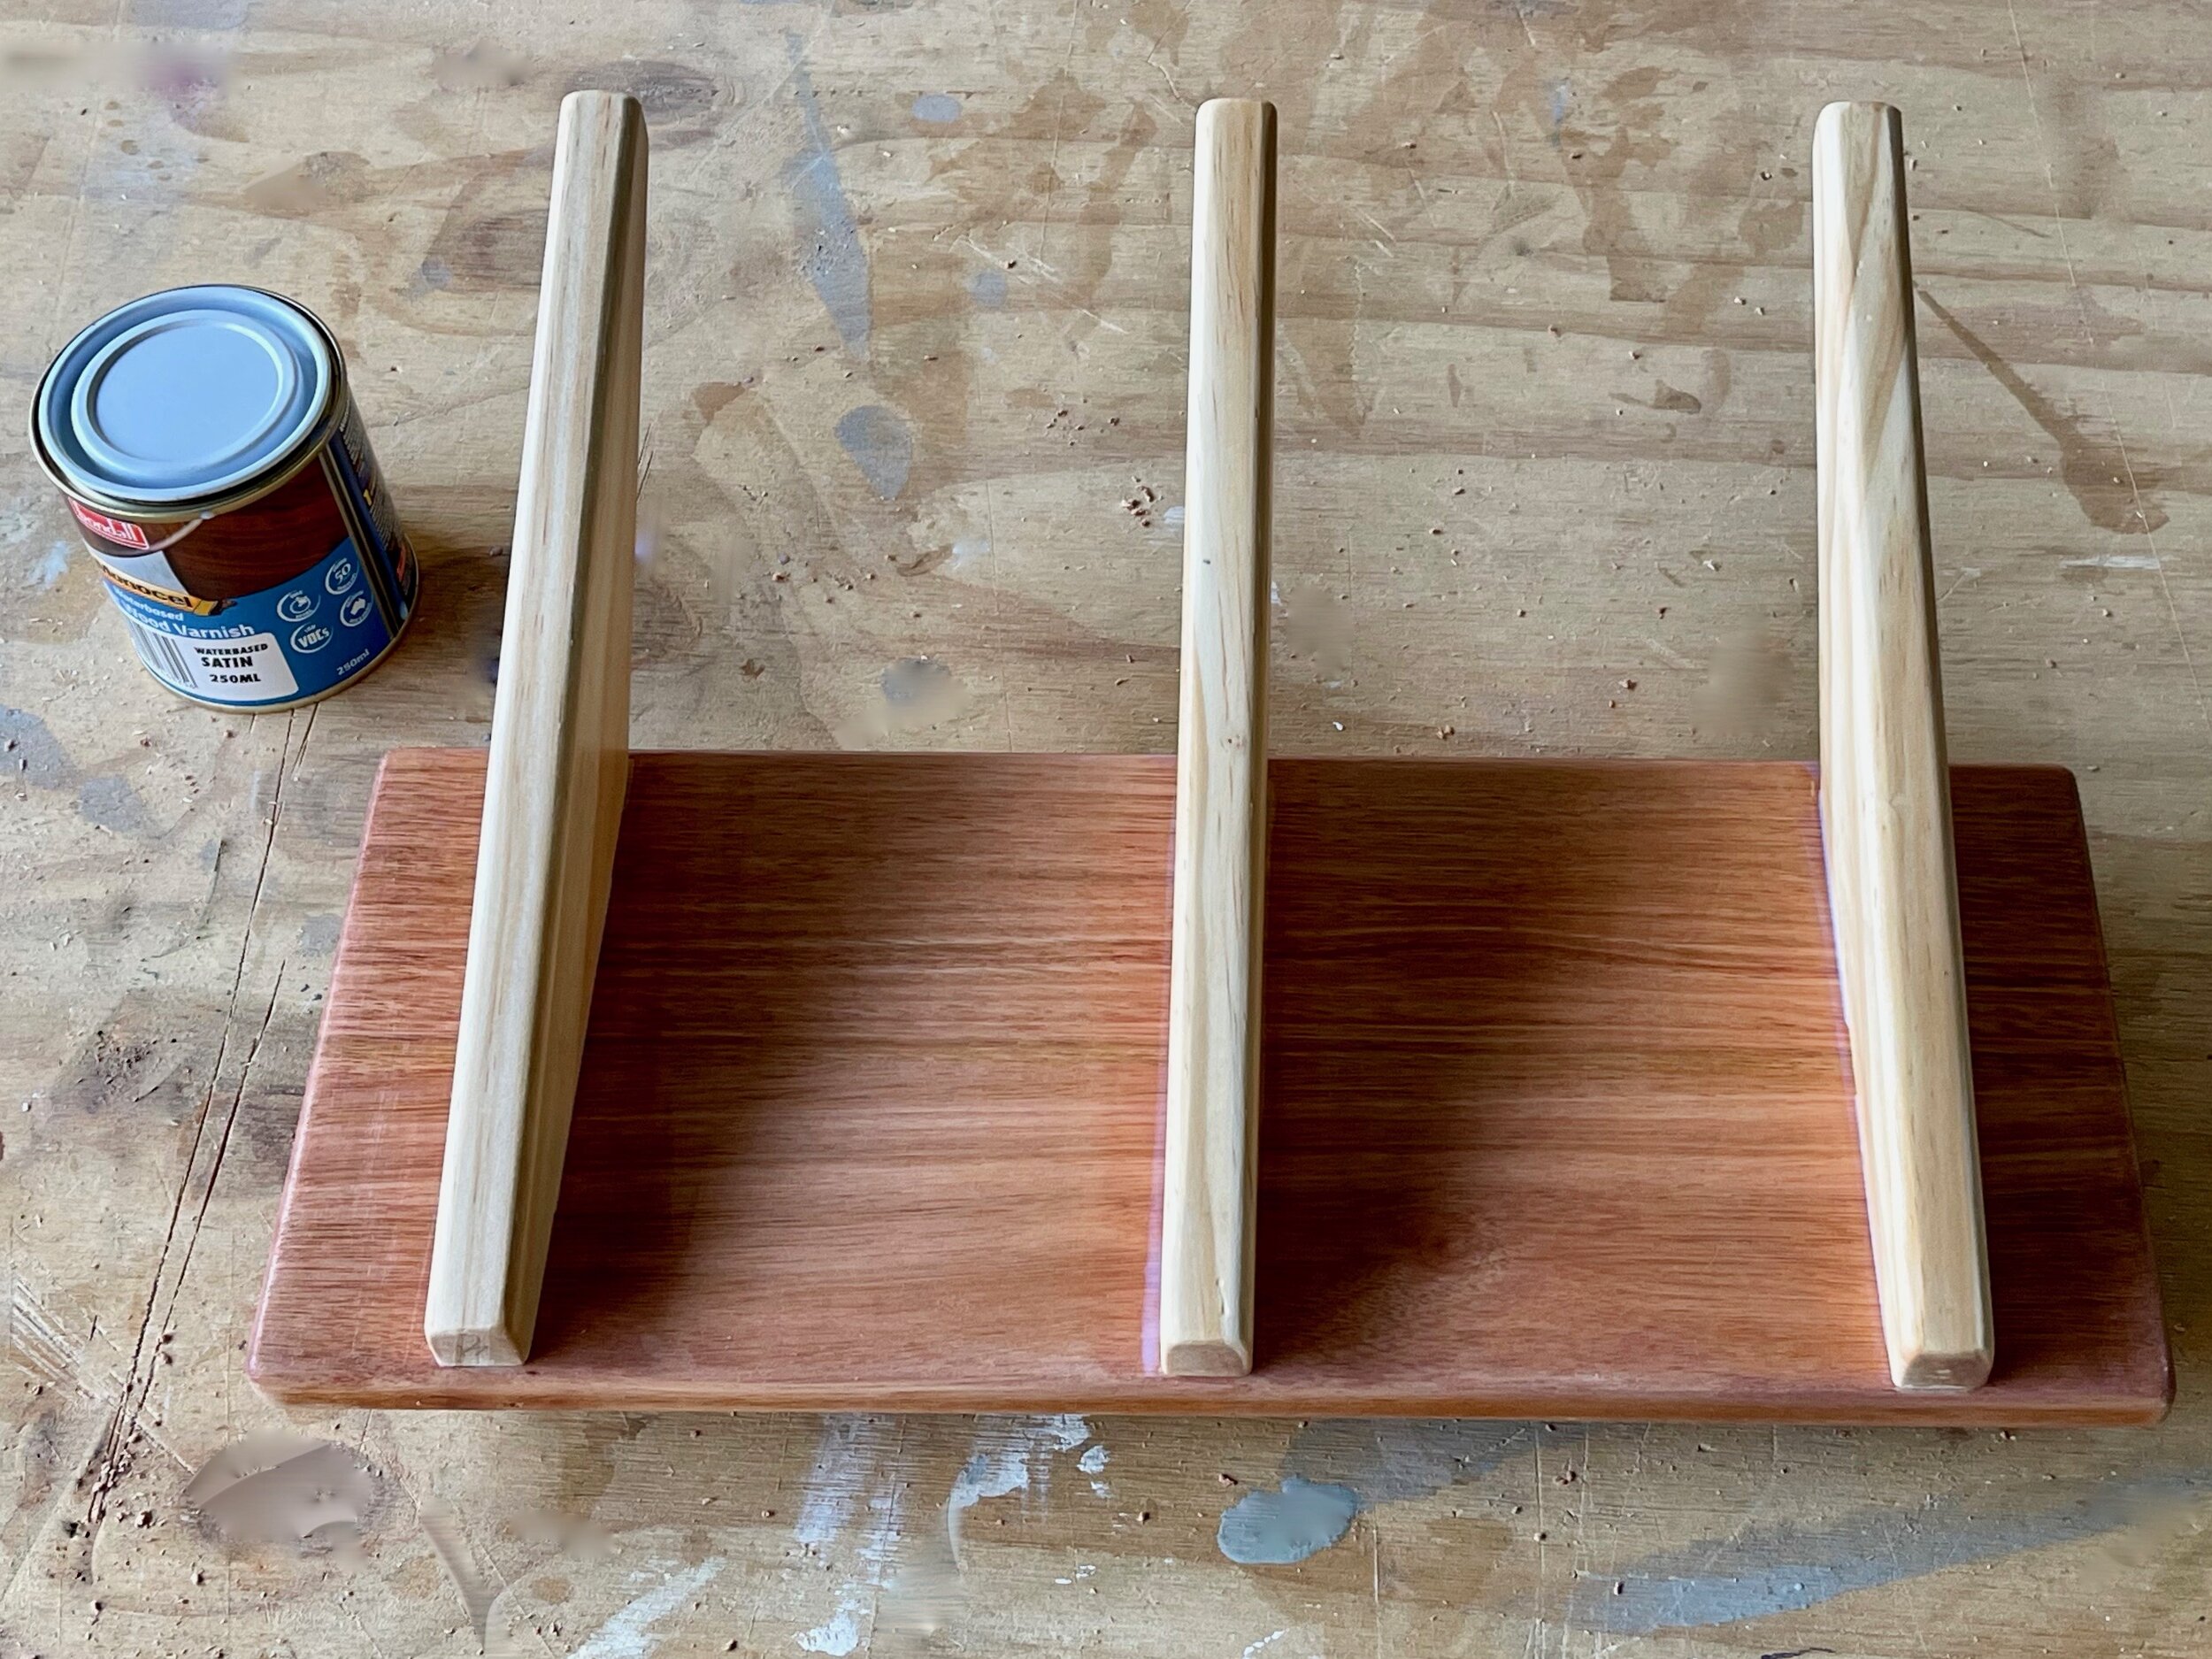
I sanded all over the hat rack, then wiped away dust with a damp cloth. To apply the varnish, I wore a disposable glove and wiped all over with a small, clean cloth, leaving to dry, then repeating for a second coat.
TIP Place the rack on some offcuts to raise if off the workbench for access around the edges.

To hang the hat rack, I used a two-part picture hanging rail to distribute the weight evenly against the wall. I centred the picture frame piece 15mm down from the top of the backing, pre-drilled the holes to about 3mm deep and attached it with the supplied screws.
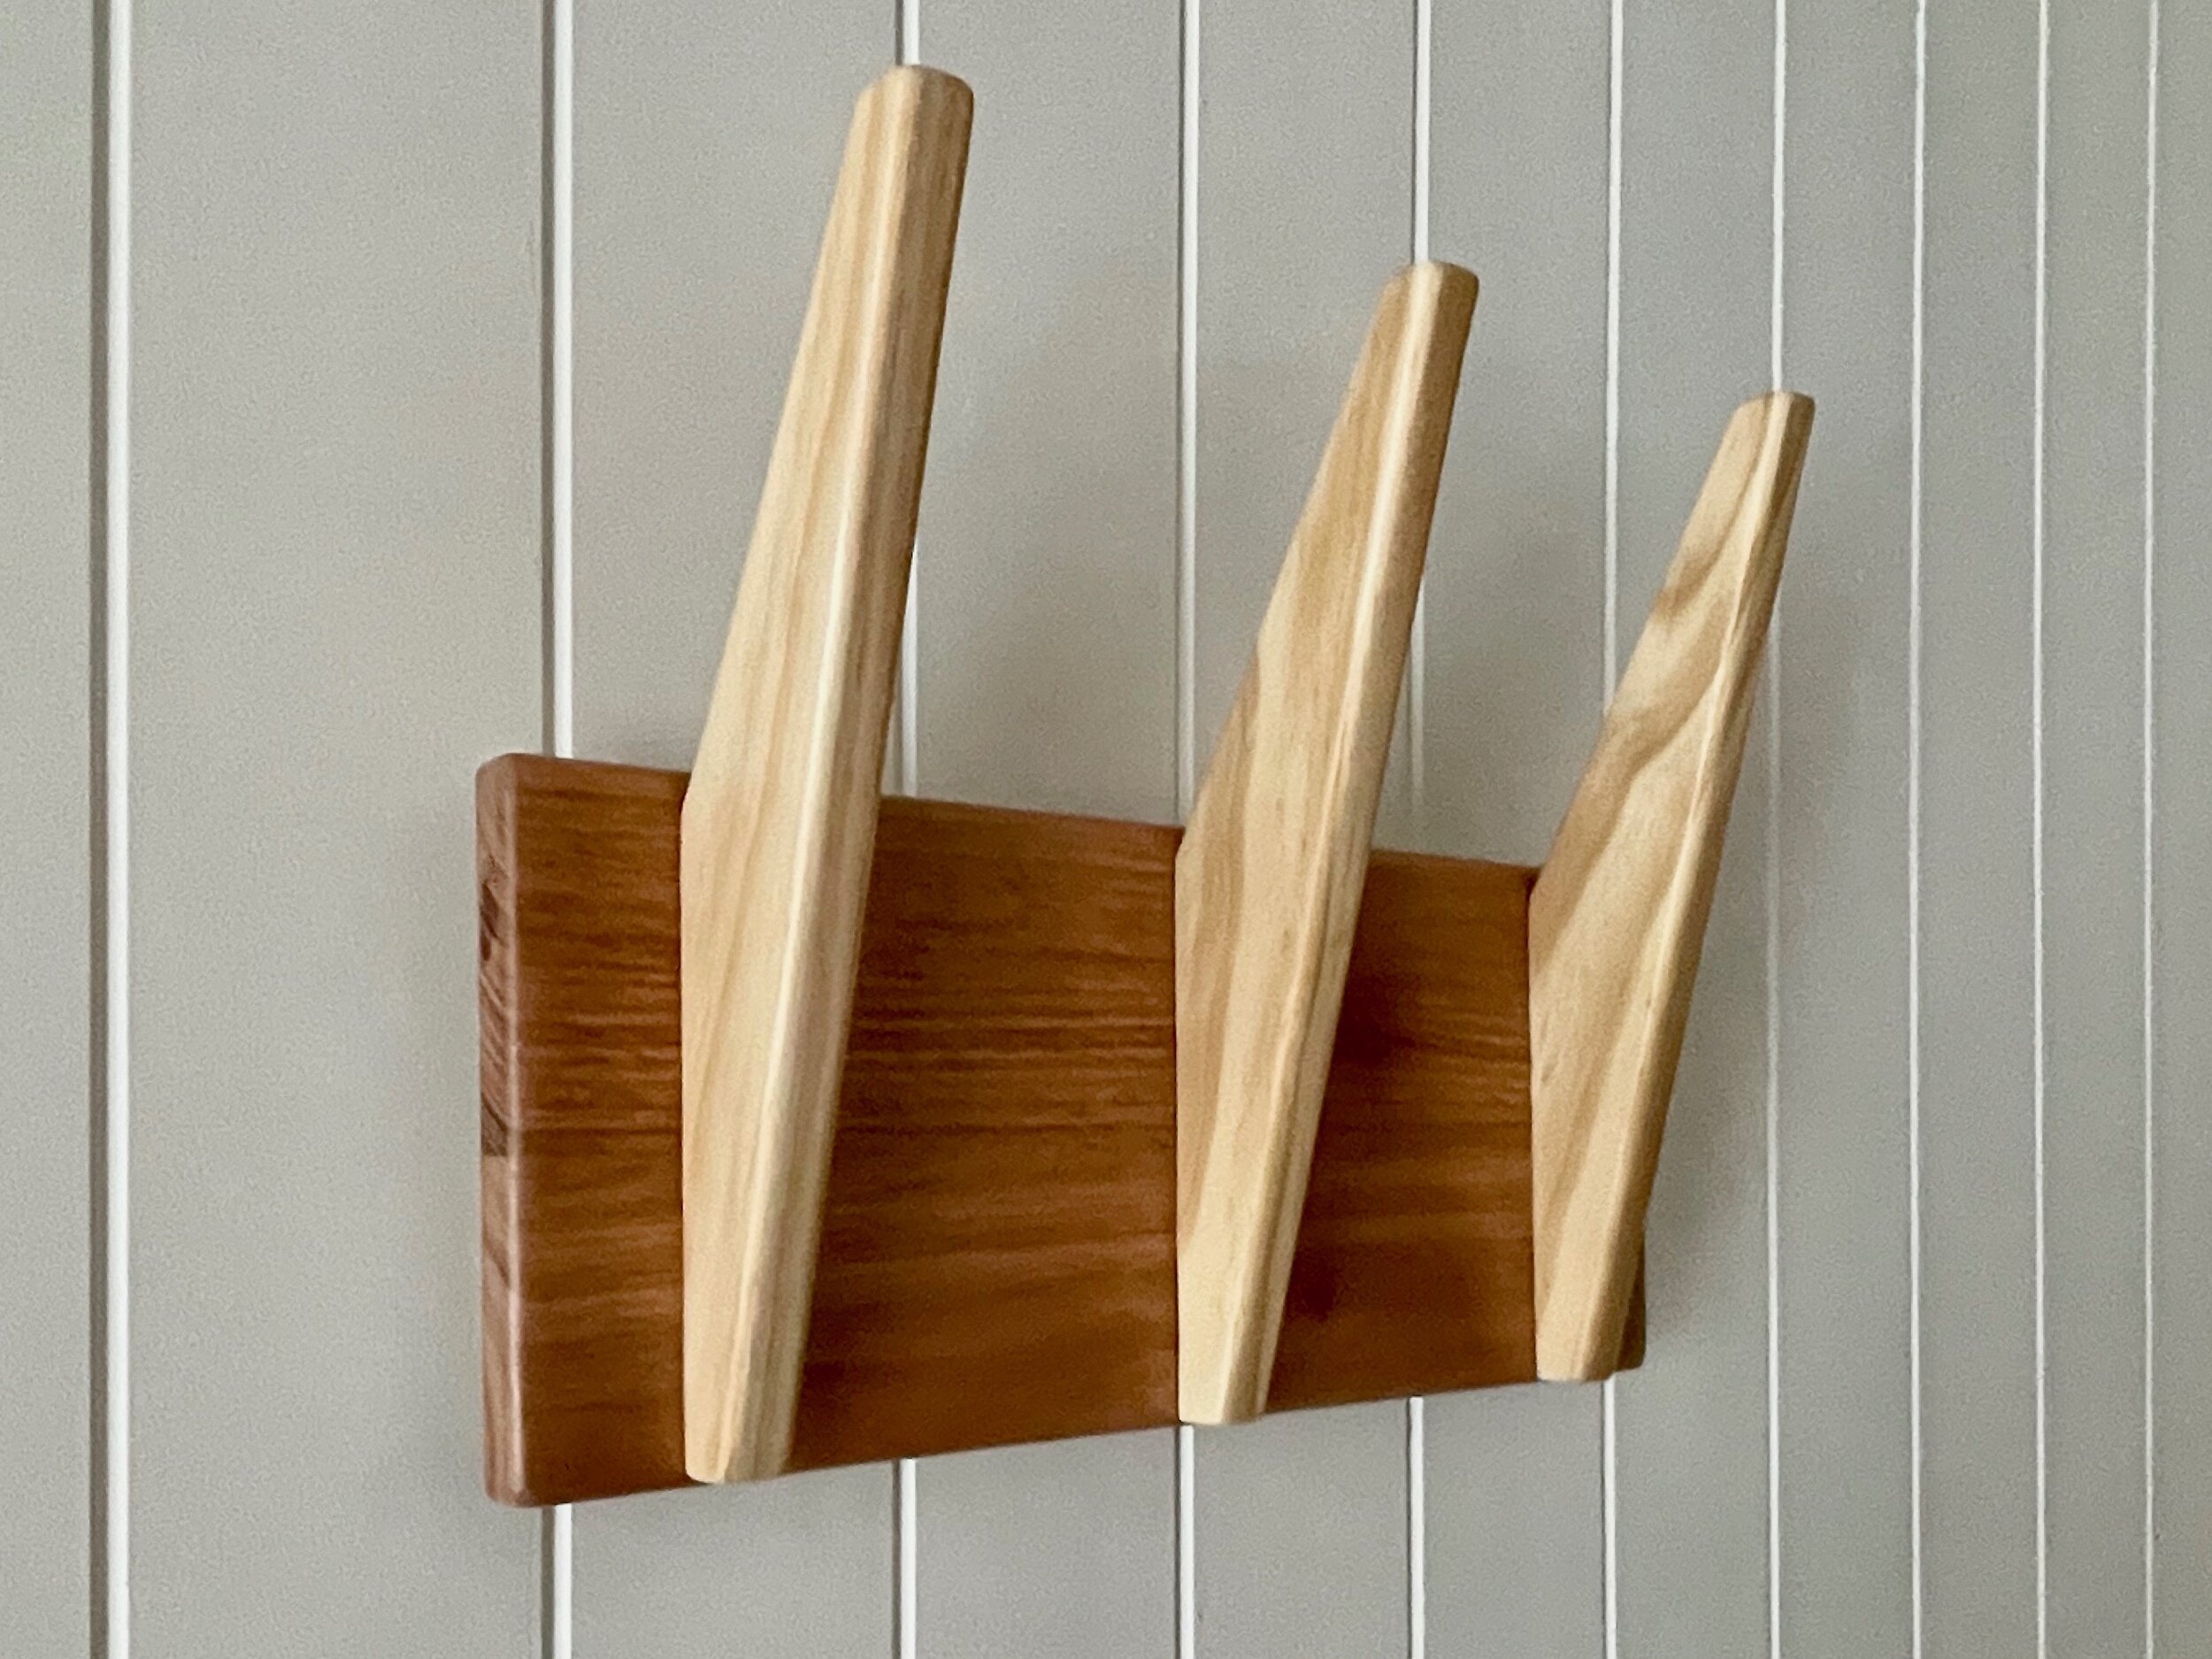
I used the supplied plasterboard anchors to attach the second part of the picture hanging rail to the wall. Then simply lifted the hat rack onto it.
TIP The hanging rail holds up to 25kg, so if you make a longer rack with more hooks, install a second rail to help distribute the weight.

Tag me on your project and follow more of my DIY journey on Instagram for tool tips, home improvement and simple building projects.