Scalloped Side Table
Natasha Dickins
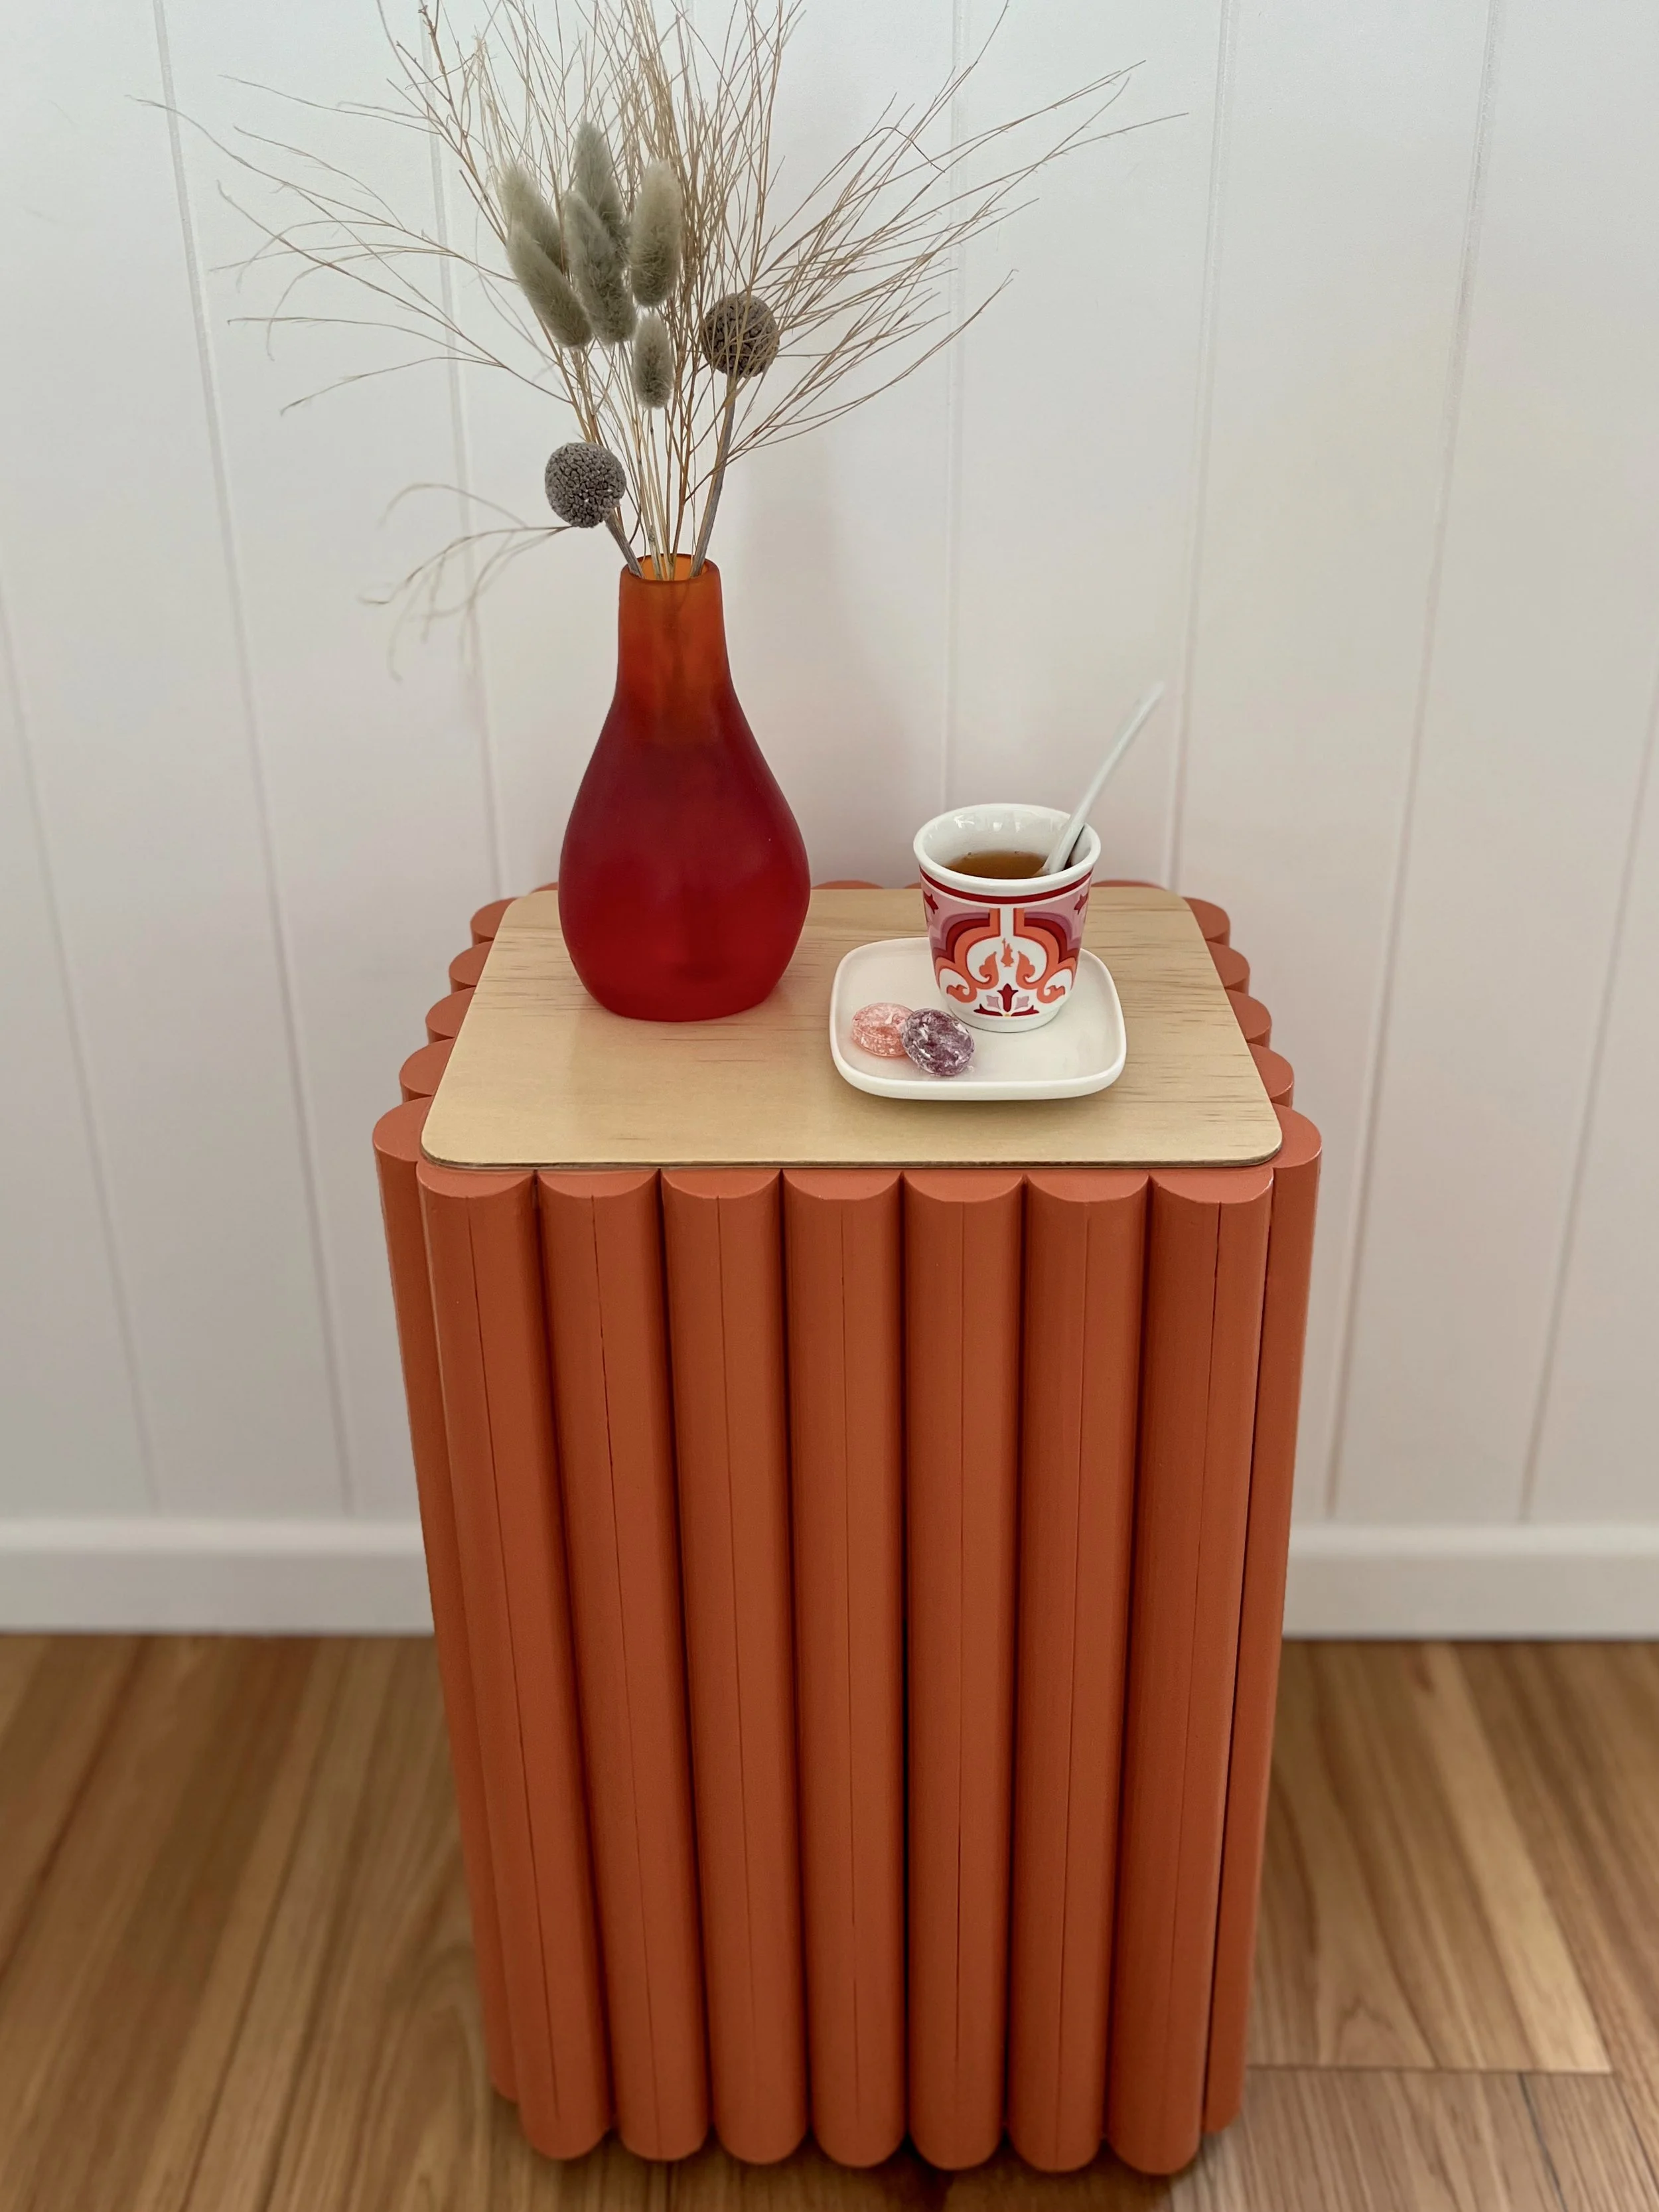
Would you believe this little side table cost me just $8 to make? For the self-adhesive slide glides. All other materials are offcuts and leftovers from home improvement projects, including the paint.
The scallops are created by quad-shaped moulding that gives the table a sunny feel. The finished size is 350mm x 225mm and 455mm high, making it perfect to tuck next to an armchair.
TIP You could make this table to any size. Just work out the dimensions for the top and base by checking that the moulding fits along the edges before cutting the plywood.
“Aside from the cute scallop effect around the edge I love the slightly lacquered finish achieved by sealing with water-based satin varnish.”
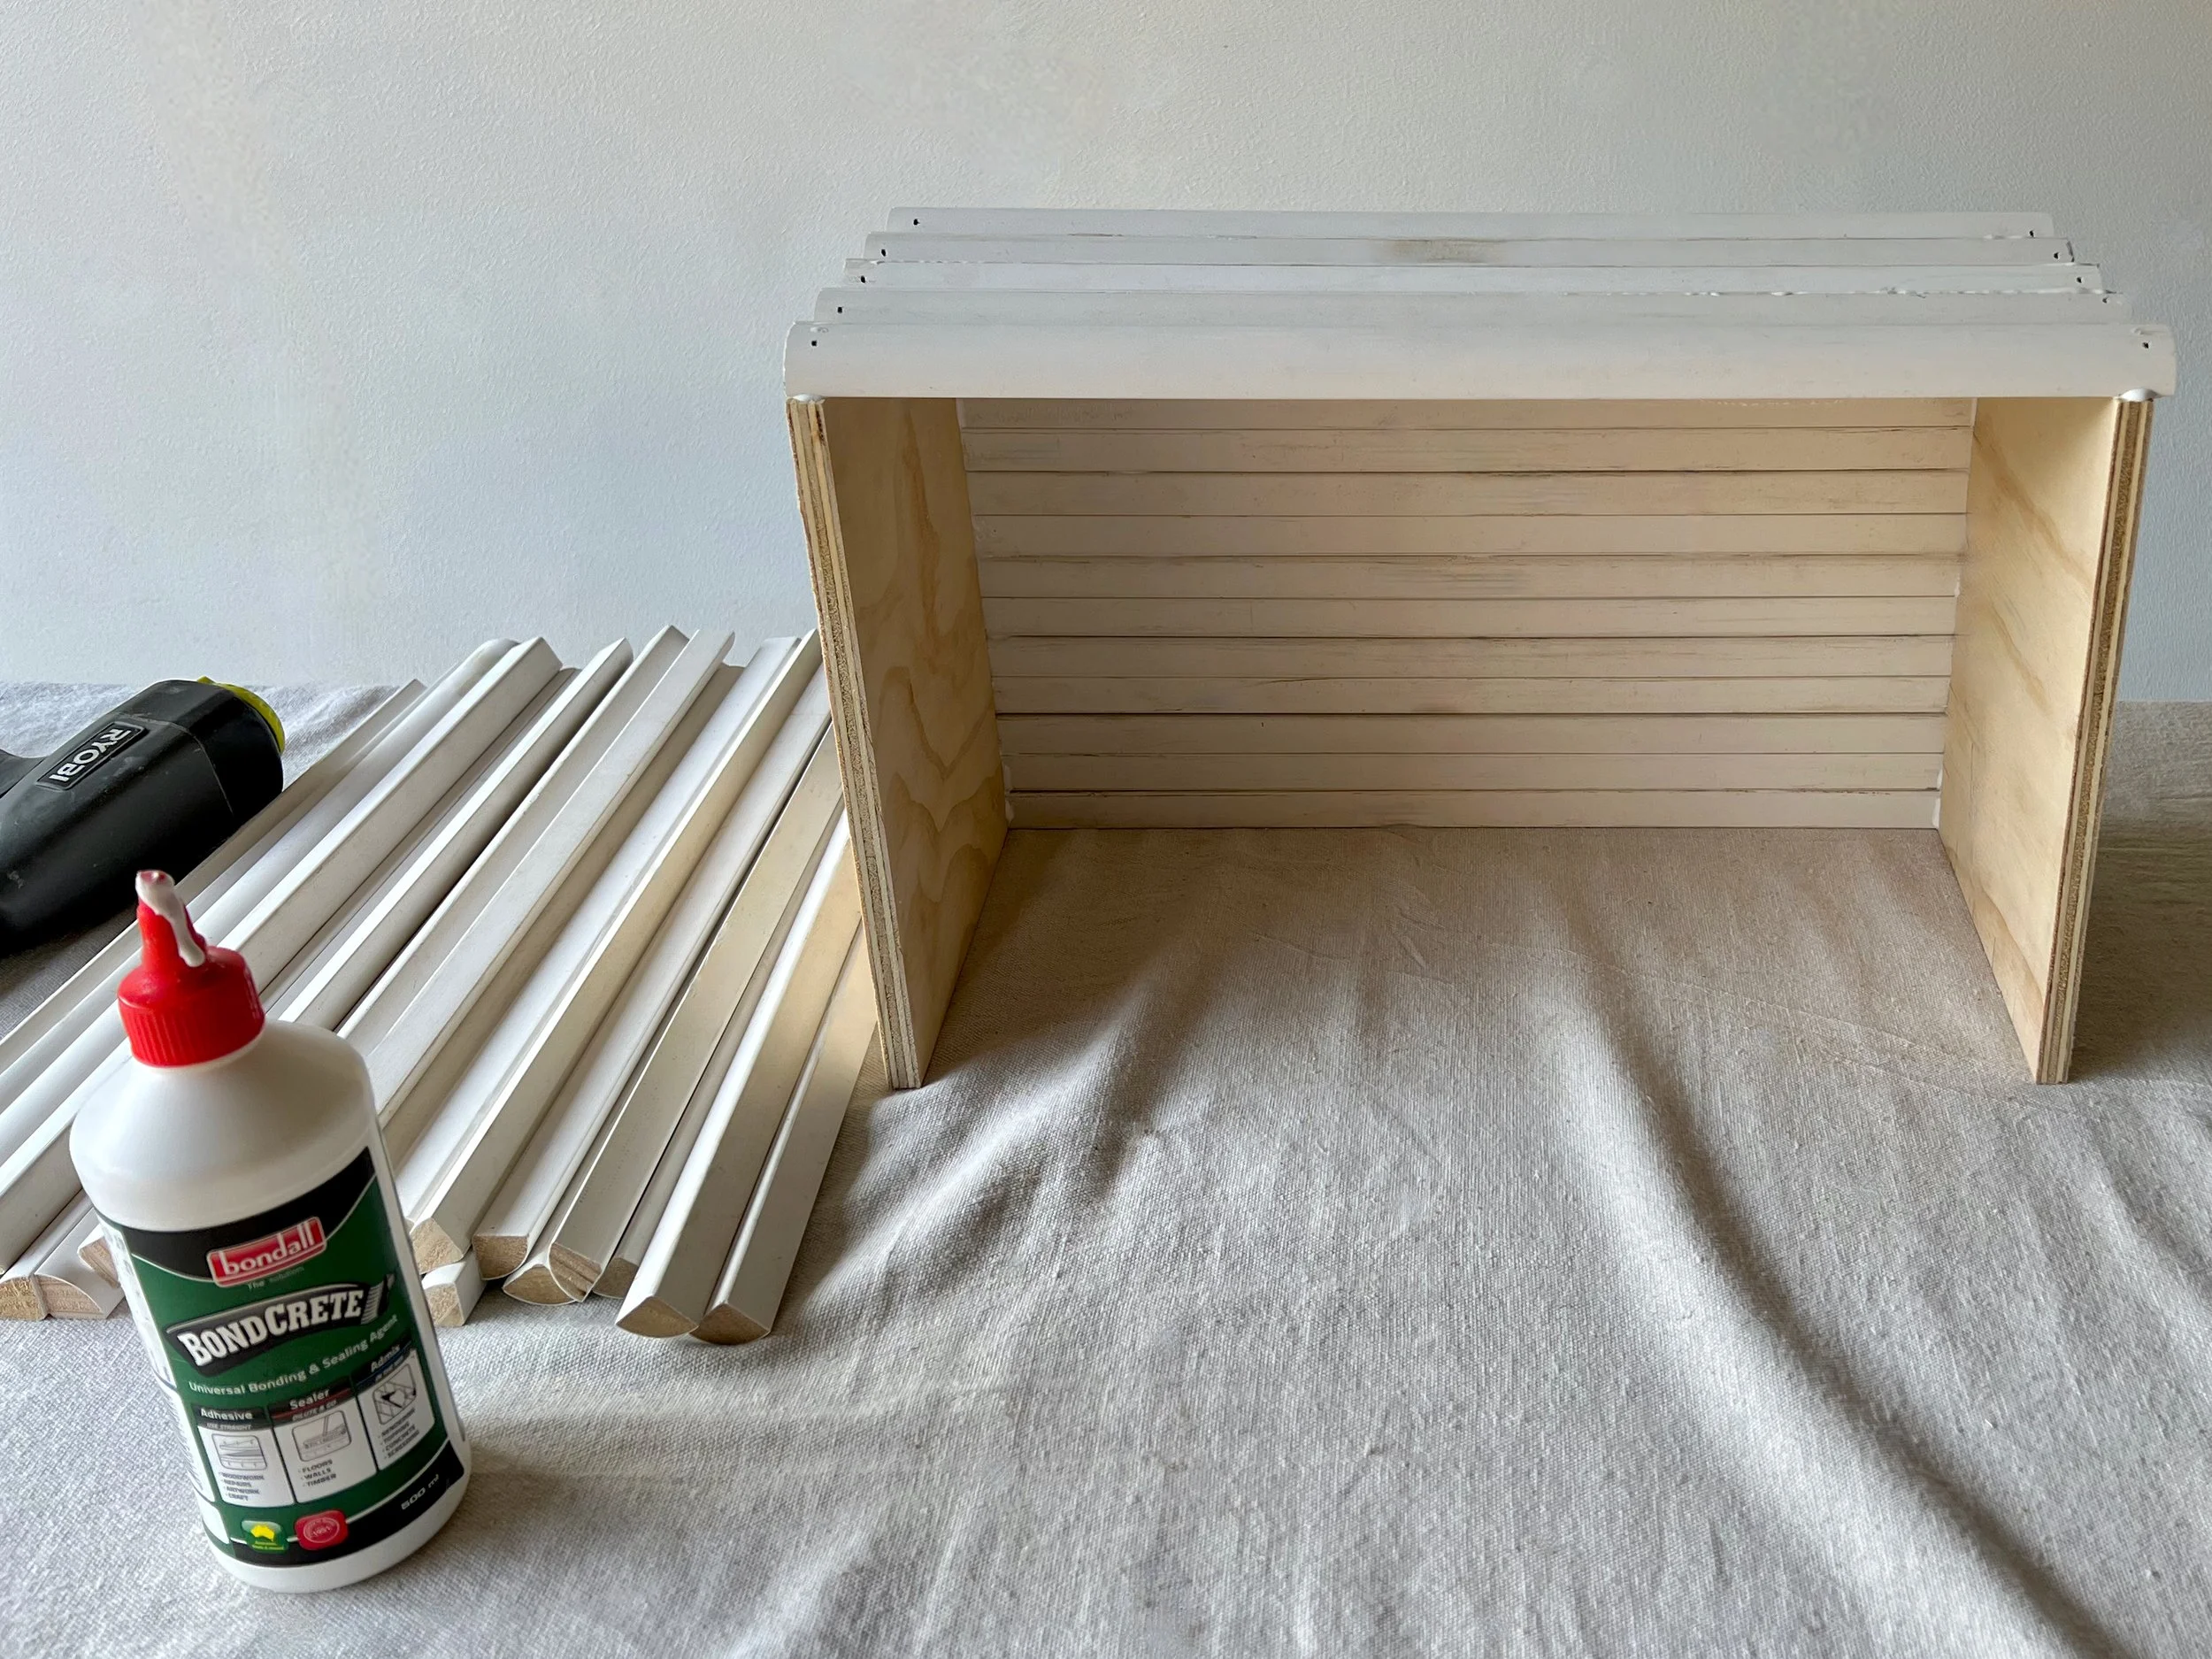
All I needed was quad moulding, 3mm and 12mm plywood offcuts, acrylic paint and Monocel Water Based Clear Varnish to finish. I used a Ryobi brad nailer with 32mm brad nails and Bondall Bondcrete as woodworking adhesive to assemble.

I used eight lengths of 2700mm primed 19mm quad moulding leftover from a room renovation. To cut, I clamped a piece of timber on the side of the mitre saw as a stopper to ensure all 48 sticks were exactly 440mm long.
TIP You could use a handsaw with a mitre box, although it would require some elbow grease to make all those cuts!
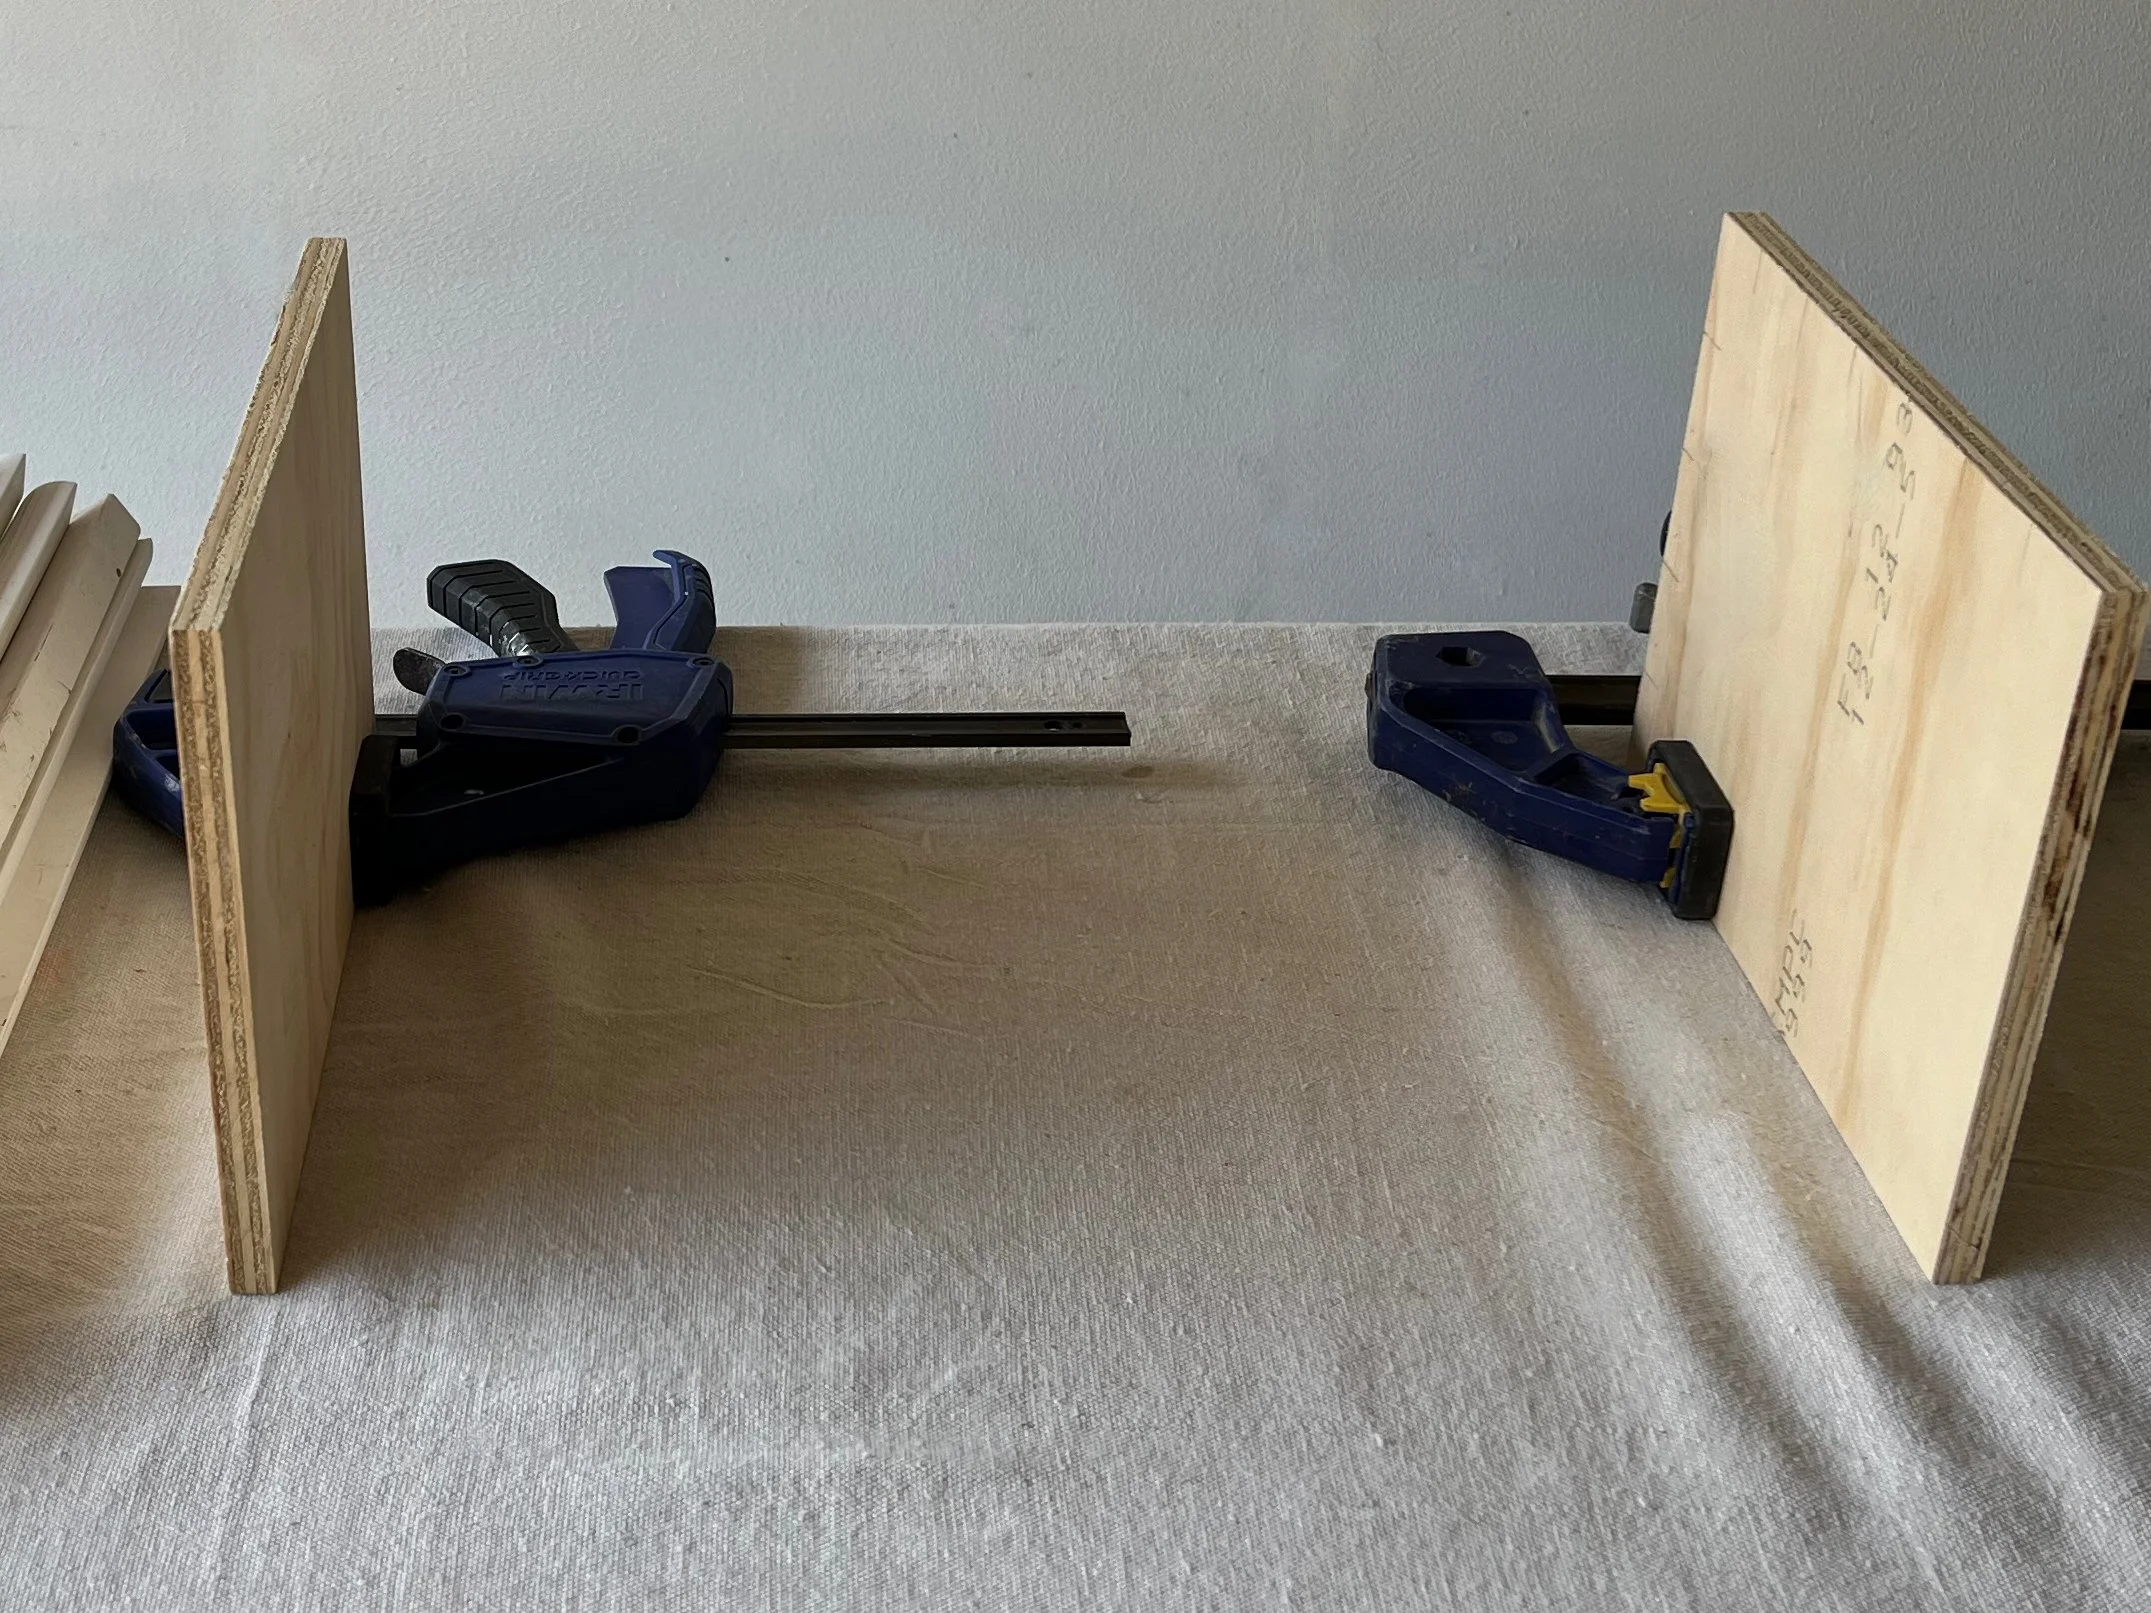
With the mitre saw, I cut two 265mm x 185mm pieces from 12mm plywood as the top and base ends, then stood them up with quick-grip clamps.
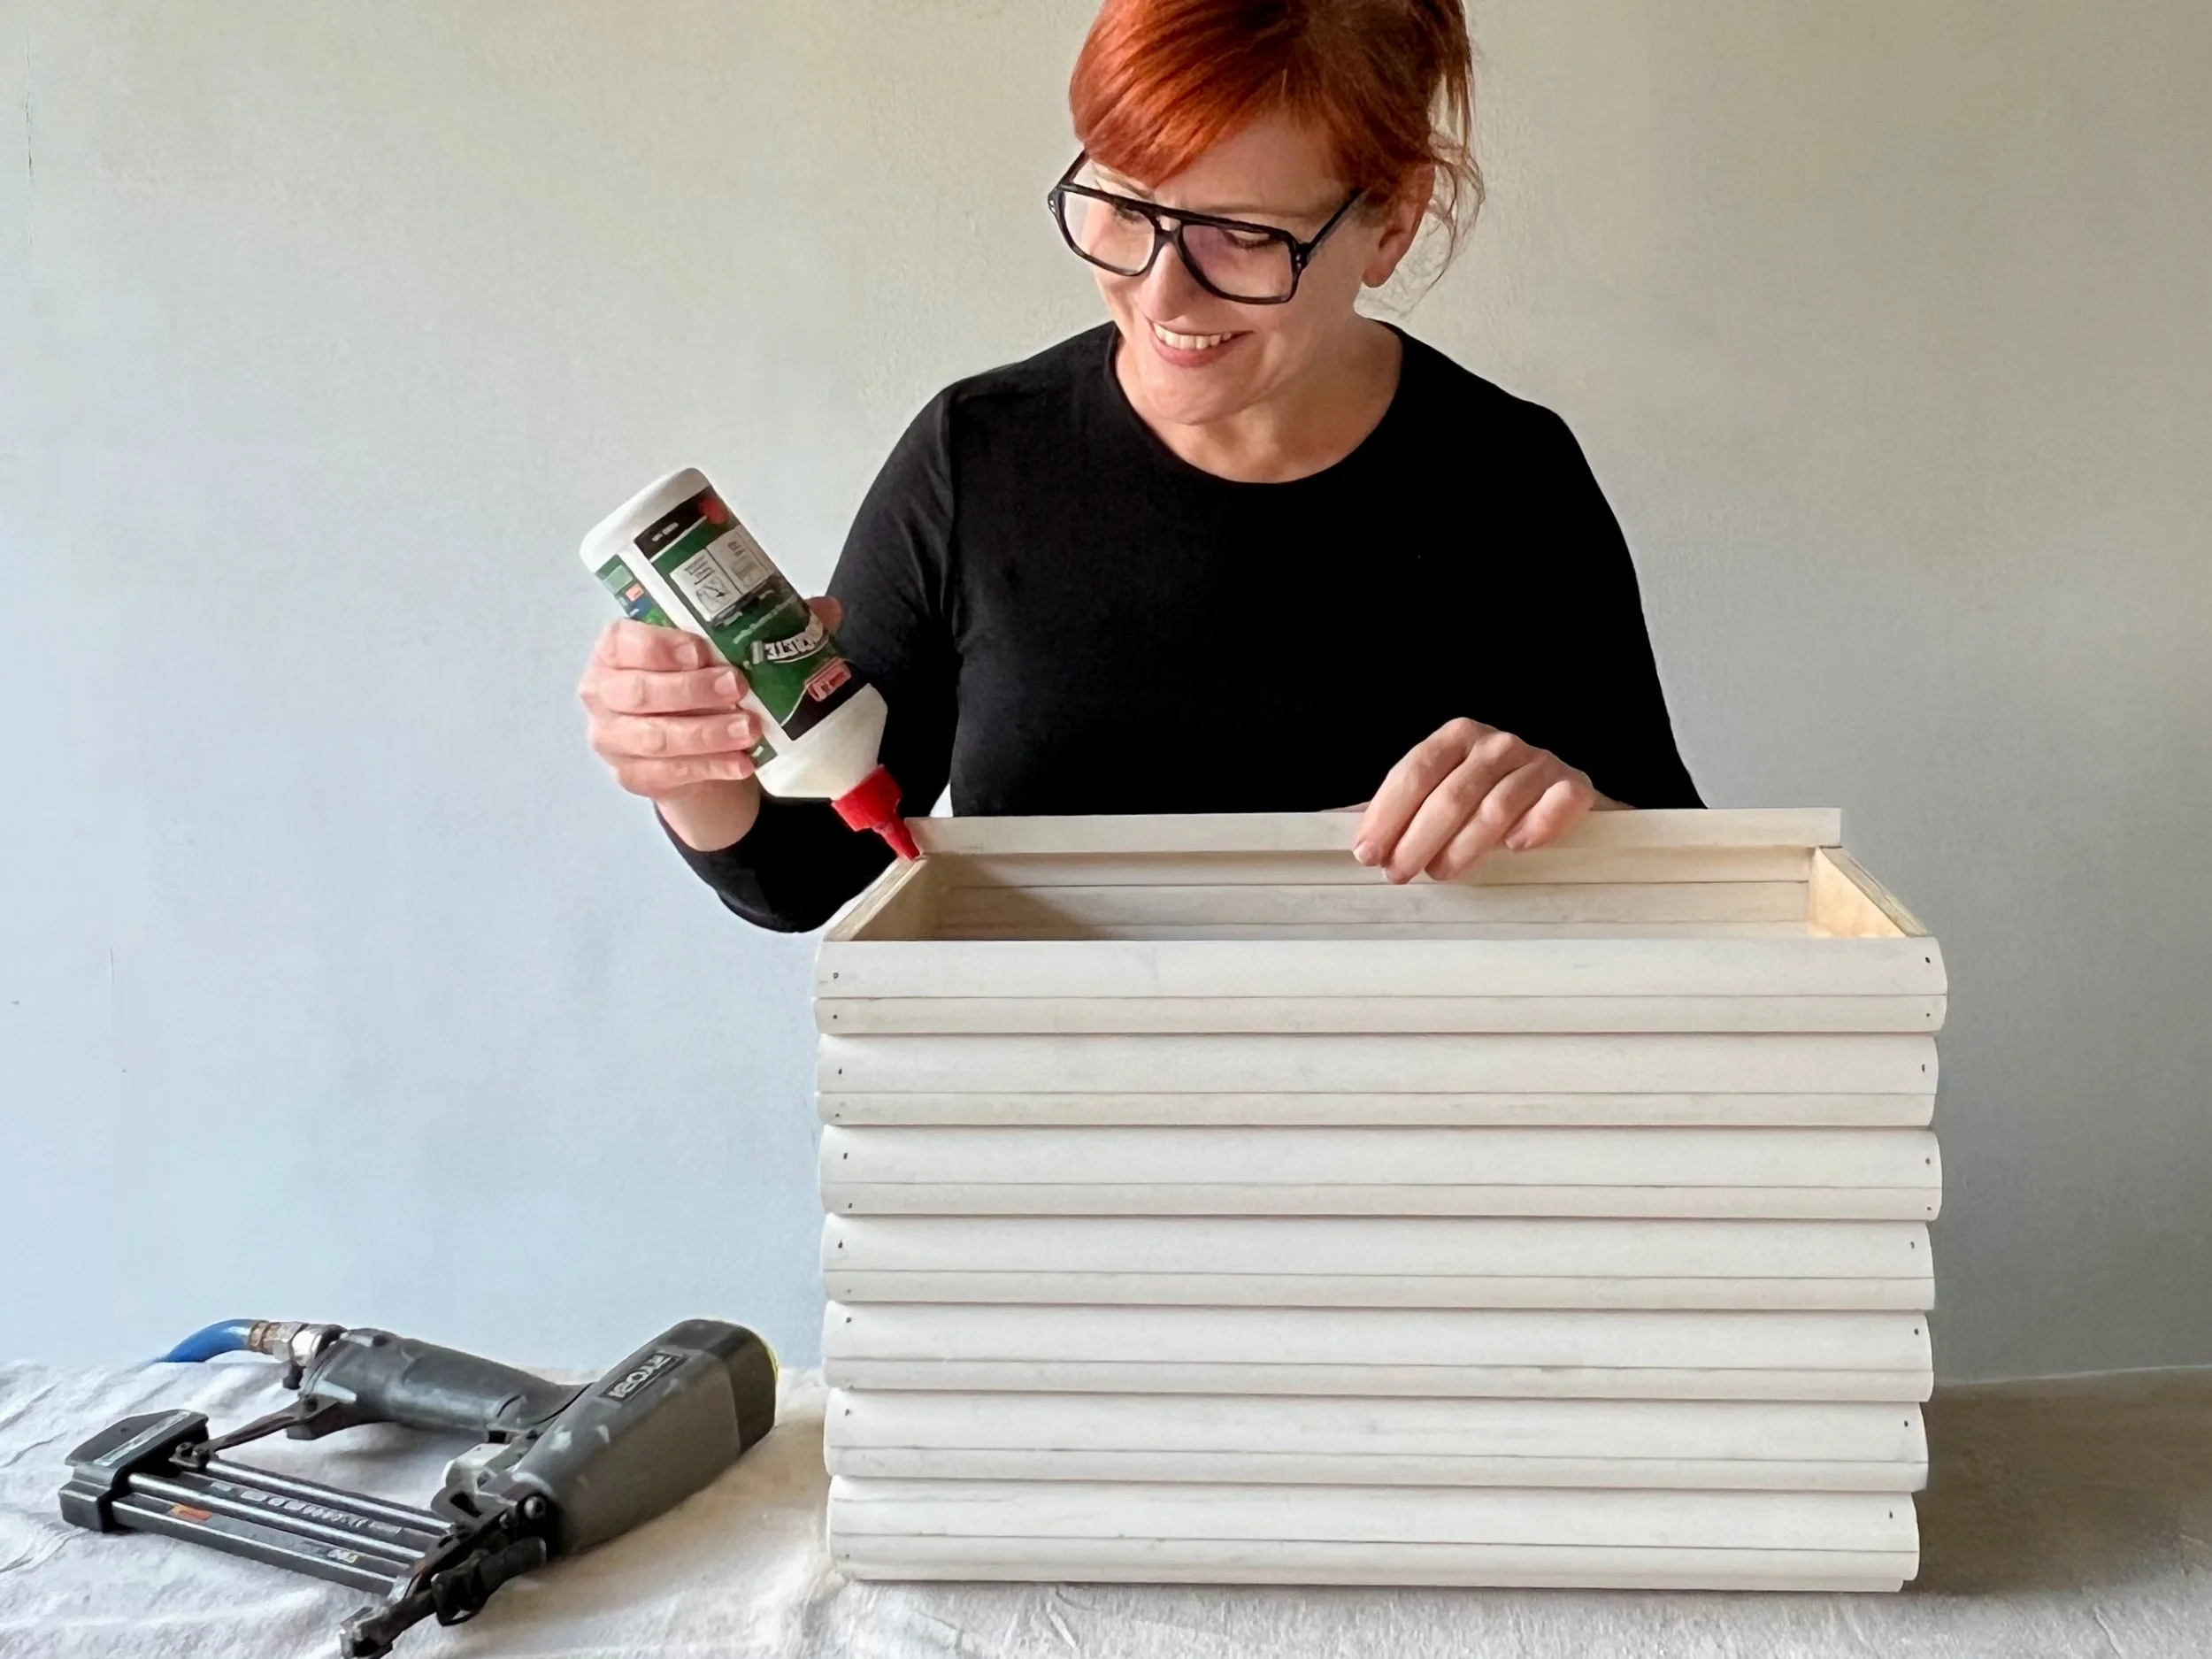
Working one side at a time, I applied adhesive along the plywood ends. I also applied it down the flat sides of two sticks and joined them to create a scallop. I positioned it flush with the plywood ends and nailed through to secure.
TIP You could use a hammer and small nails, but a brad nailer makes quick work of assembling the table. To shoot, hold the gun with the tip flat against the centre of each stick.
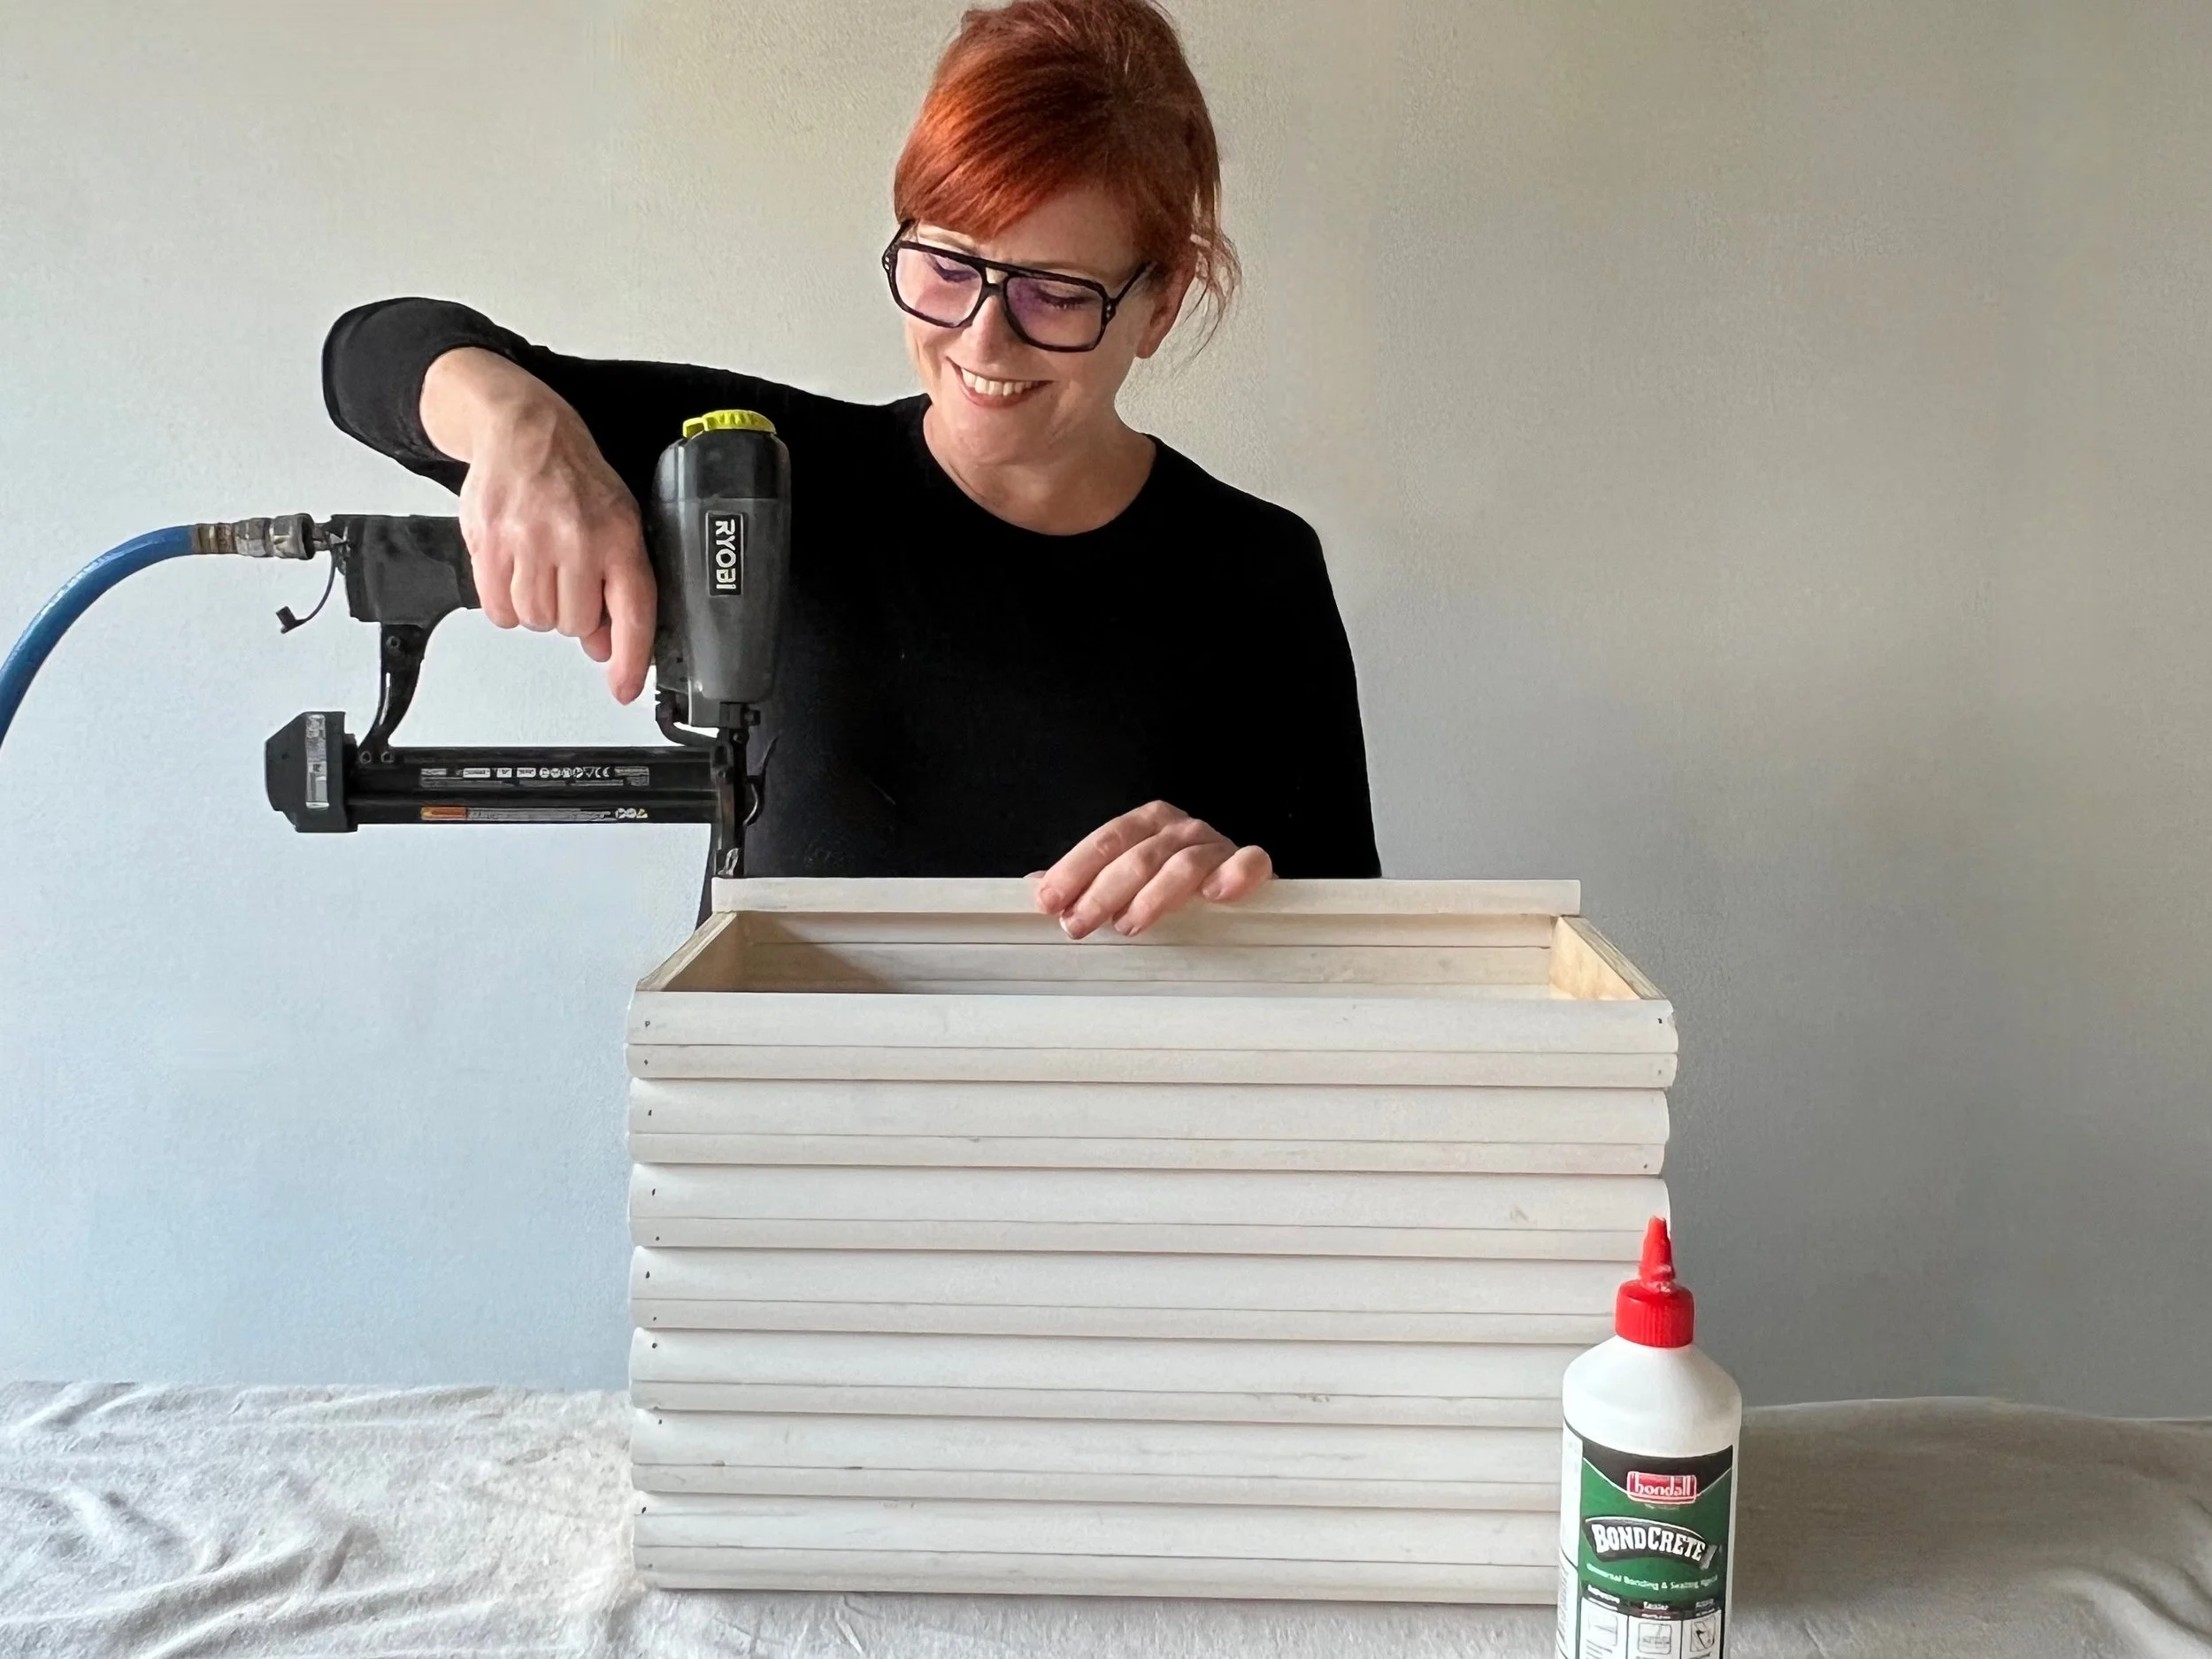
To make each side of the table, I repeated applying adhesive and nailing the scallops to the ends, using a damp cloth to wipe away excess adhesive.
TIP Bondall Bondcrete as woodworking adhesive has the perfect dry-time for this project – about 30 minutes – which means you can reposition pieces if needed but it cures quickly enough to get on with the next steps.

I used a random orbital sander with a 120-grit abrasive disc to smooth over the ends and ensure the sticks were flush with the plywood.
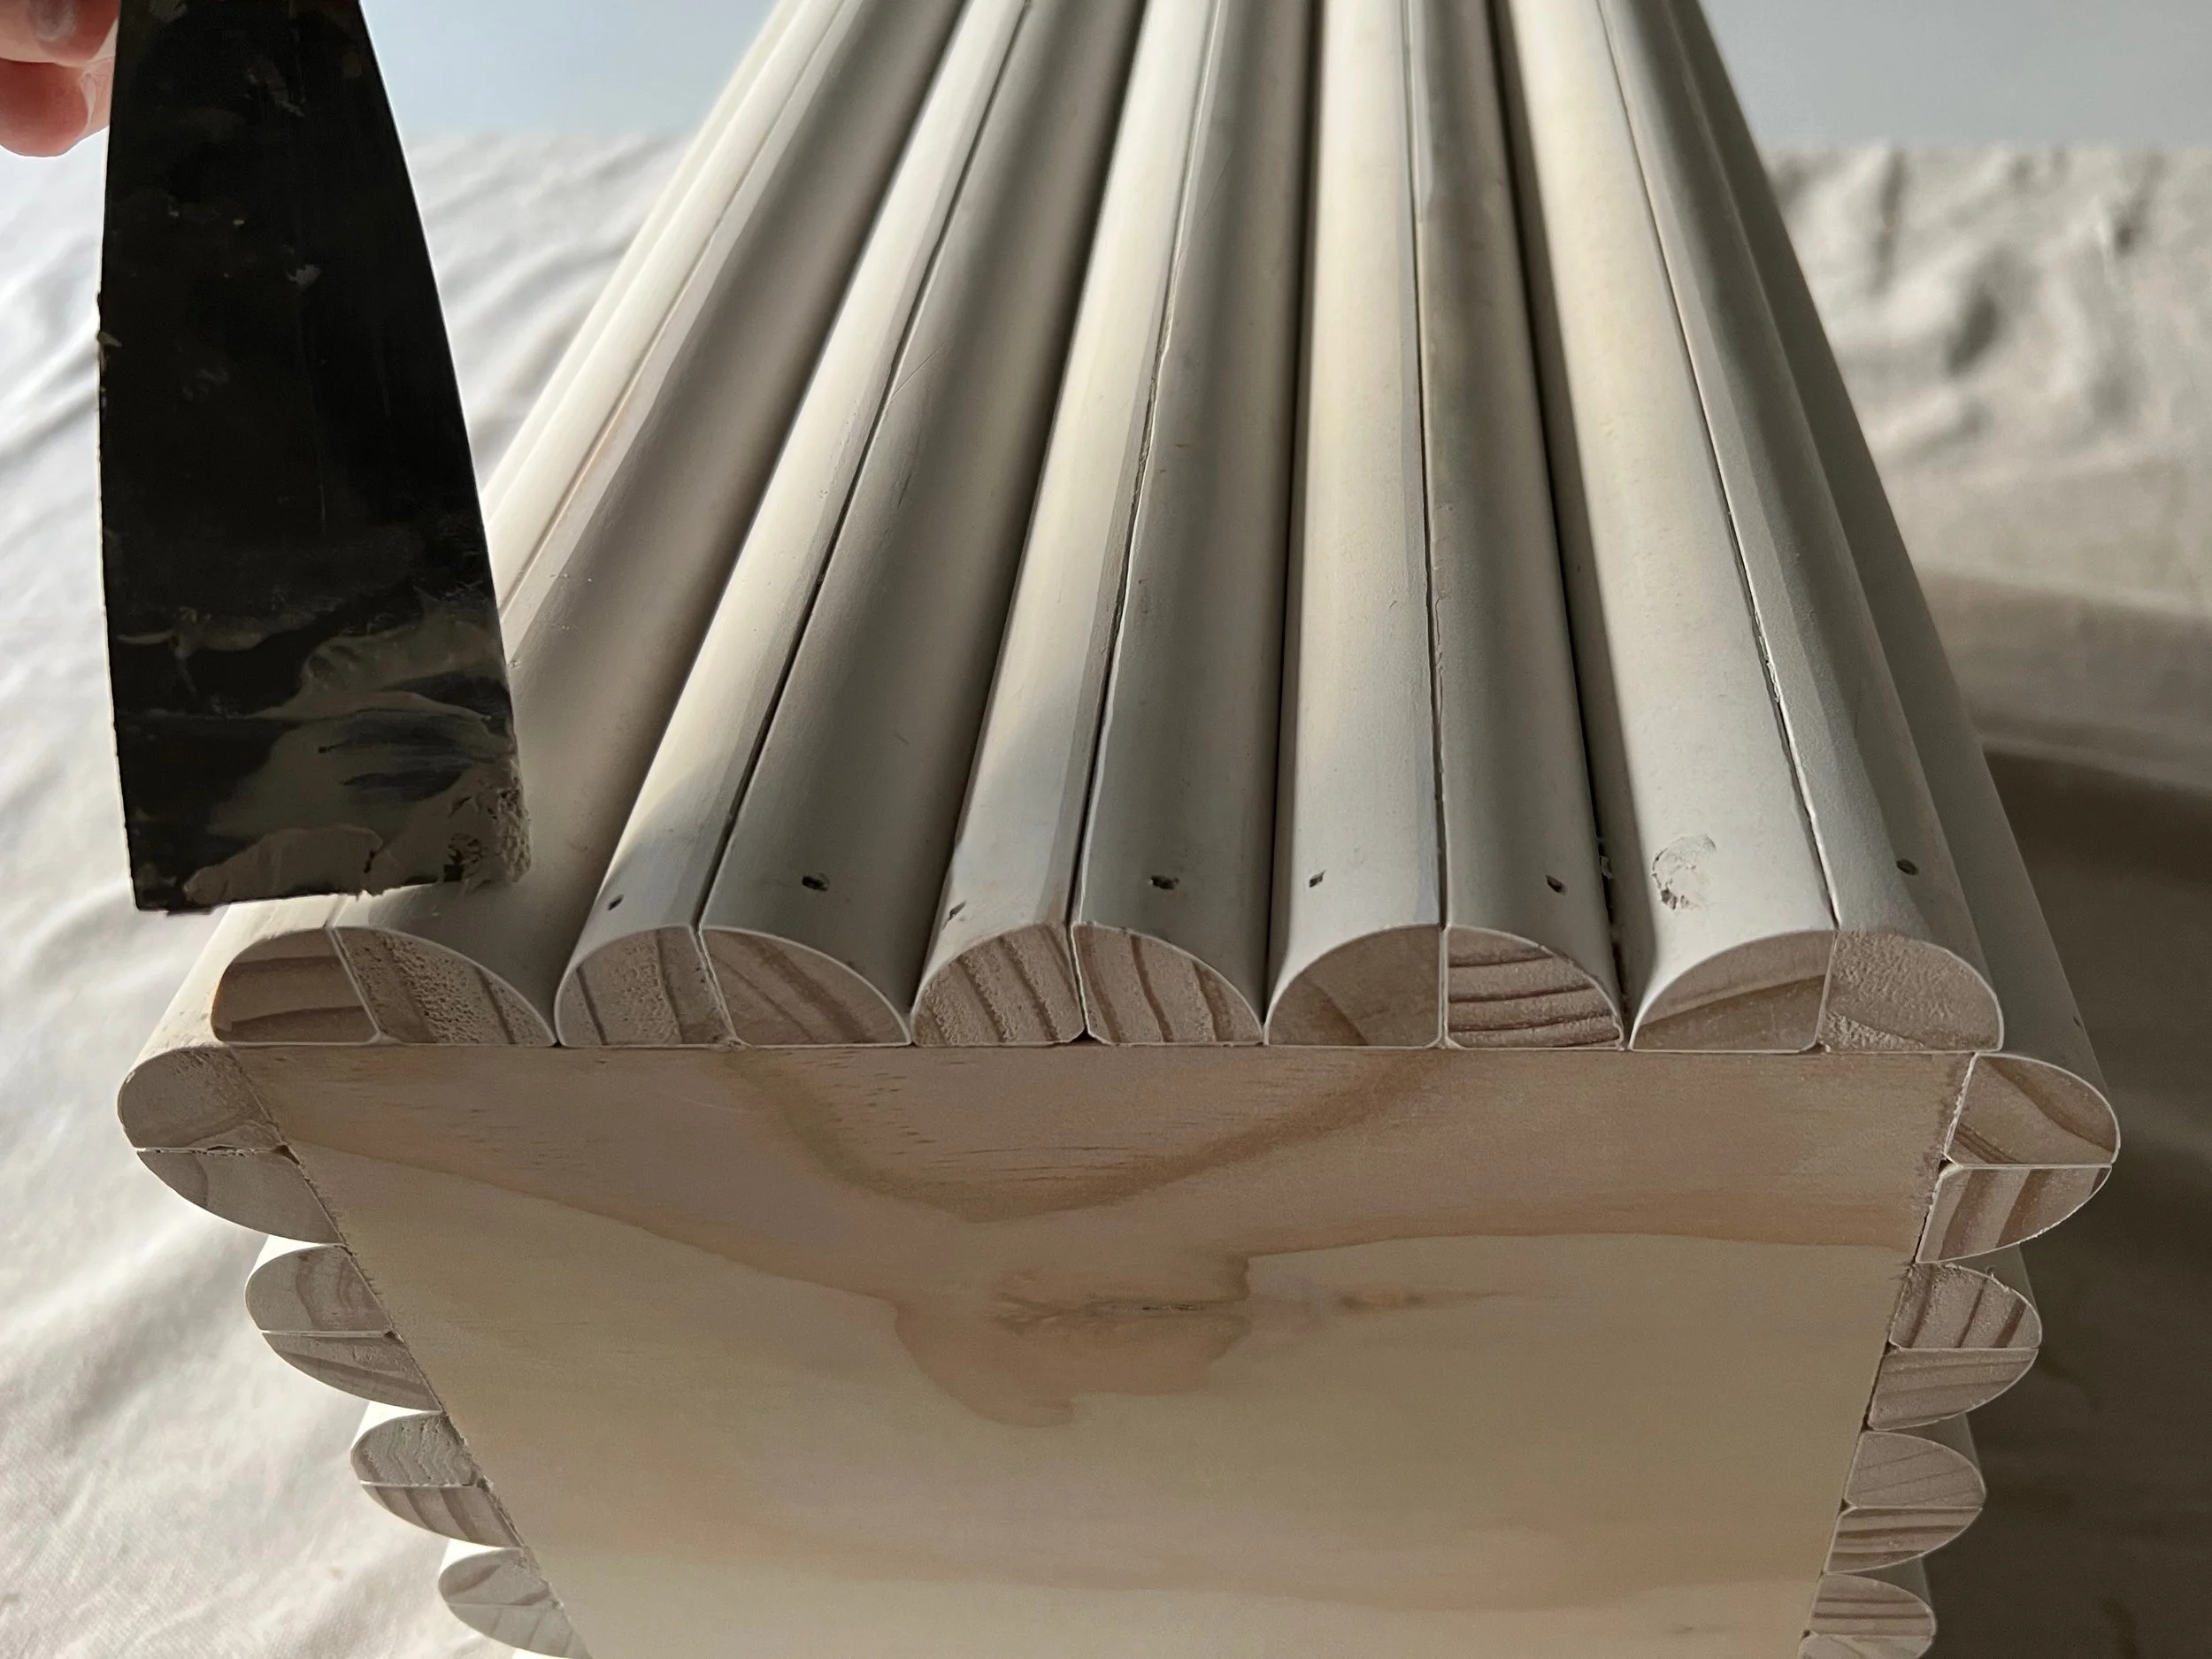
Then I smoothed over the nail heads with timber filler, sanded all over with a fine-grit sponge and wiped away the dust with a damp cloth.
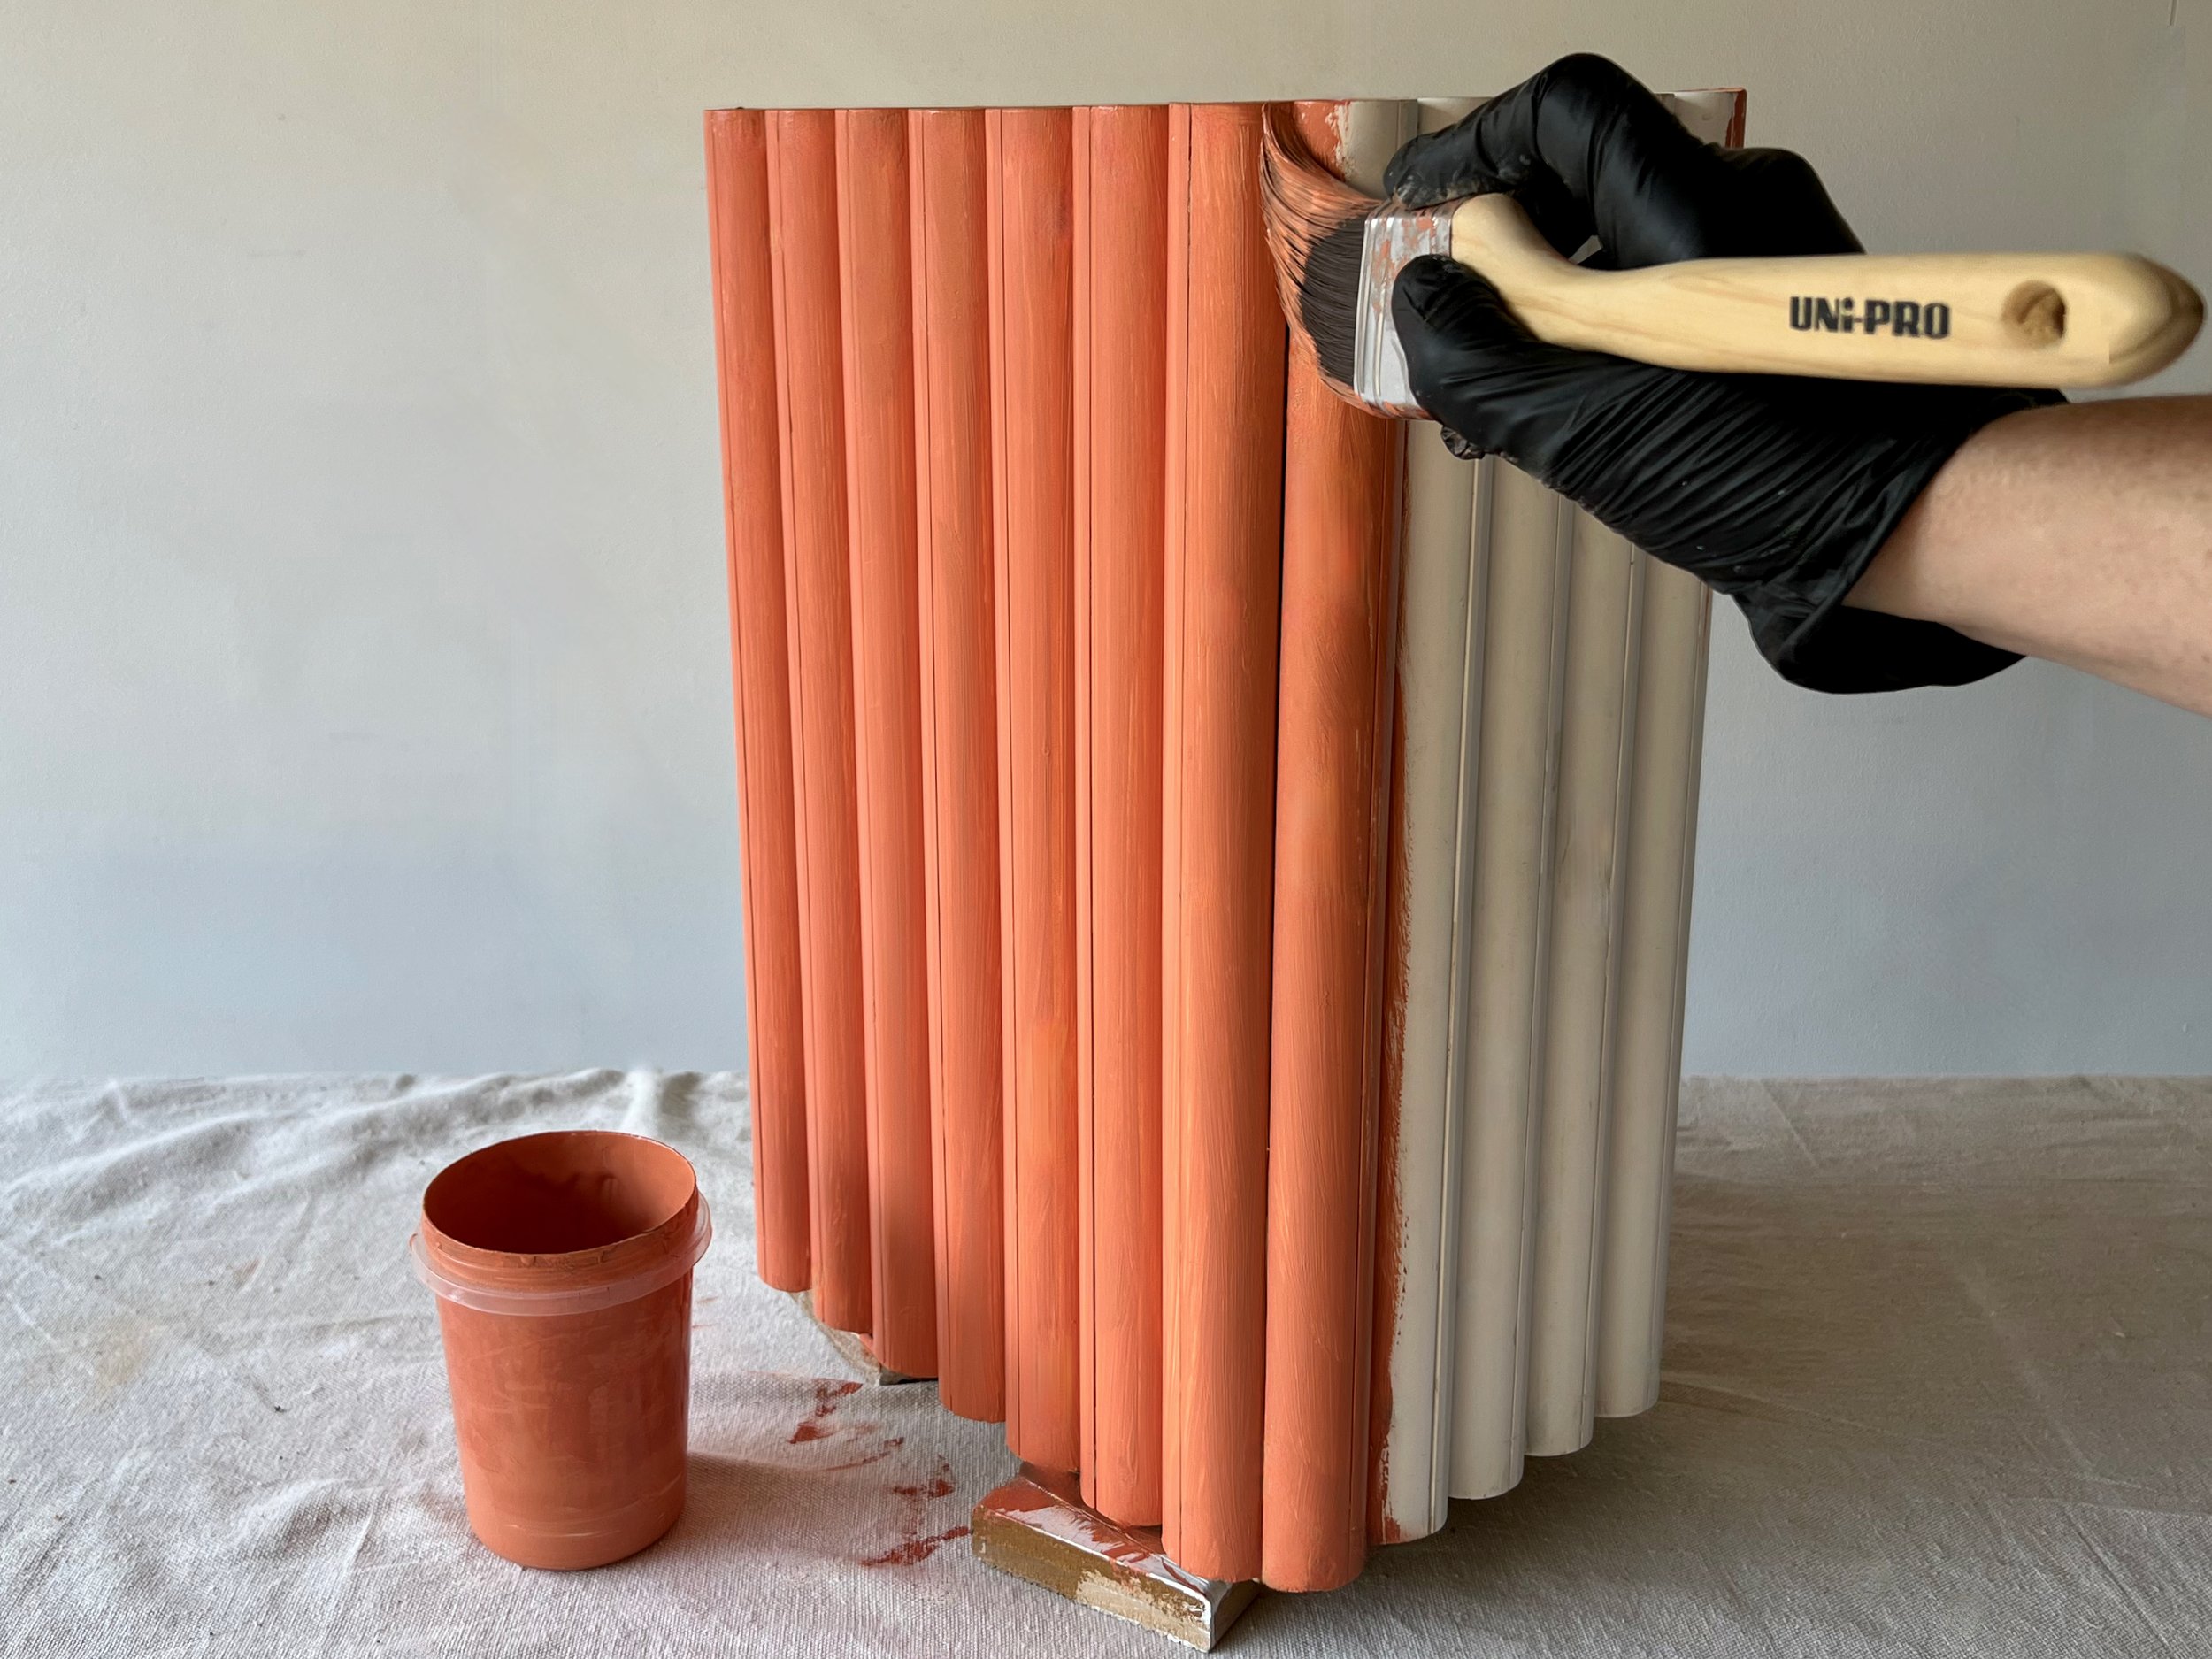
For a splash of fun colour, I applied two coats of bright acrylic paint with a 50mm angled brush in a sweeping motion, applying three even coats, leaving to dry between each.
TIP Position the table on offcuts for easy access around the base.
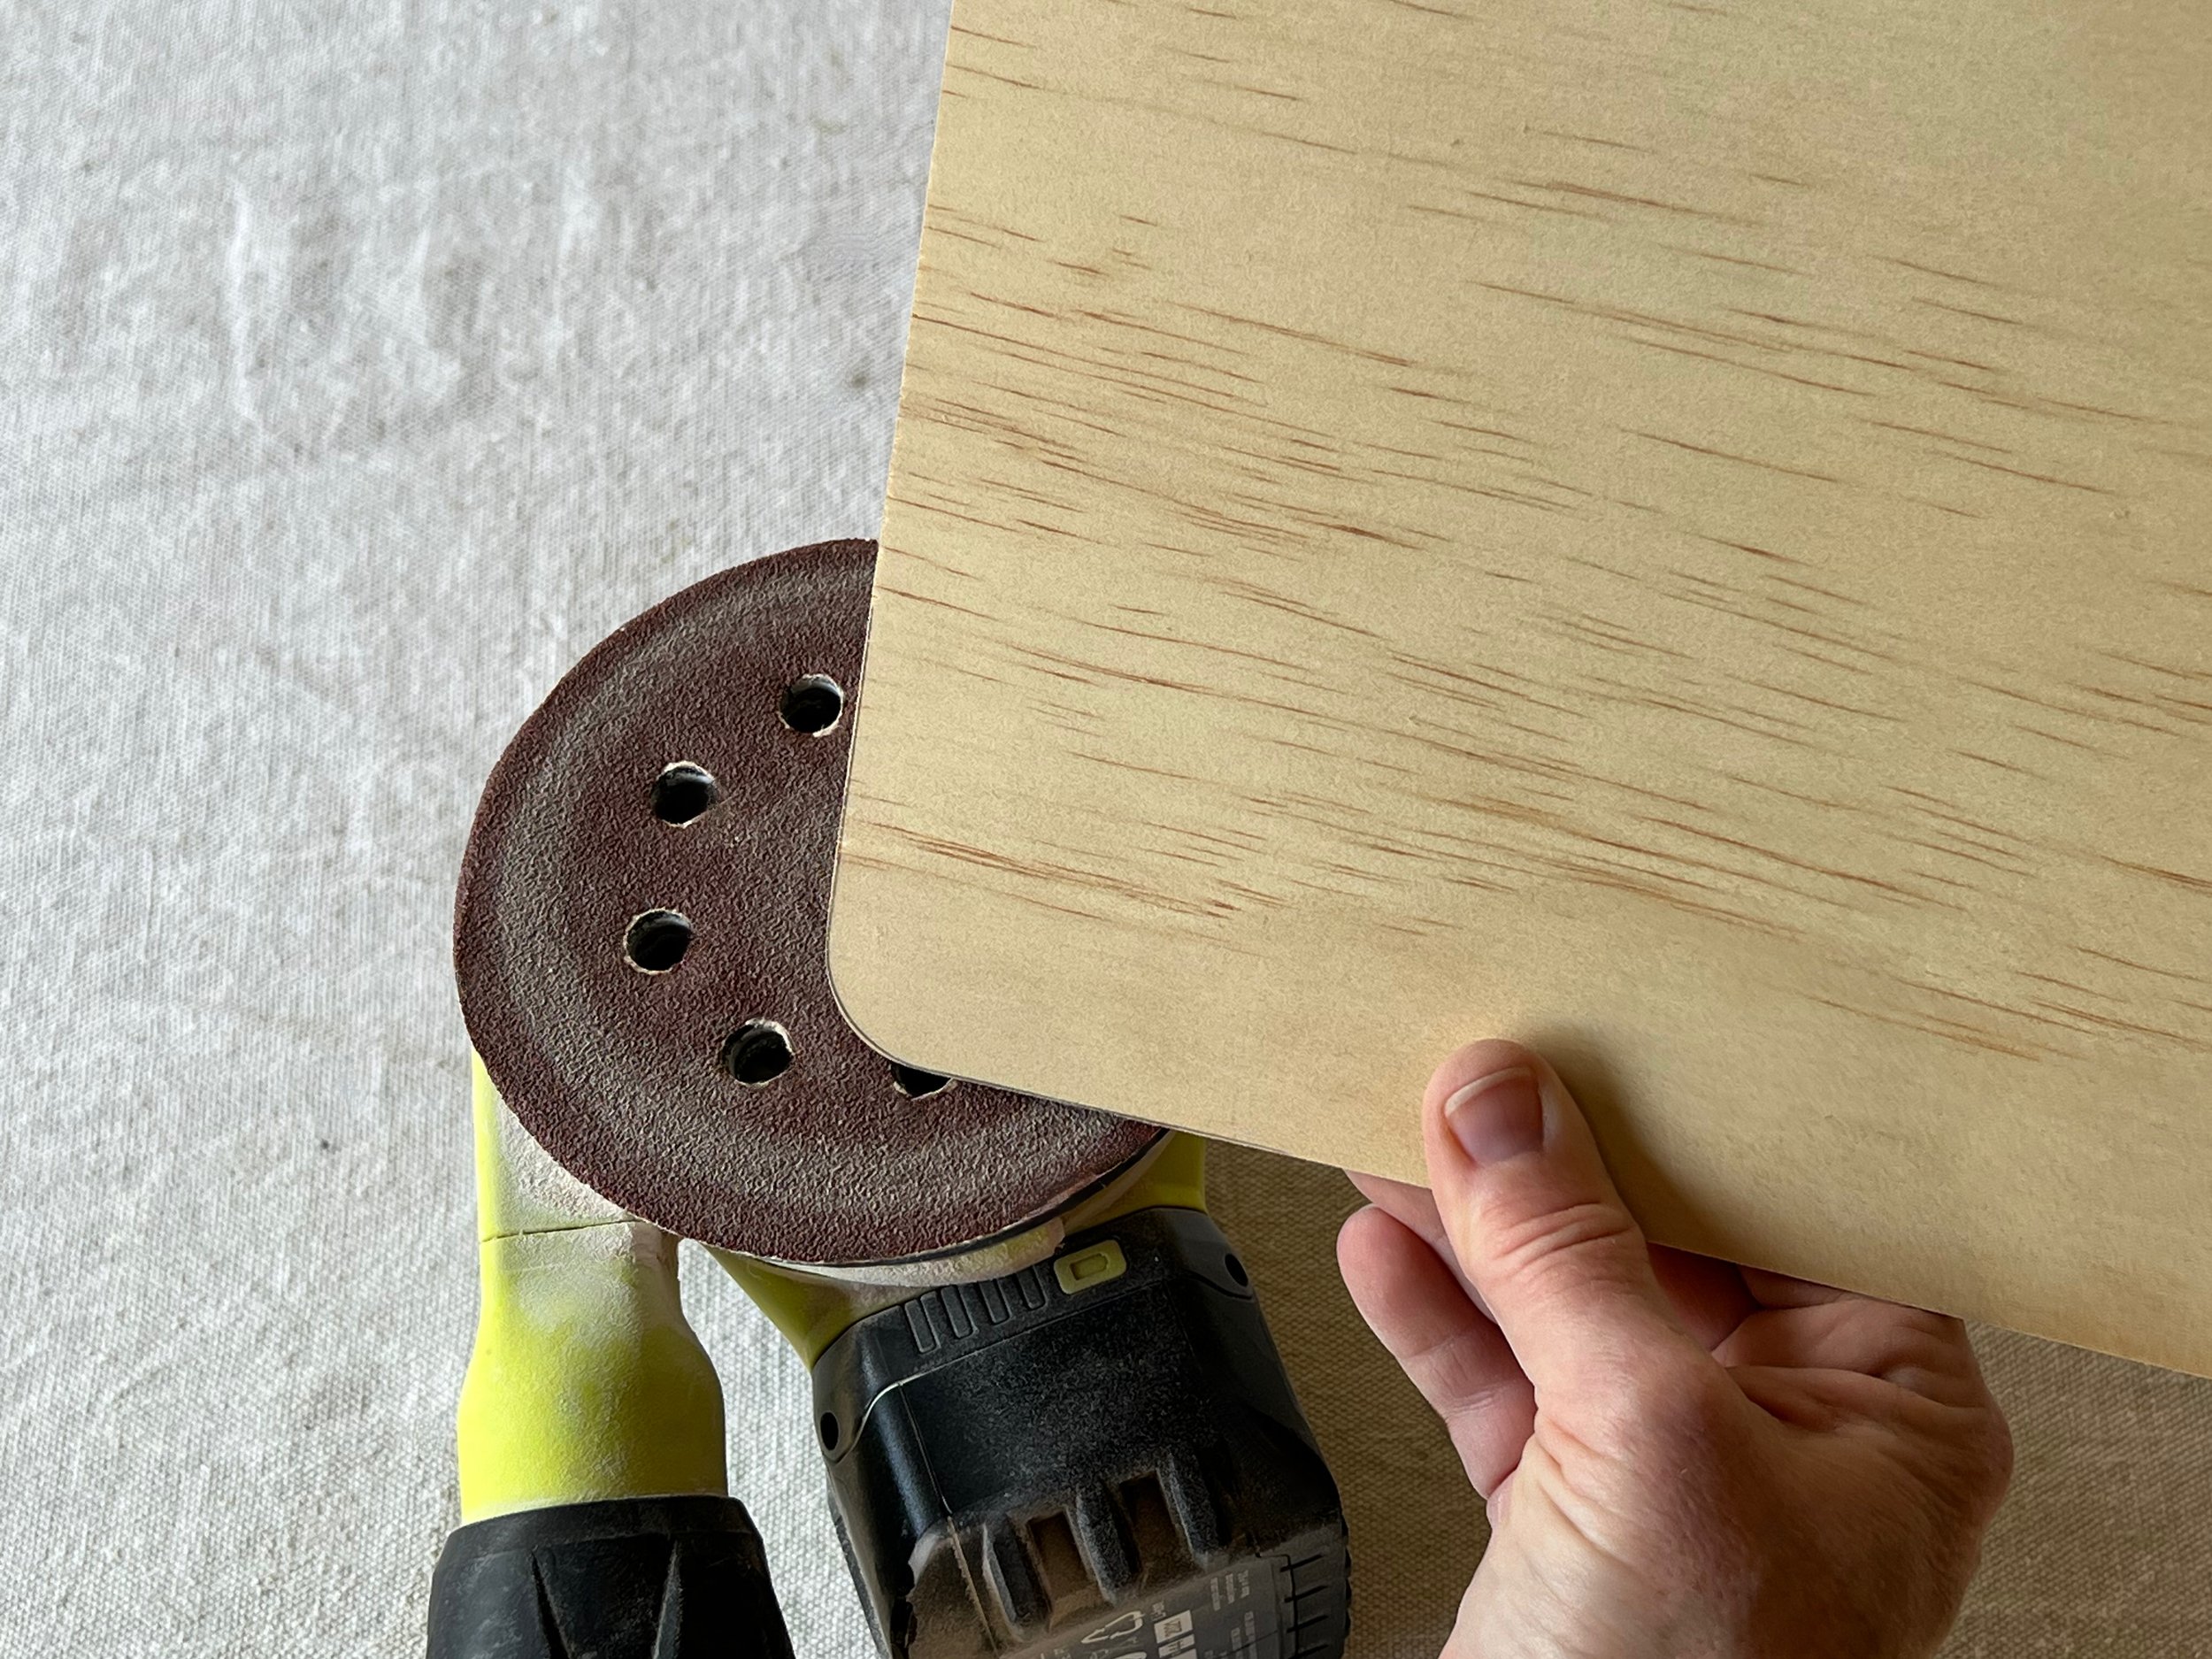
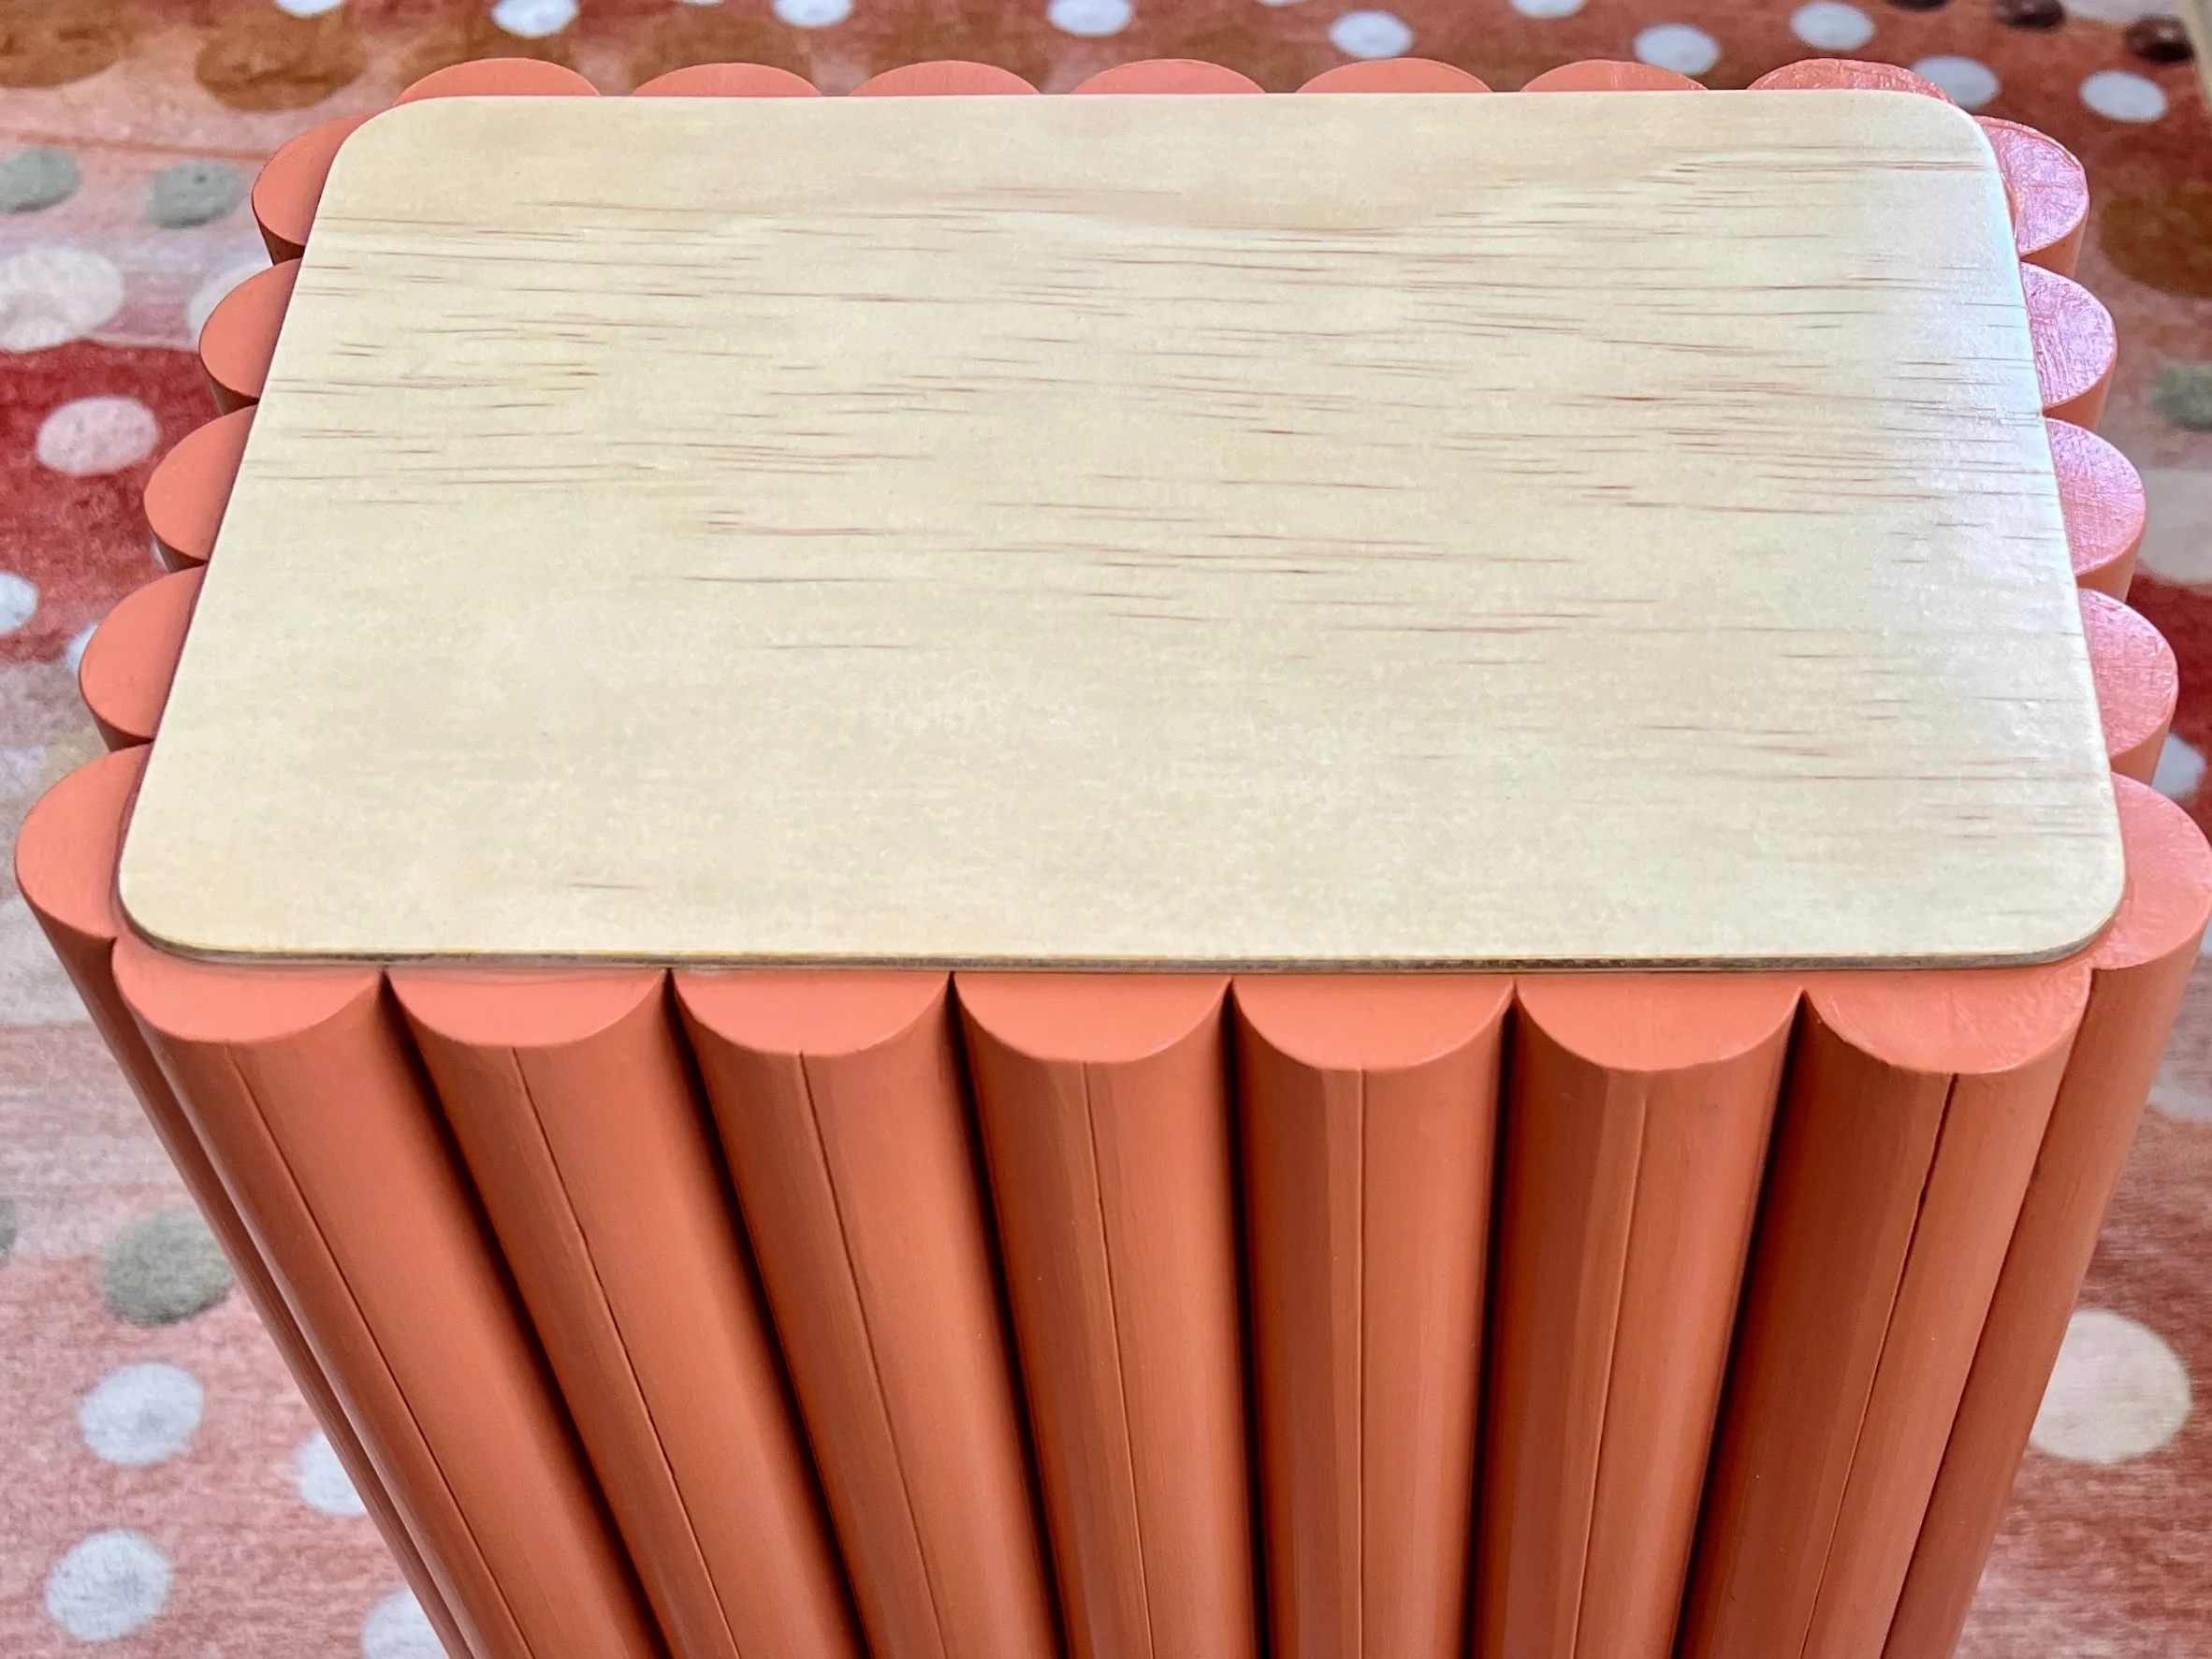
From 3mm plywood, I cut a 275mm x 195mm top and used a lid as a template to mark rounded corners with a pencil. With my orbital sander upside down, I sanded the corners to the marks, then smoothed all over with 180-grit.

I applied adhesive on the underside of the top, centred it on the table, pushed down and left it to dry.
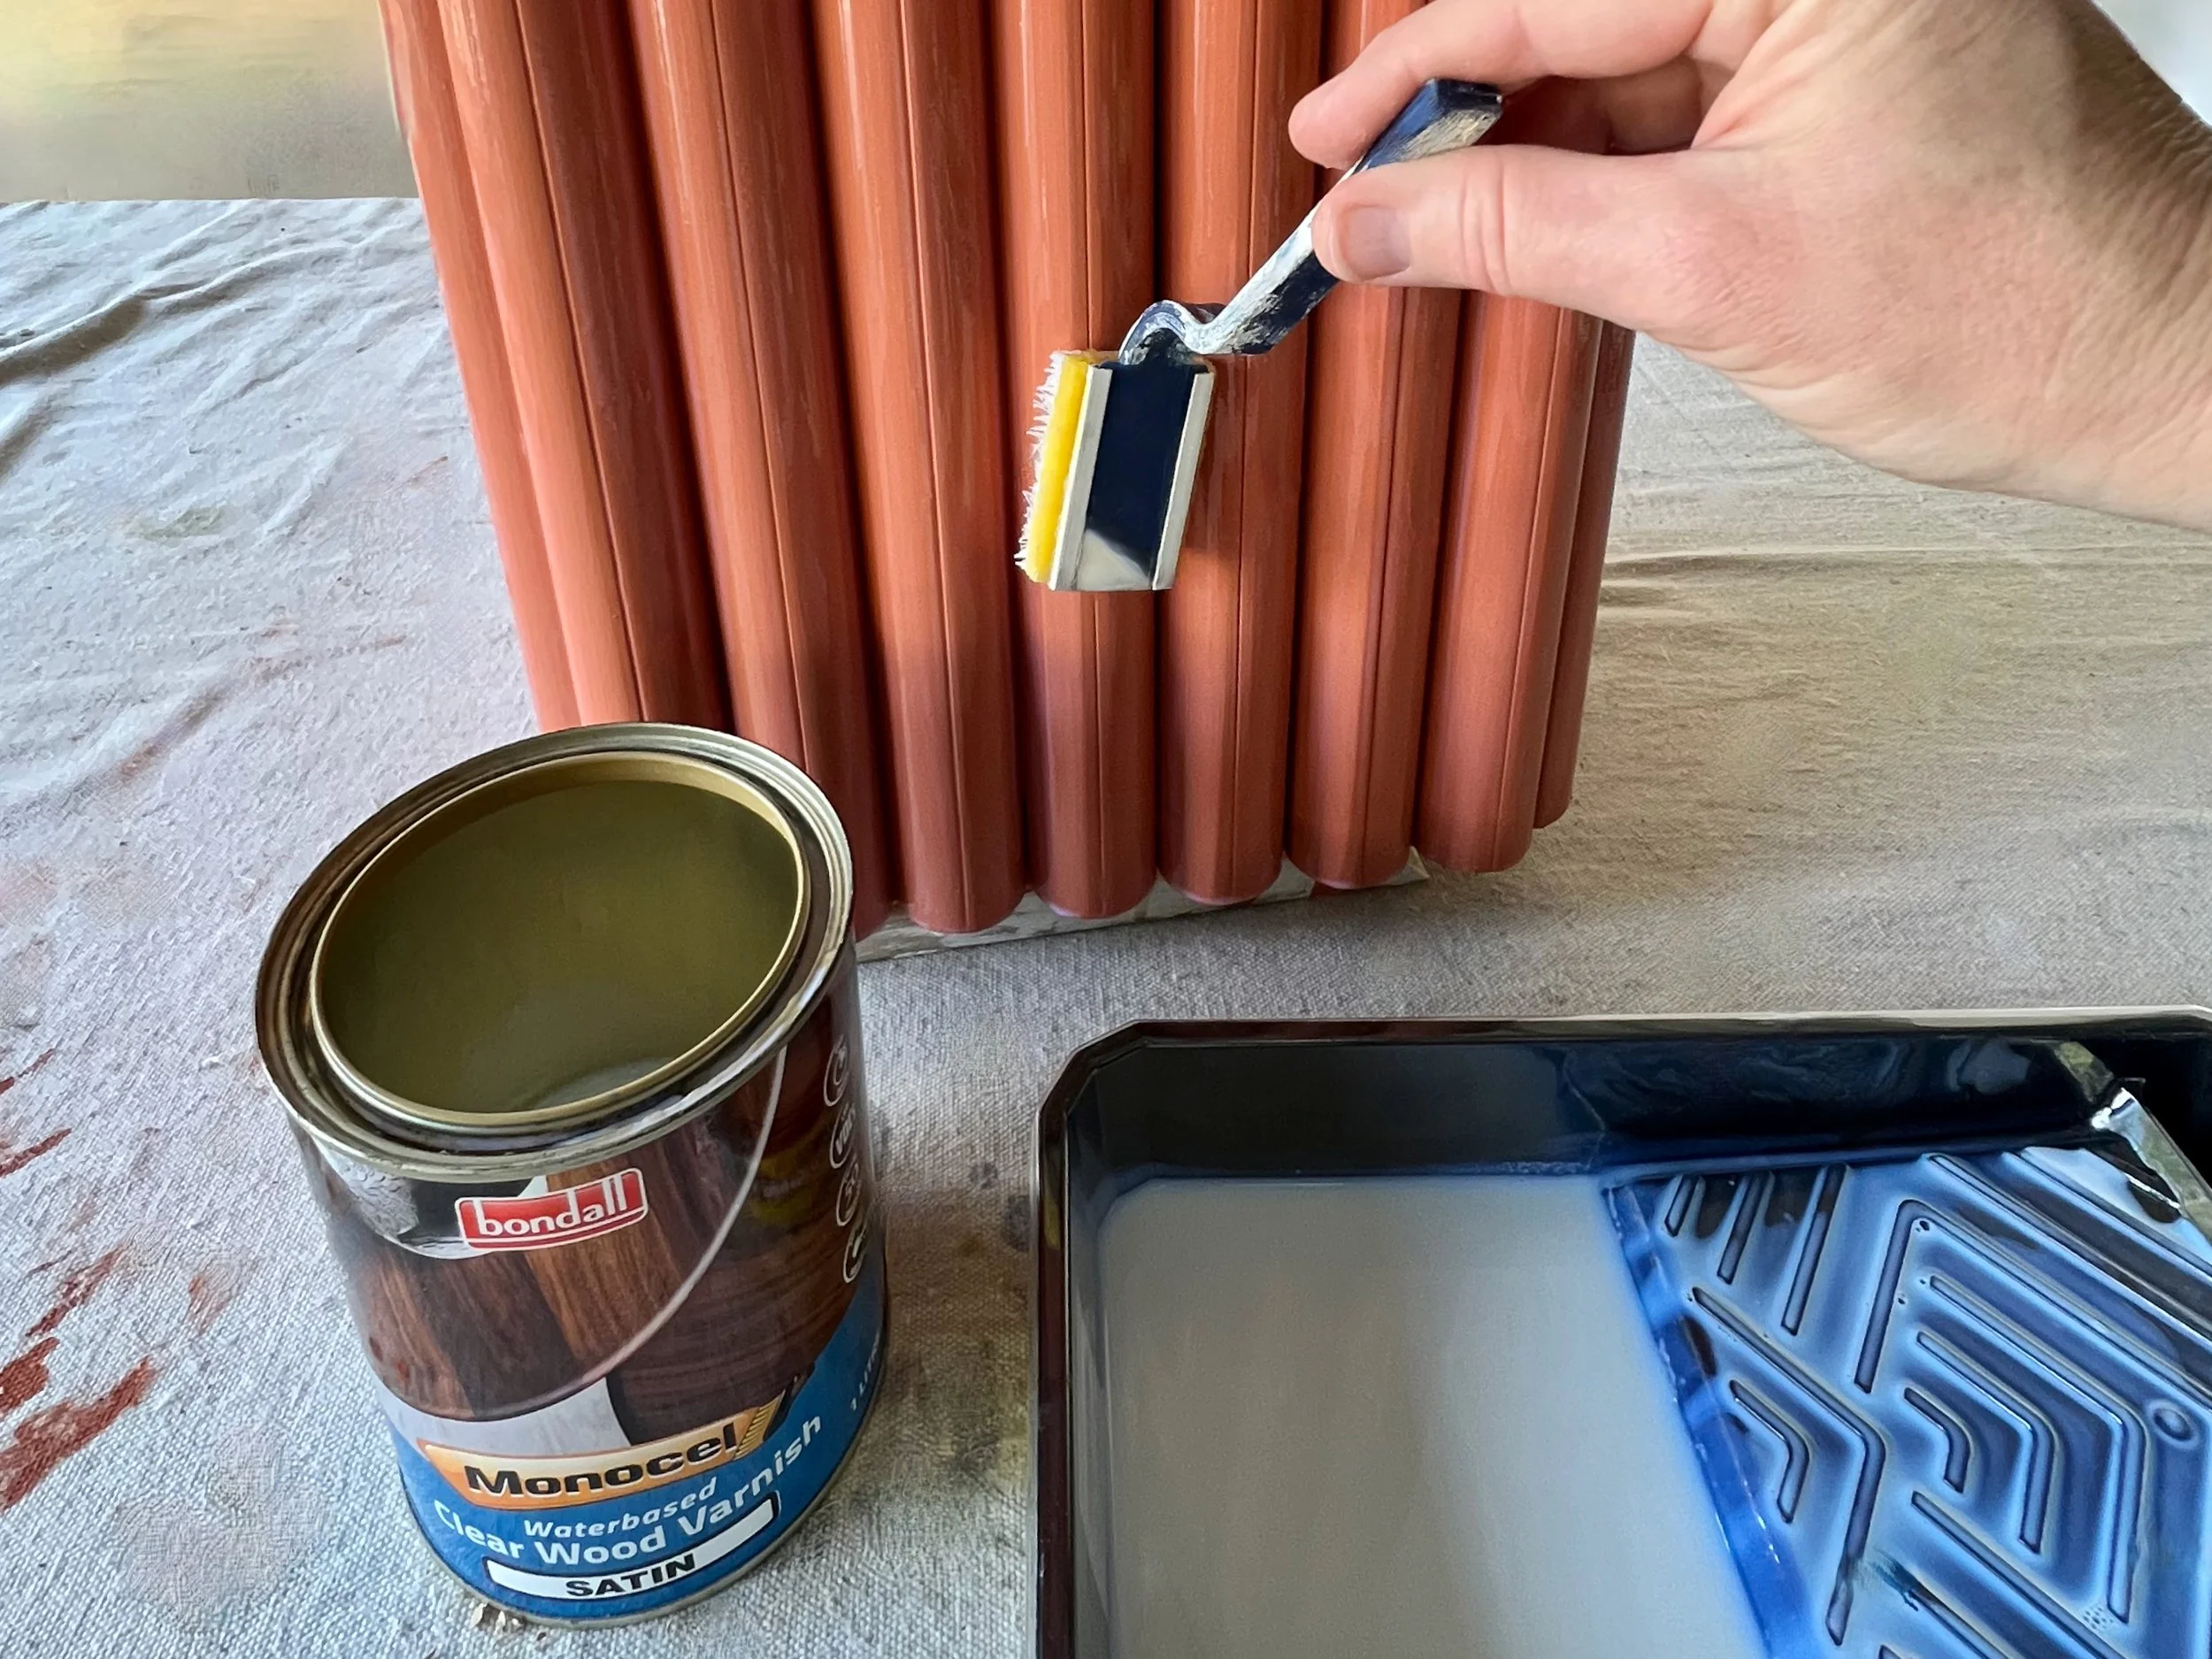
To create a lightly lacquered finish, I applied two coats of Monocel Water Based Clear Varnish with a small applicator pad.
TIP Apply the first coat over the entire table, leave it to dry then lightly smooth with a fine-grit sanding sponge. Wipe away dust with a damp cloth then apply another coat and leave to dry. Finish with an extra protective coat on the top.
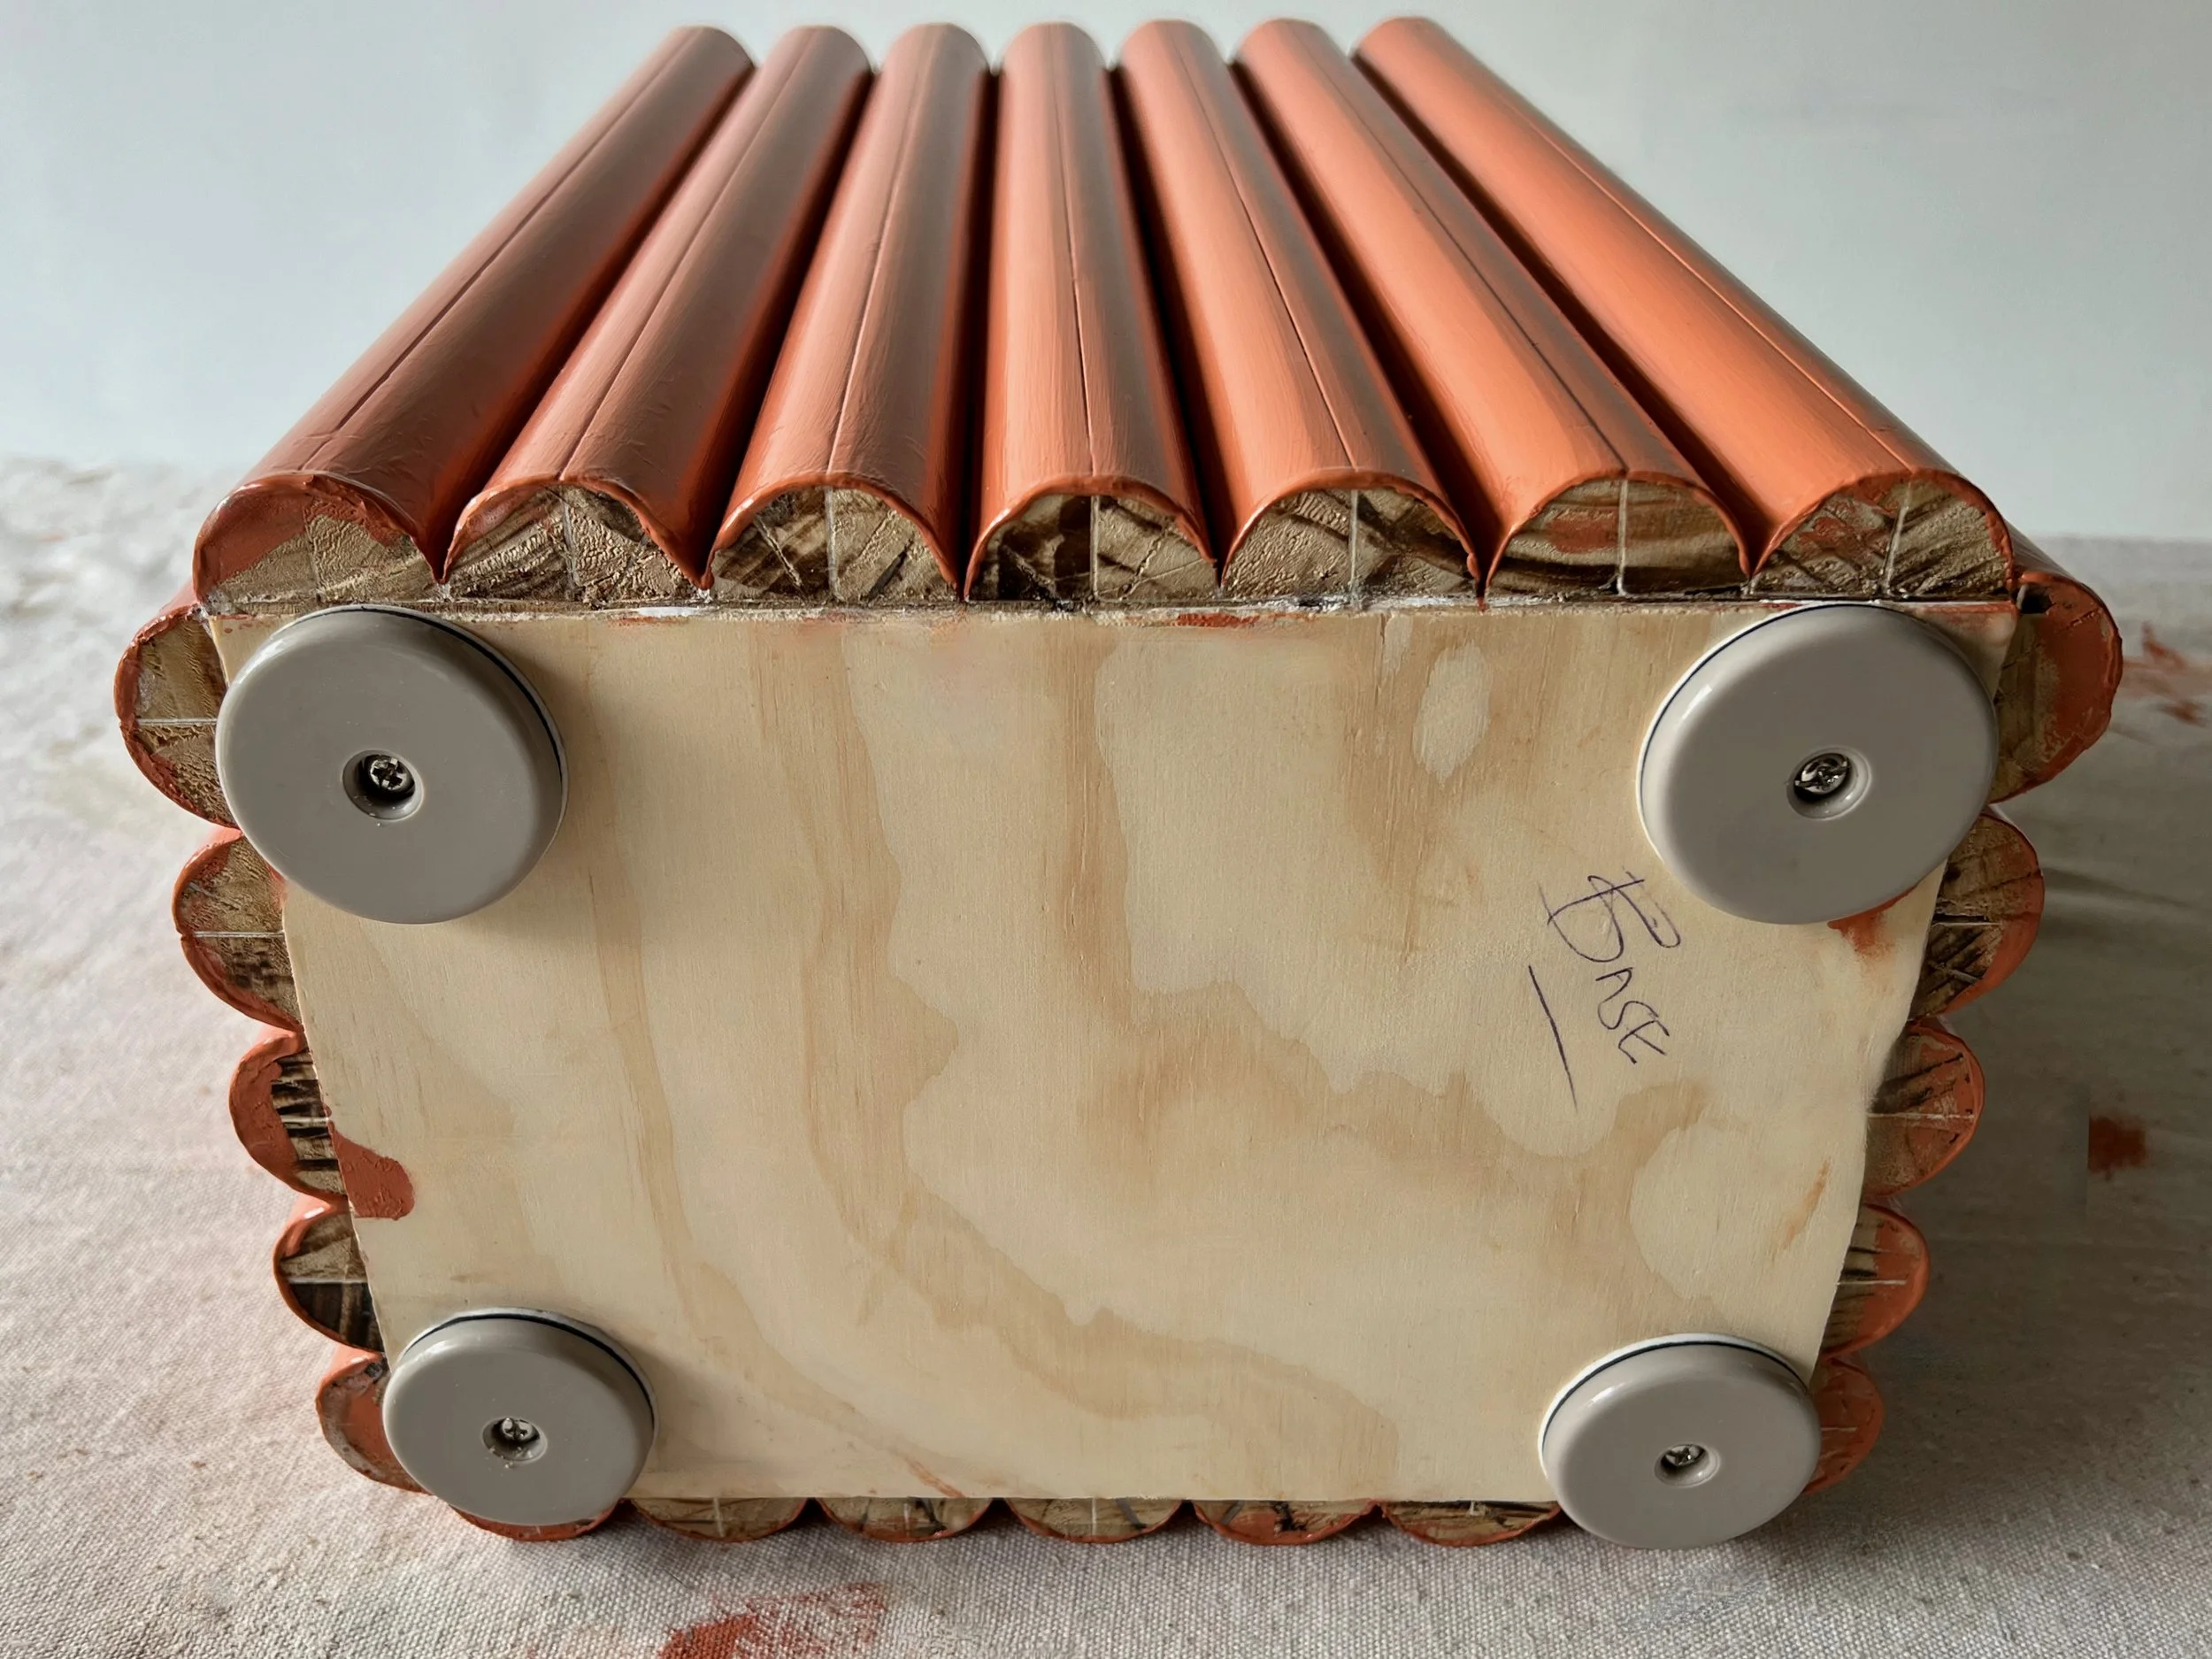
I positioned self-adhesive slide glides on the underside of the table, checking they didn’t protrude out the sides, then secured with the supplied screws.

Has this project inspired you to get stuck into using those leftover building materials?
Tag me on your project and follow more of my DIY journey on Instagram for tool tips, home improvement and simple building tutorials.