Coloured-Grout Planter
Natasha Dickins
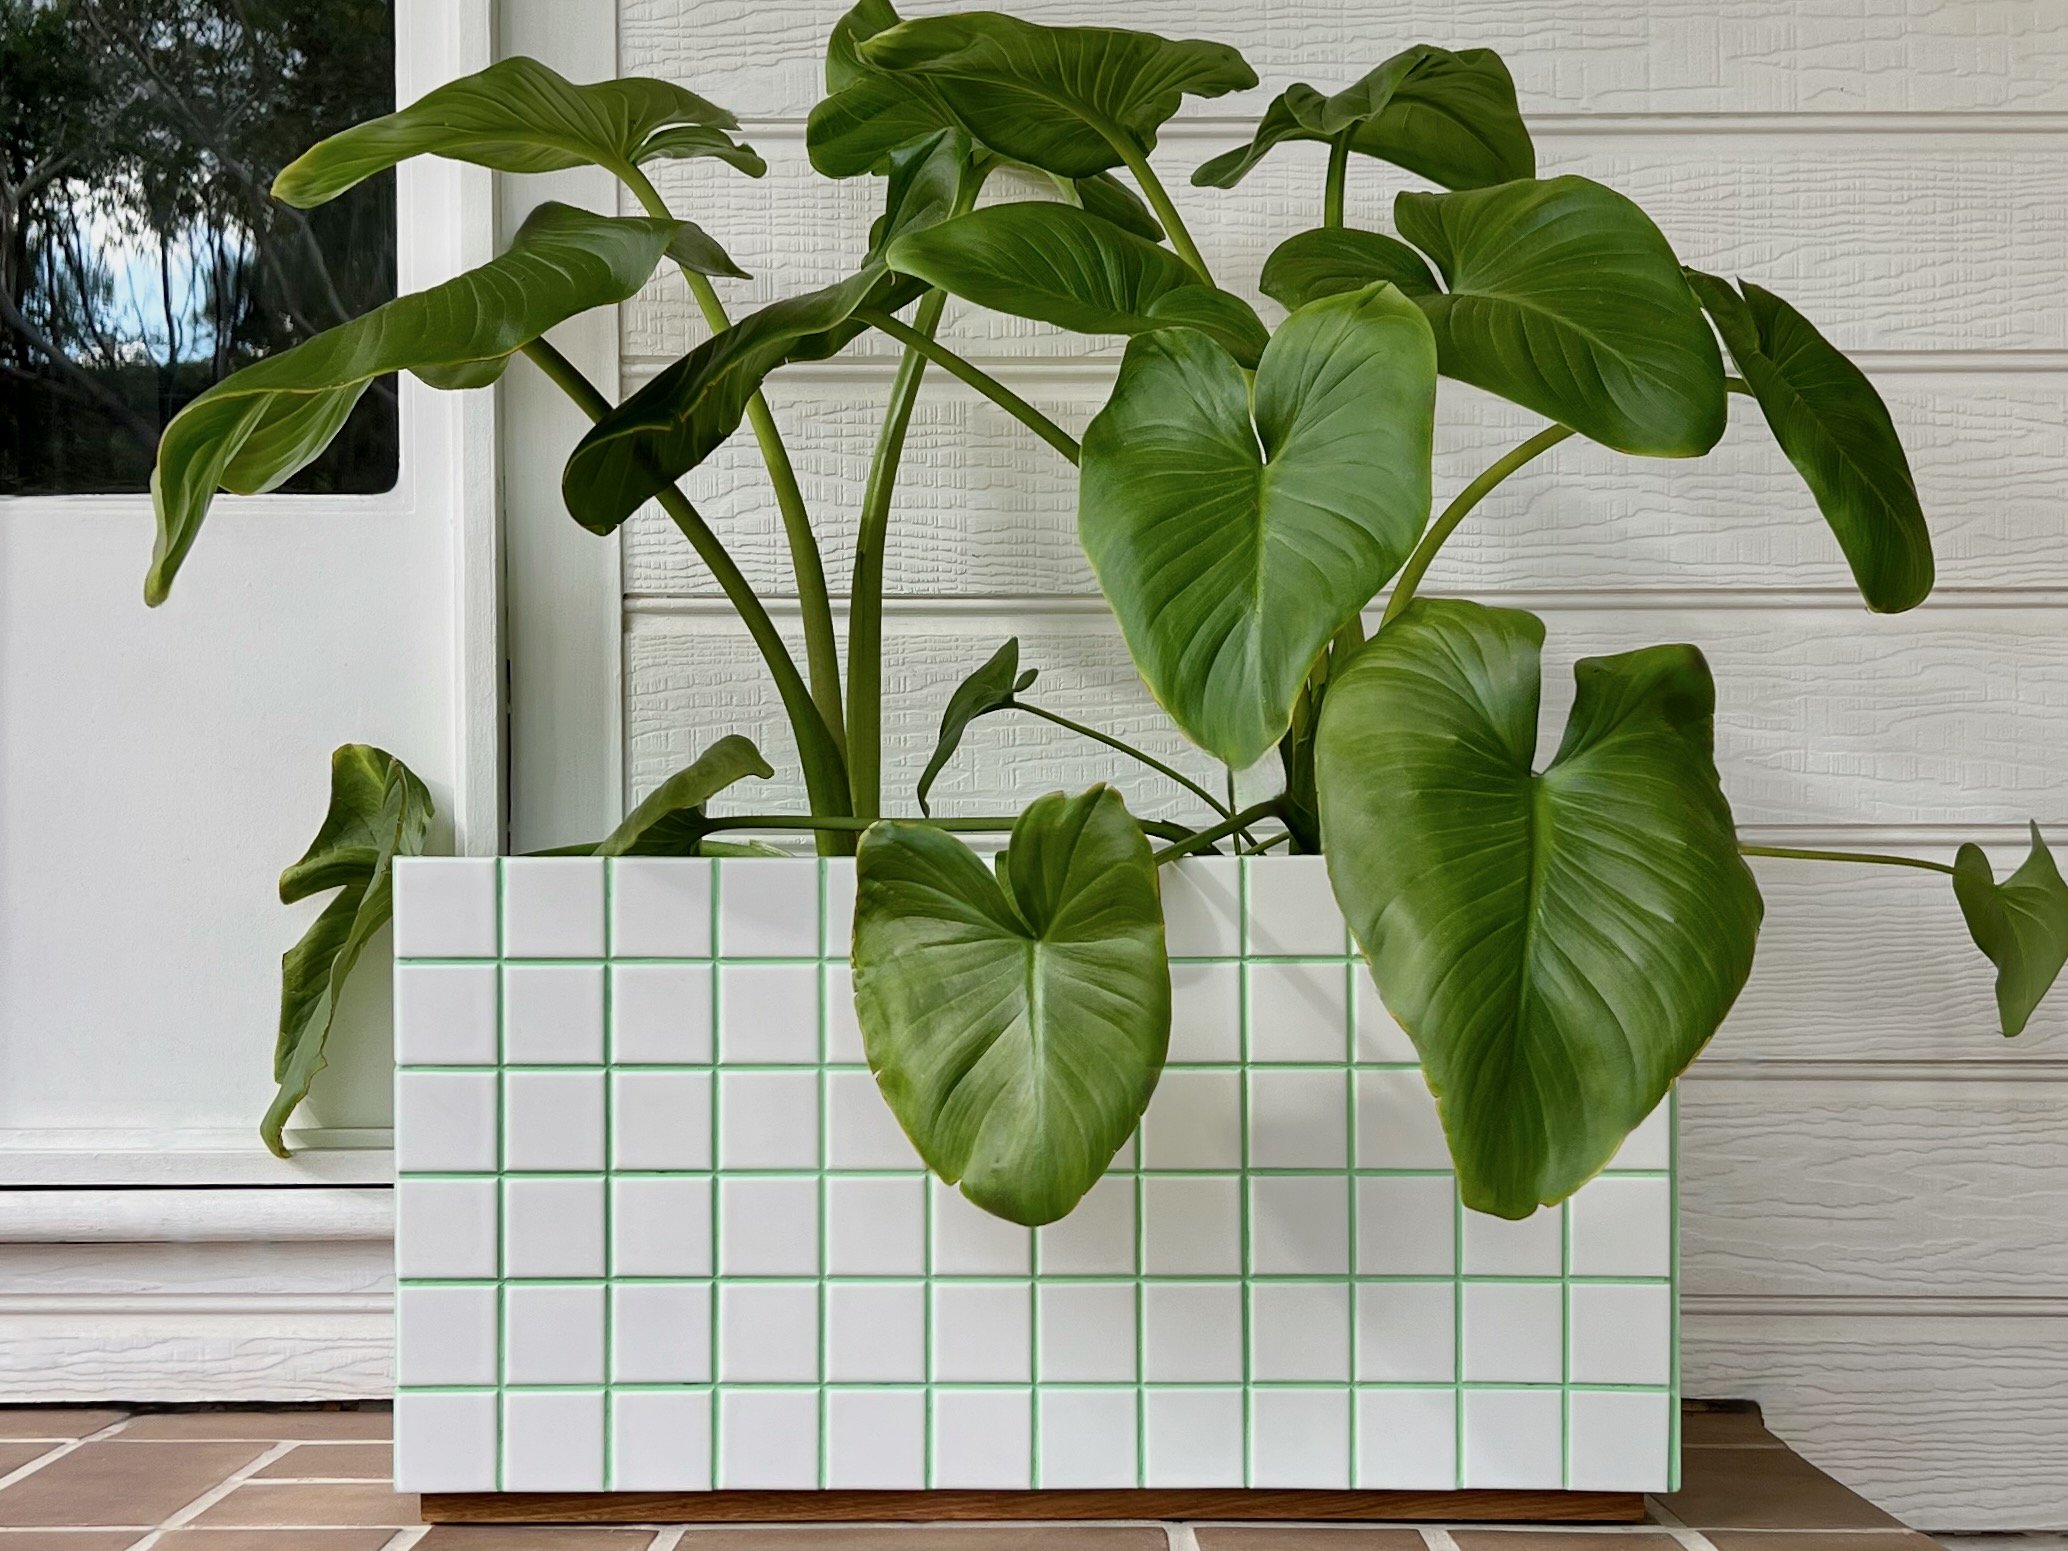
I was after a minty-fresh planter box with white square tiles and contrasting grout for a geometric pop of colour, but couldn’t find any green in store. So I decided to DIY.
“I kept it simple with easy-to-use products including a square-sided planter, fast-drying construction adhesive to lay mosaics, ready-mixed grout with acrylic paint, and a spray-on sealer.”
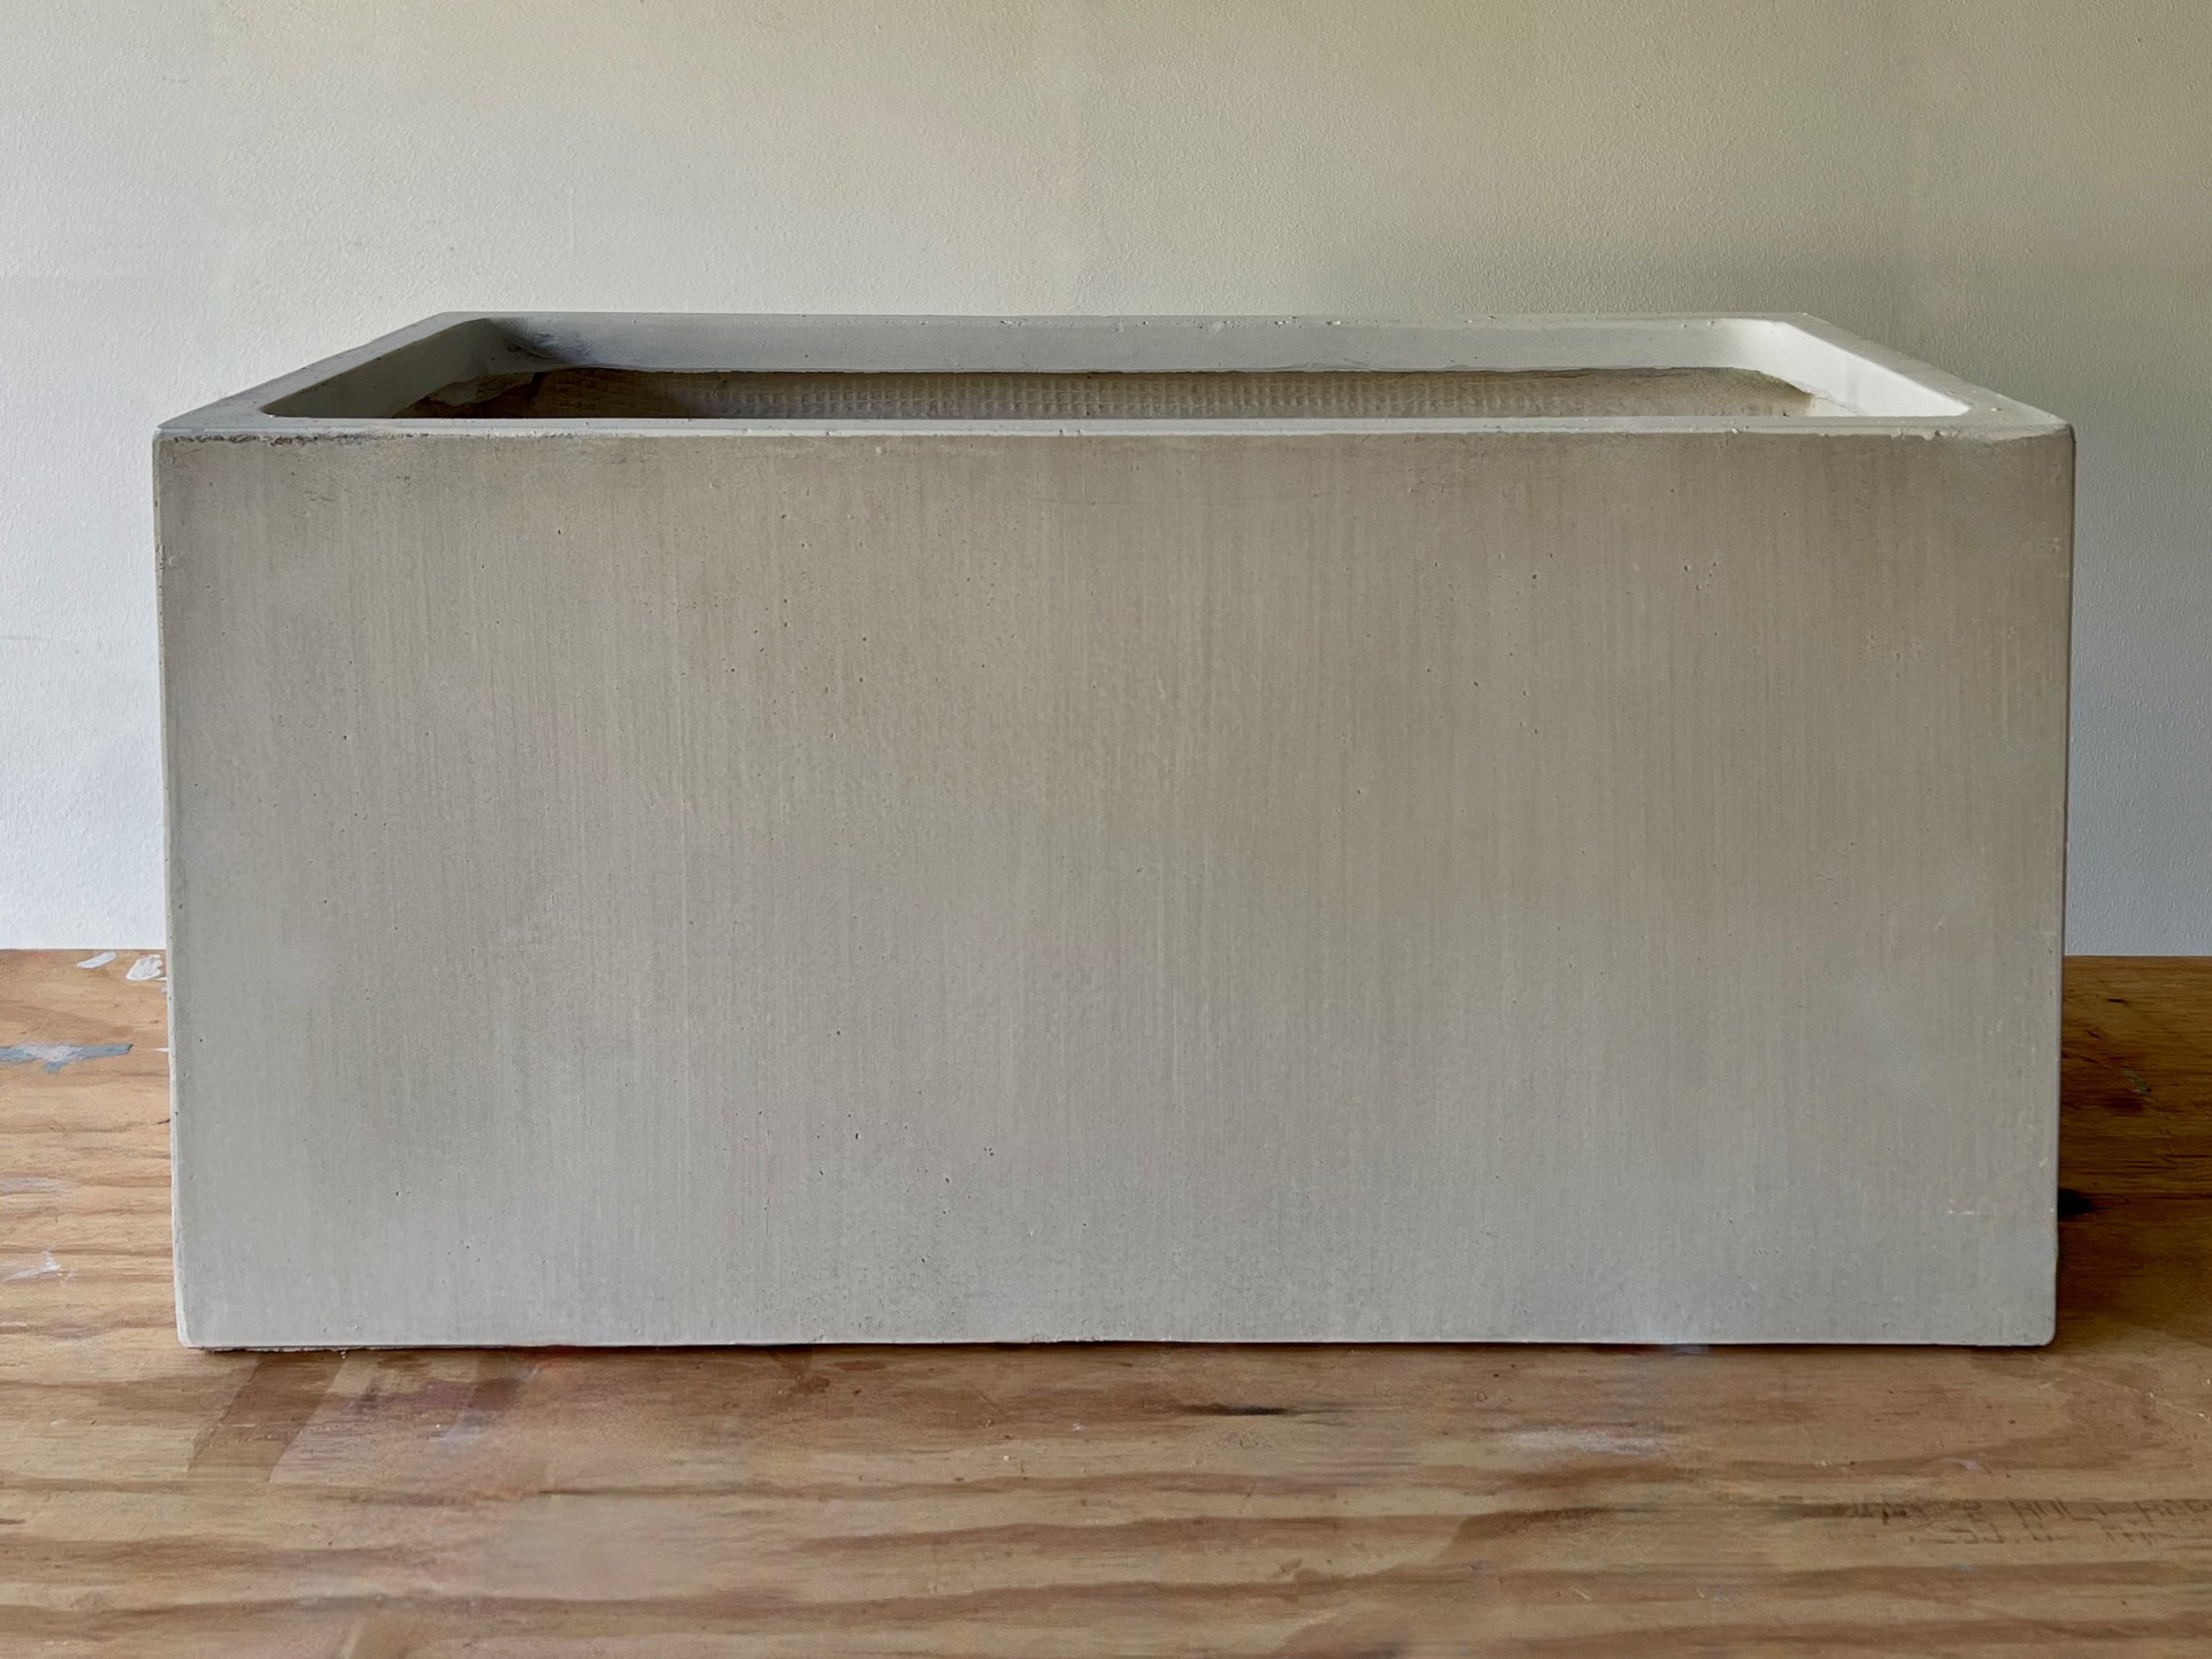
To avoid having to cut tiles, I used a Northcote Pottery 600mm x 300mm lightweight planter to fit 300mm-square Decor8 Tiles matt white porcelain mosaic tile mats.
TIP Chose square mosaics for clean, straight edges.
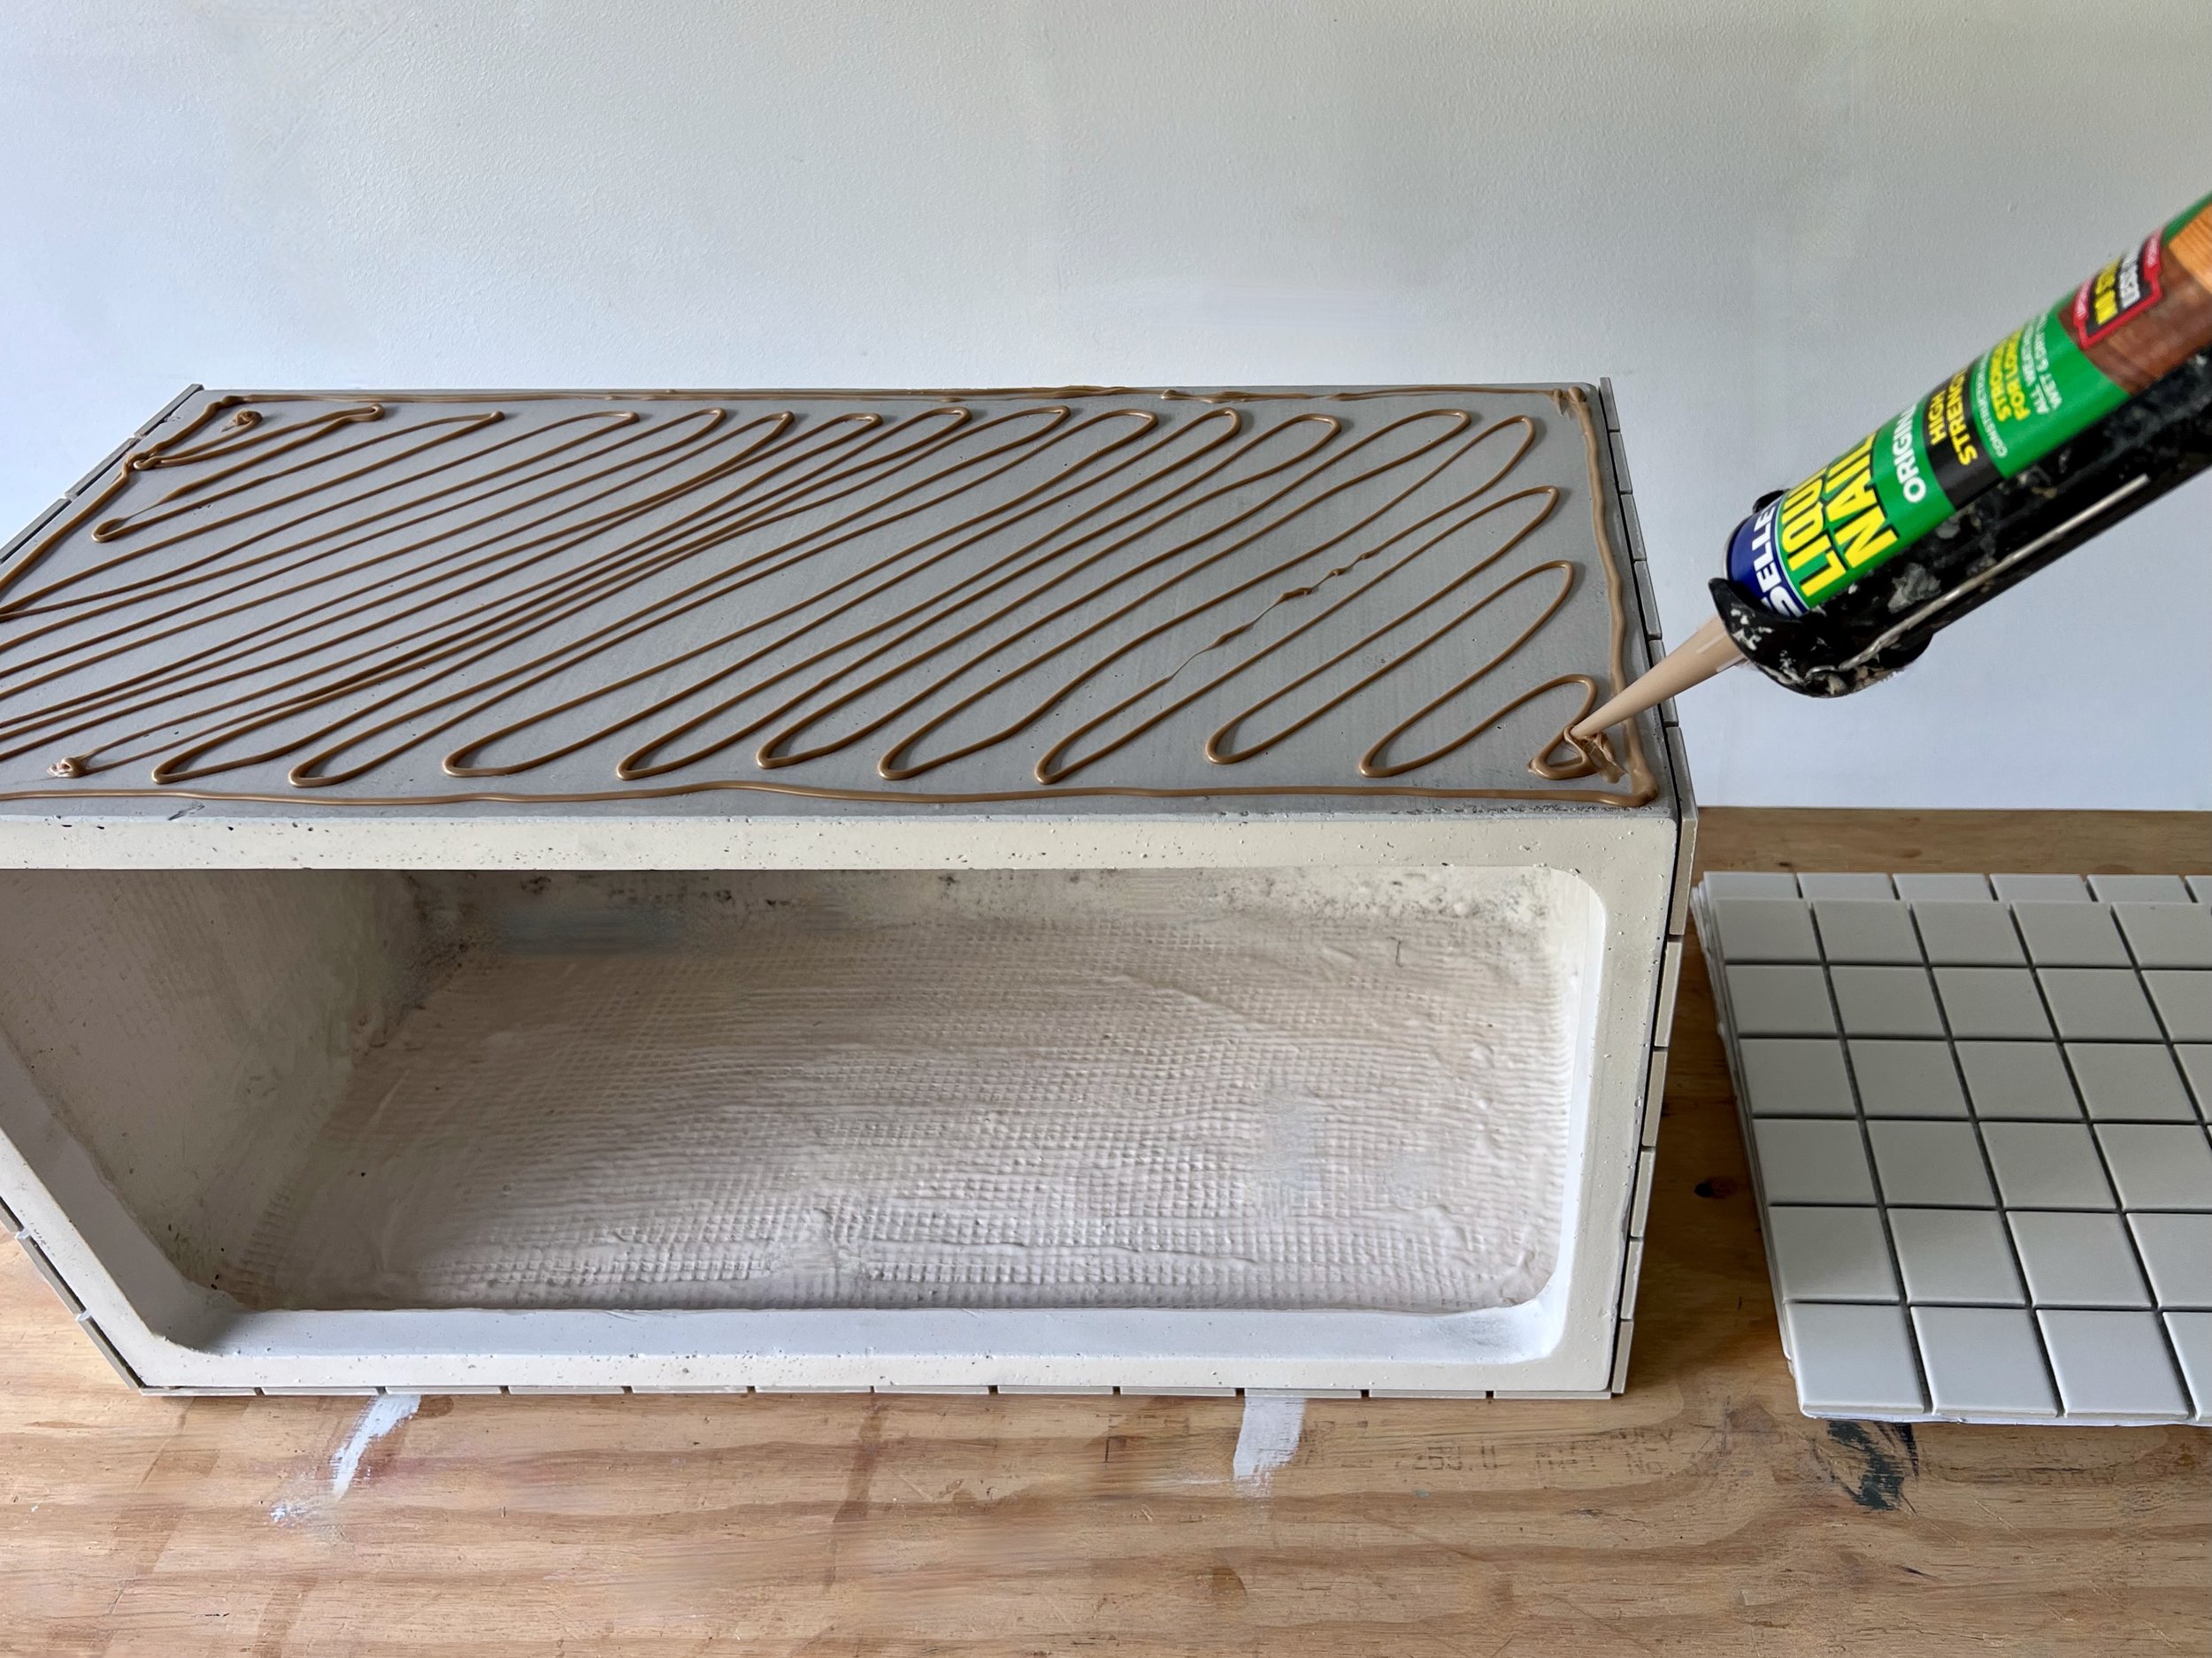
With the planter positioned on its side, I applied quick-drying, fast-grab Liquid Nails construction adhesive with a caulking gun.
TIP For a larger tiled area, such as a splashback or tabletop that requires lots of cleaning, use standard premixed adhesive and leave it to cure overnight before applying the grout.
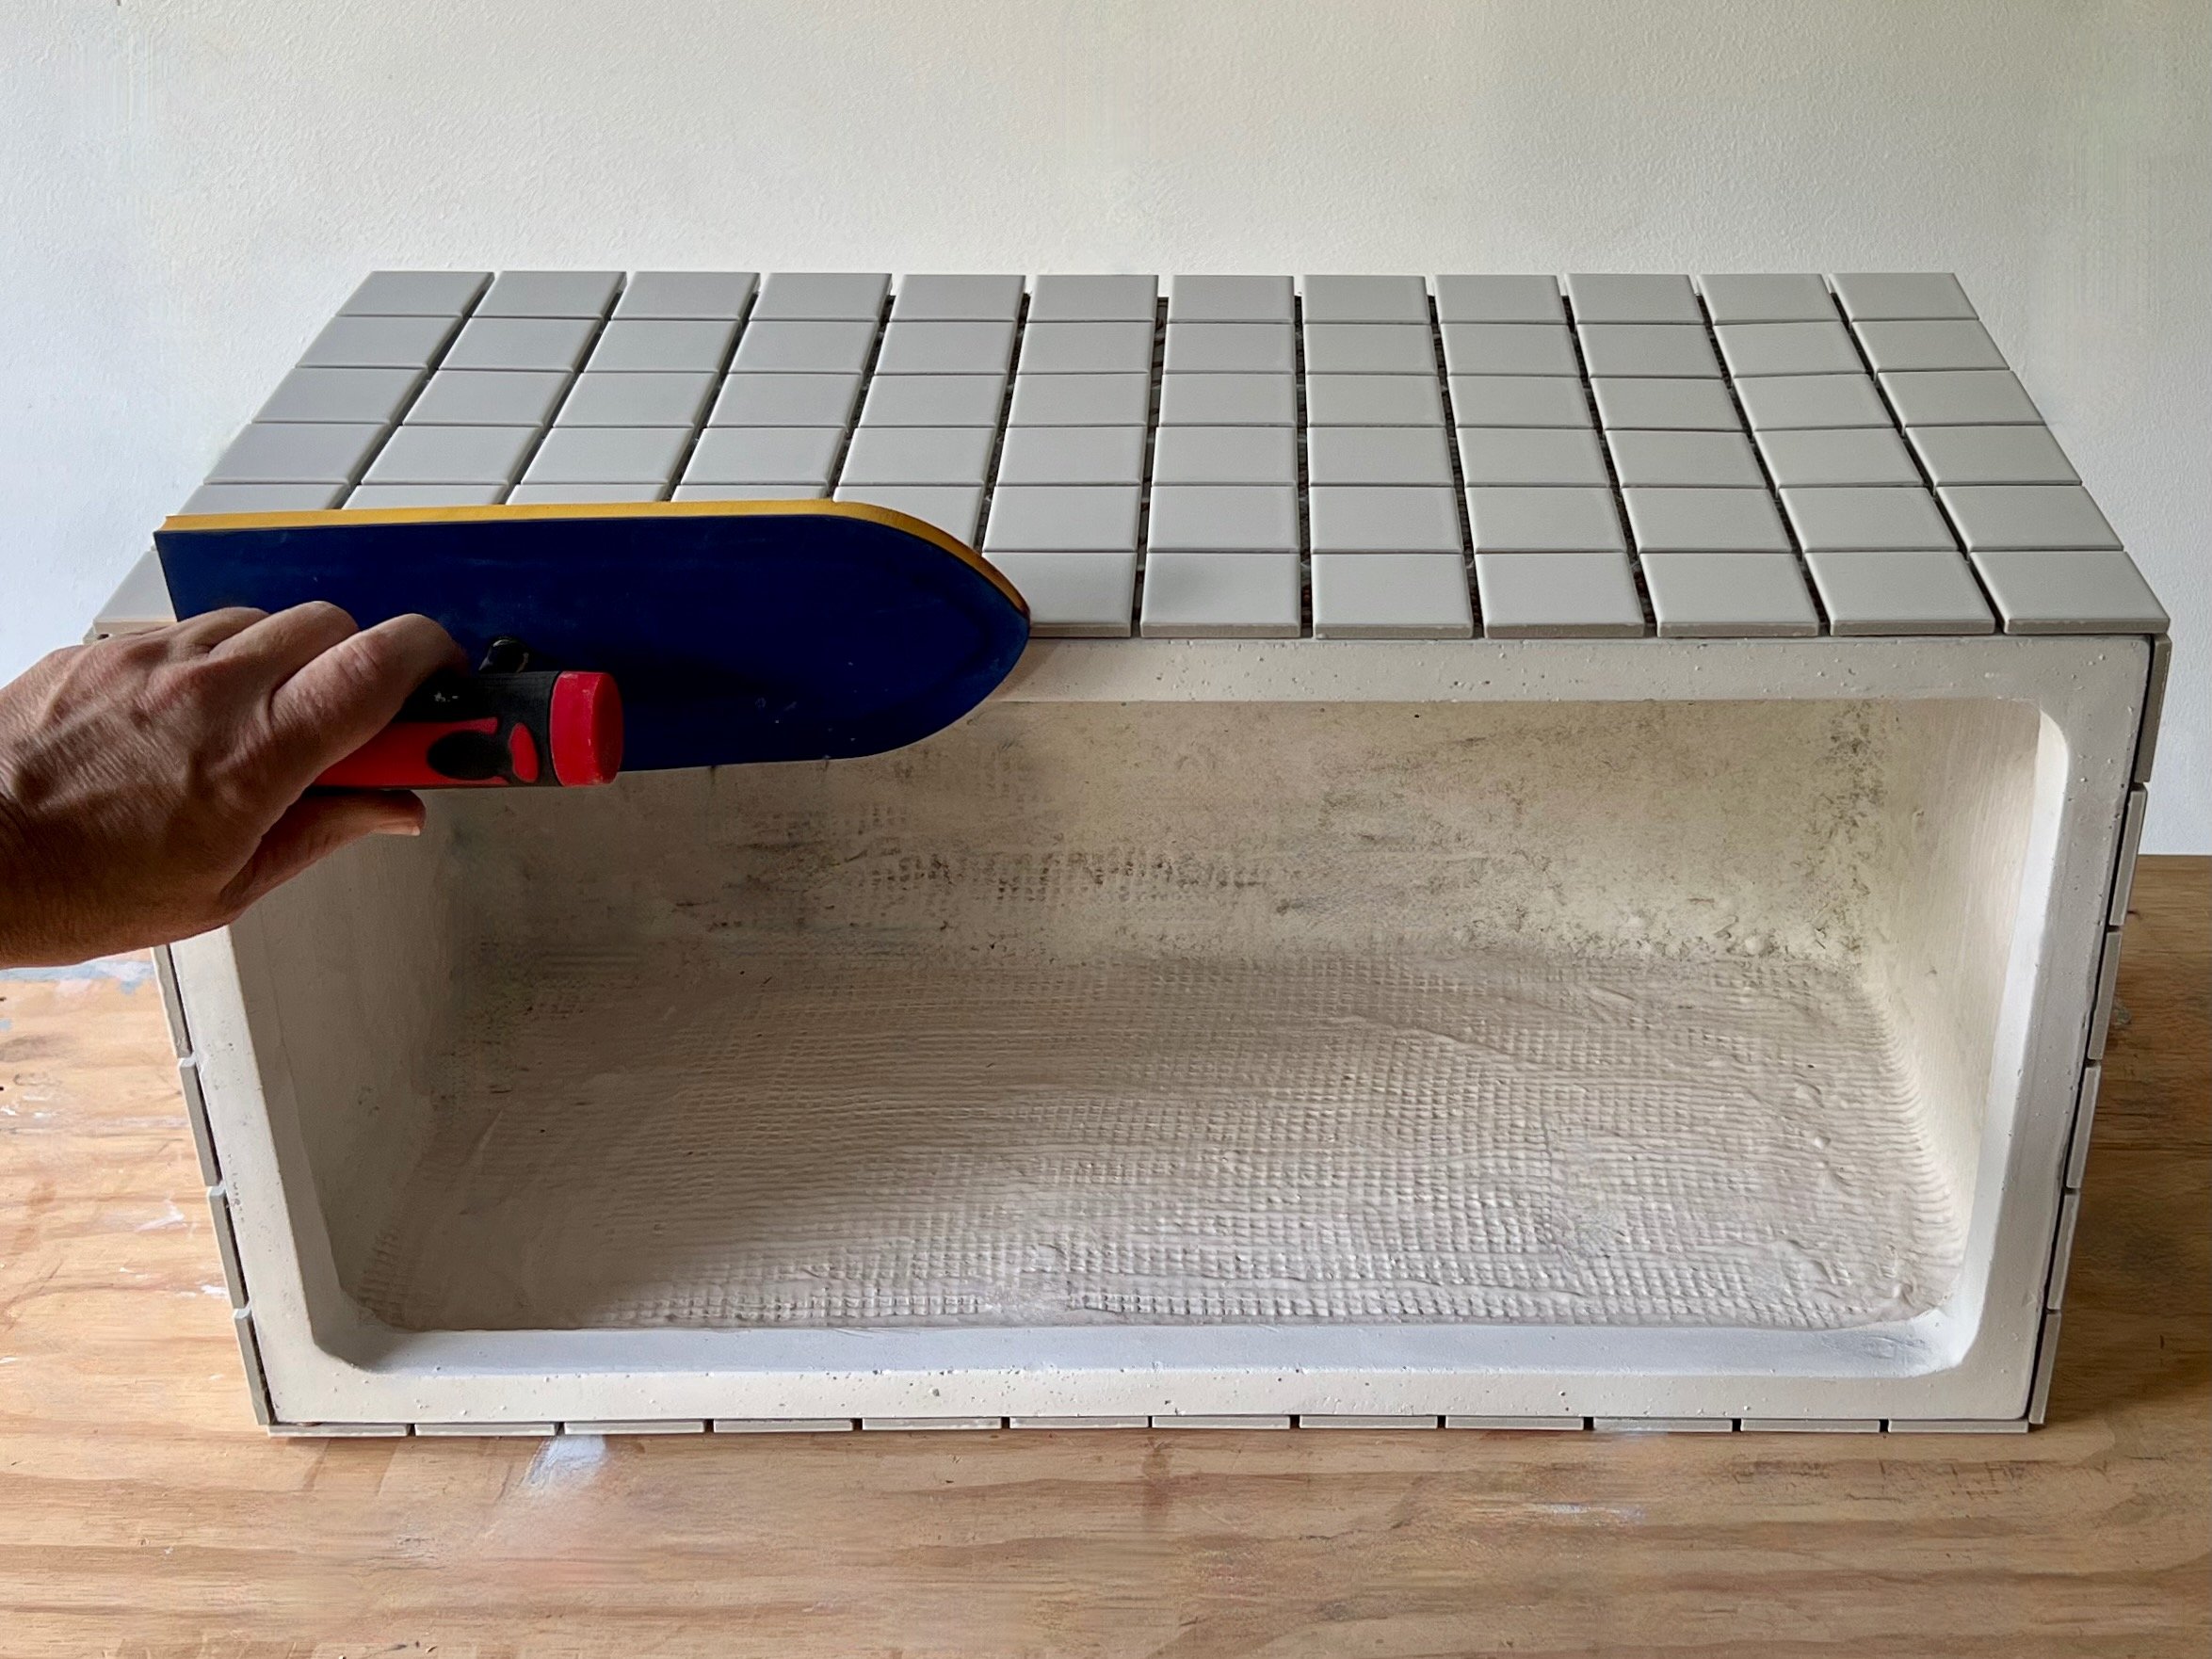
I placed each mosaic mat flush with the top of the planter and the ends, using a float to check the tiles were straight and push them into the adhesive.
TIP While mats are the same size as the ends of the planter – and two fit nicely on the sides – there’s a slight overhang around the base.

To work on the planter upright, I positioned it on timber offcuts to keep it raised and prevent chipping the base tiles.
TIP Adding timber feet later ensures the planter stays off the ground, but be careful not to knock the tiles before the adhesive has cured.
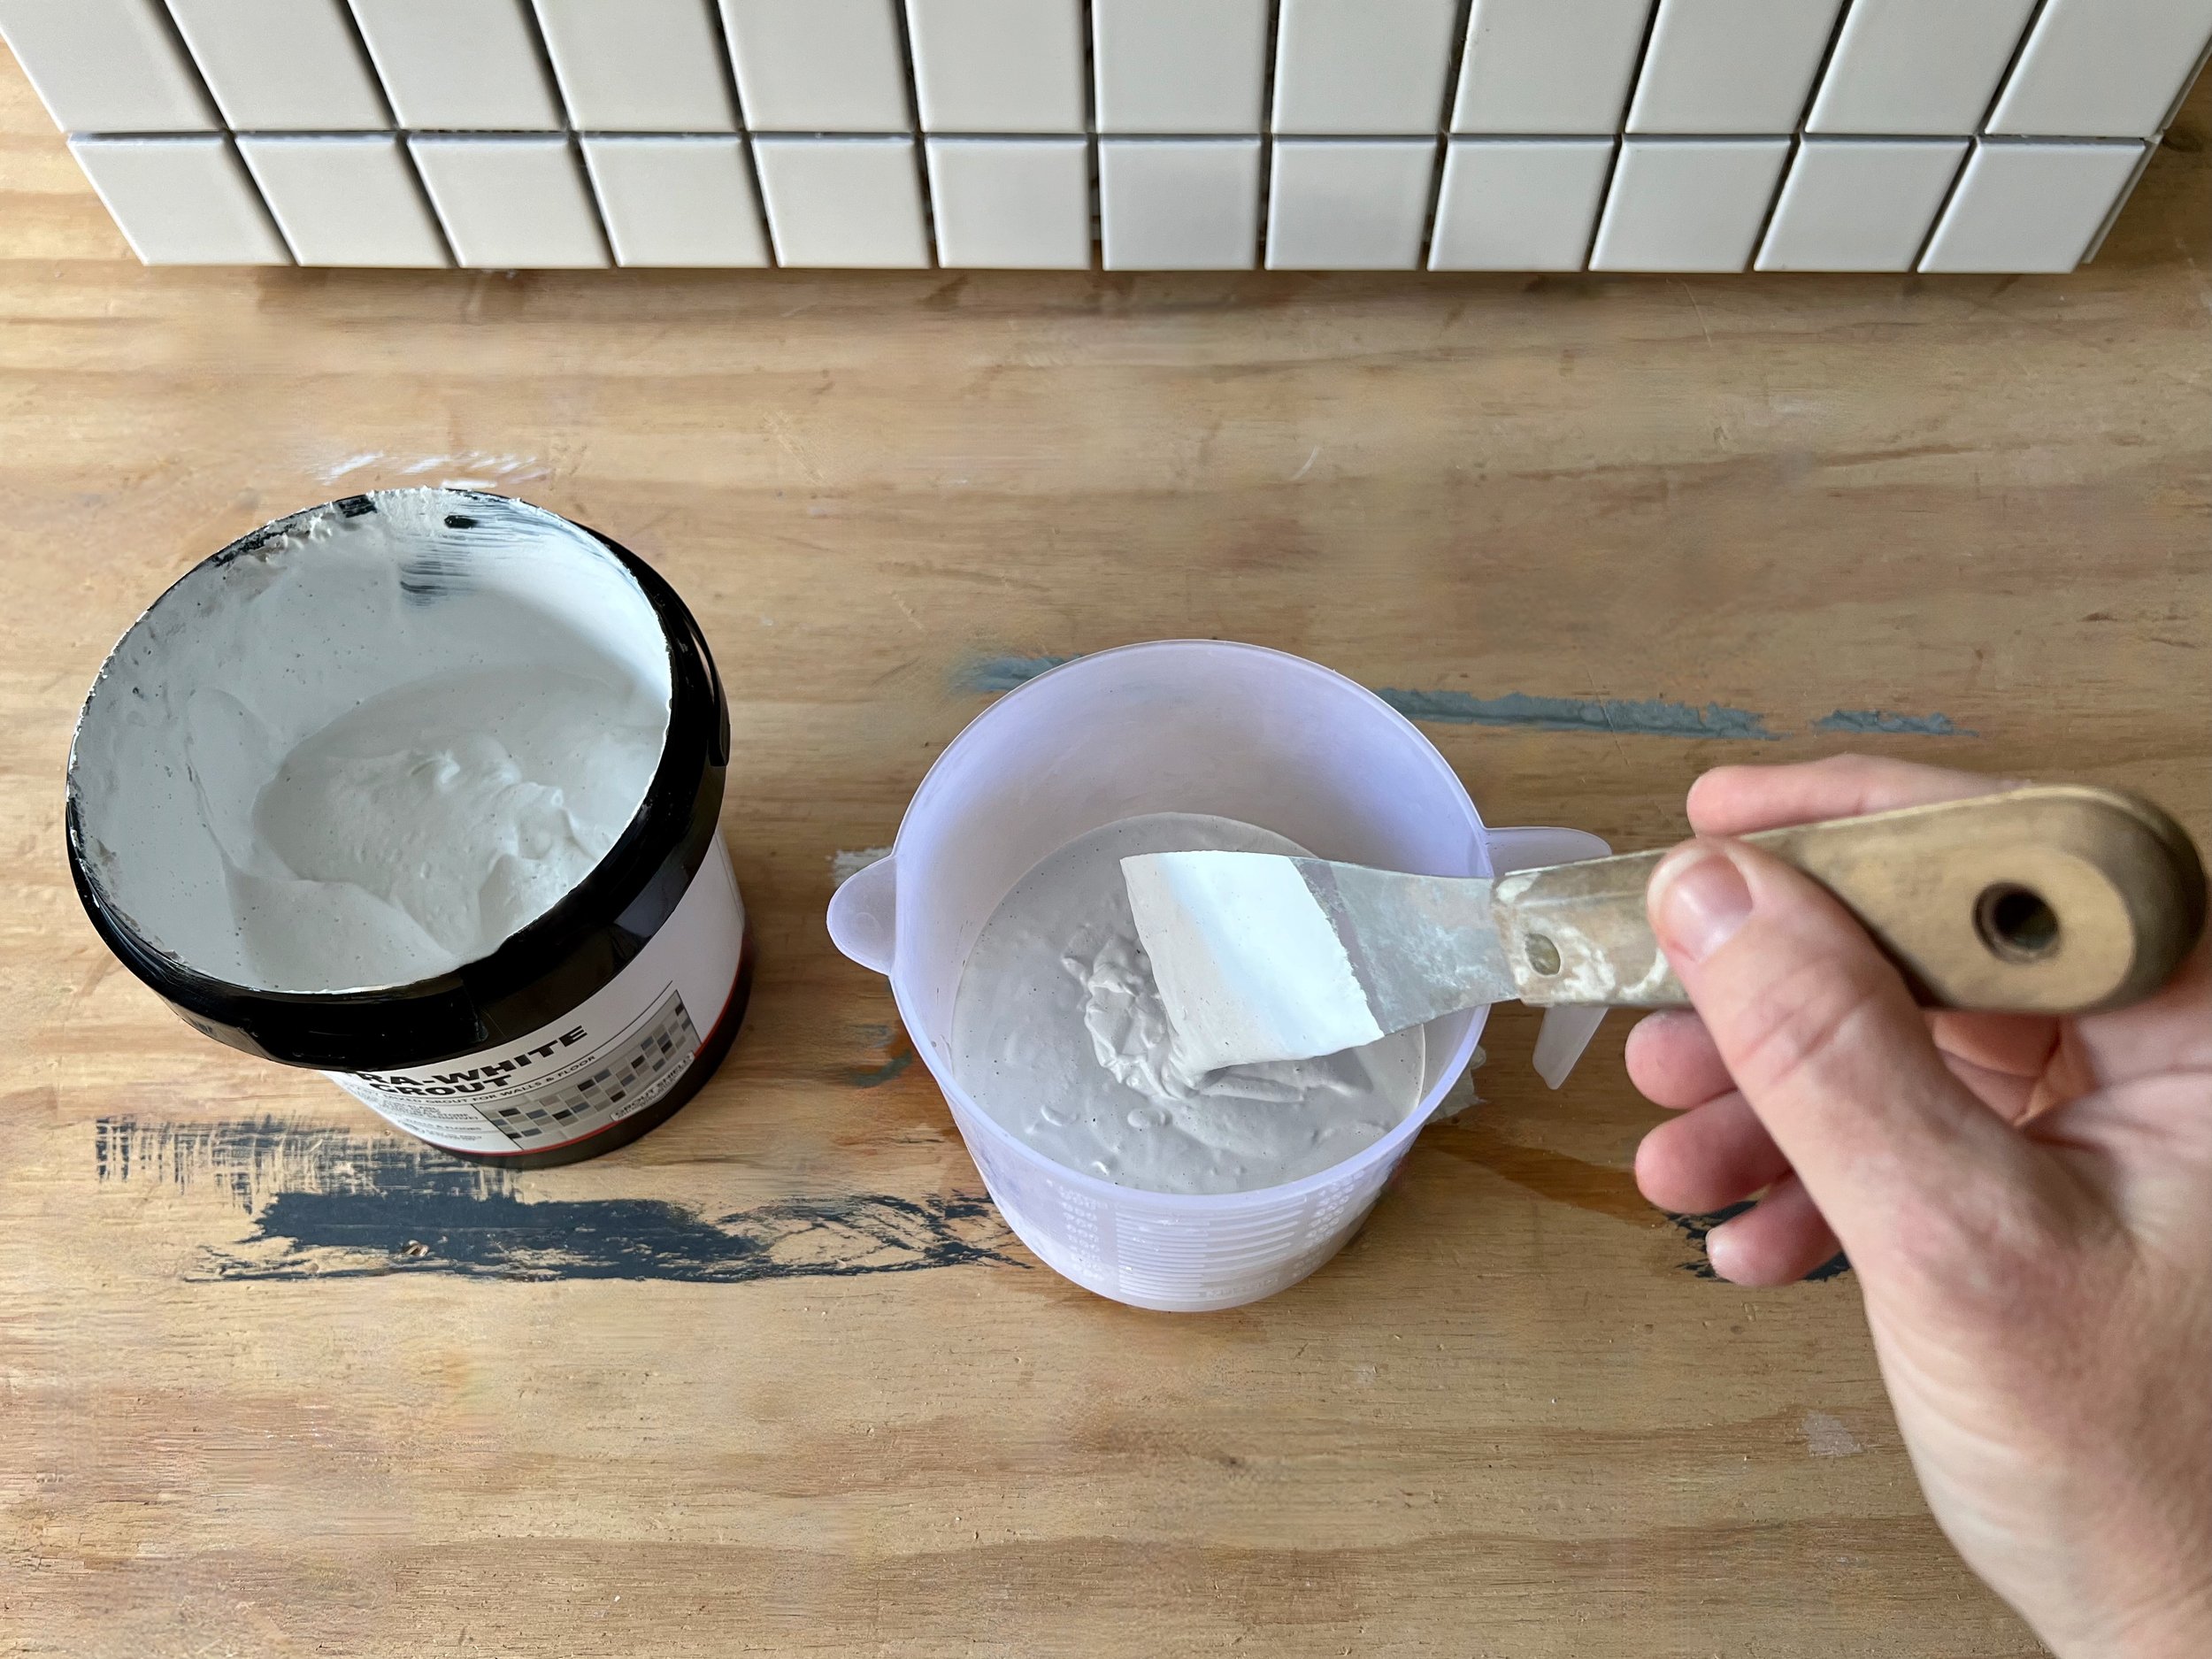
I scooped 500ml Dunlop Ready-To-Go Ultra-White Grout into a measuring jug…
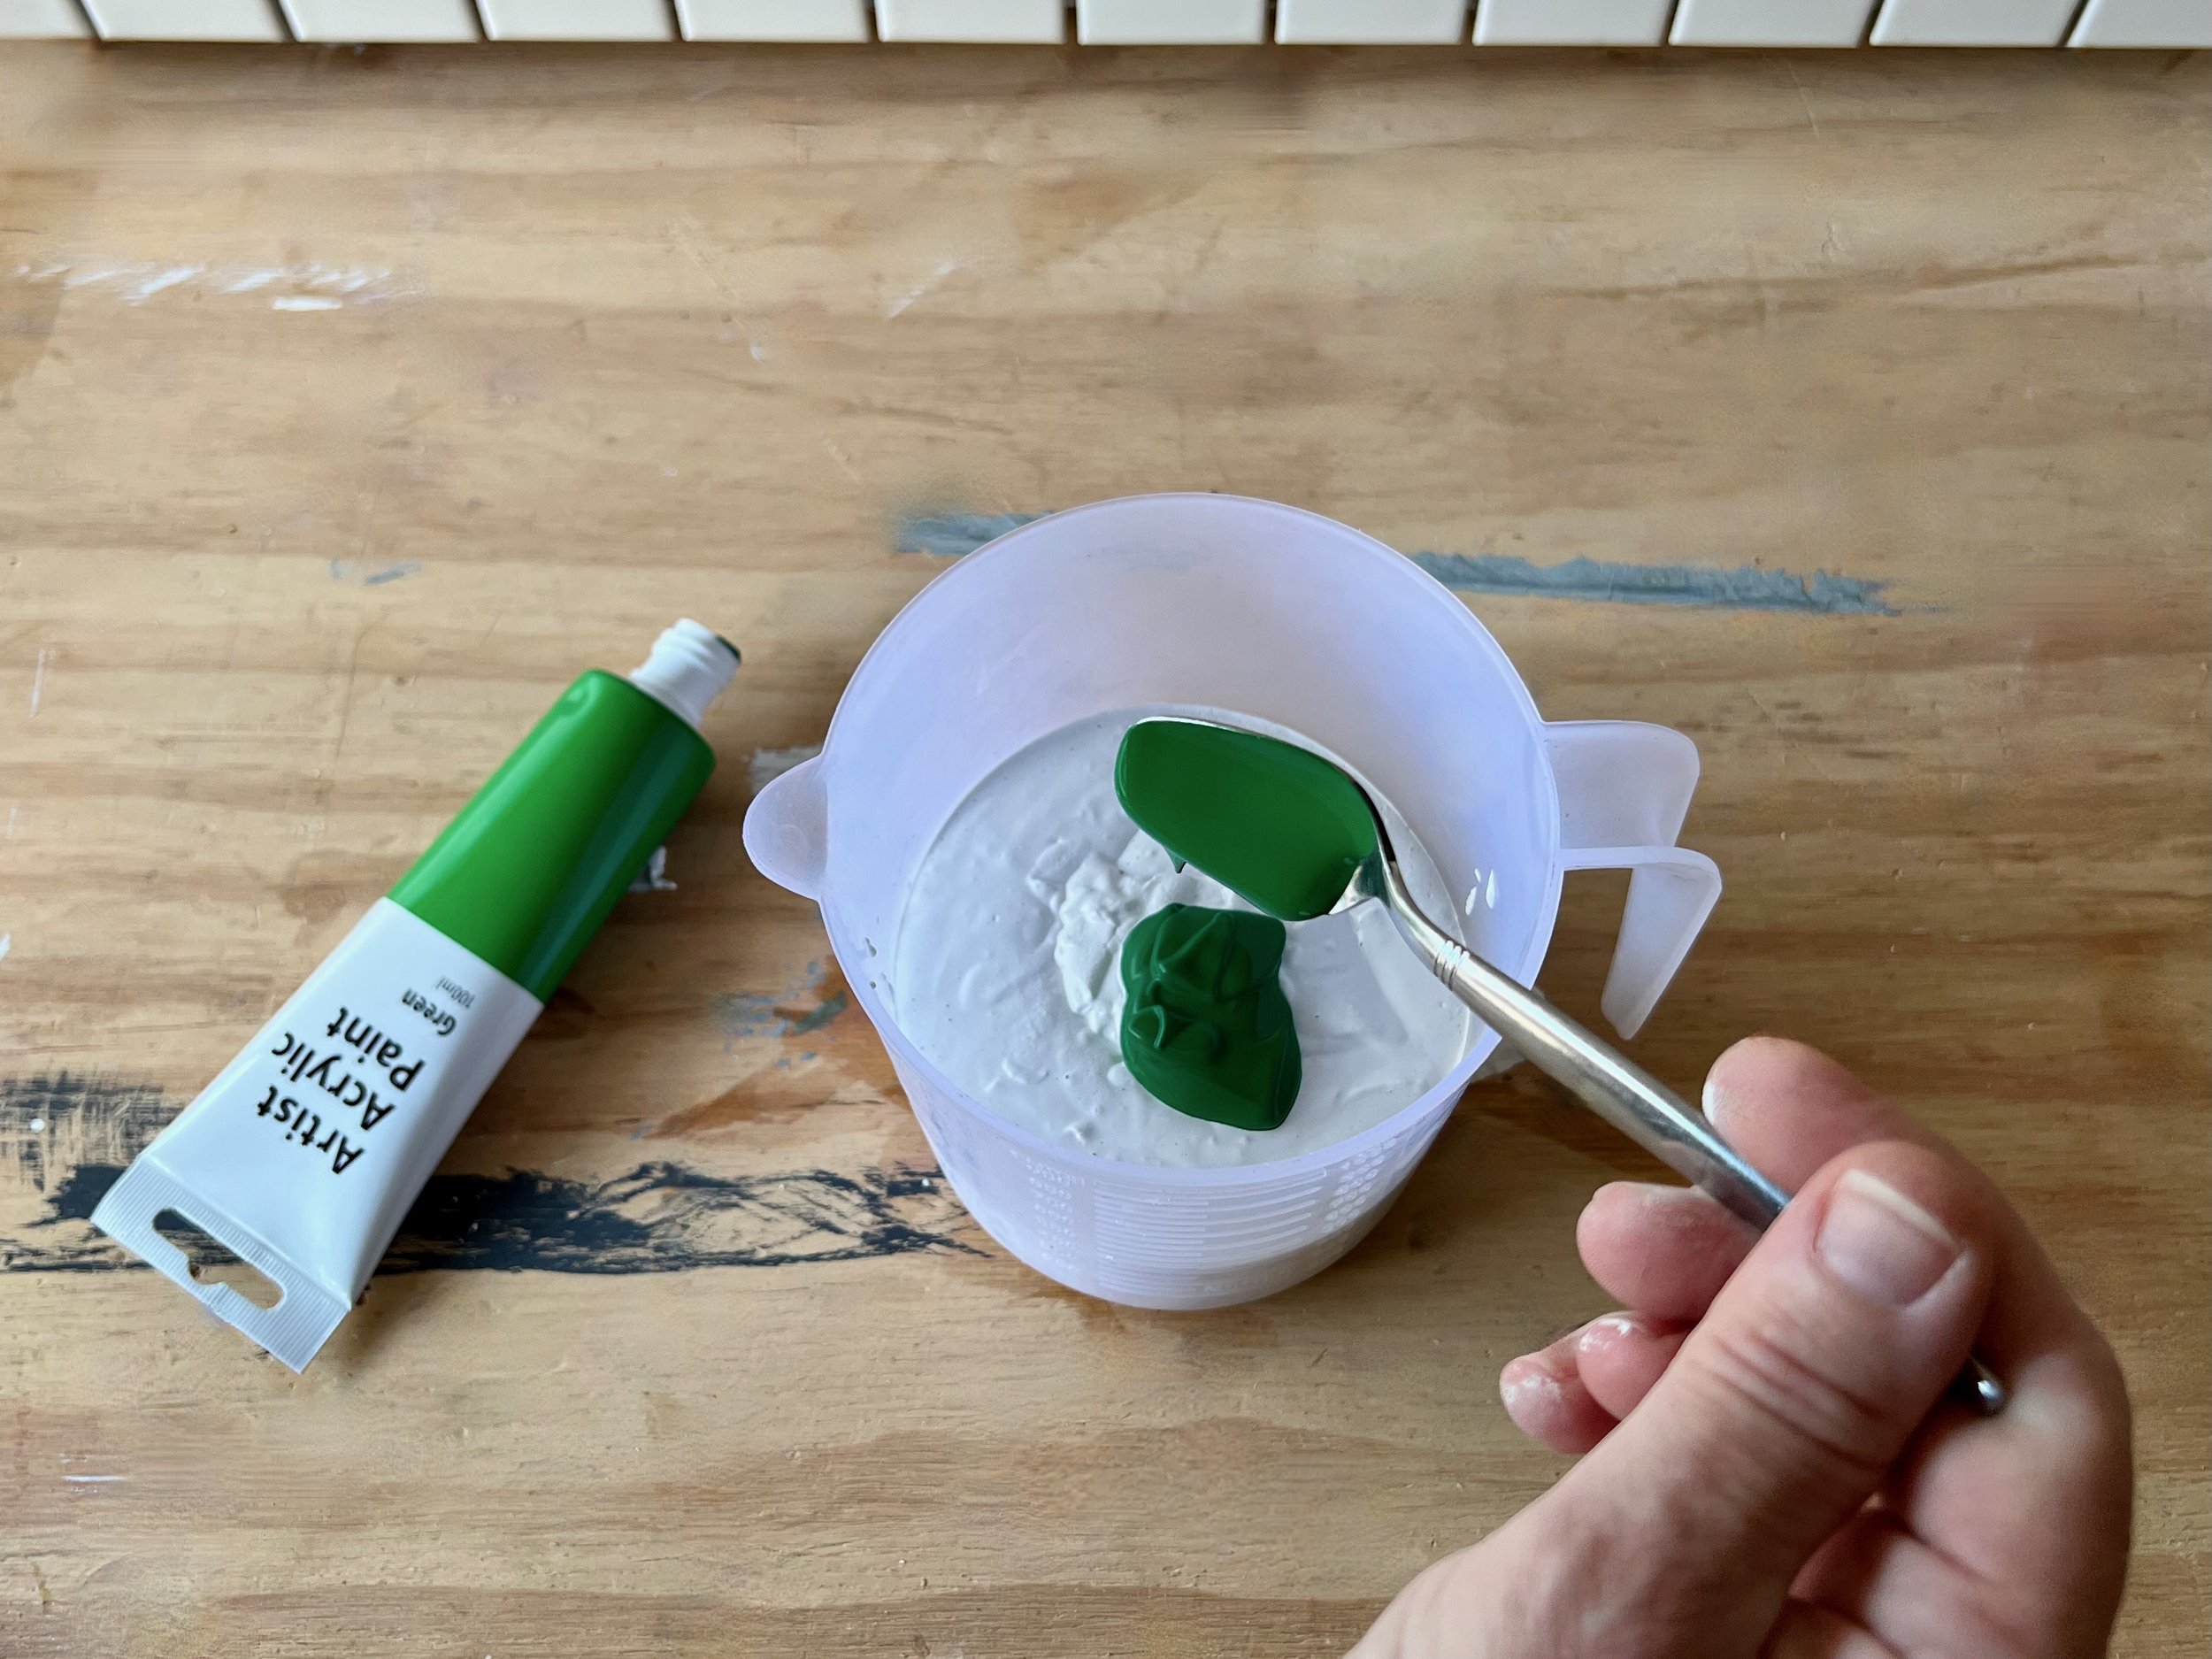
… and added two teaspoons of grassy-green artist acrylic paint.
TIP Adding colour to white lightens it substantially, so choose a rich shade to ensure the results are strong.
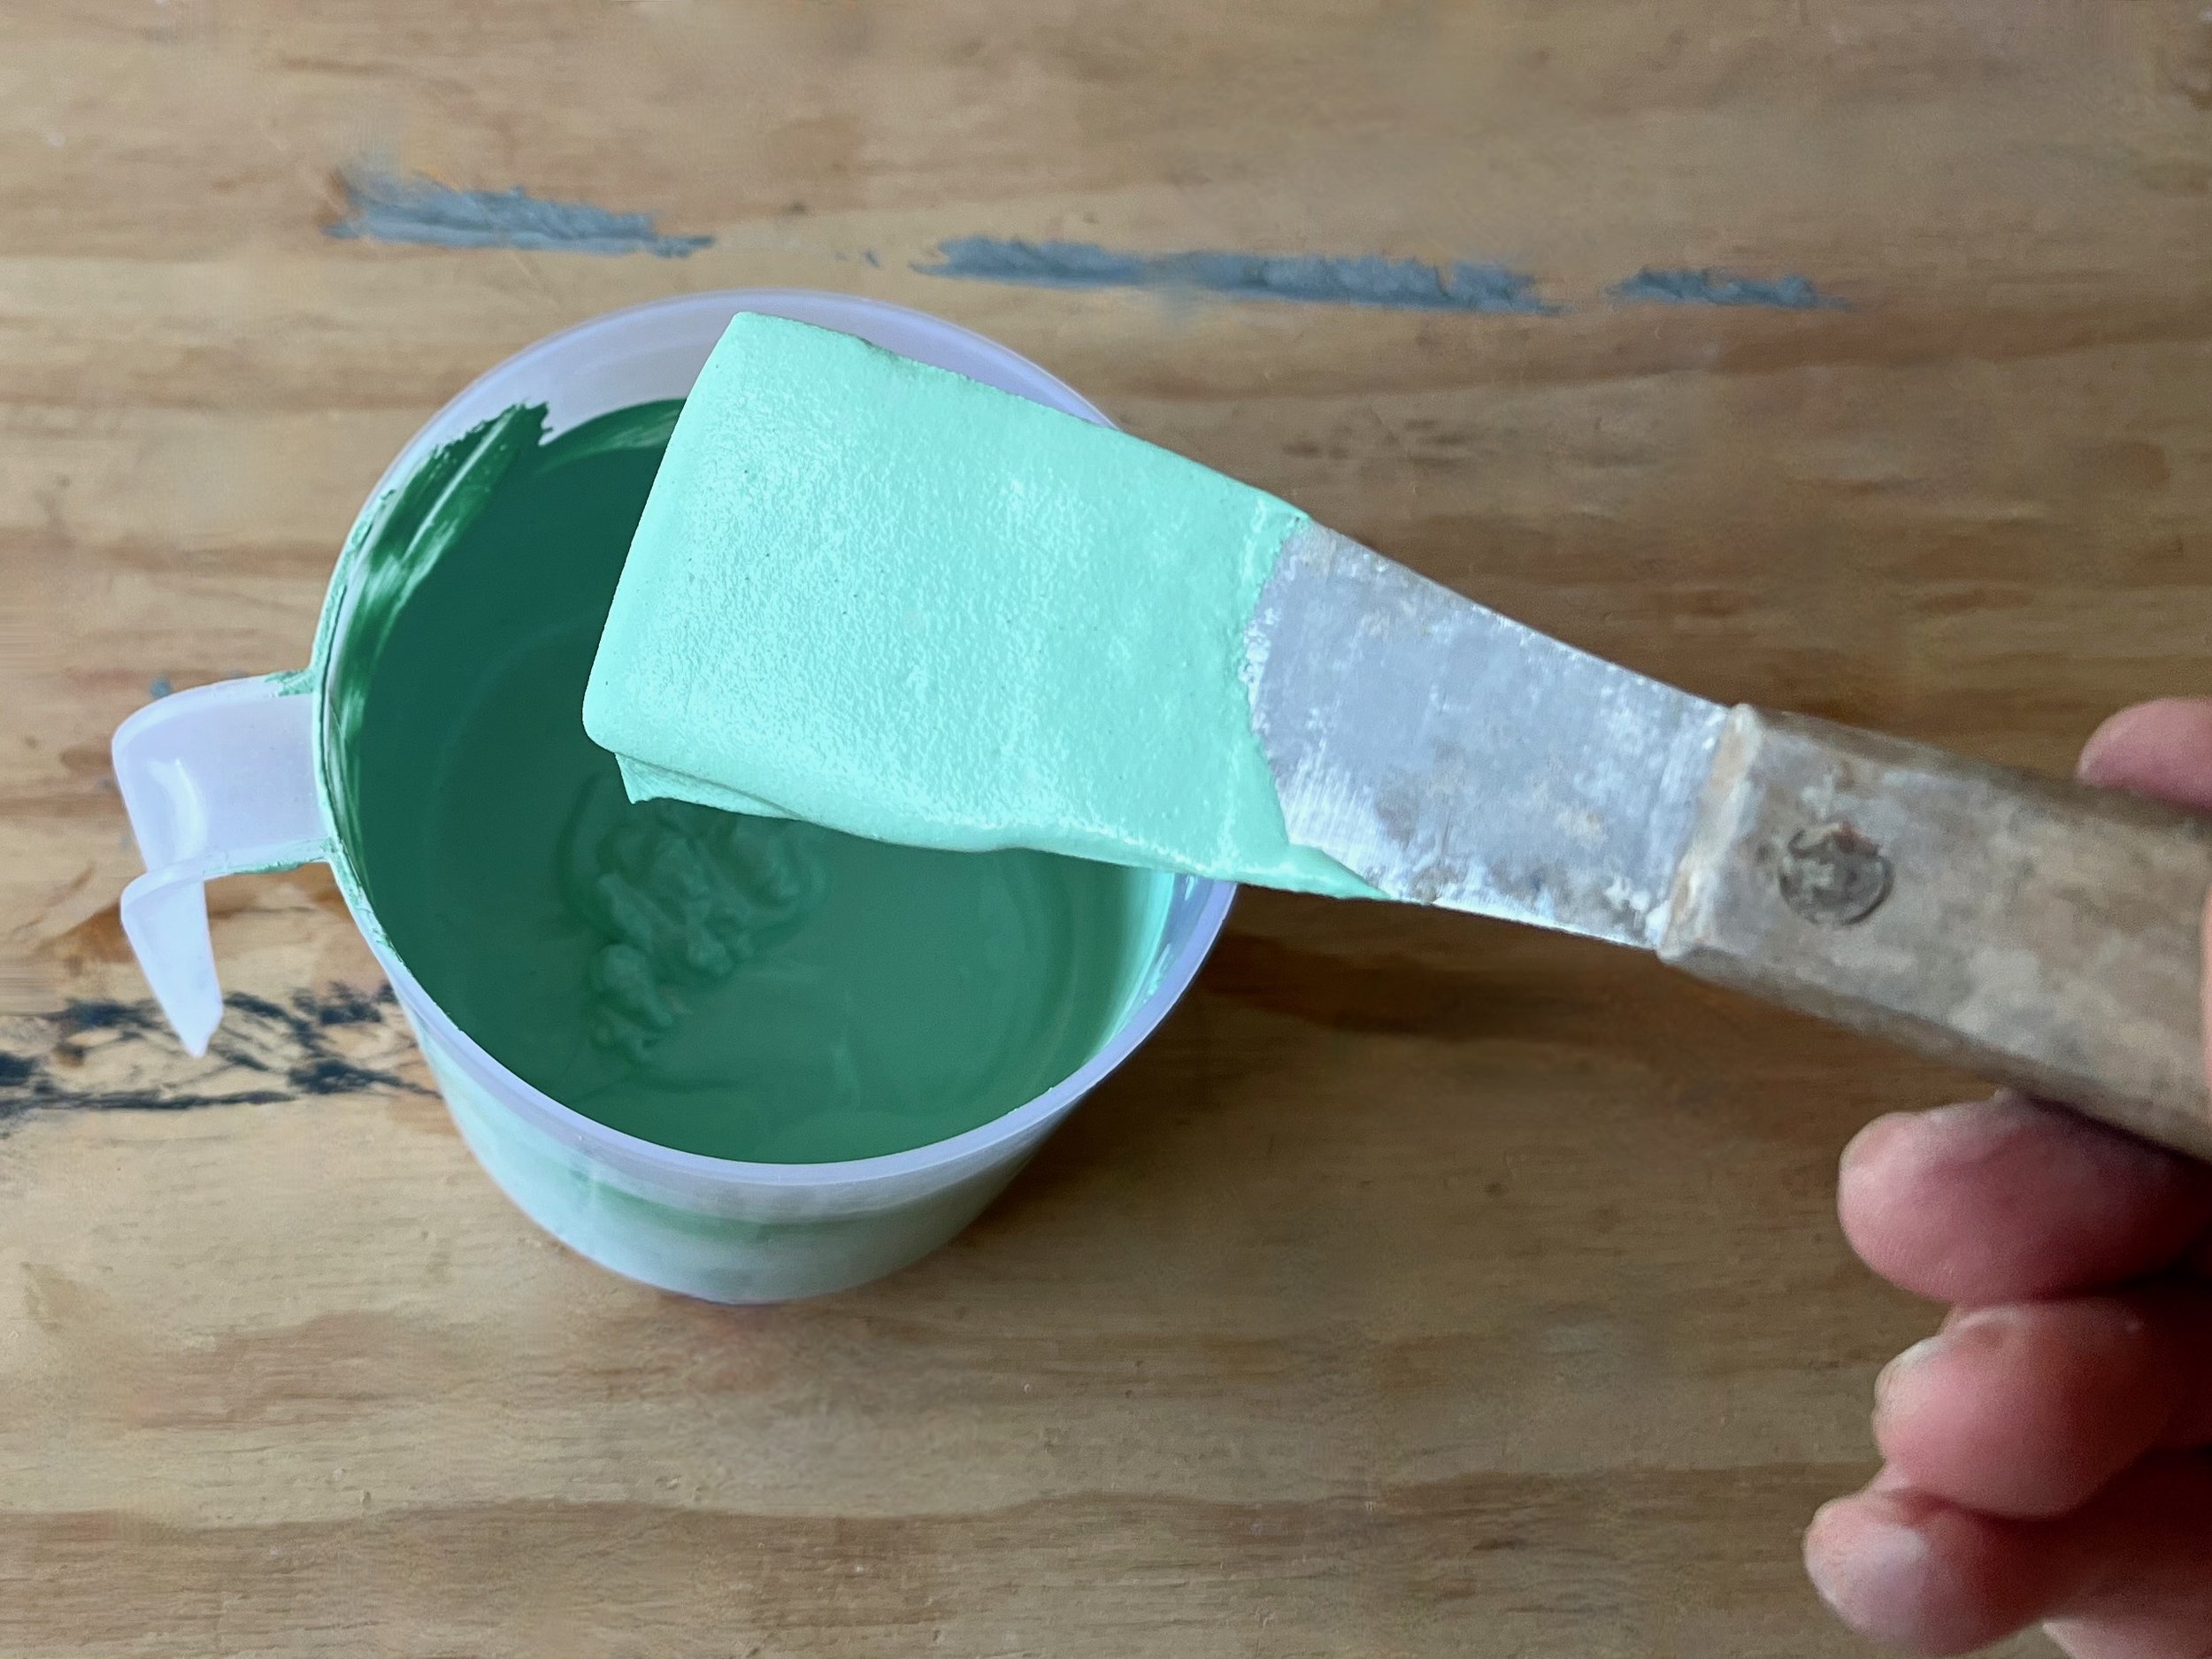
Combine the grout and paint thoroughly, leaving it to thicken for 10 minutes – adding the extra liquid to the pre-mixed formula makes it slightly too runny to use immediately.
TIP Keep a note of the portions in case you need to make more of the same shade. I found this was enough for one planter.
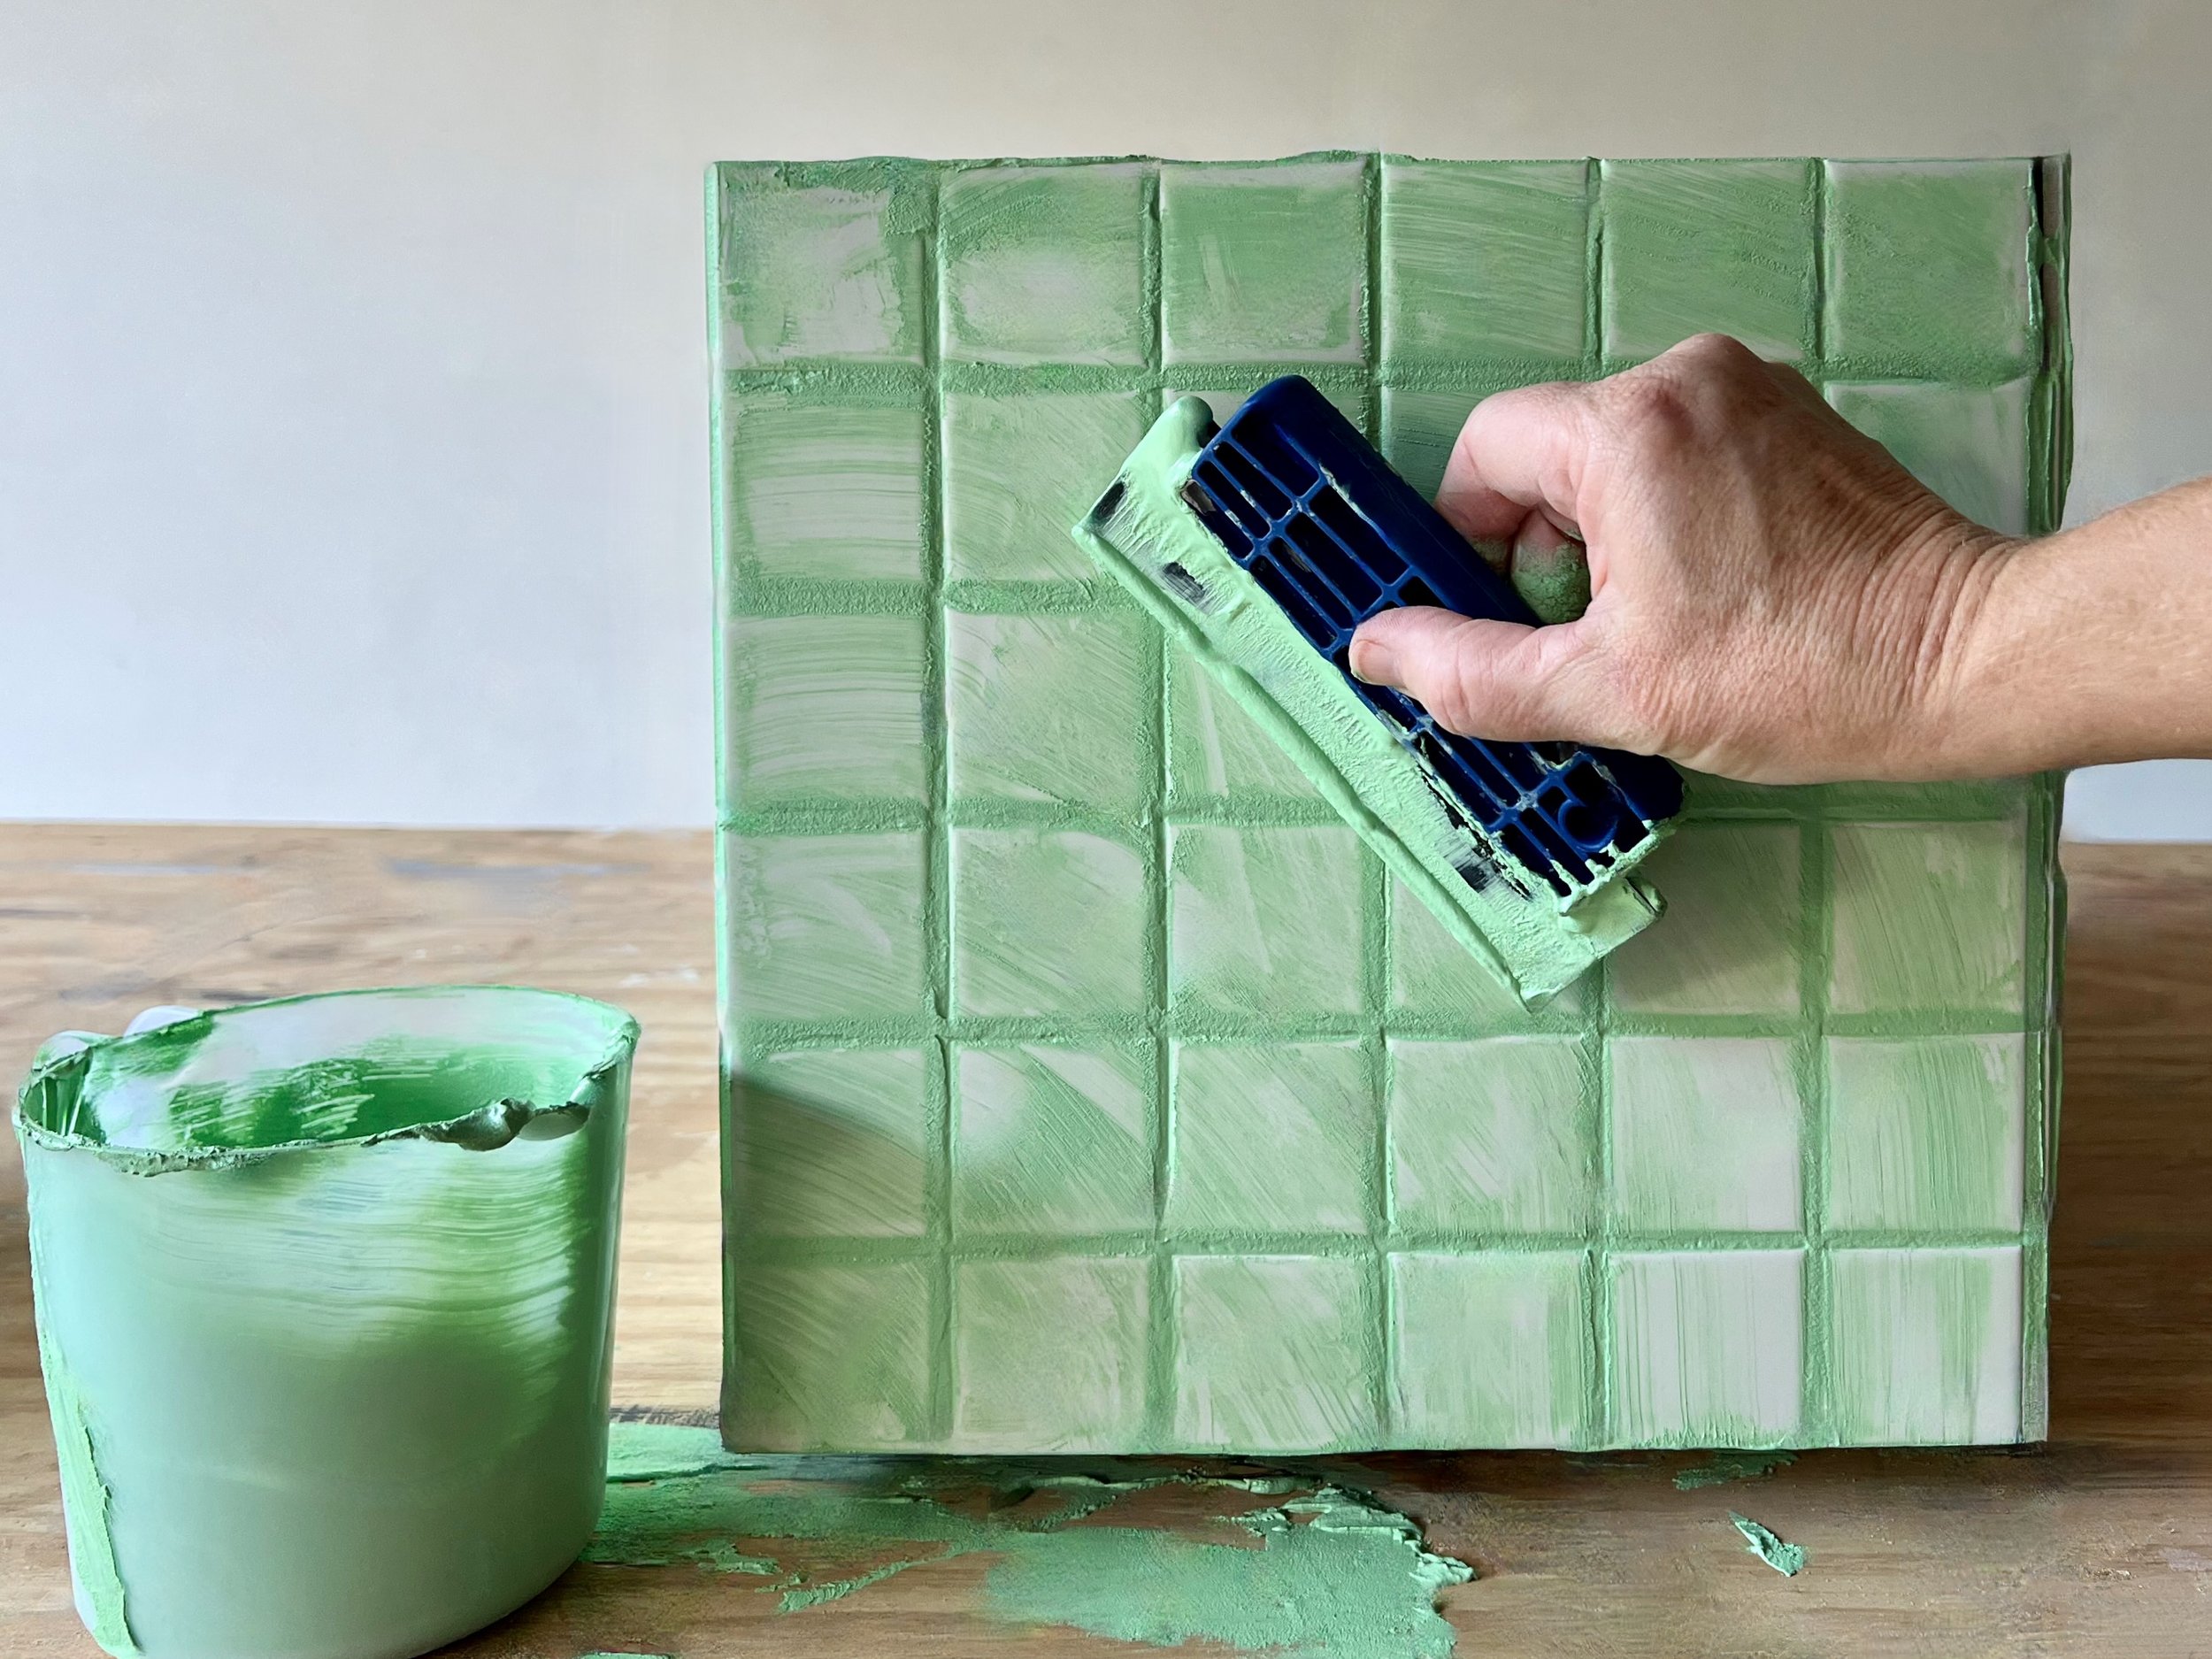
Working on one side at a time, I used a small rubber squeegee to apply grout mix into gaps and around the edges, spreading it diagonally. Then I wiped away the excess and smoothed along the edges with a large sponge.
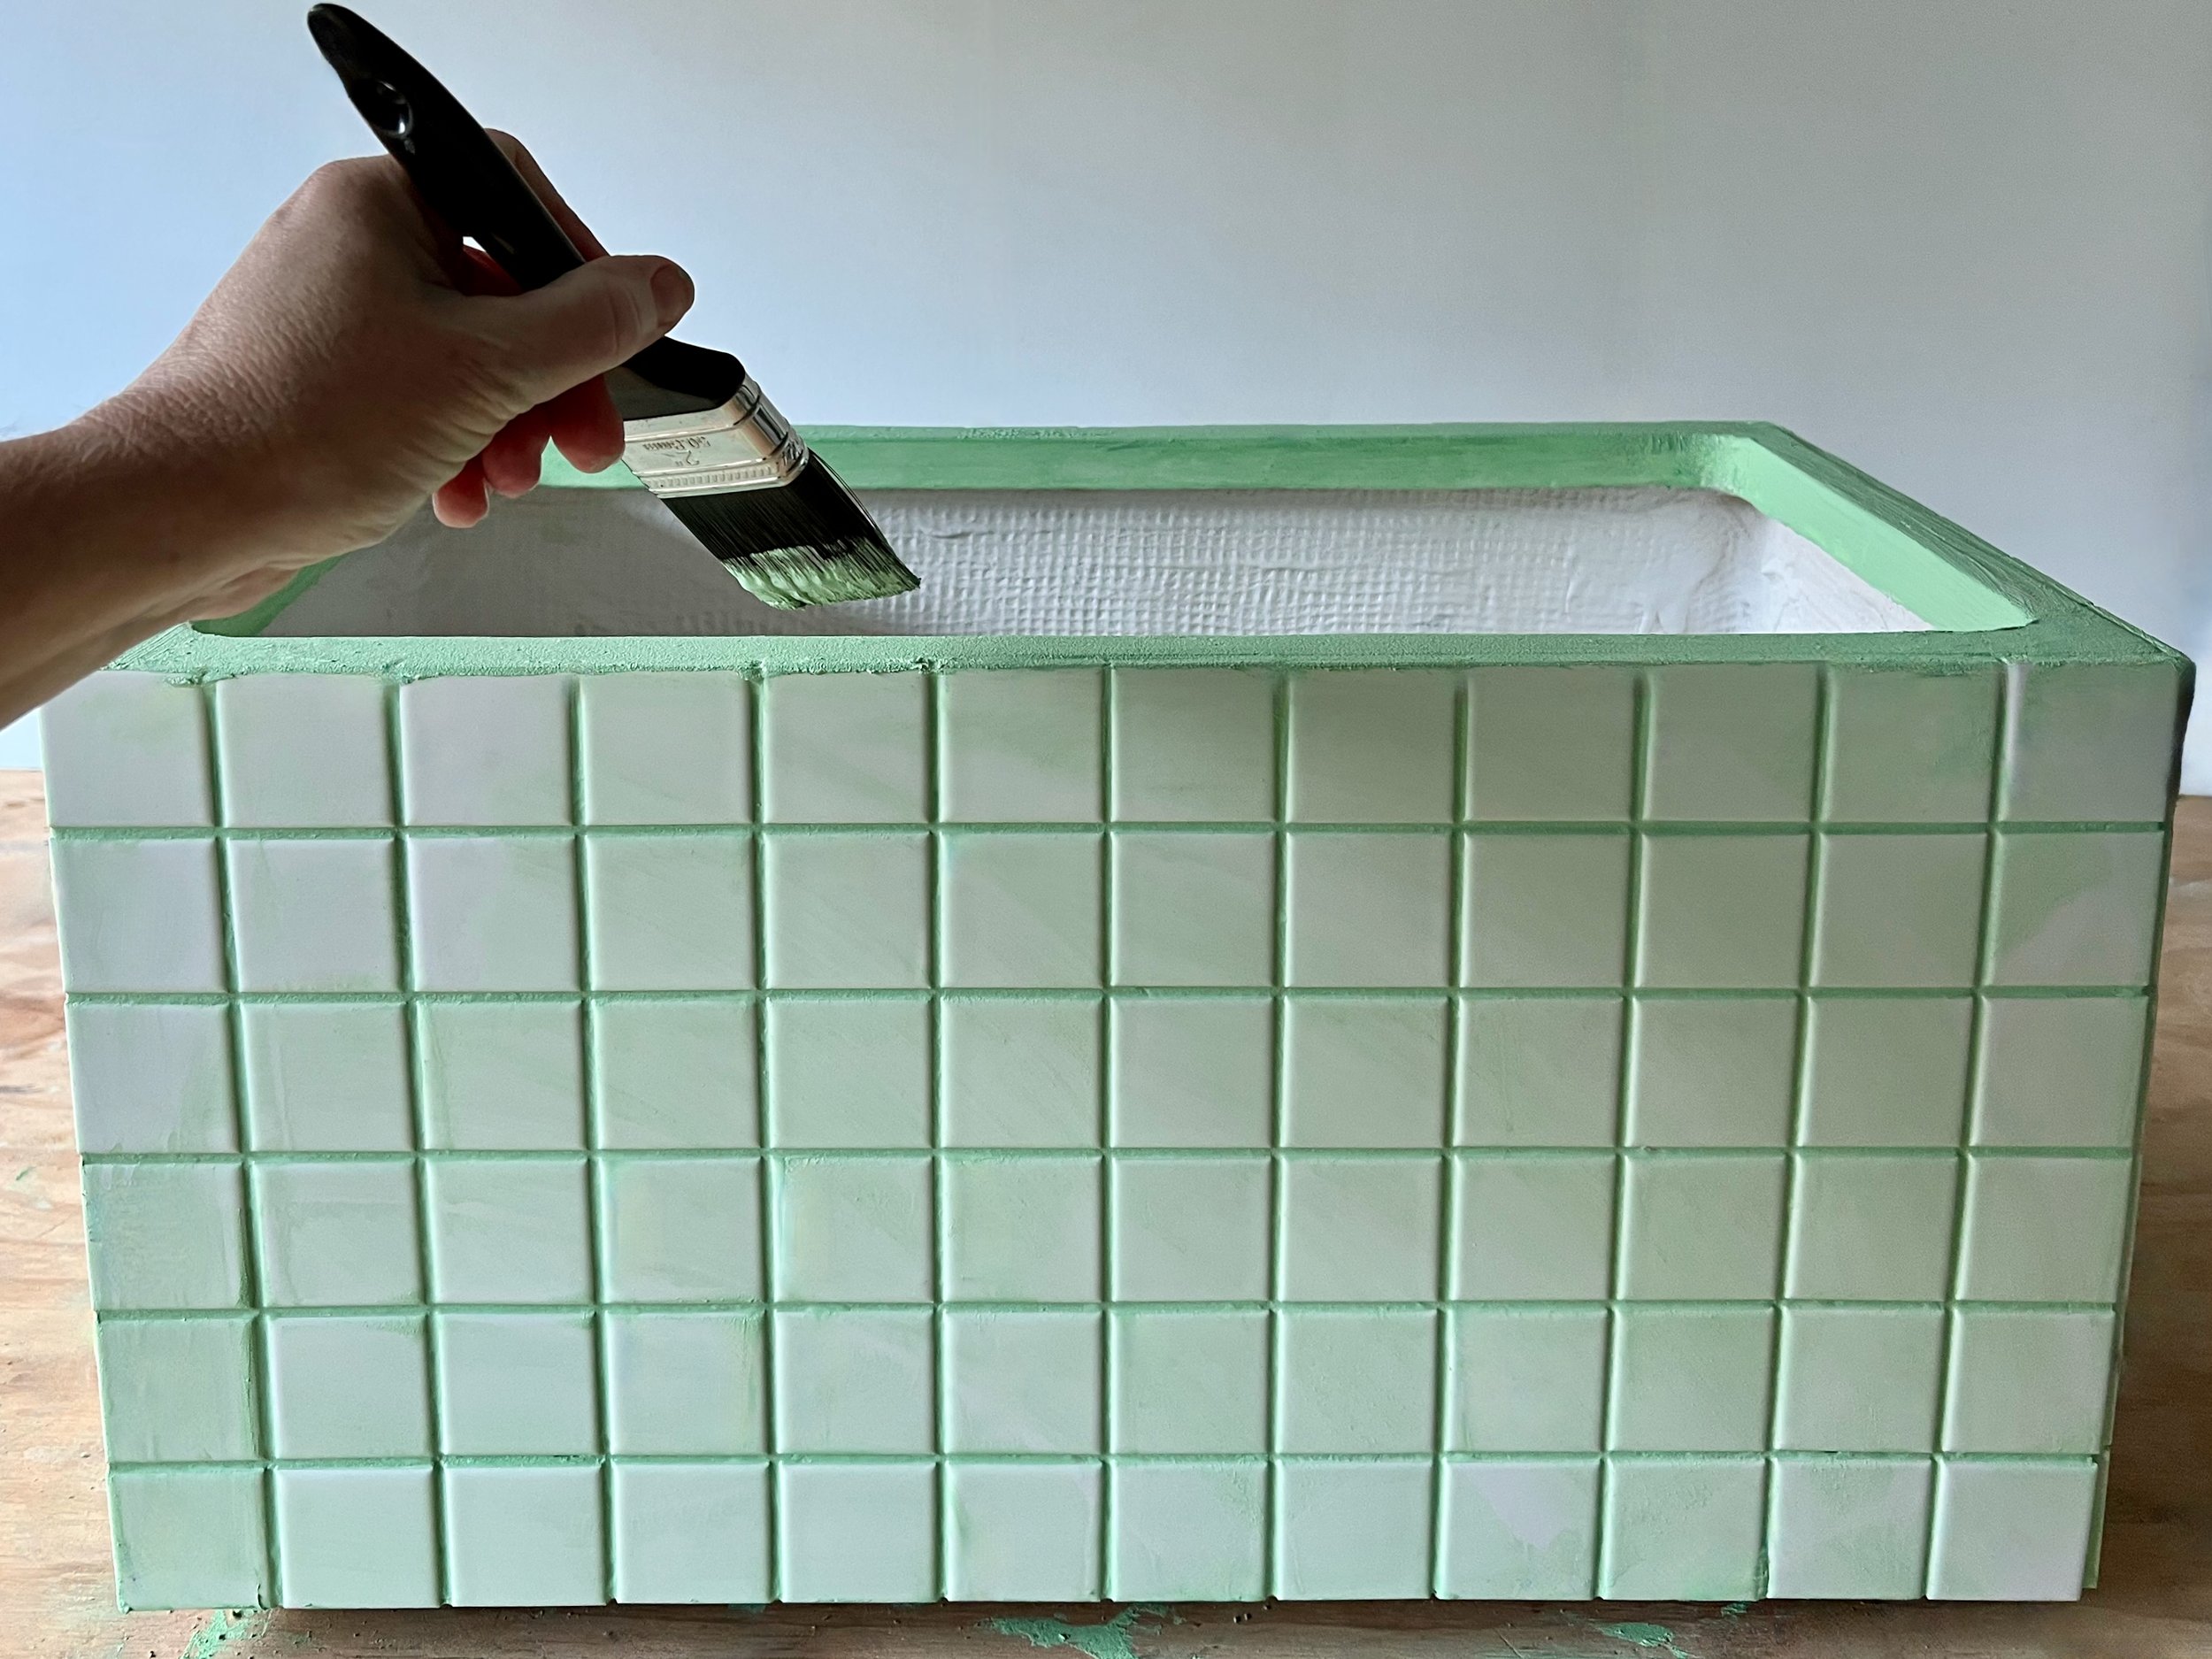
To render around the top of the planter, I used a paintbrush to apply and smooth out the mix.
TIP After painting, check around the sides to dab mix into any gaps that may have formed as the grout dries, and leave for 15 minutes.
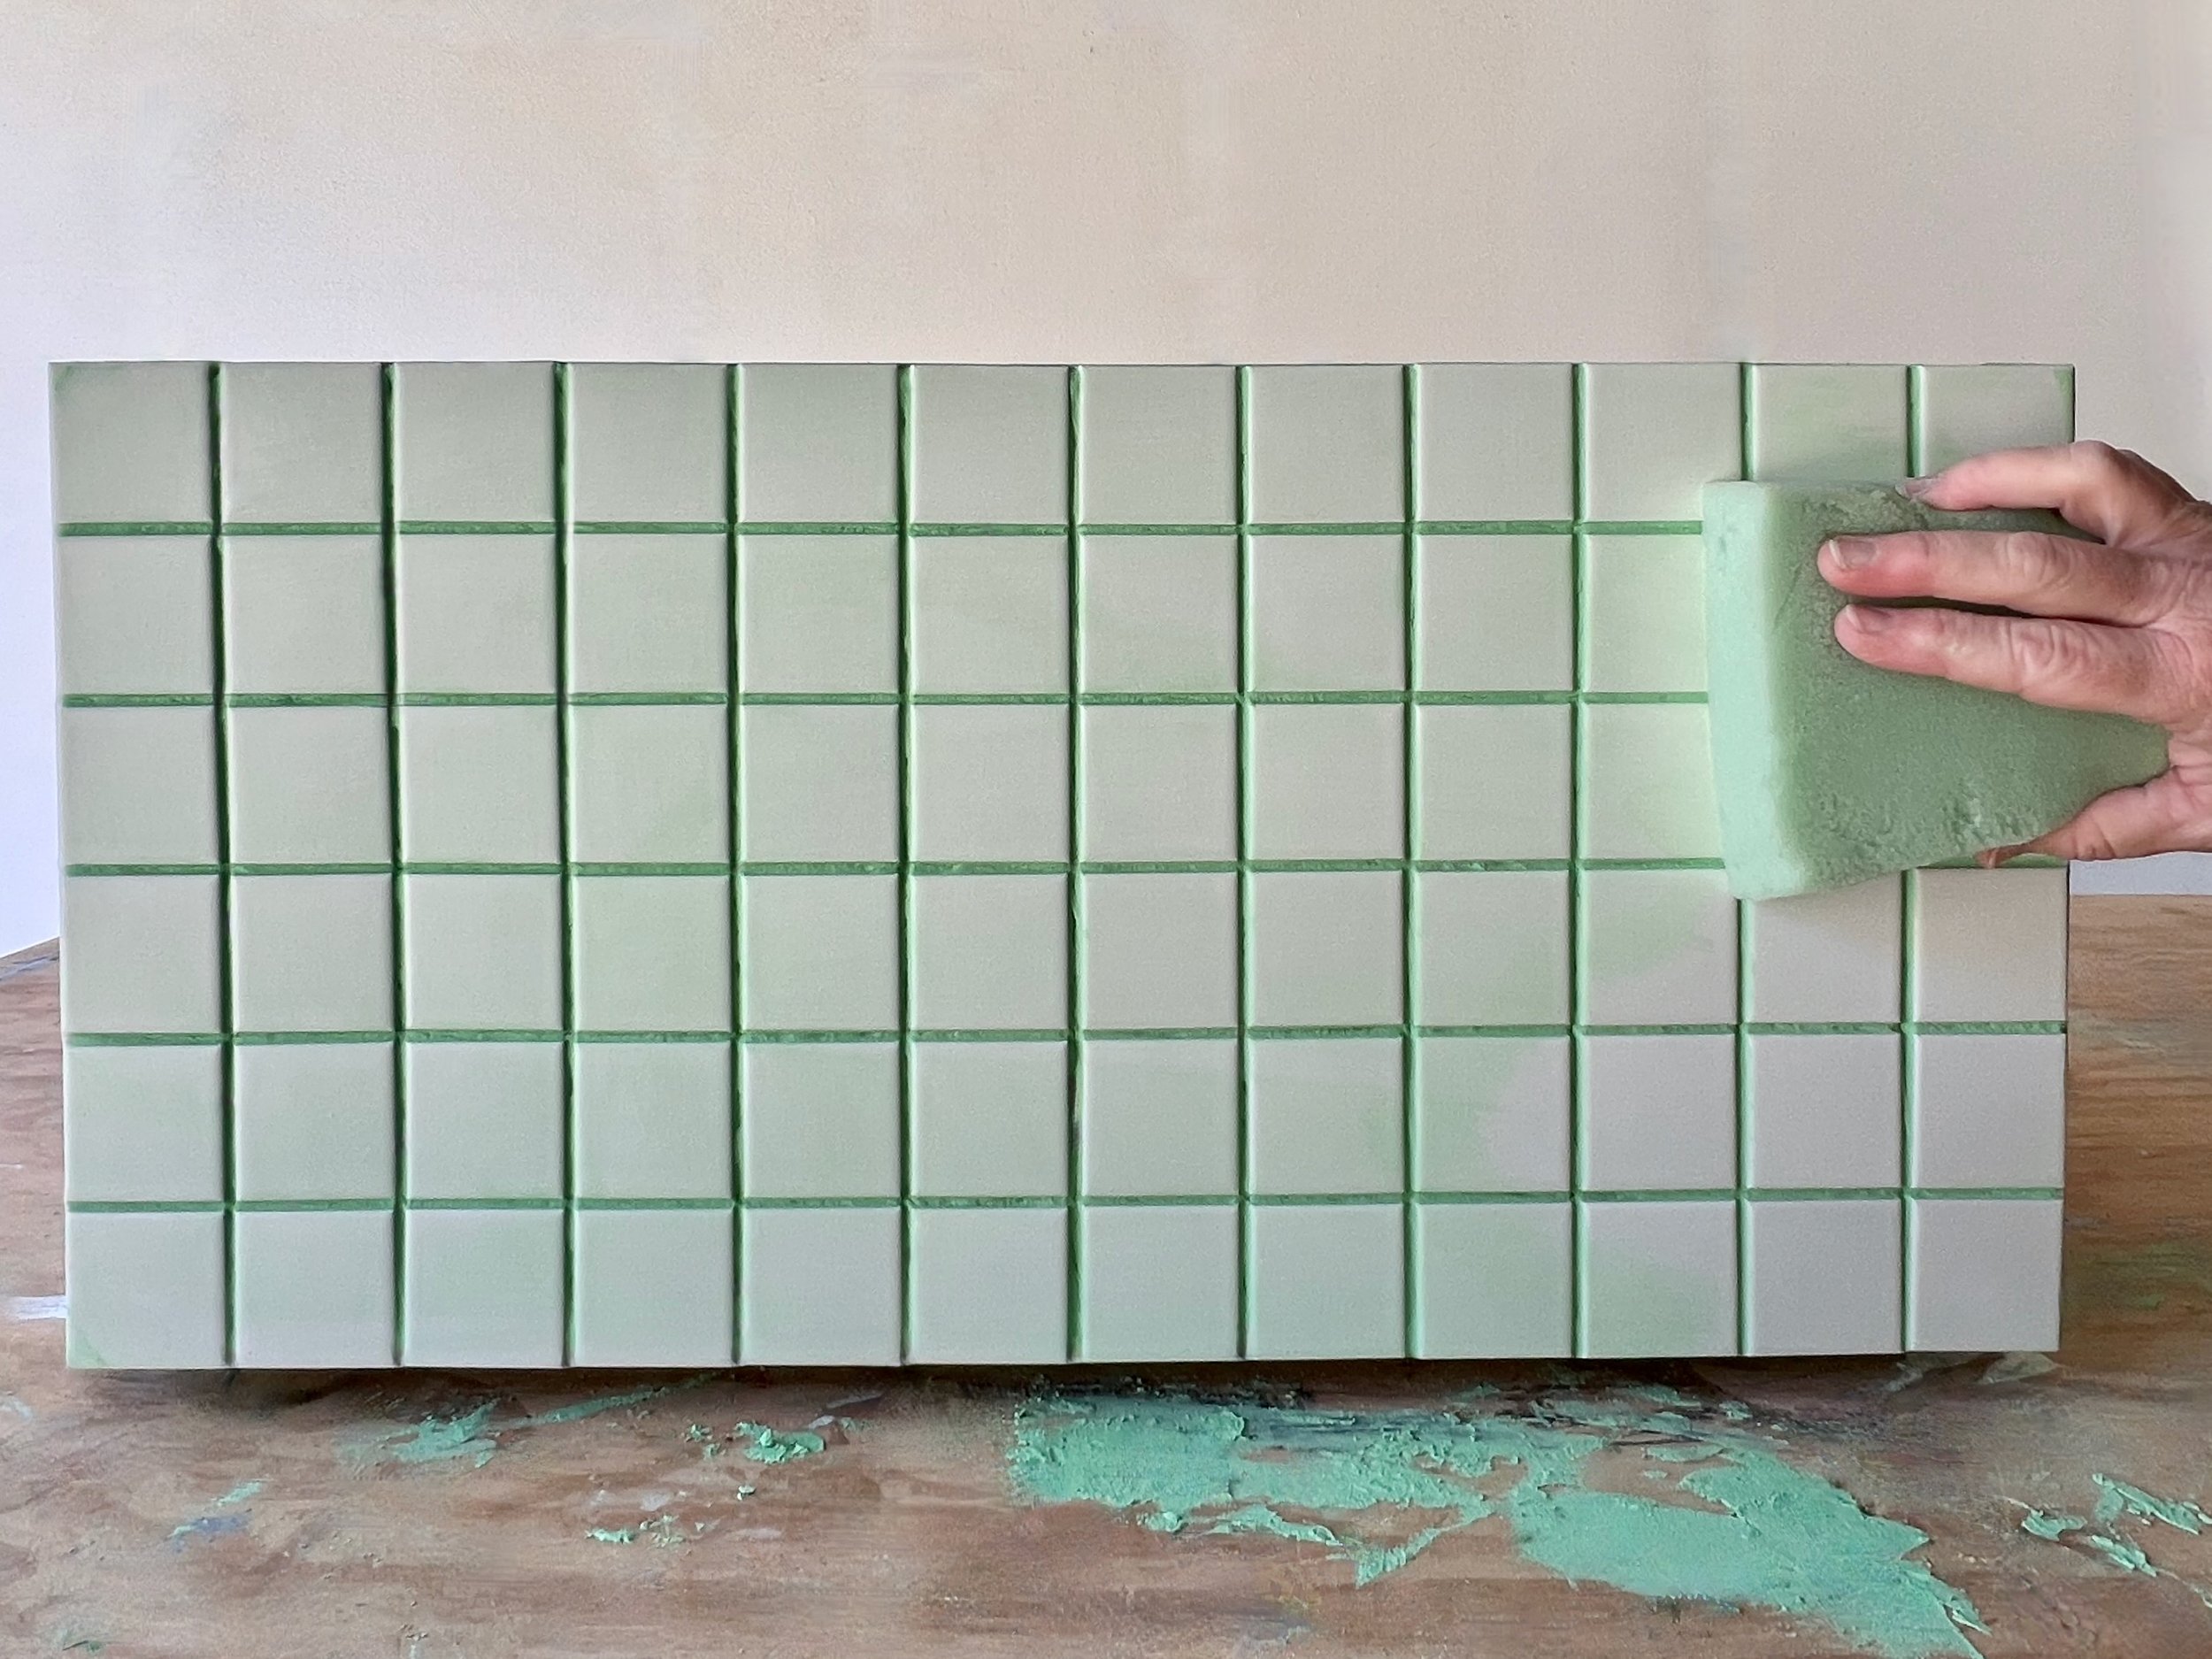
I used a couple of clean, slightly damp sponges to wipe away the grout haze, rinsing and wringing them out and leaving to dry in the sun for a few minutes before reusing. Then I left the grout to cure overnight.
TIP As the grout dries it leaves a haze over the tiles that takes a couple of wipe-downs to remove.
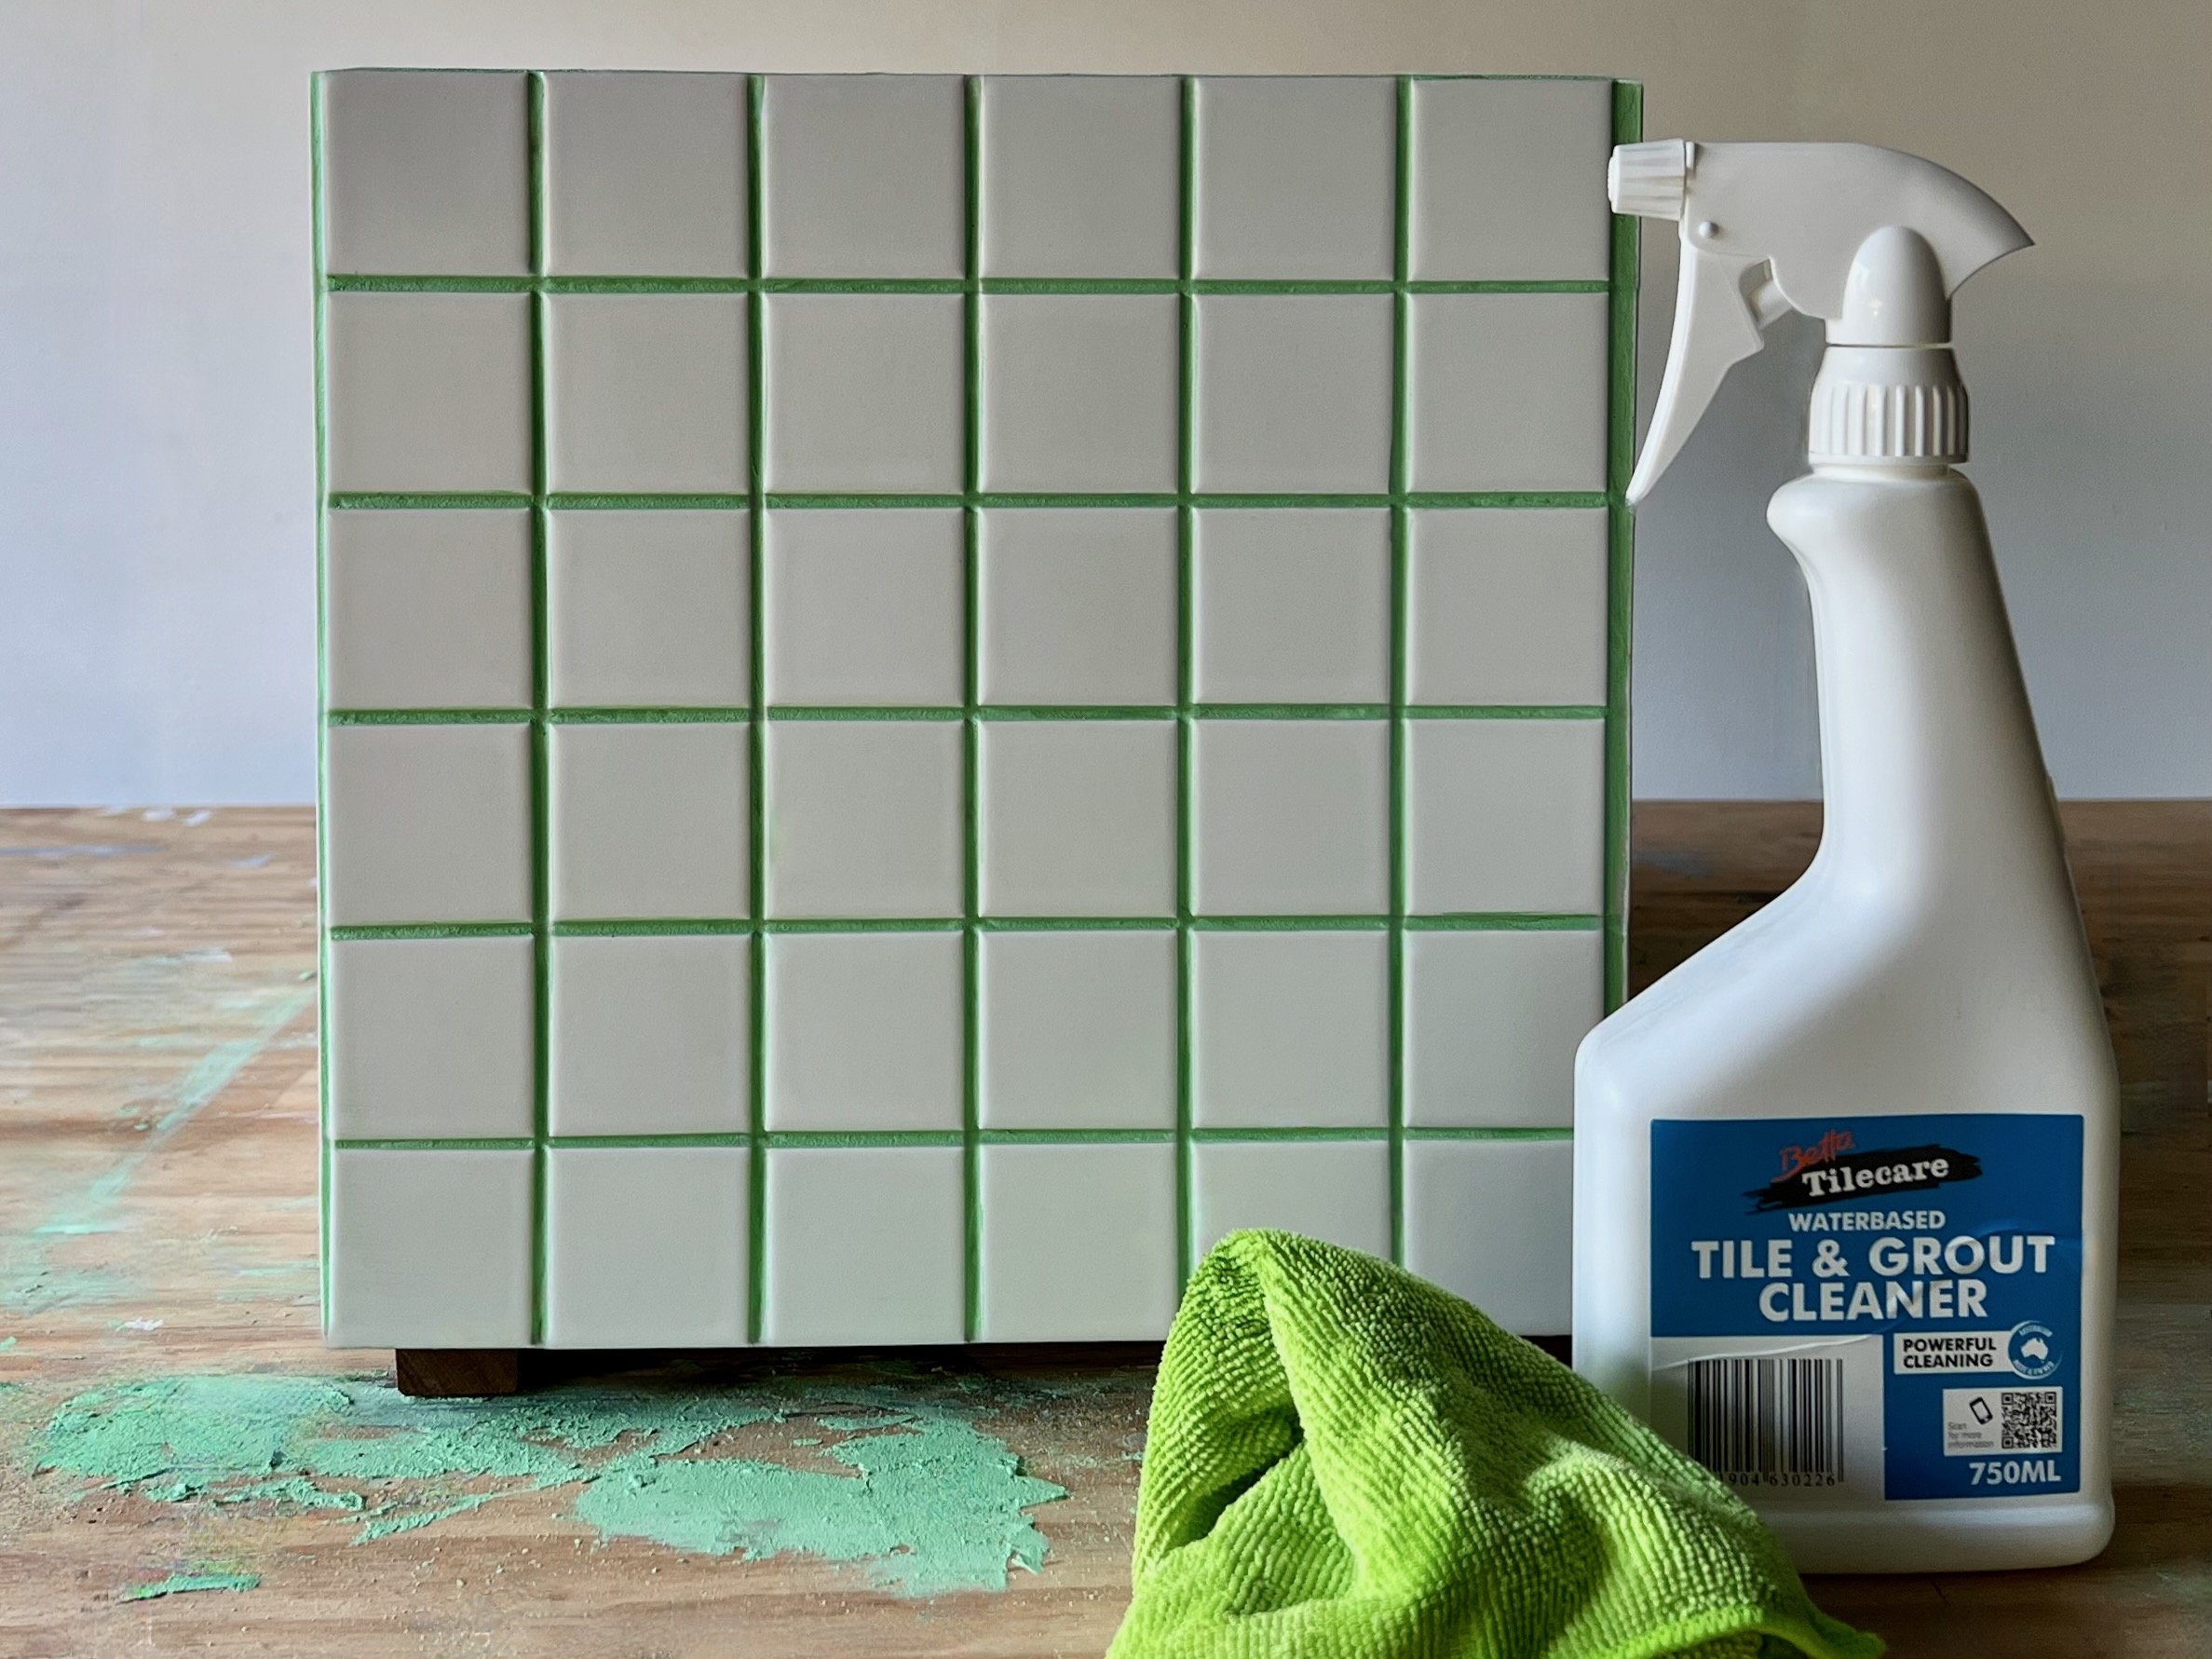
After spritzing Bondall Betta Tilecare Tile & Grout Cleaner over the tiles, I wiped them down with a clean microfibre cloth.
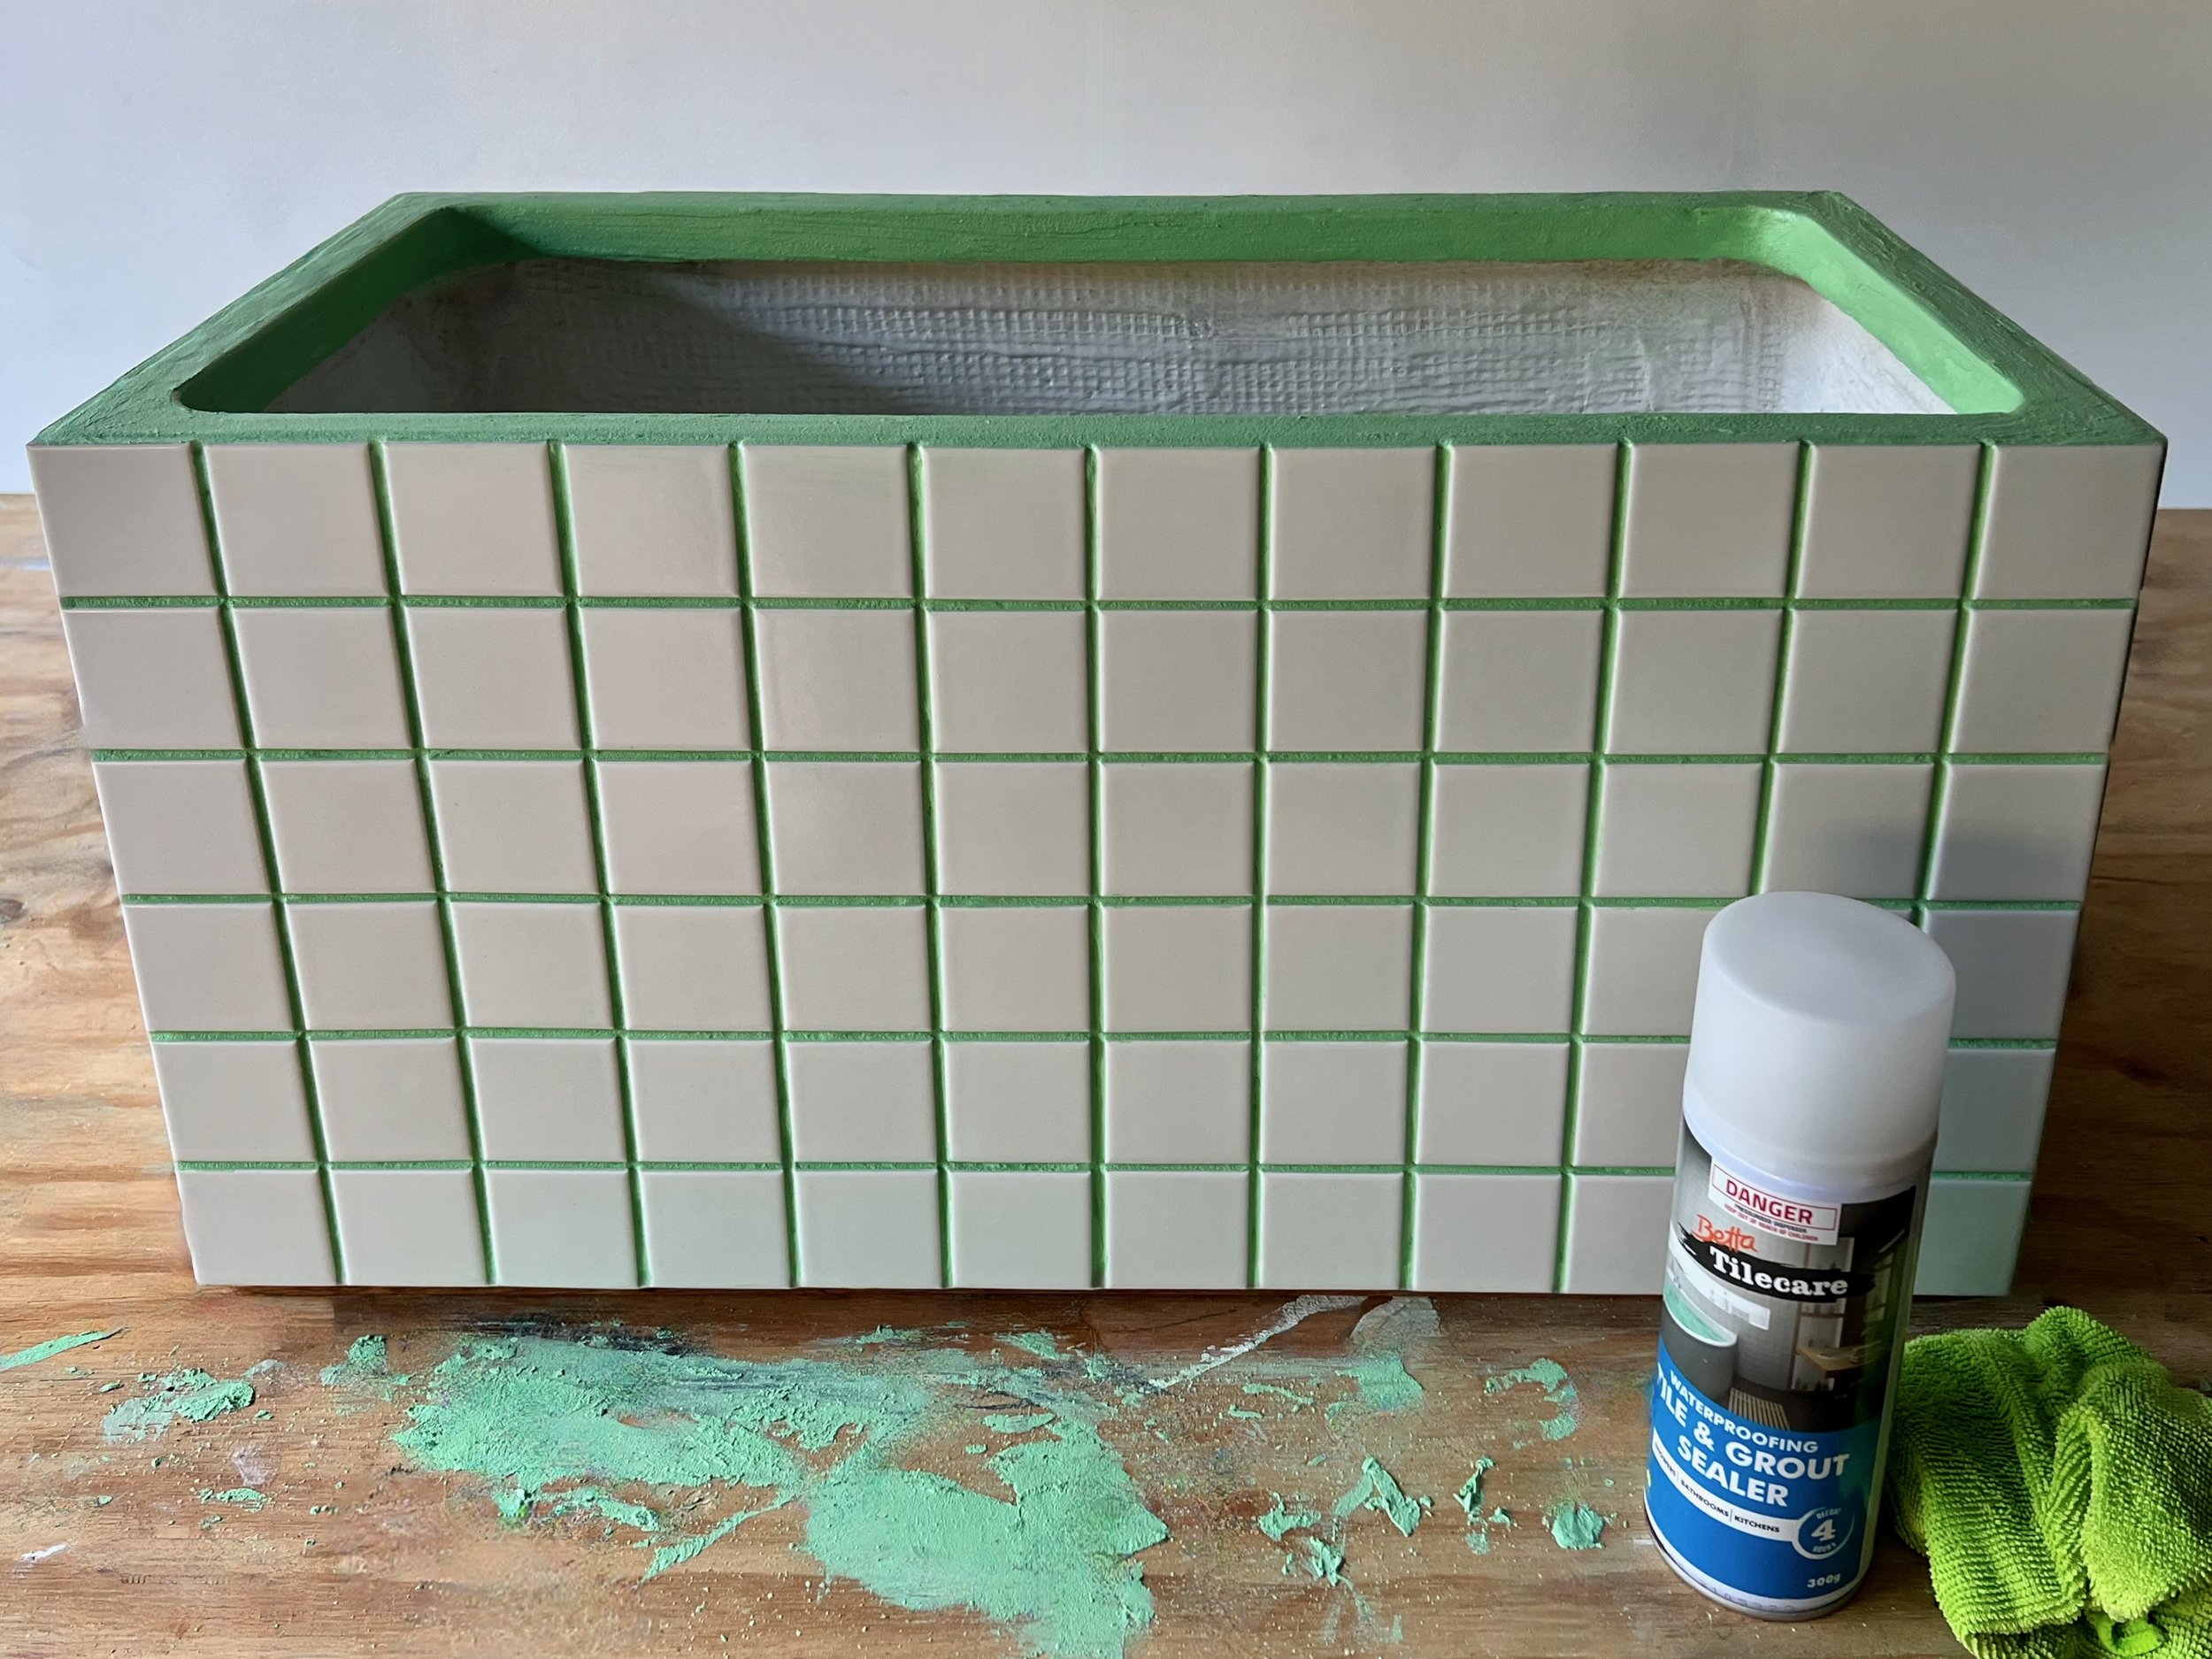
To finish I applied three coats of aerosol Bondall Betta TileCare Waterproofing Tile & Grout Sealer, spraying along the grout lines and around the rendered top. After each coat I wiped the excess from the tiles with the cloth and left the sealer to dry for an hour.
TIP While the sealer doesn’t absorb into these glazed porcelain tiles, it is essential to seal the grout, especially the rendered section.
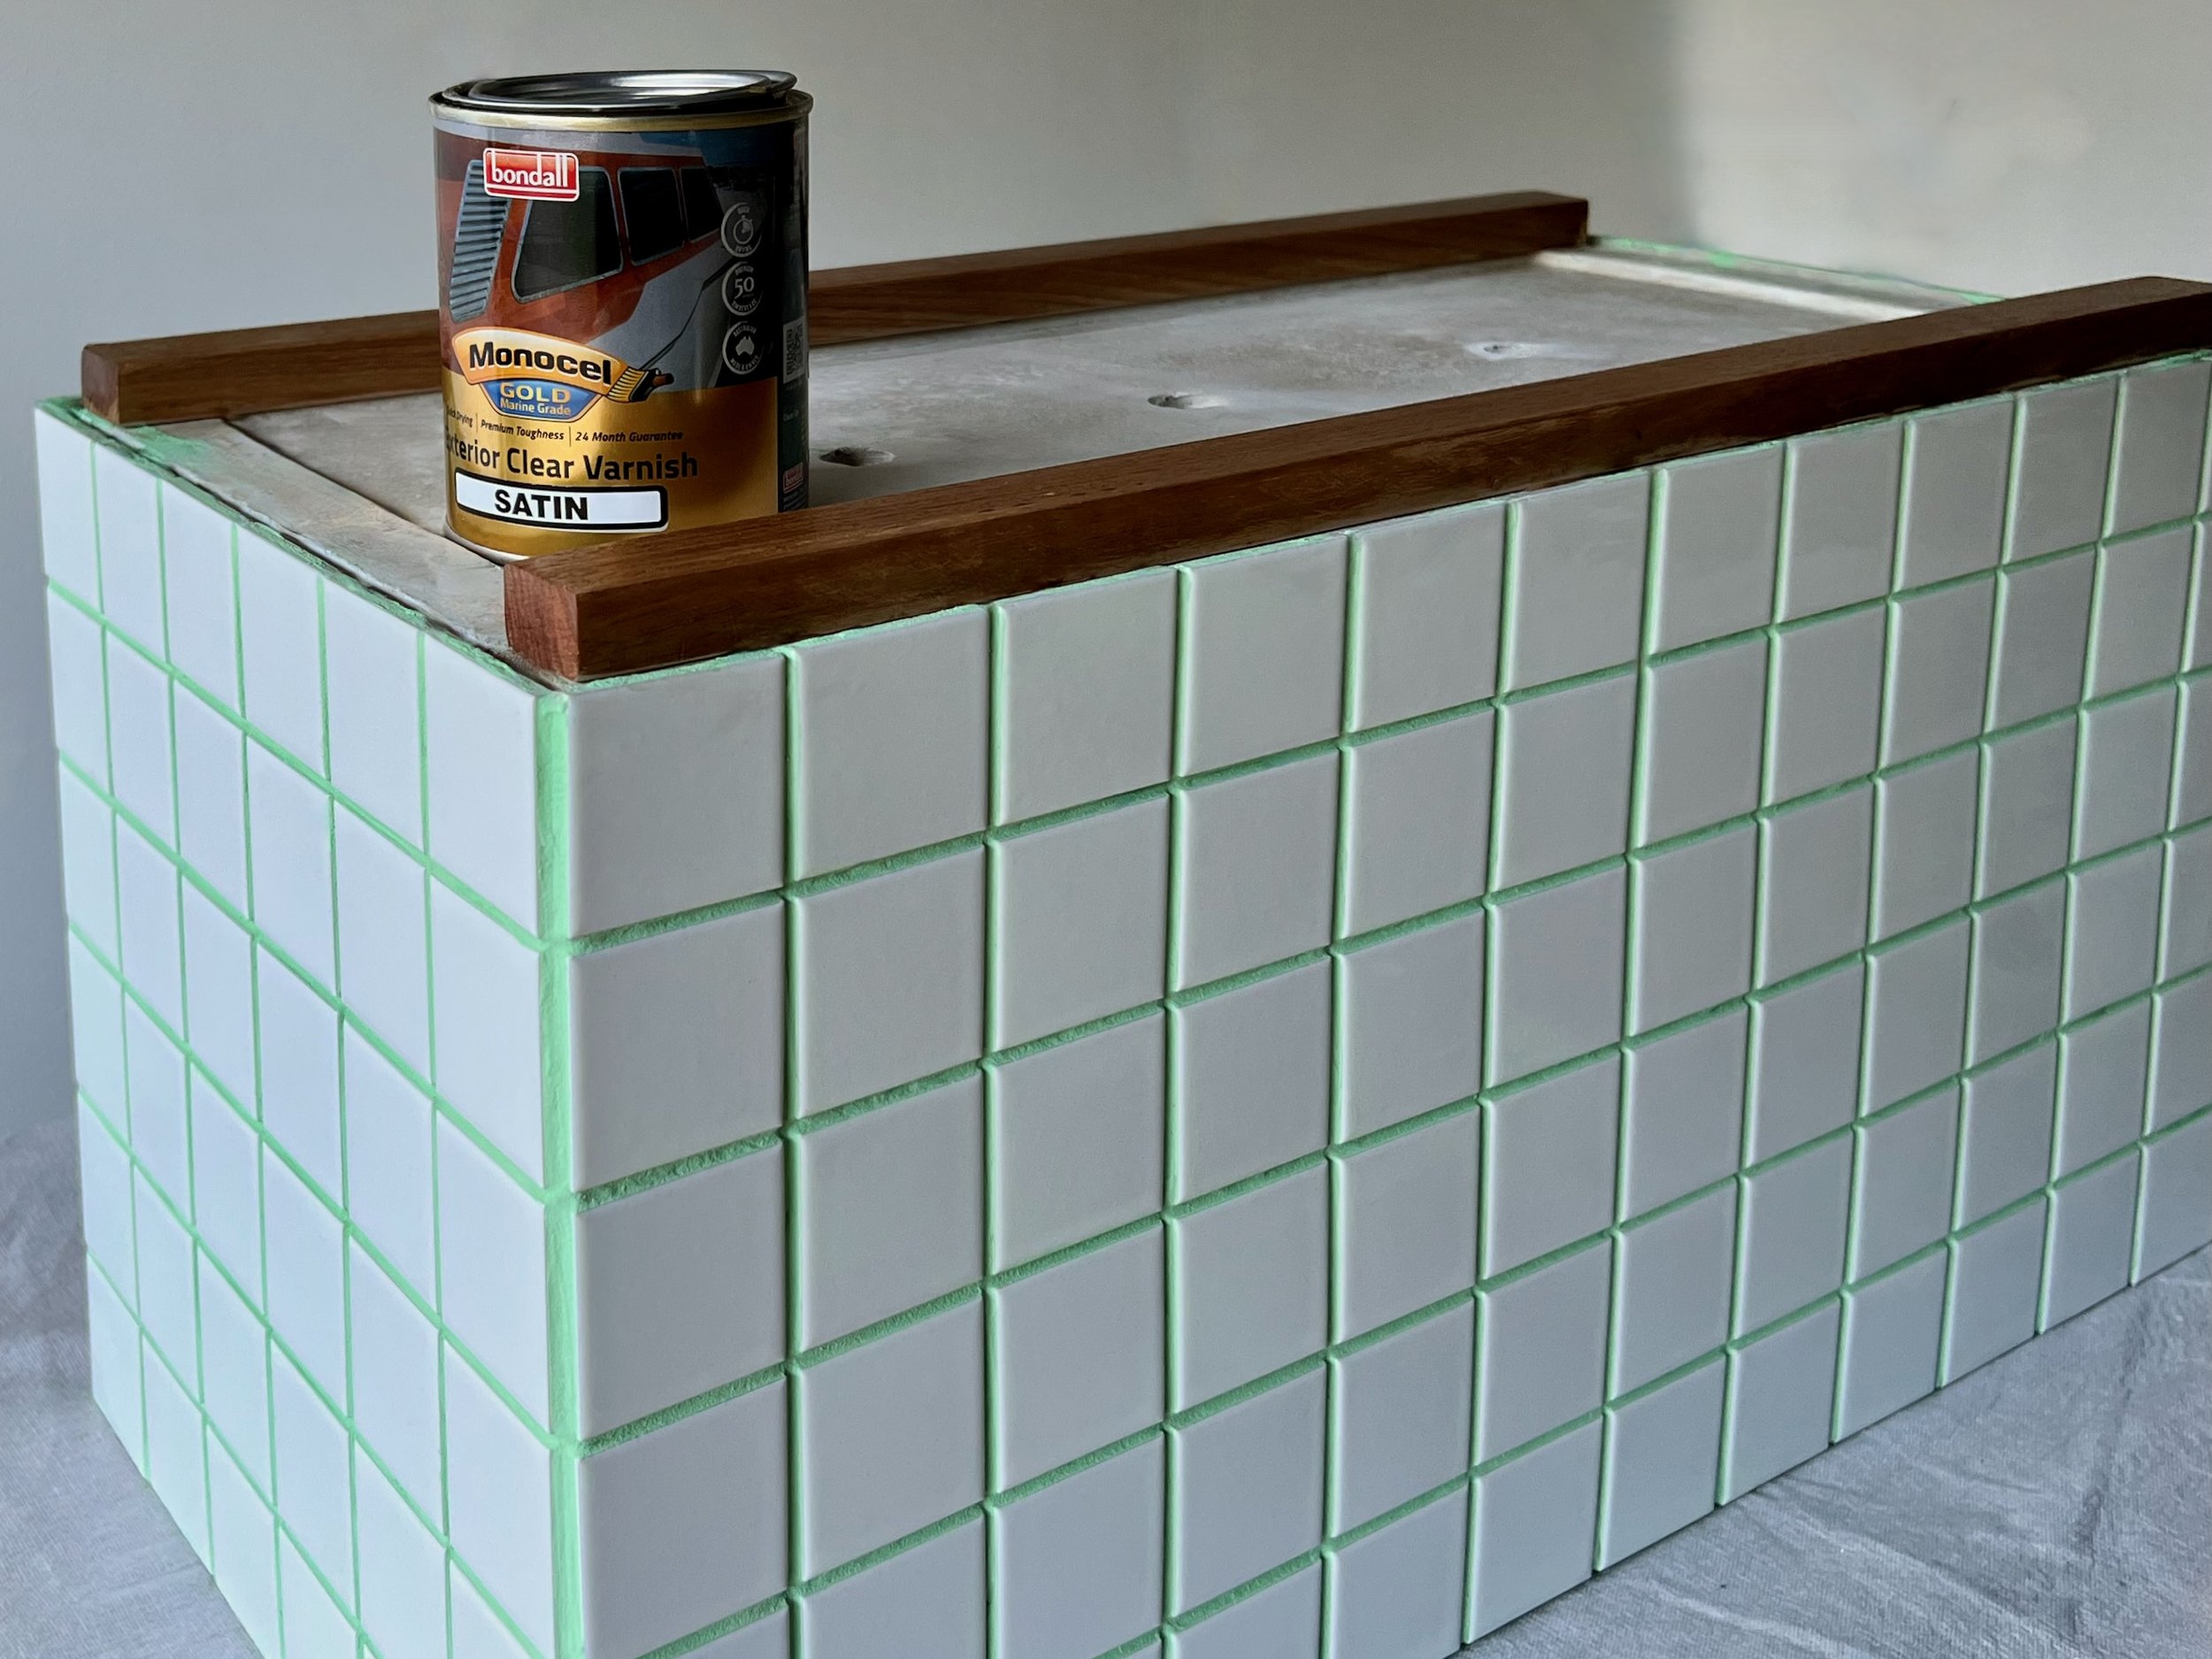
On the base, I added two lengths of 30mm x 18mm DAR Tasmanian oak cut to fit, securing with construction adhesive and leaving to dry for half an hour before sealing with Monocel Gold Exterior clear marine-grade varnish using a cloth.
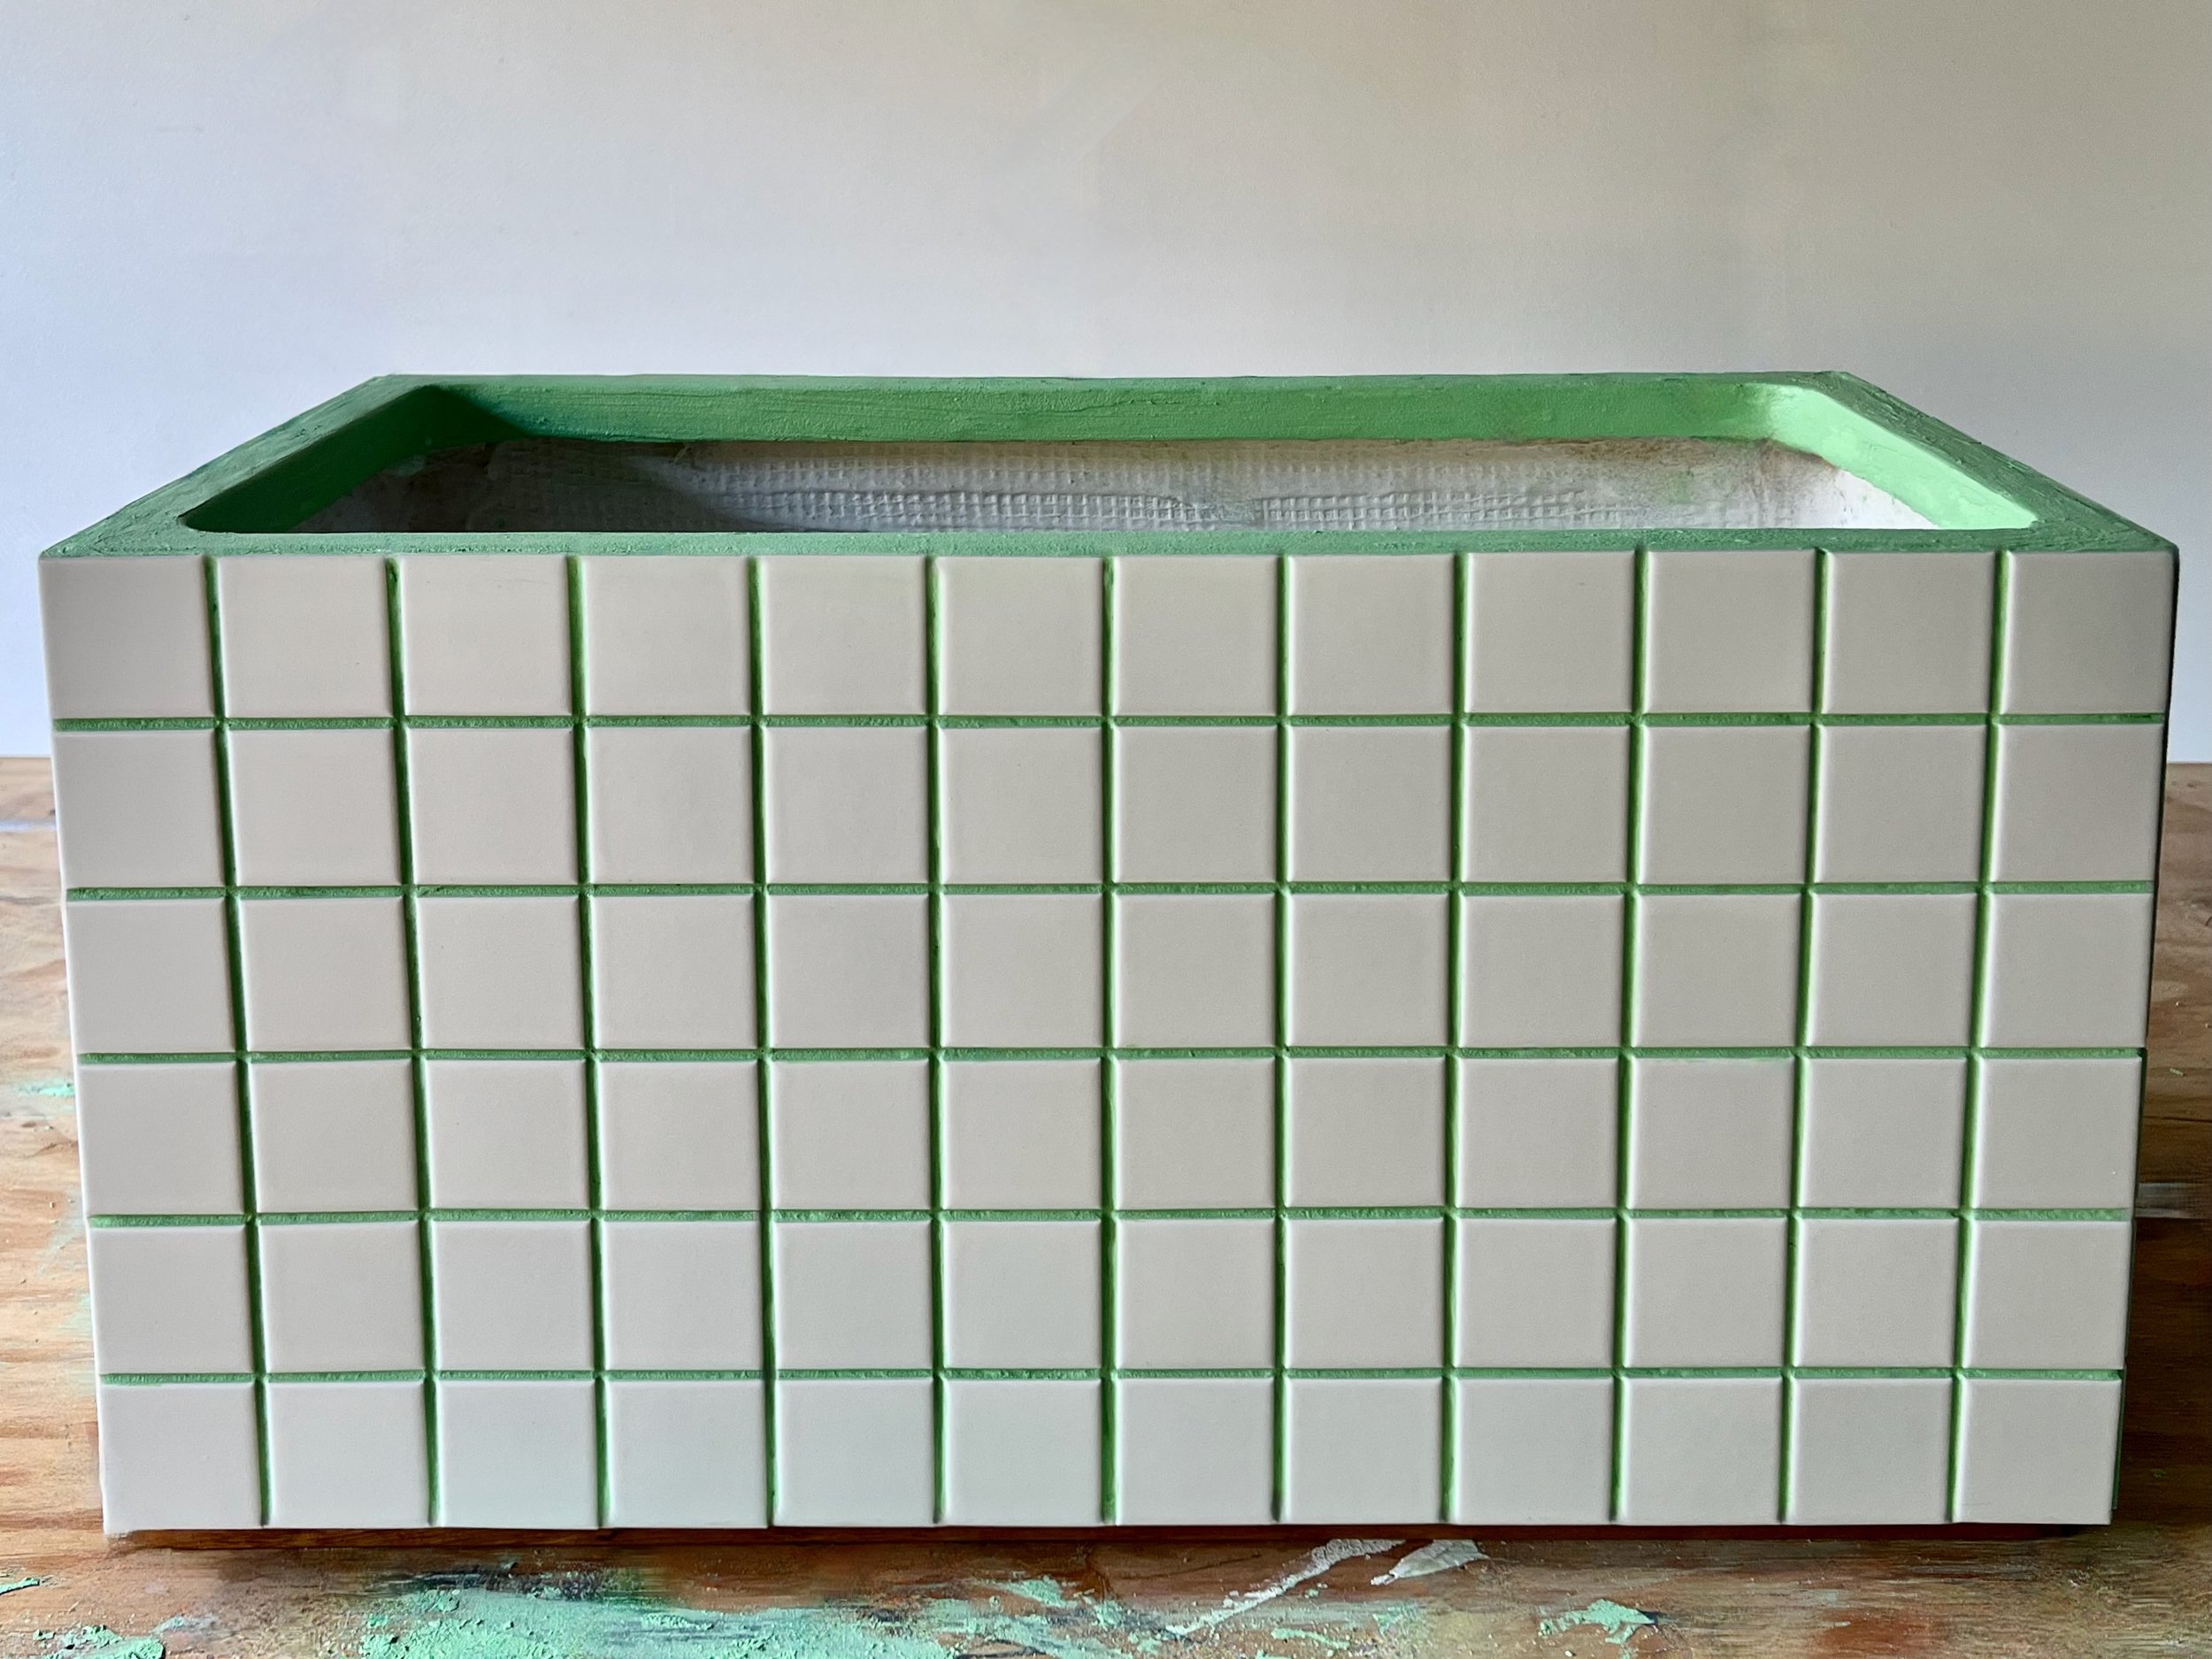
The timber creates a nice shadow line while raising the planter for drainage and to prevent chipping the tiles around the base.
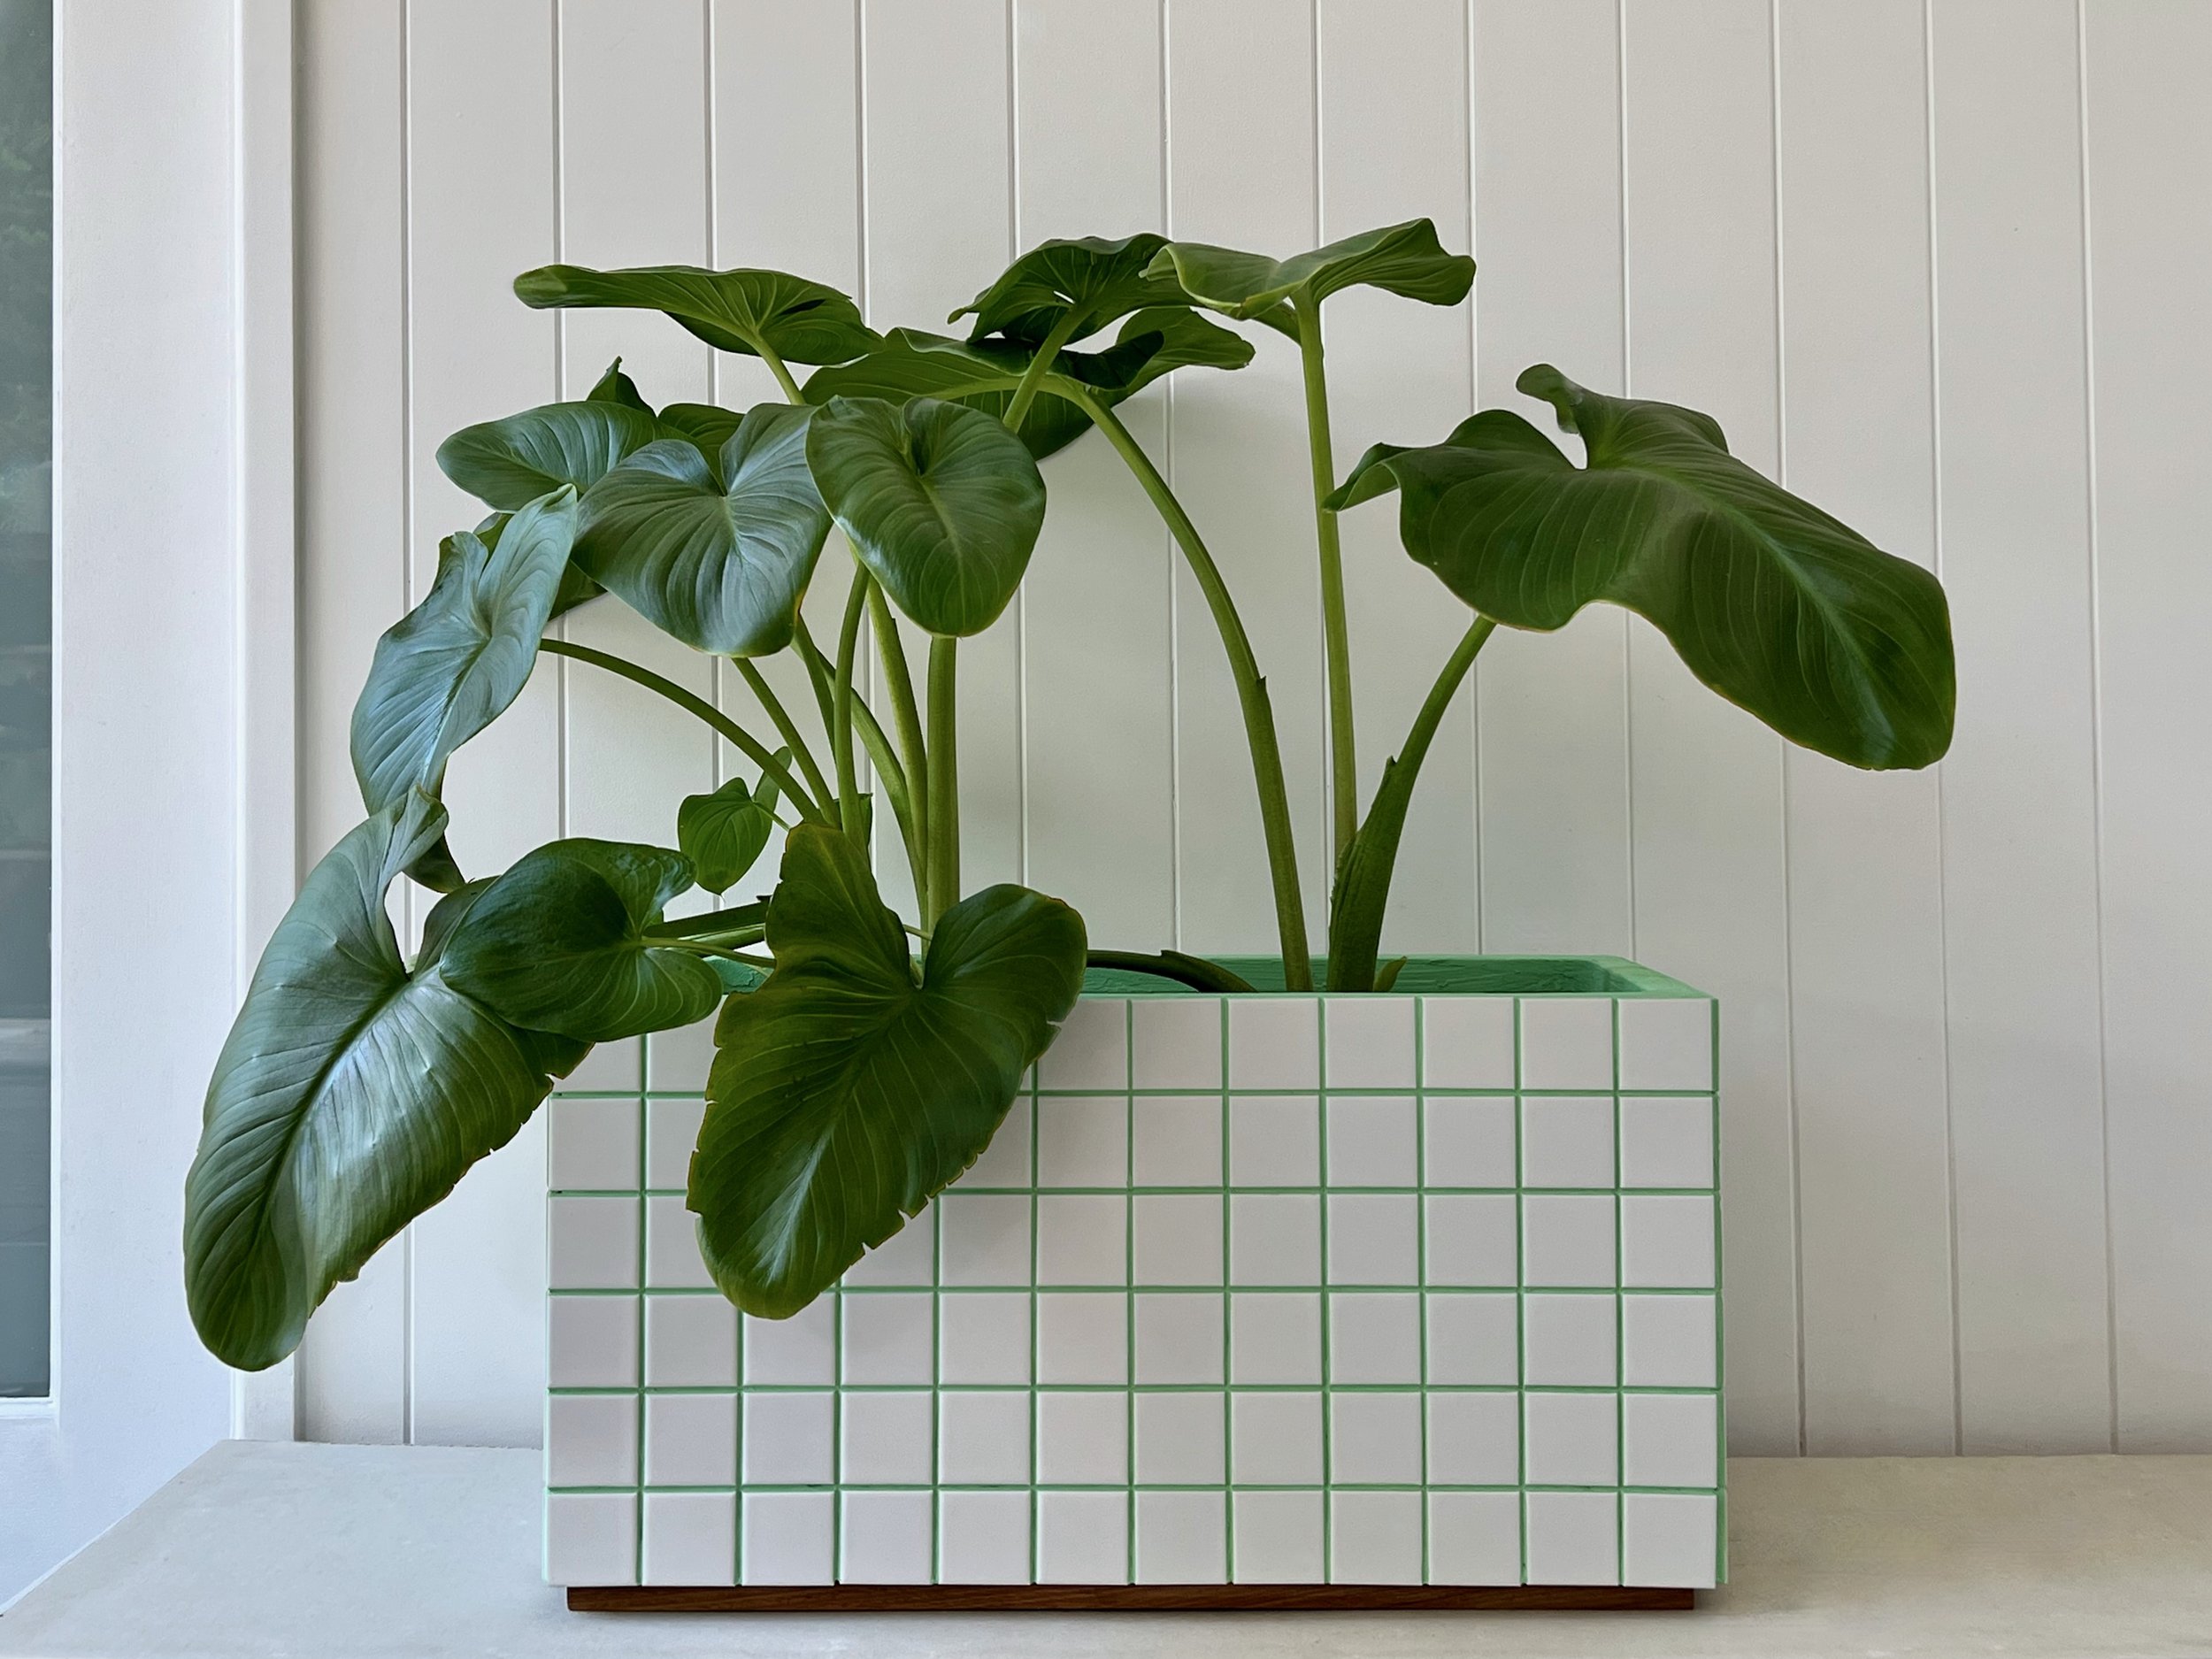
The finished planter is quite heavy, so I avoided filling it directly with soil. Instead, I moved it into position and added two 250mm x 235mm black plastic pots, which fit perfectly.
Has this inspired you to get stuck into some tiling? Tag me on your project and follow more of my DIY journey on Instagram for tool tips, home improvement and simple building tutorials.