Versatile Stool
Natasha Dickins
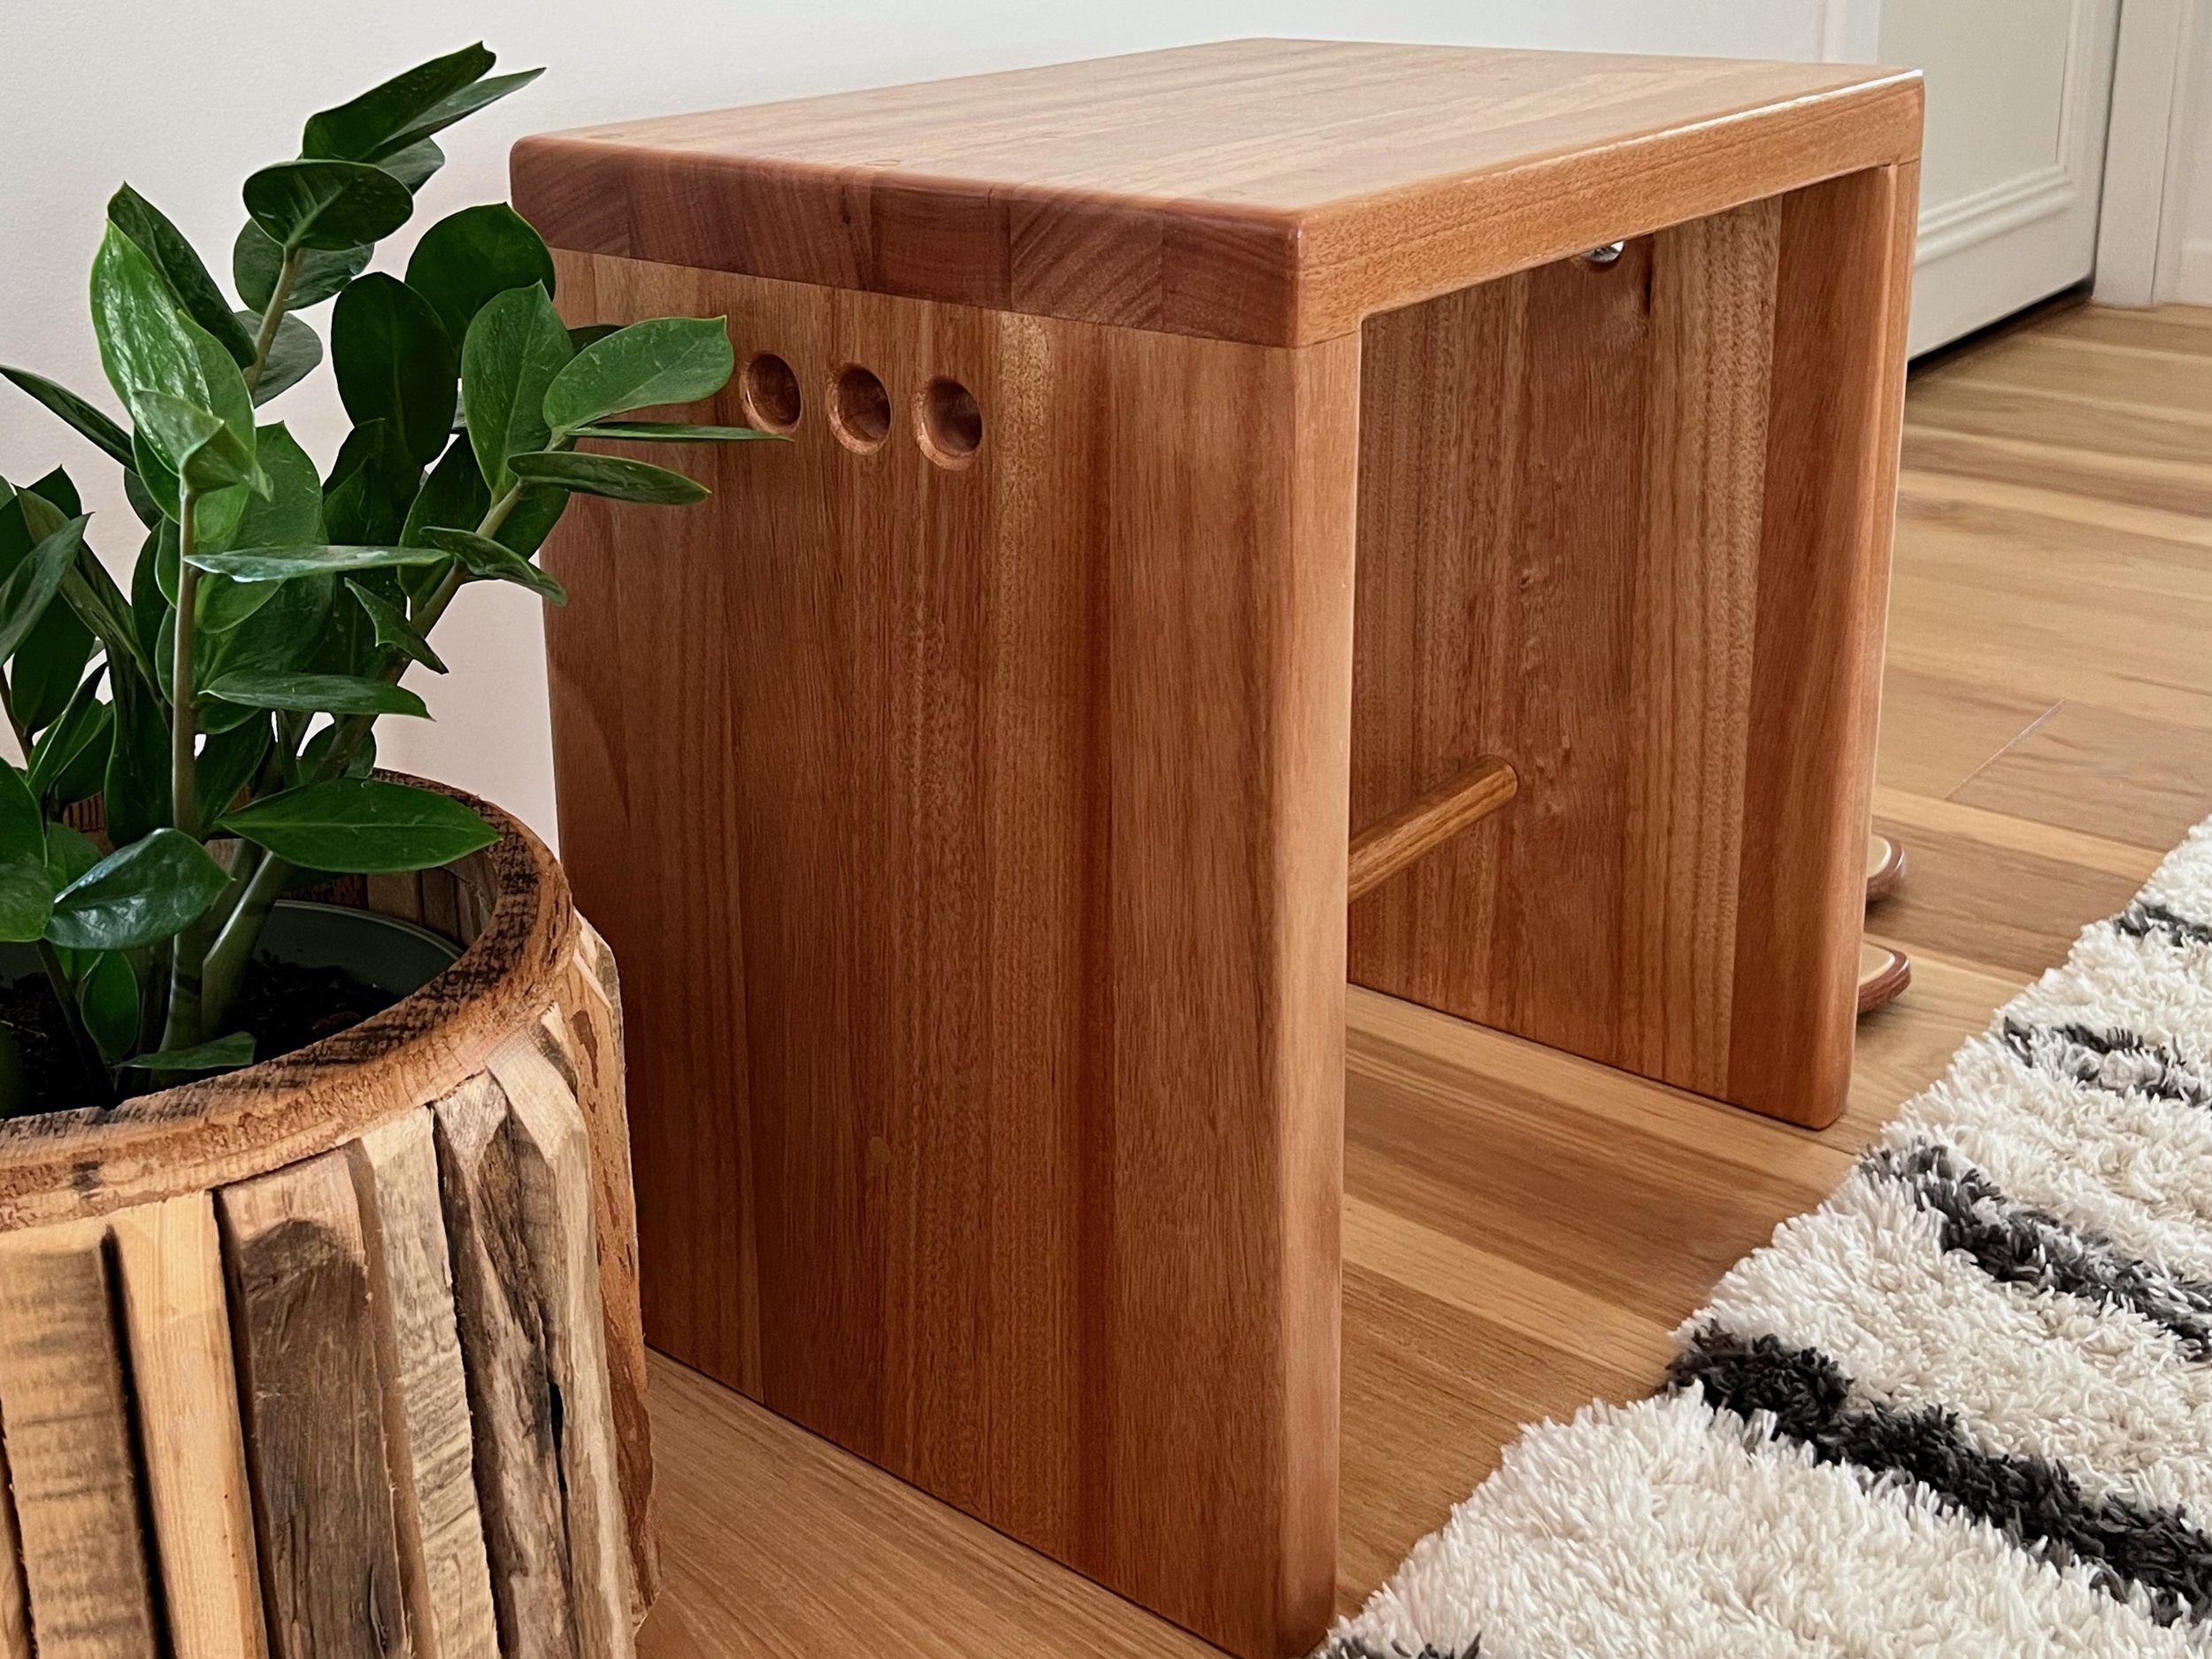
Would you use this as a chunky side table, solid stool, a step ladder…
… or make two to stack as a book rack or display storage? Whatever you need this handy cubed piece for, it’ll stand up to the job!
I made this practical, chunky version using 33mm-thick okoume panels from Bunnings. It’s a soft, super-lightweight hardwood.
“Adding three holes in the sides for fingers makes it easy to move, but I also like them as a design feature.”
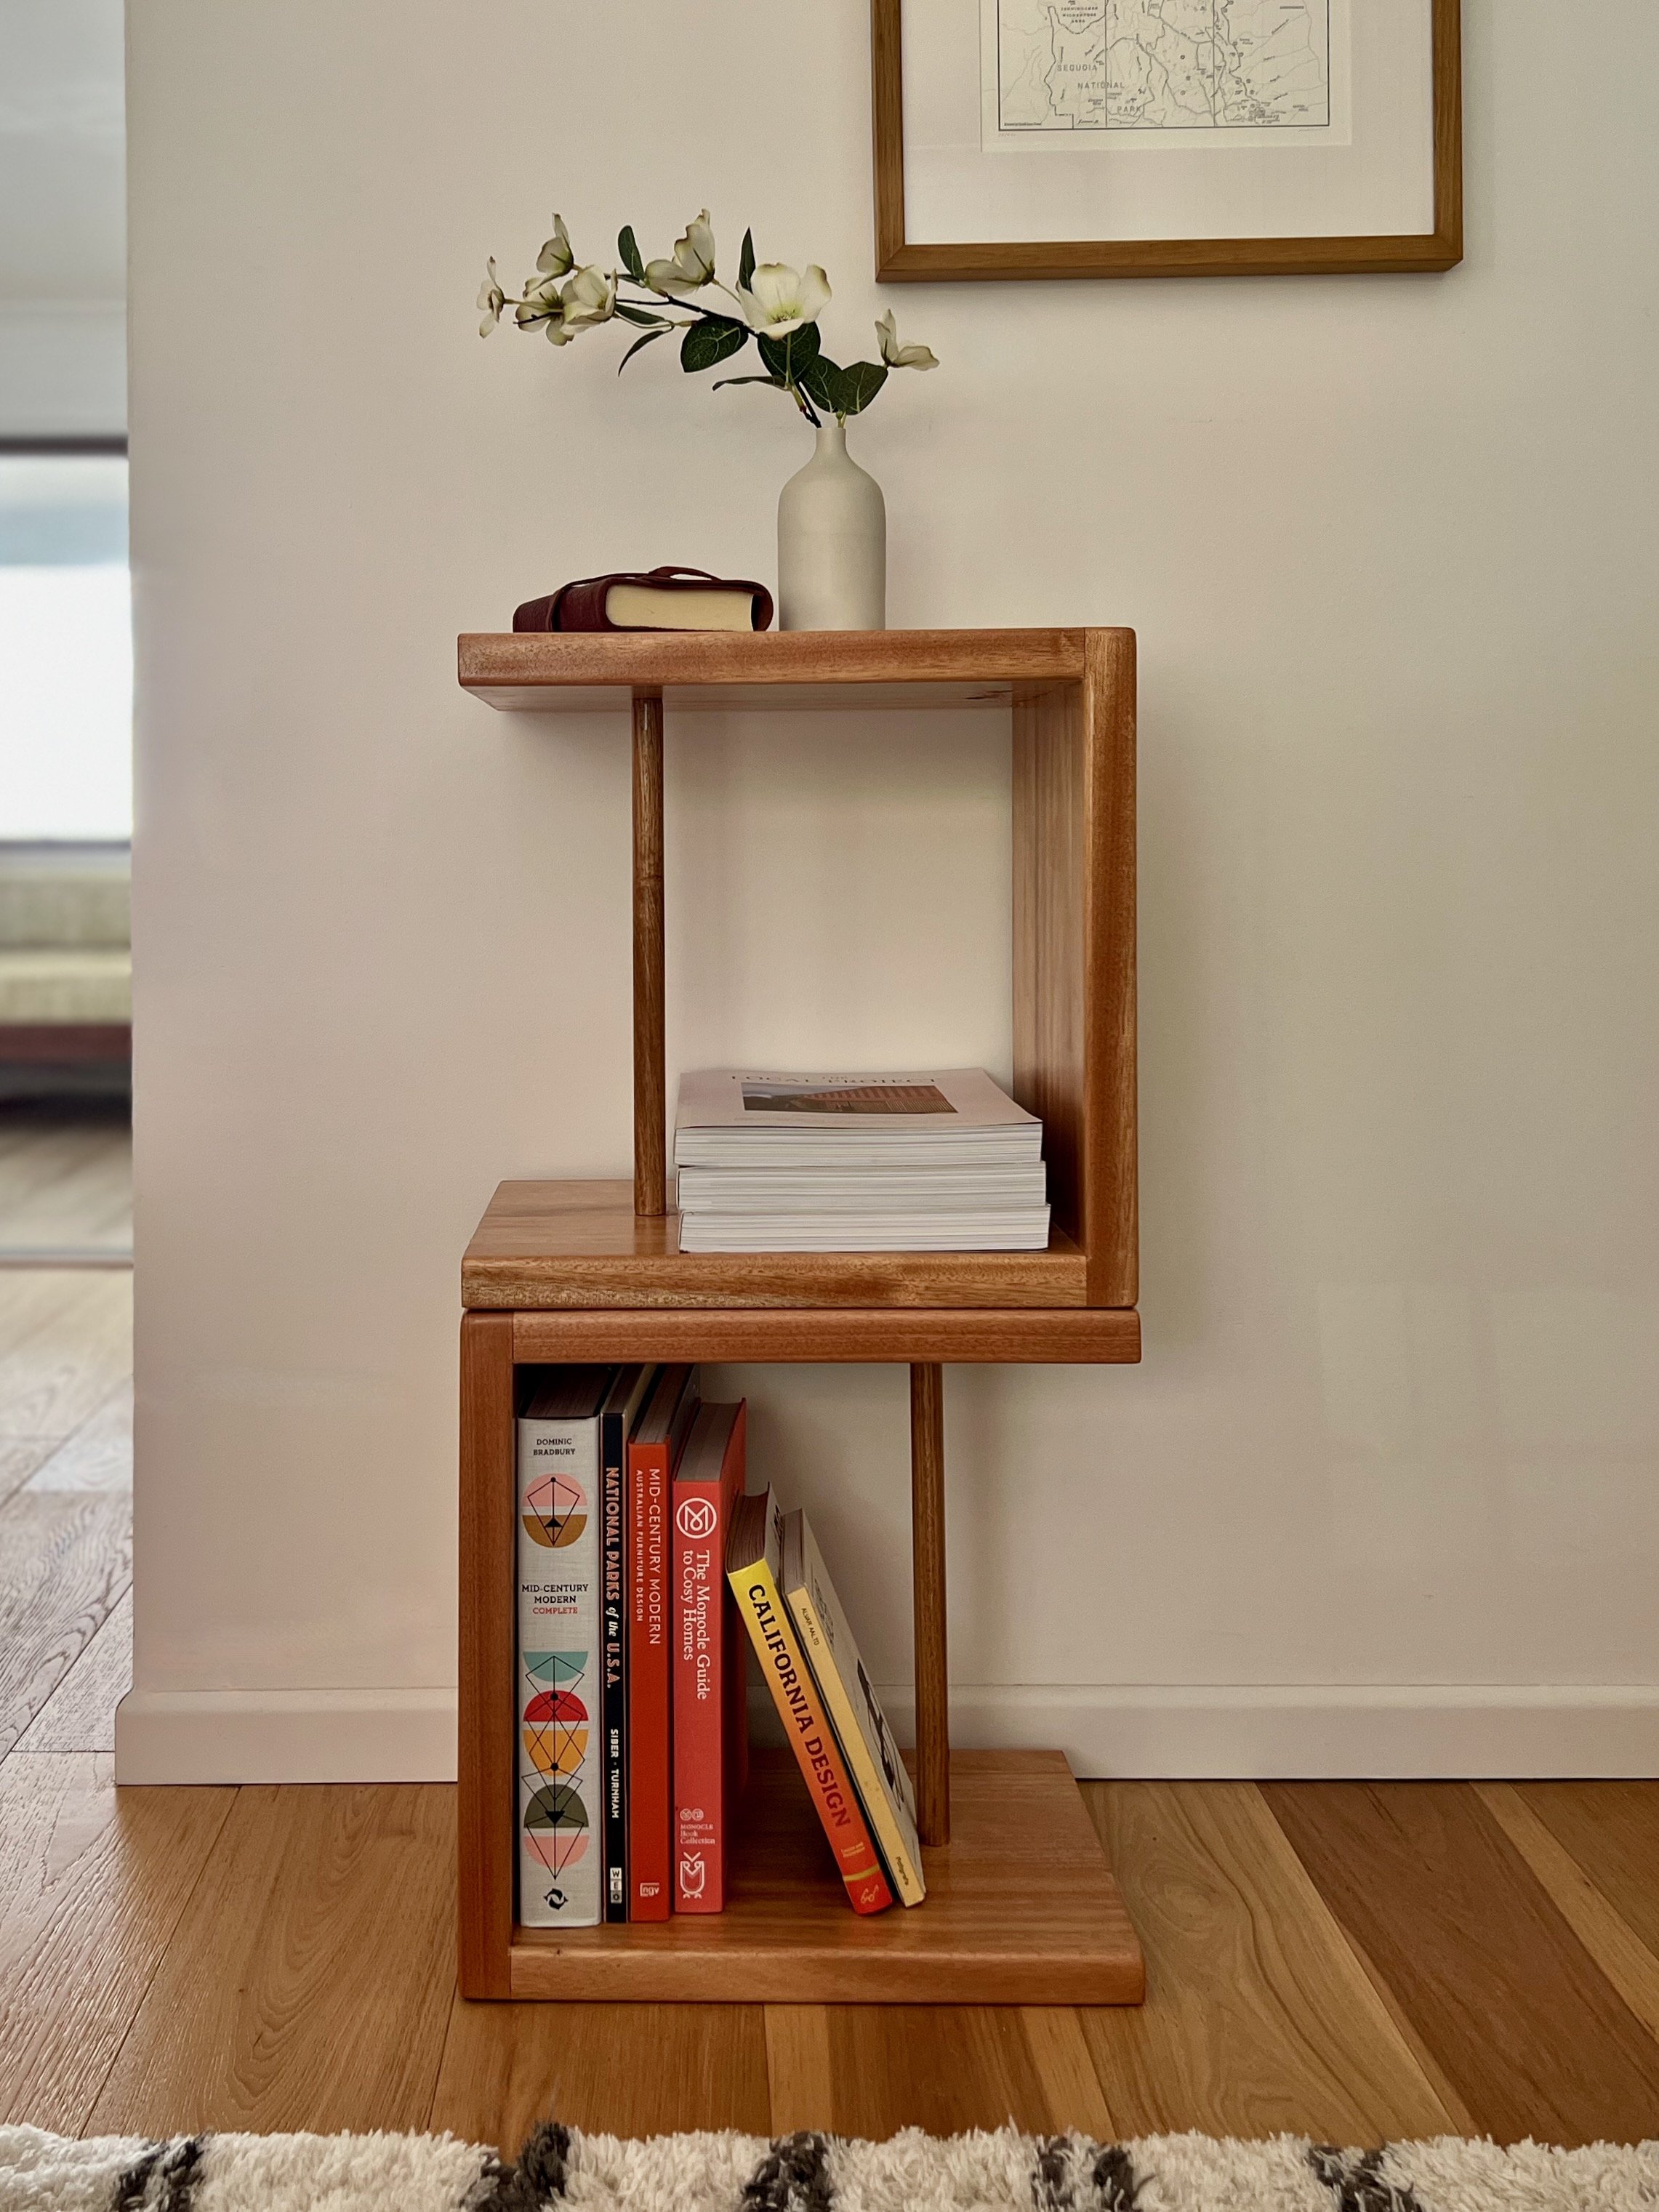
This project is a variation of a multipurpose side table I made for Bunnings Magazine using an 18mm panel (instead of the 33mm used here).
TIP To make it with standard 18mm panels, follow these instructions but change the screws to 40mm and countersink the top 9mm in from the sides rather than 15mm.
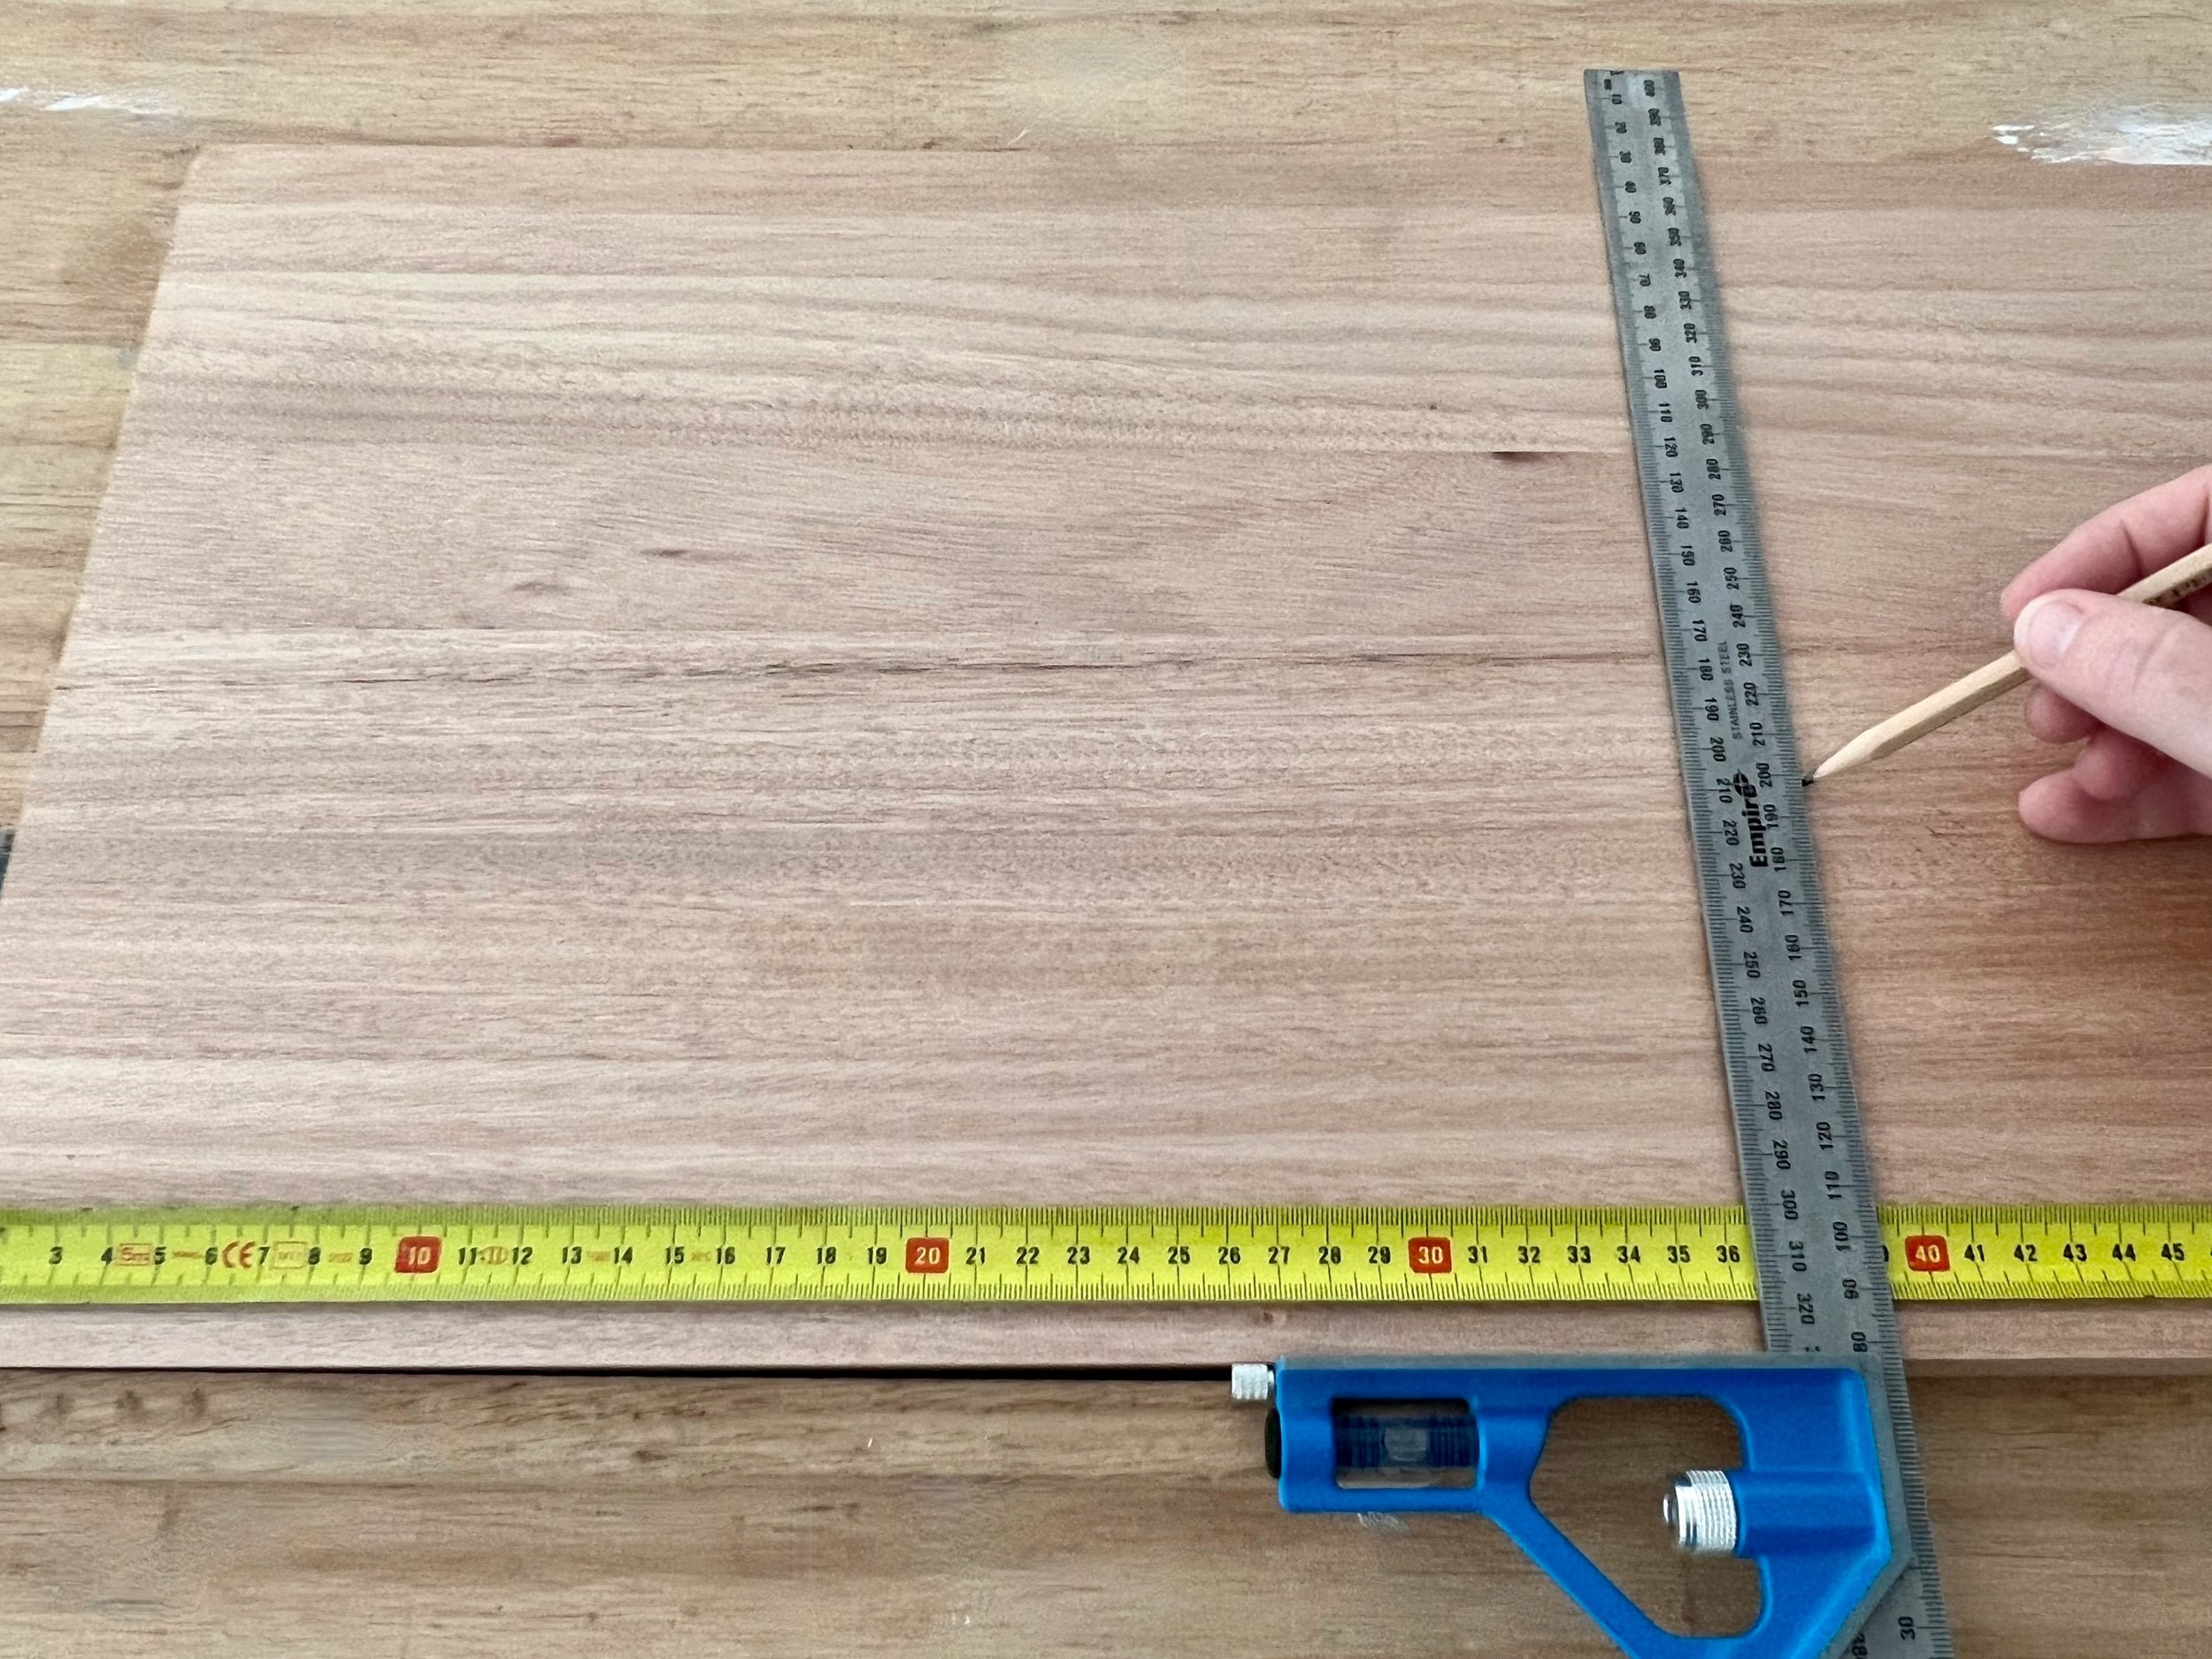
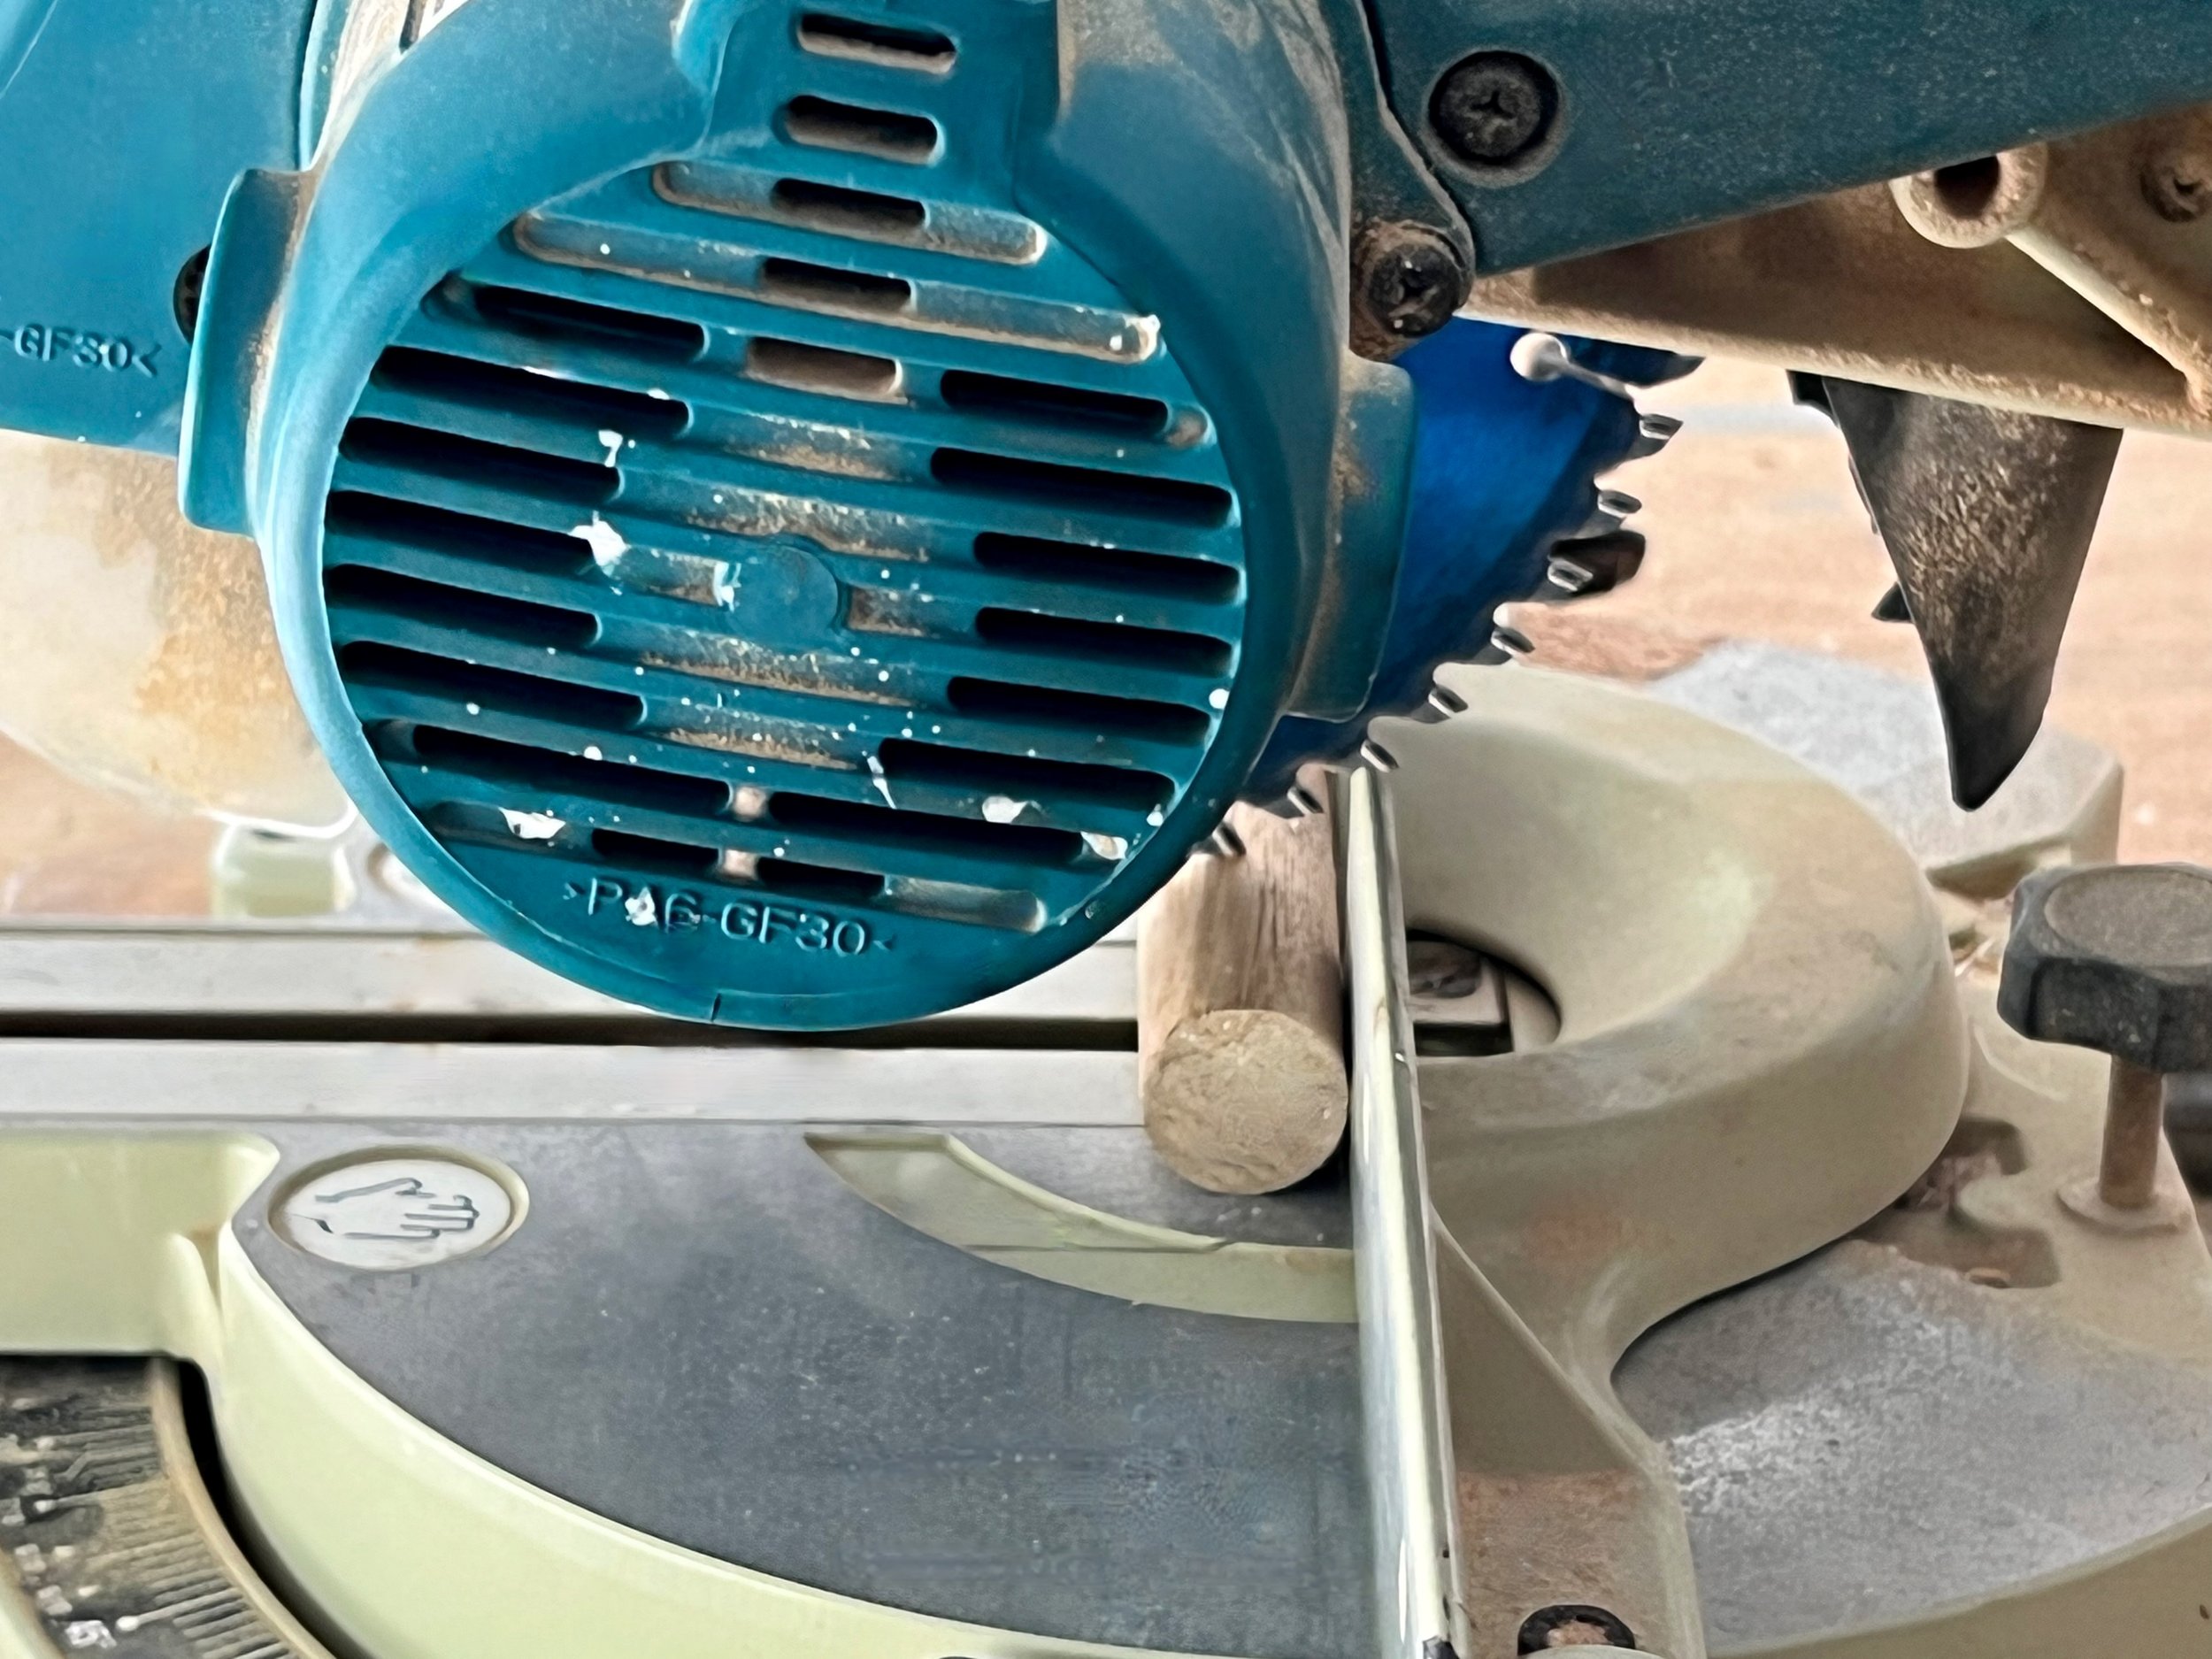
Using a 400mm combination square with a tape measure, I marked up a 33mm- thick 1200mm x 300mm timber panel 390mm in from the ends…
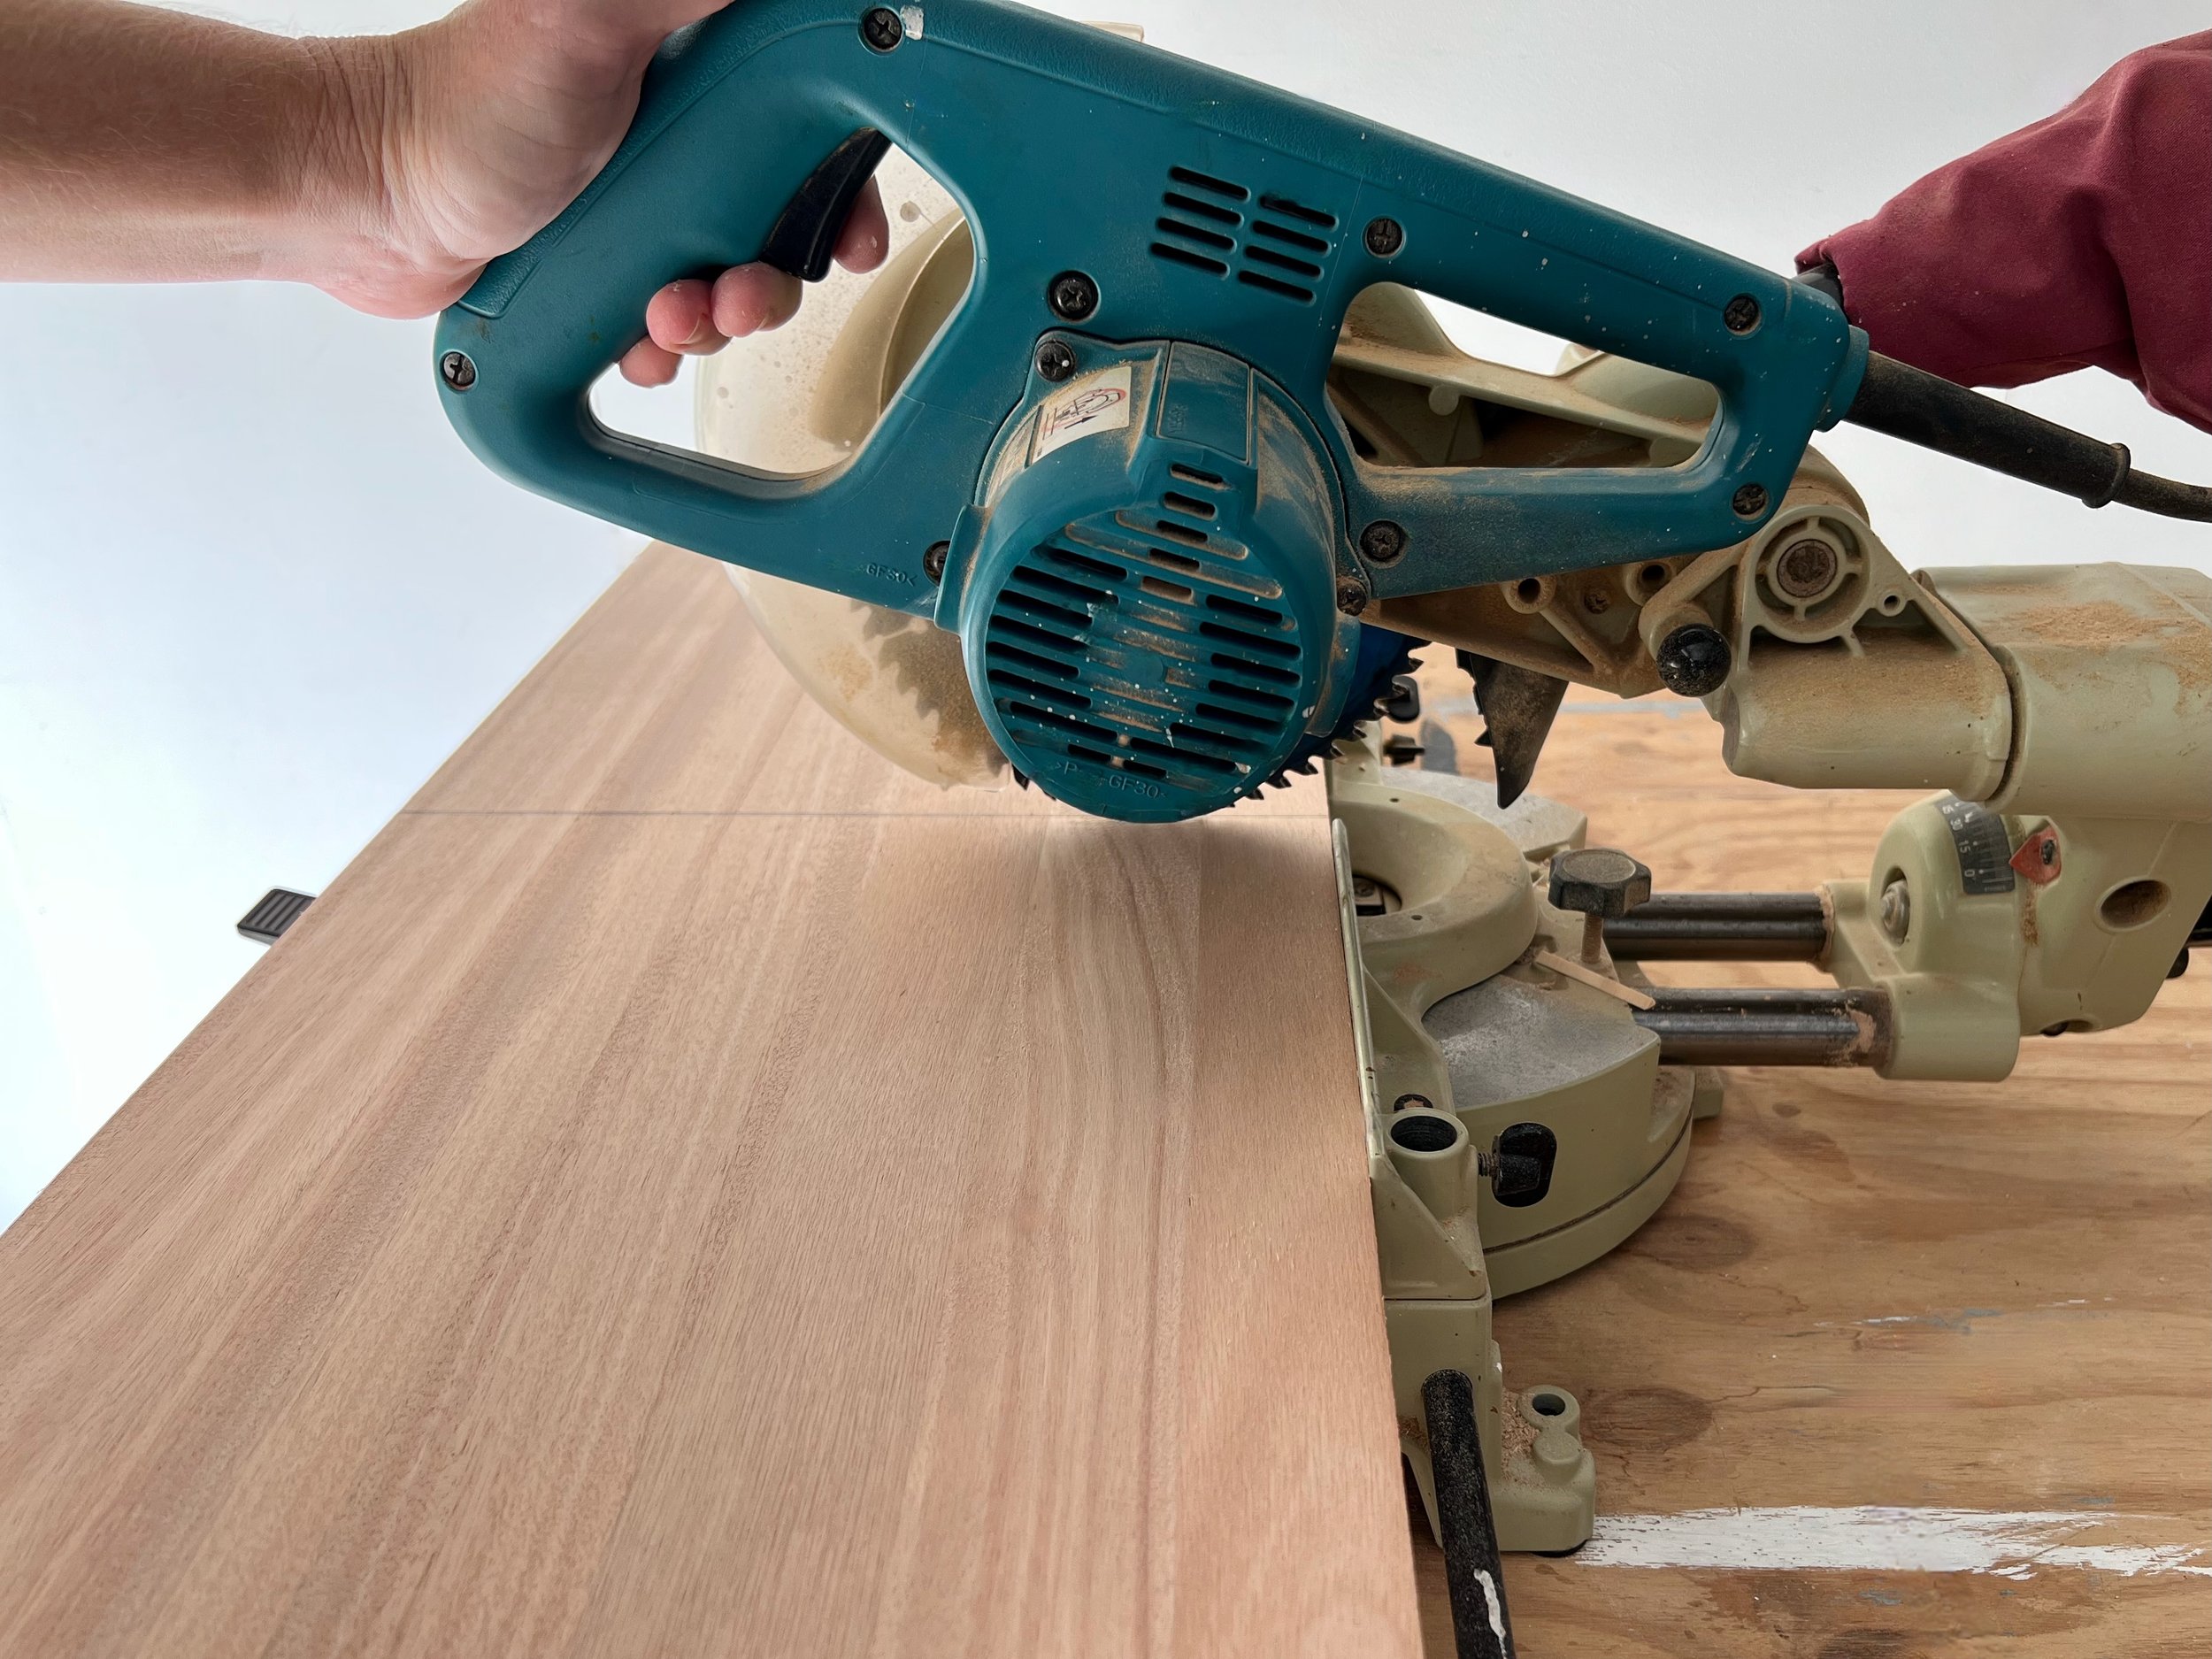
… and made the cuts on a compound mitre saw.
TIP Centre the blade over the marks so the pieces are exactly the same to allow for the the width of the saw blade, called the kerf. The end pieces become the legs and the centre piece is the 420mm top.
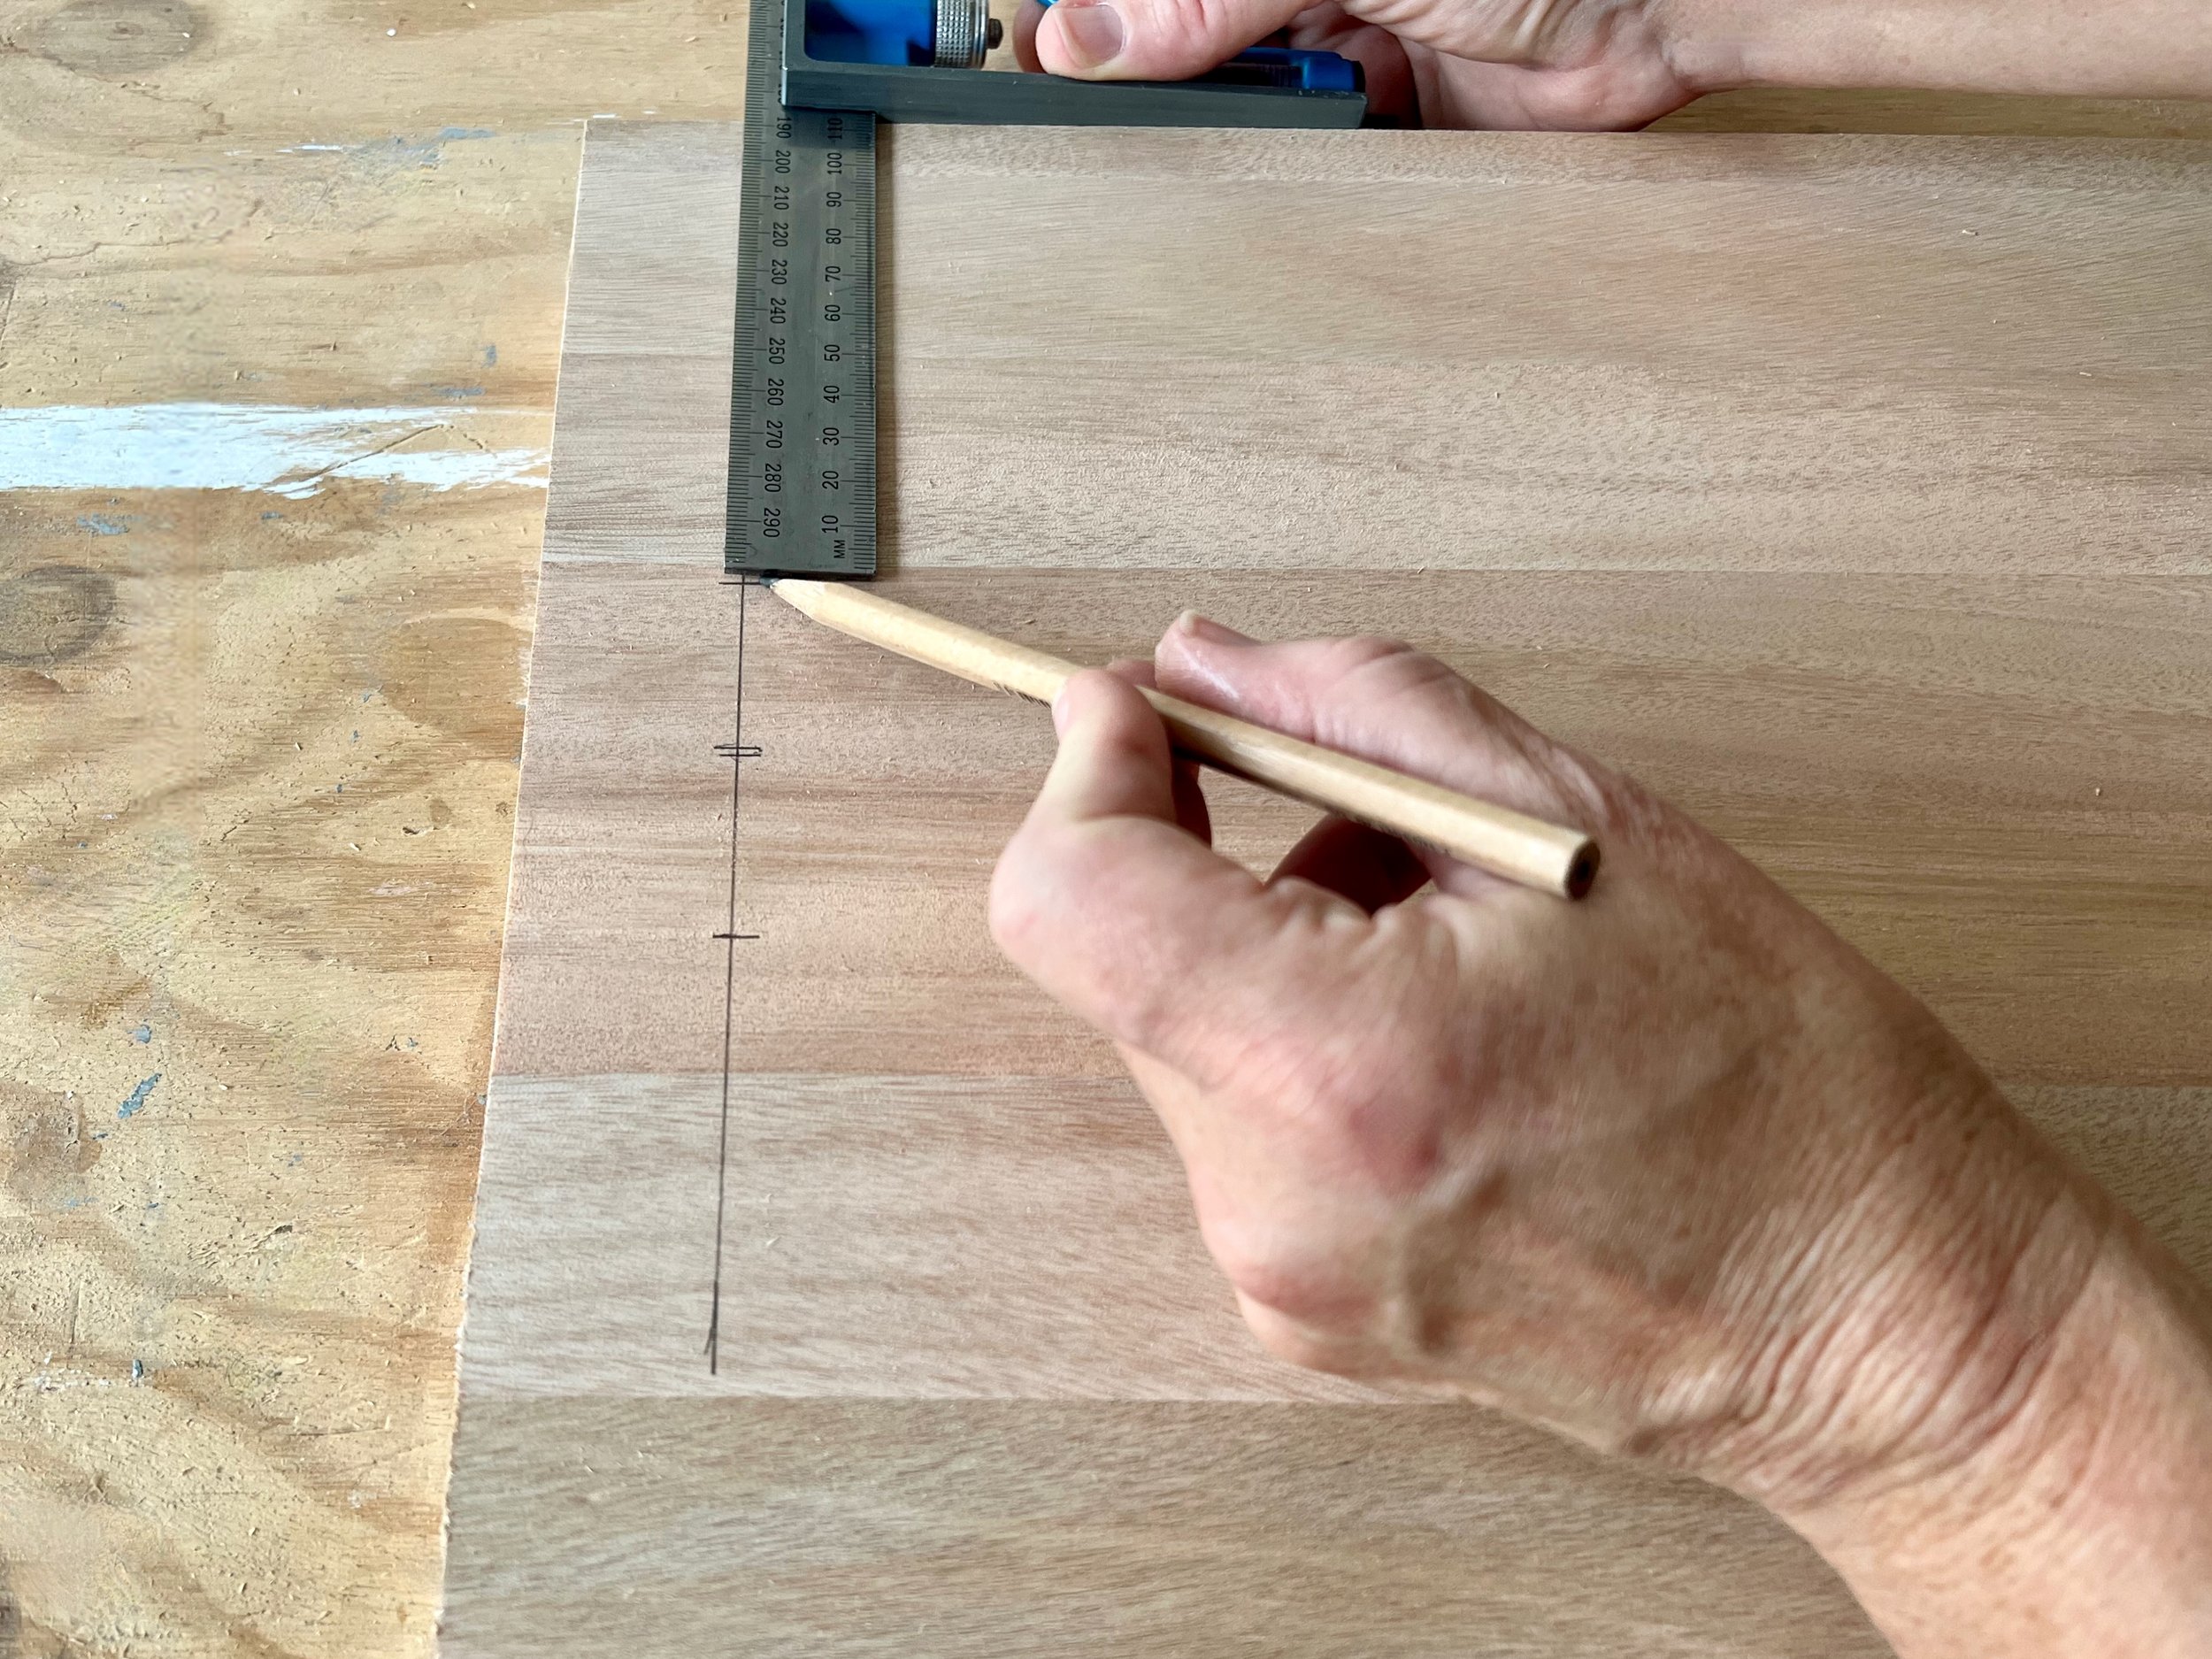
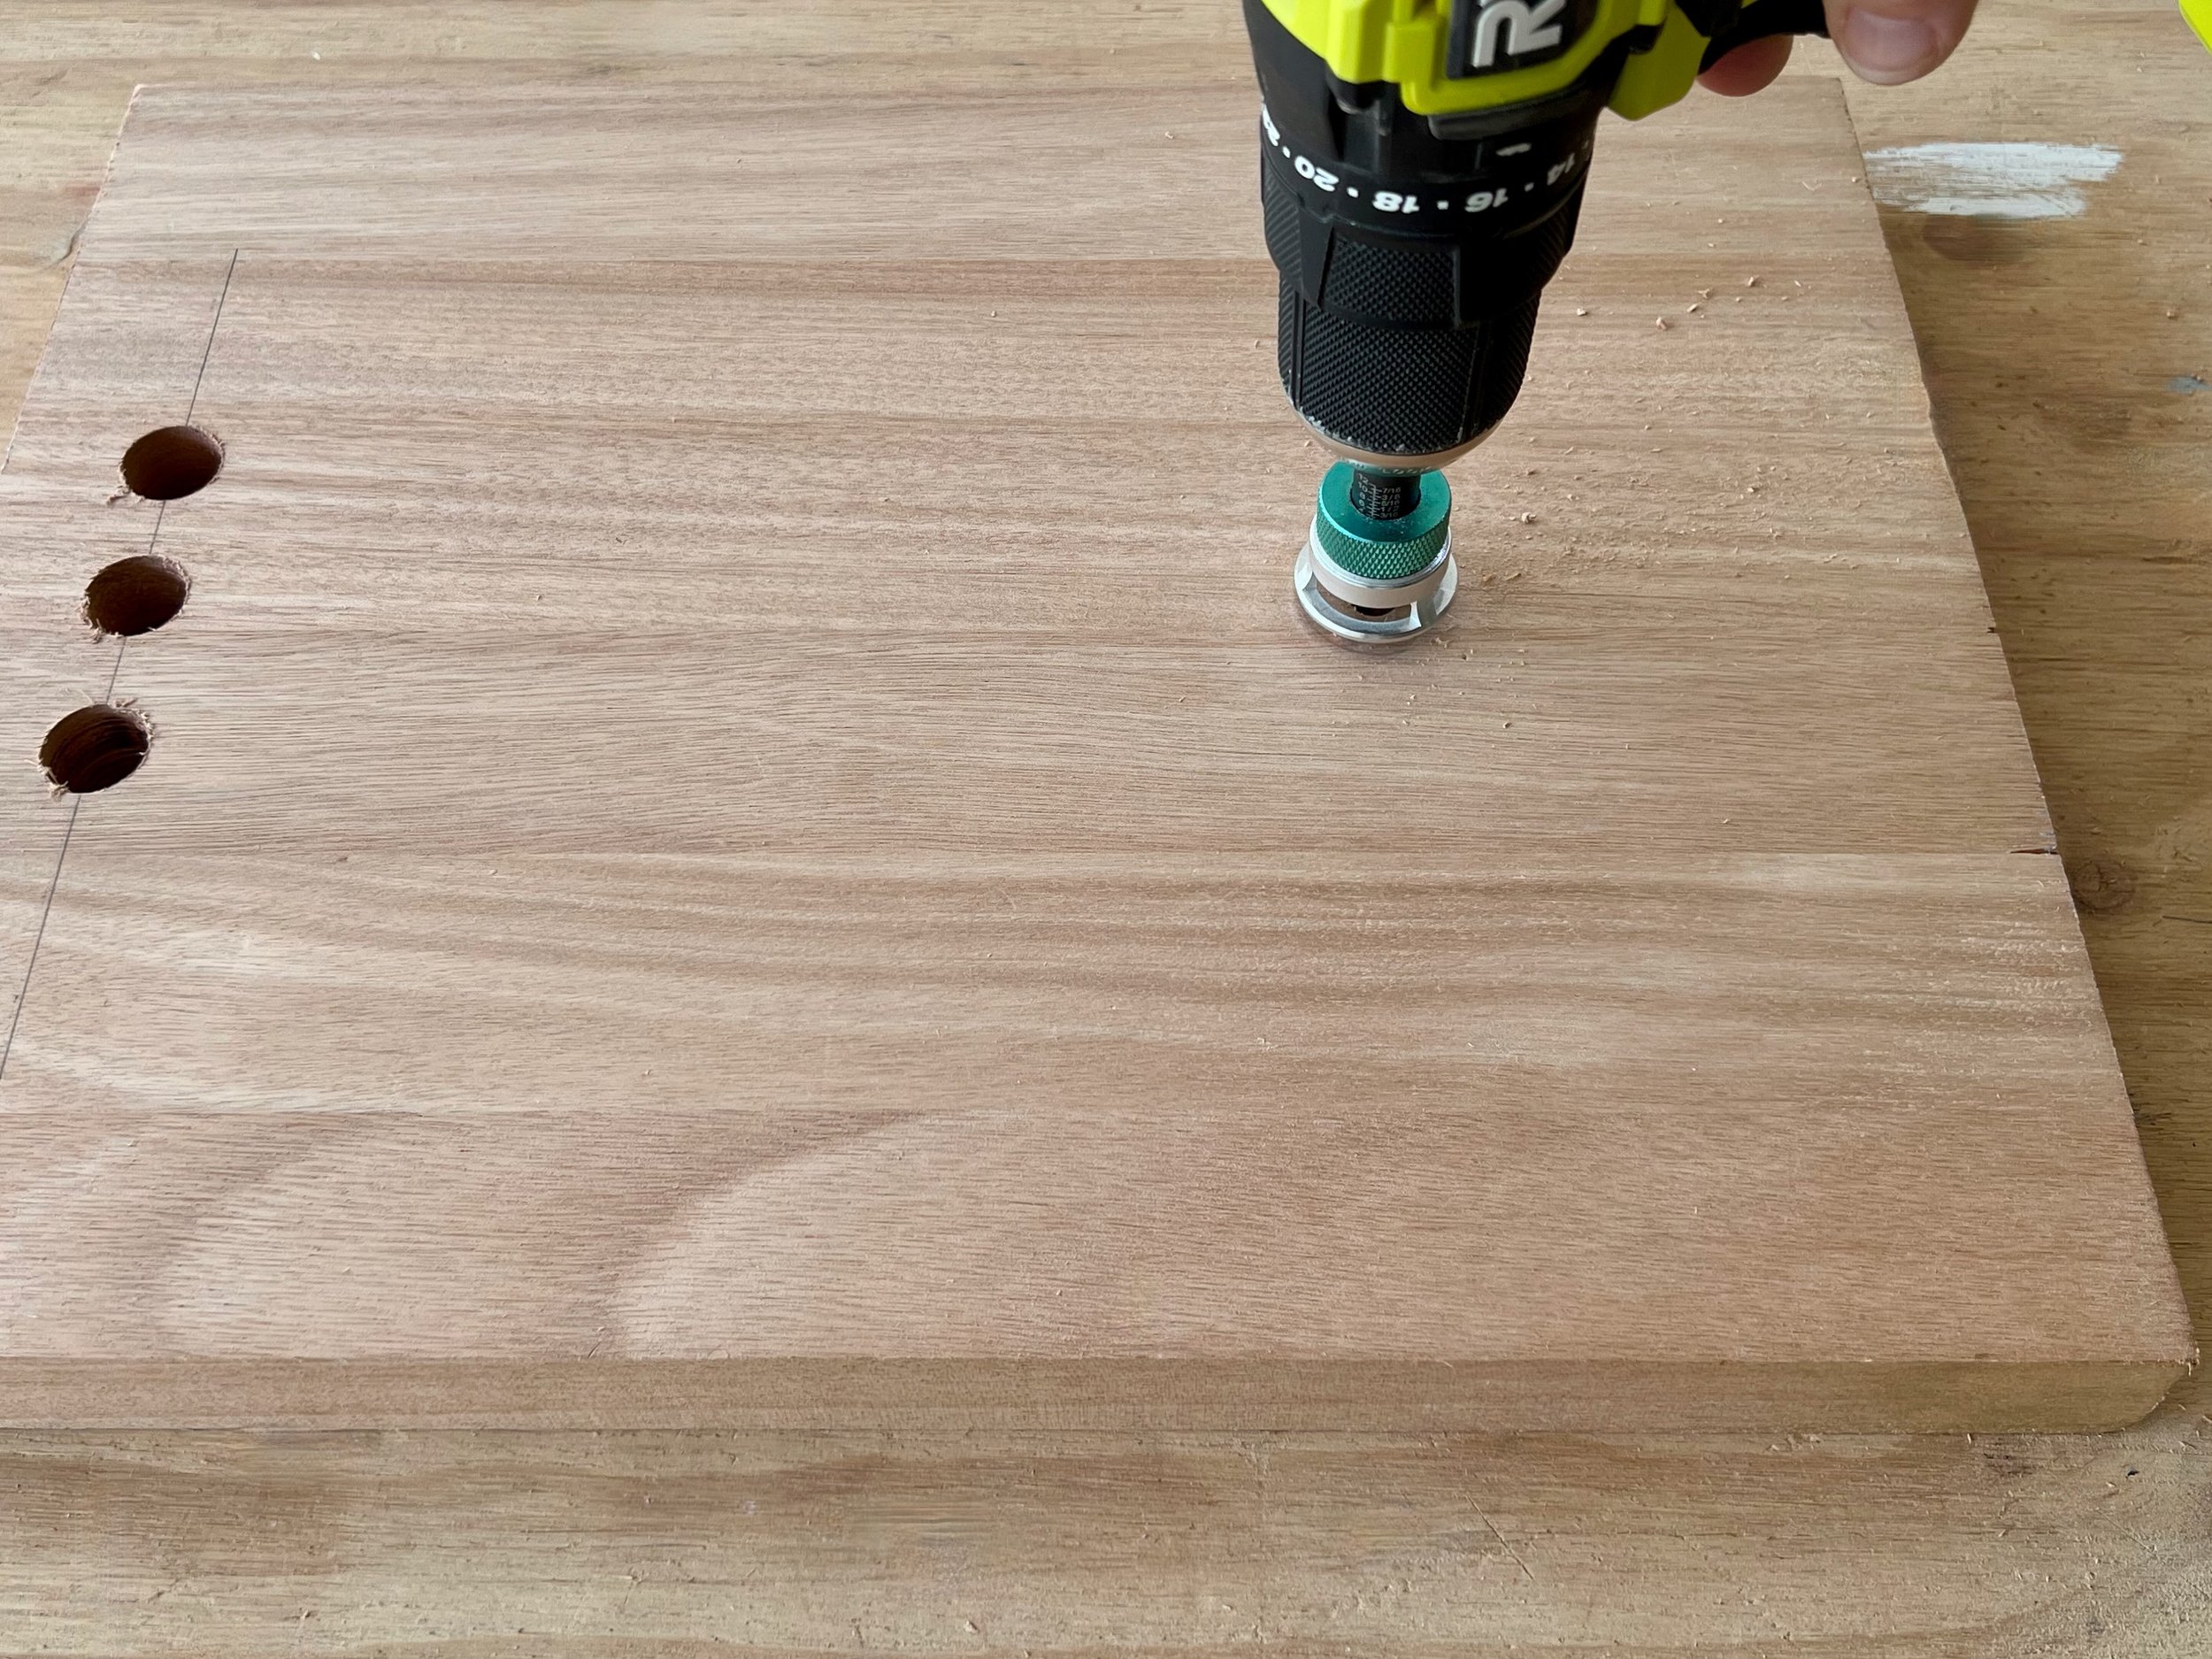
On the legs, I marked a line 33mm down from the top, then the centre and 115mm in from either side.
TIP The holes are designed to ergonomically fit three fingers to make moving easier.
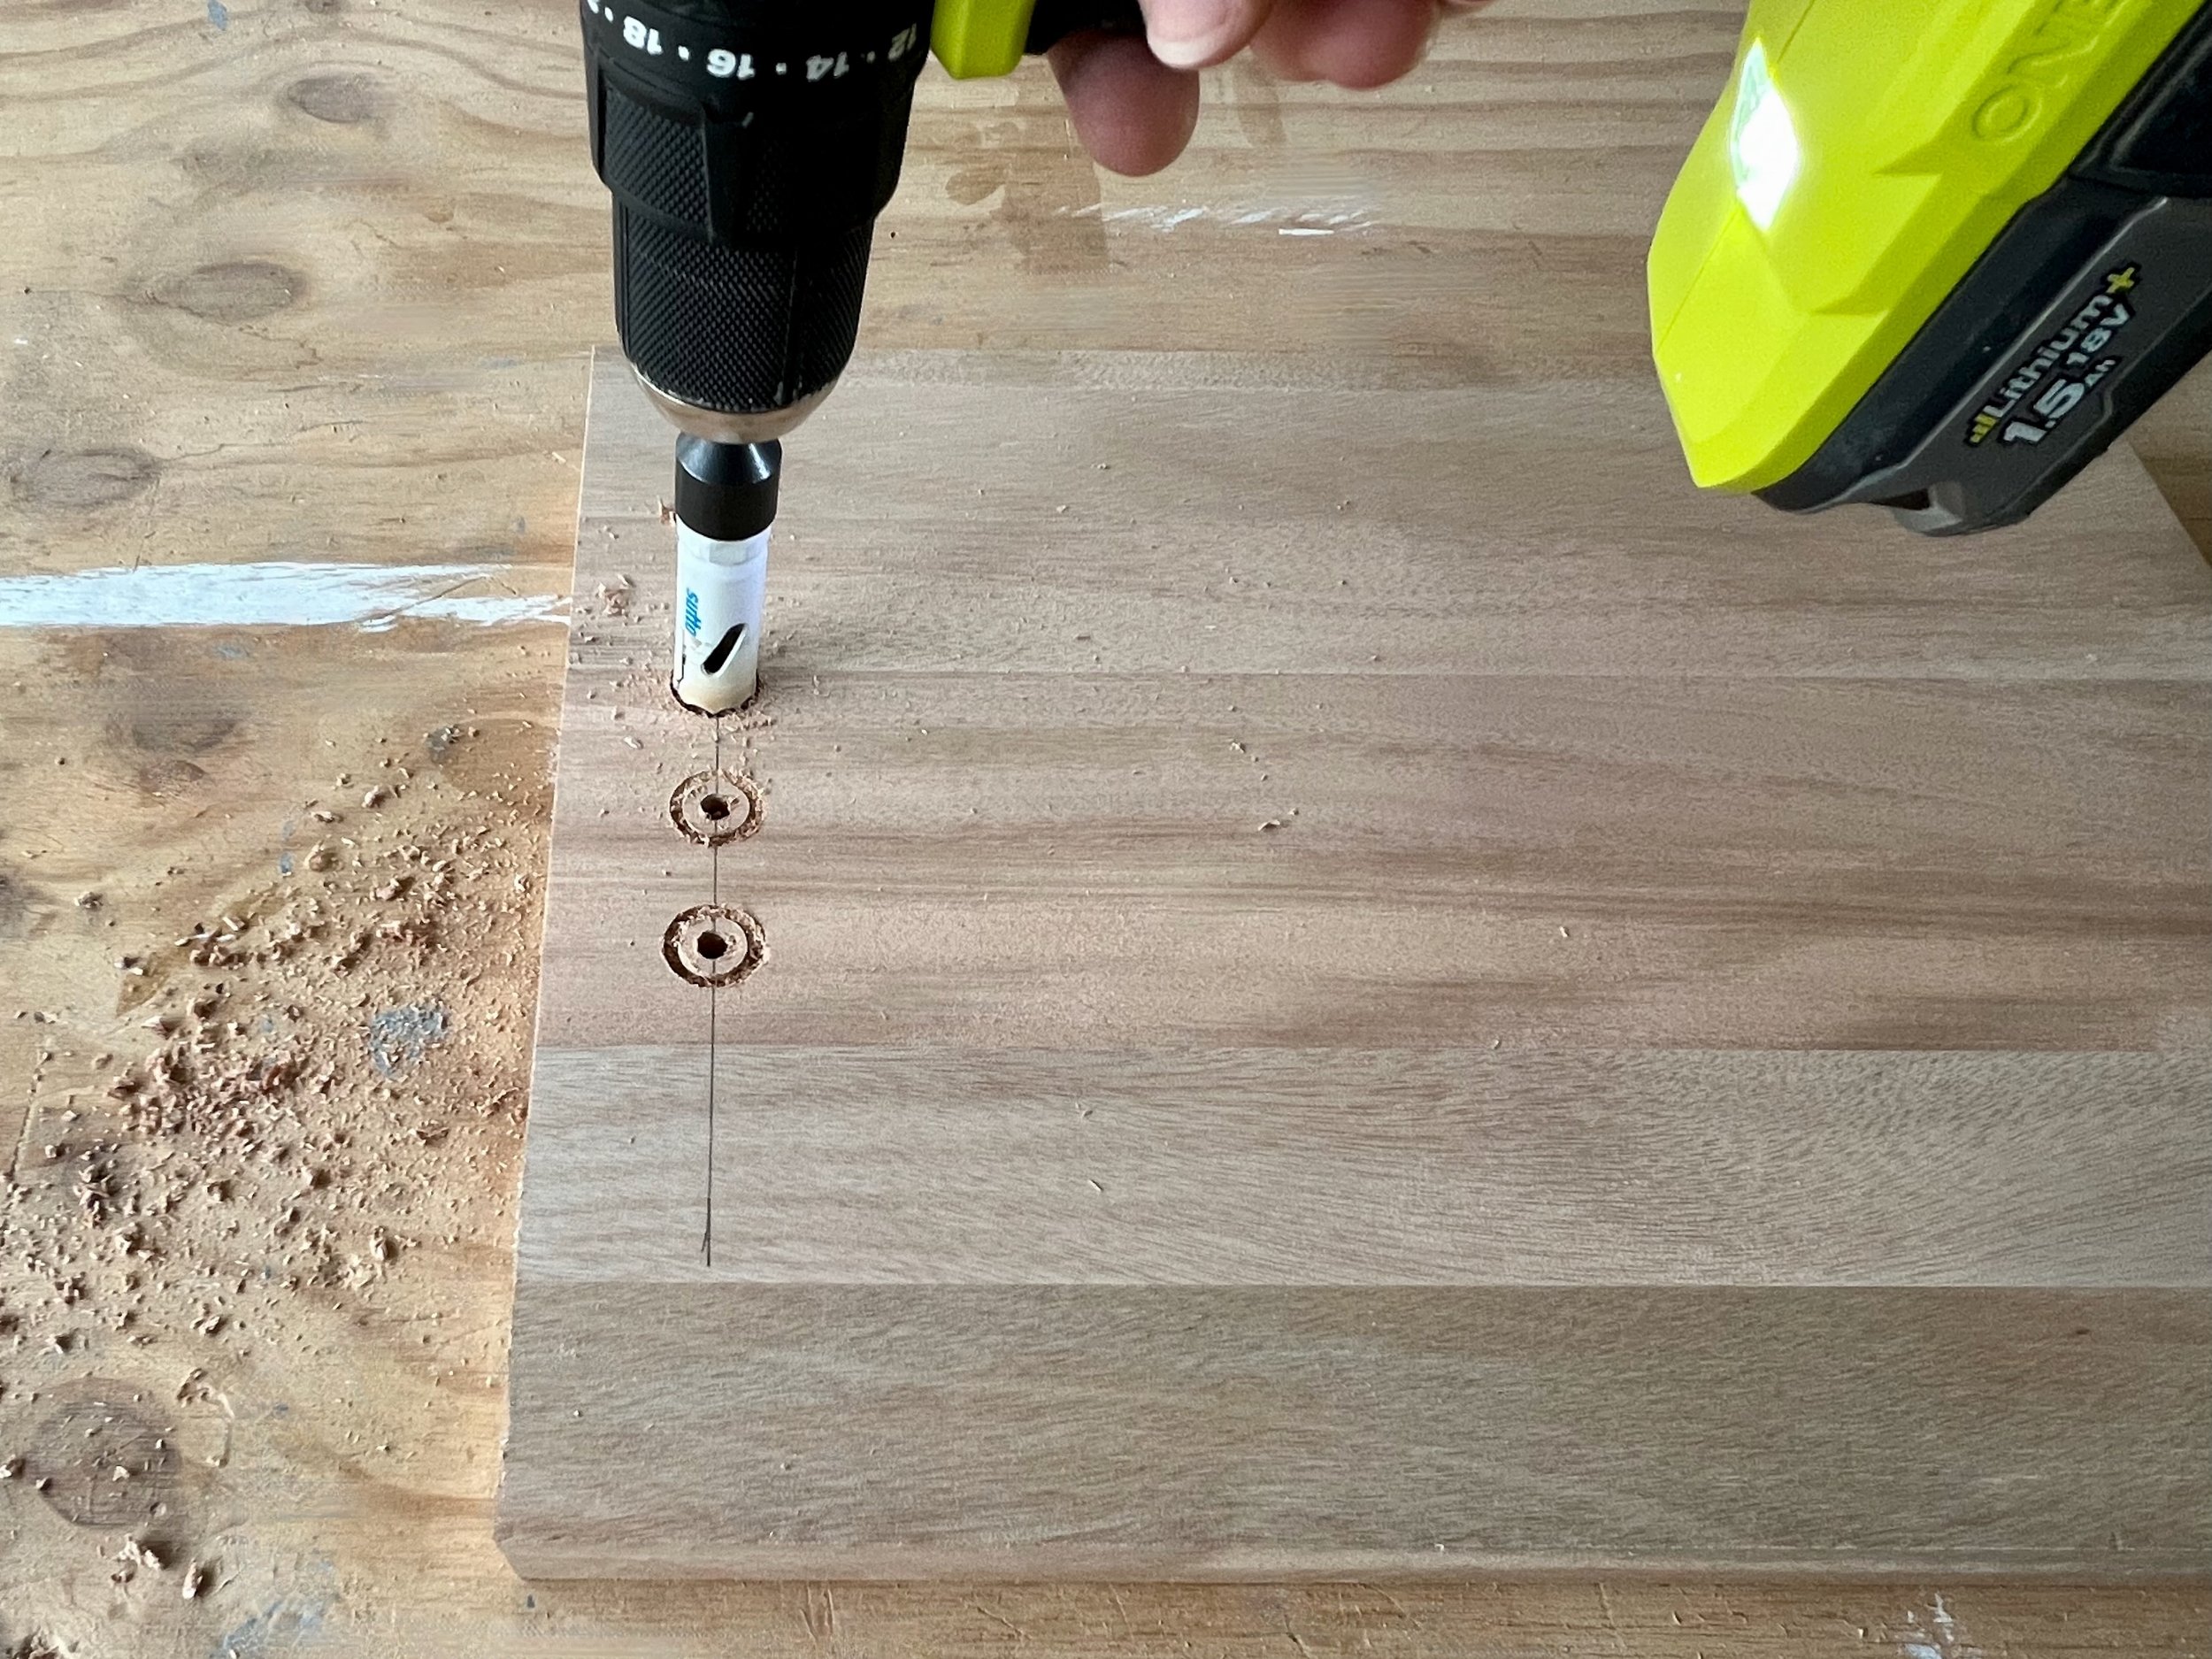
I used a 19mm holesaw to drill from one side, centring the bit on the marks. Halfway through, I flipped them to finish drilling from the other side to avoid breakout.
TIP Be sure to hold the drill completely straight and vertical. When purchasing a holesaw, check it has an arbour (the drill bit in the centre). If not, buy one separately or invest in a full set.
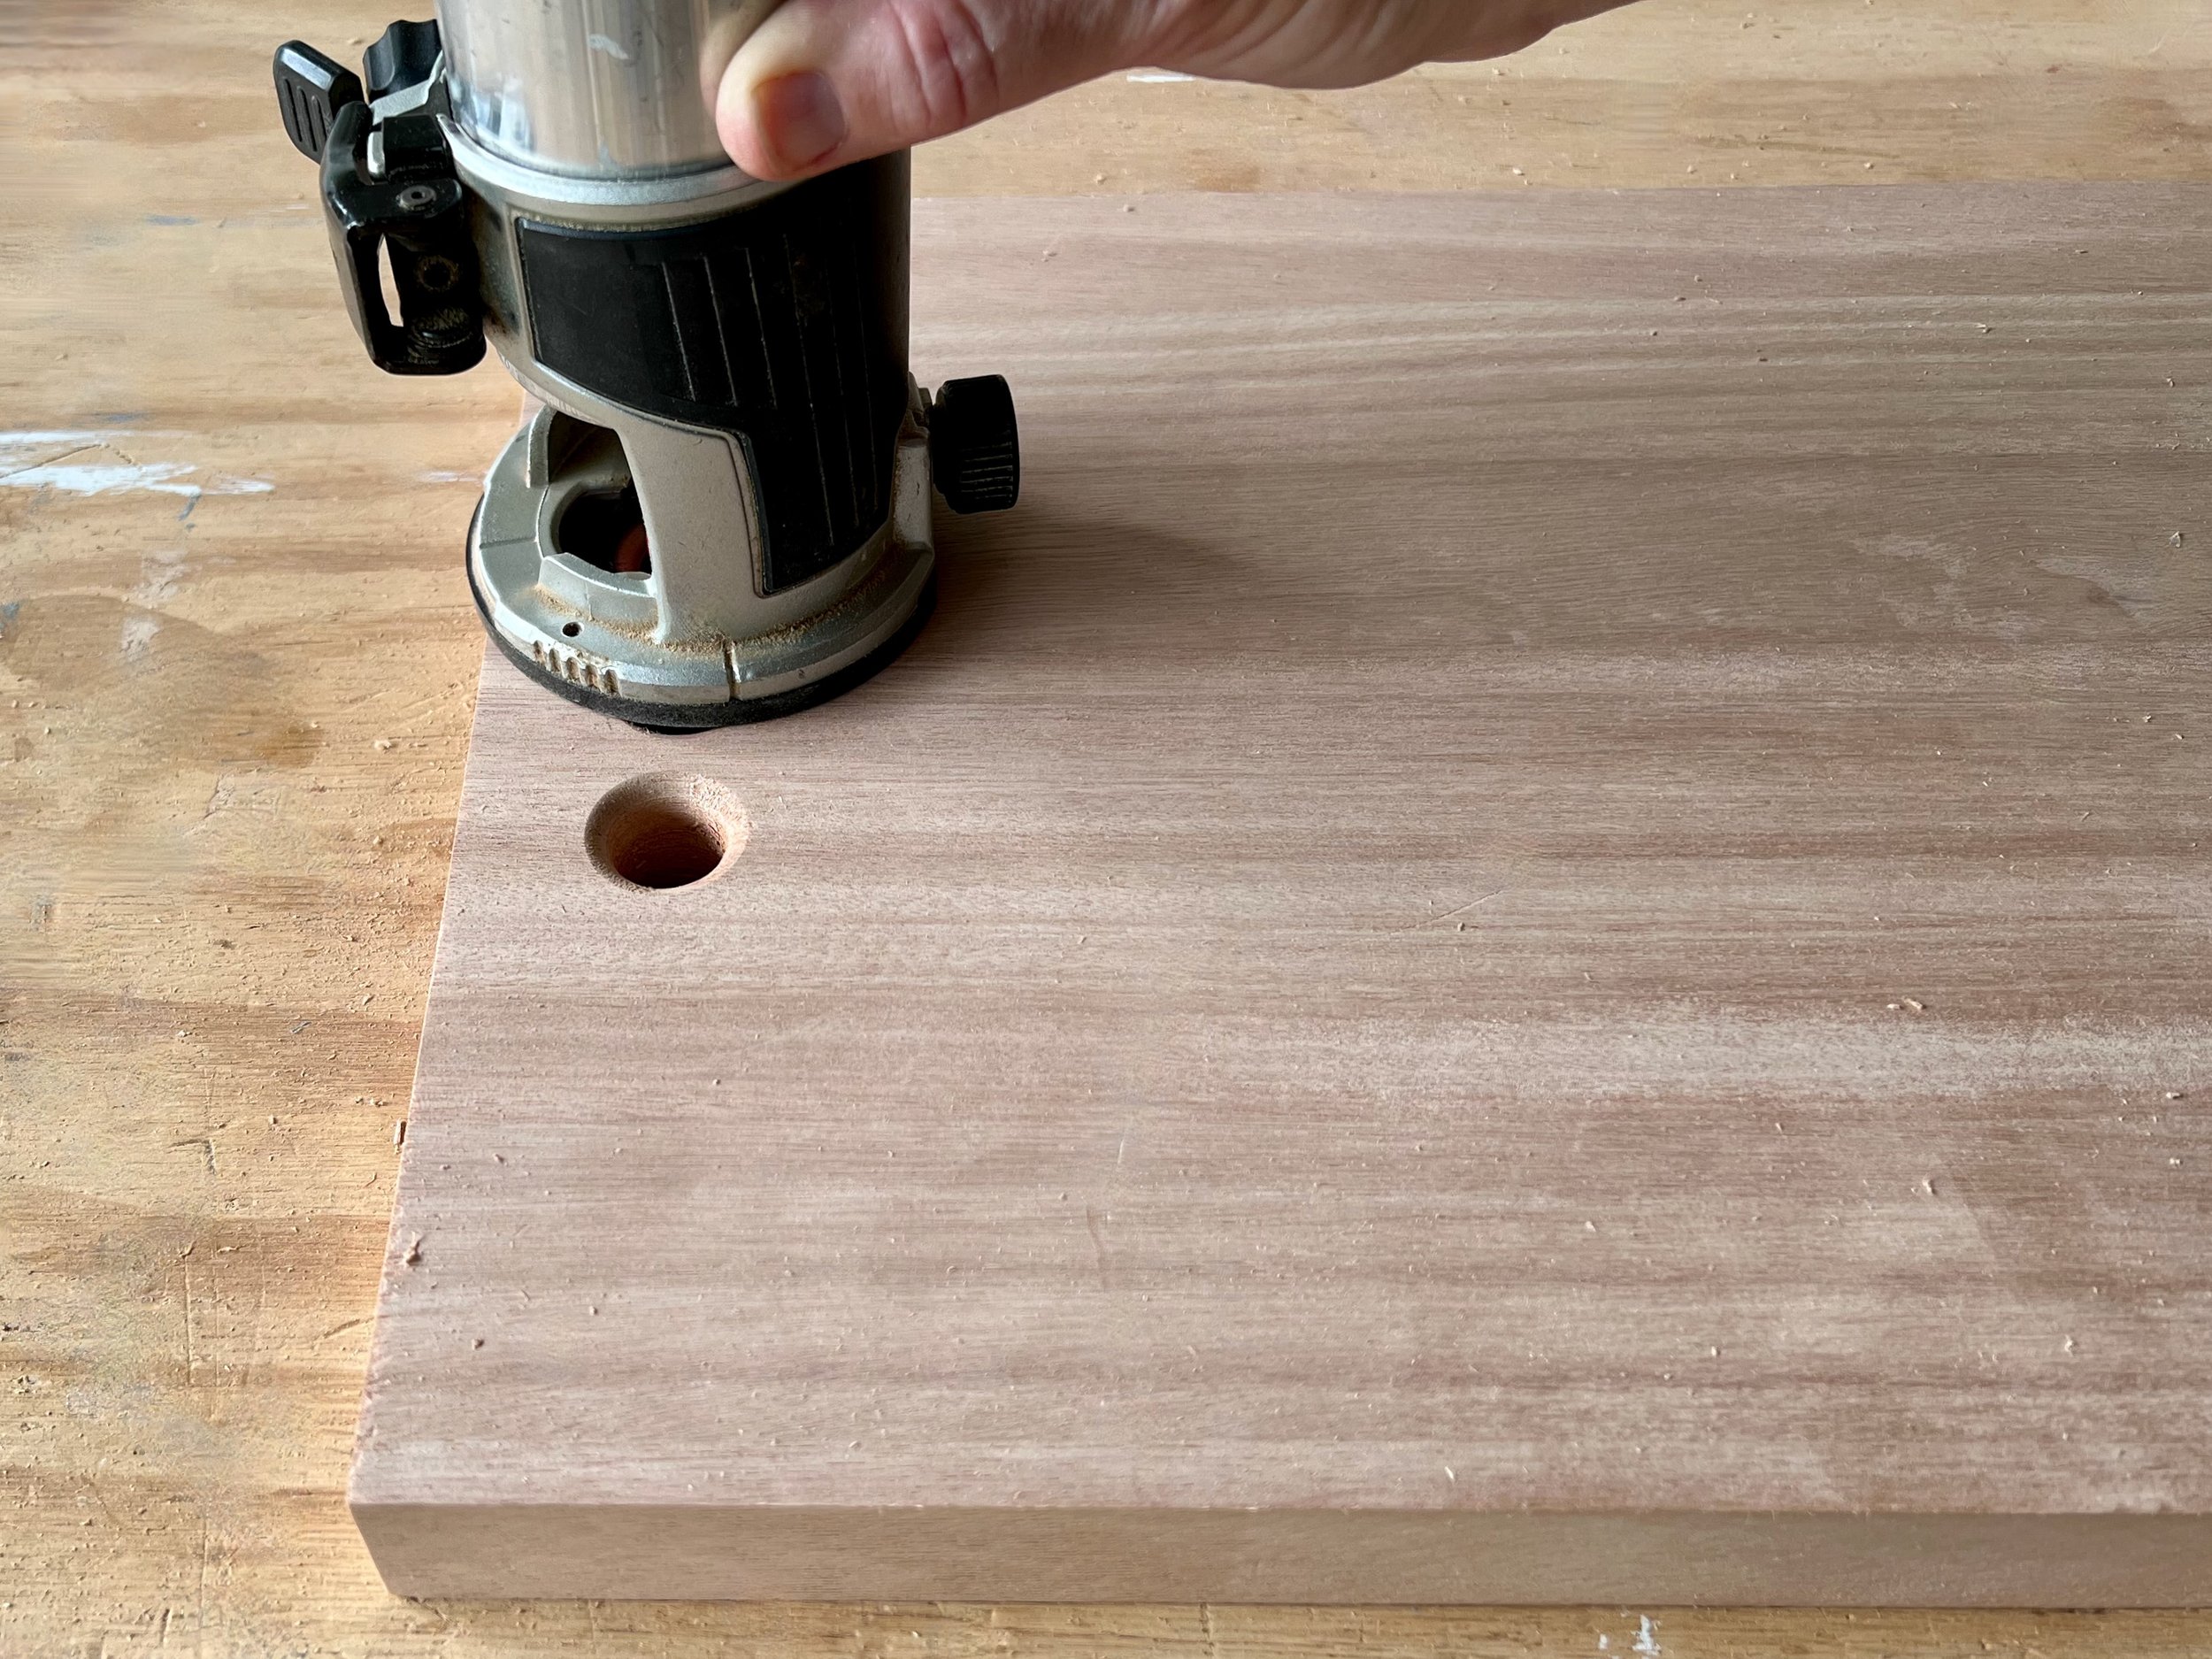
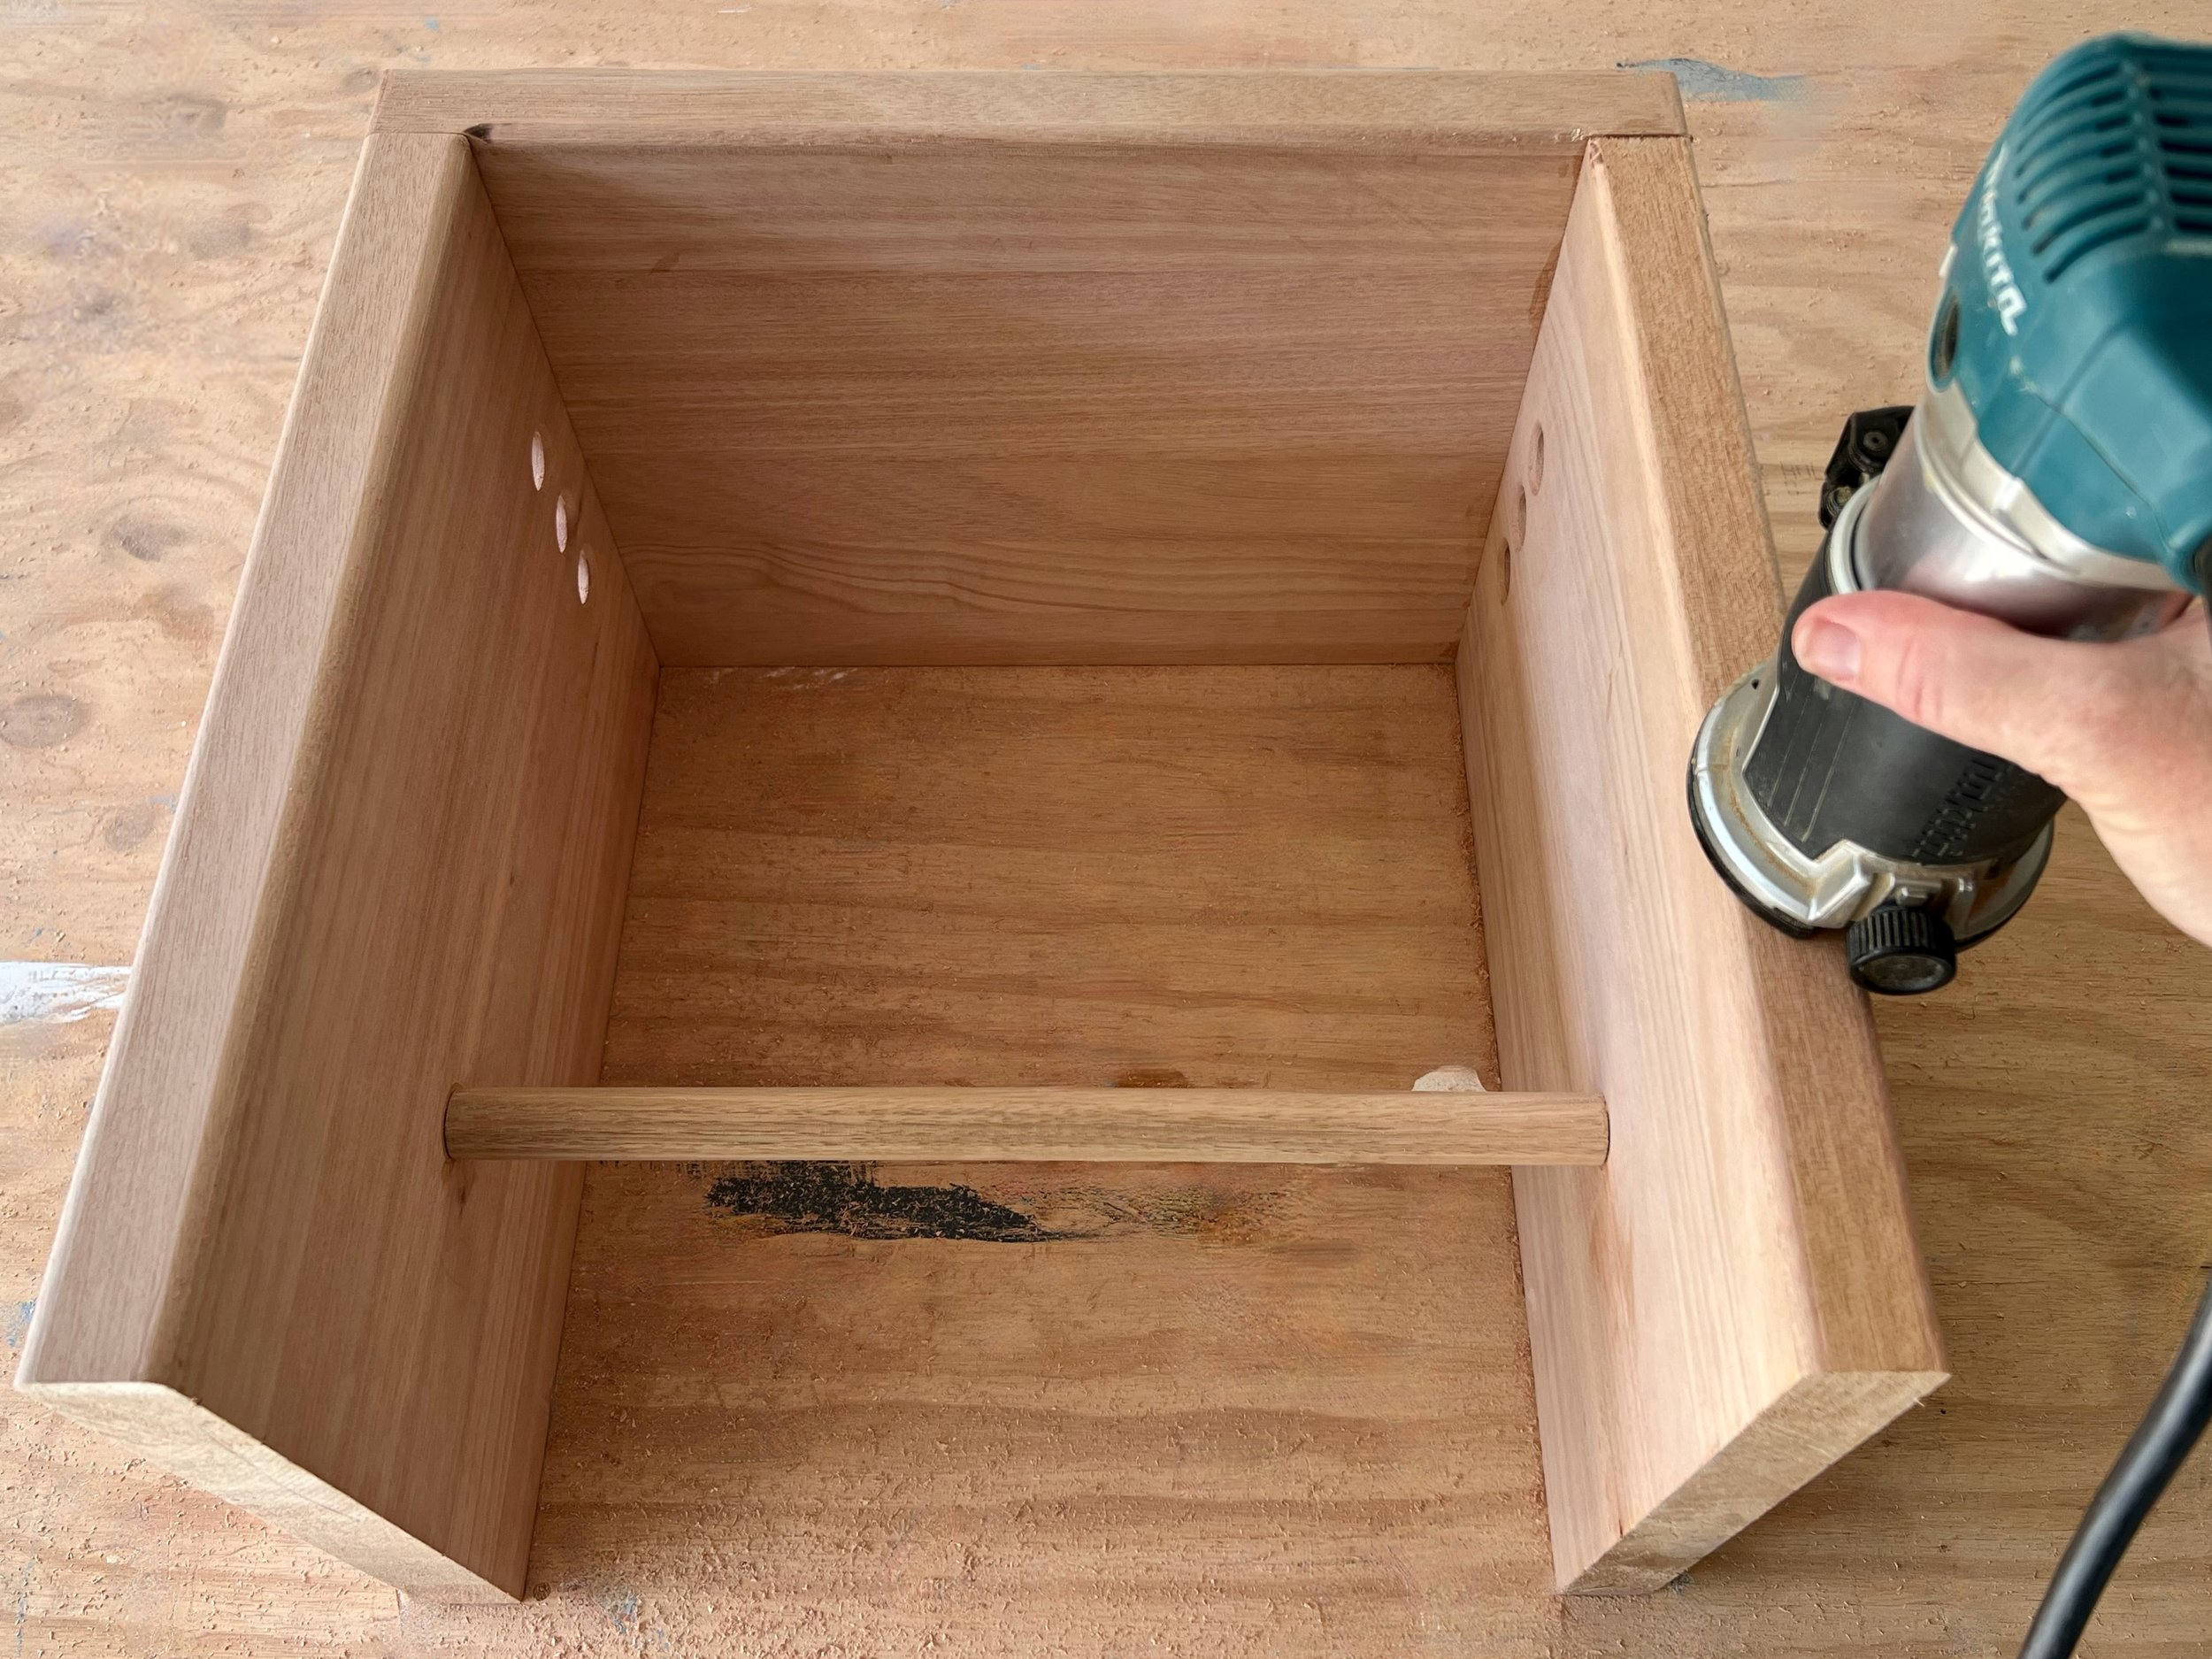
To smooth the holes, I used a trim router with a round-over bit from both sides and finished by sanding inside with rolled-up 120-grit abrasive paper.
TIP This small trim router is one of my fave tools, but if you don’t have one, use 120-grit abrasive paper to round-over the holes.
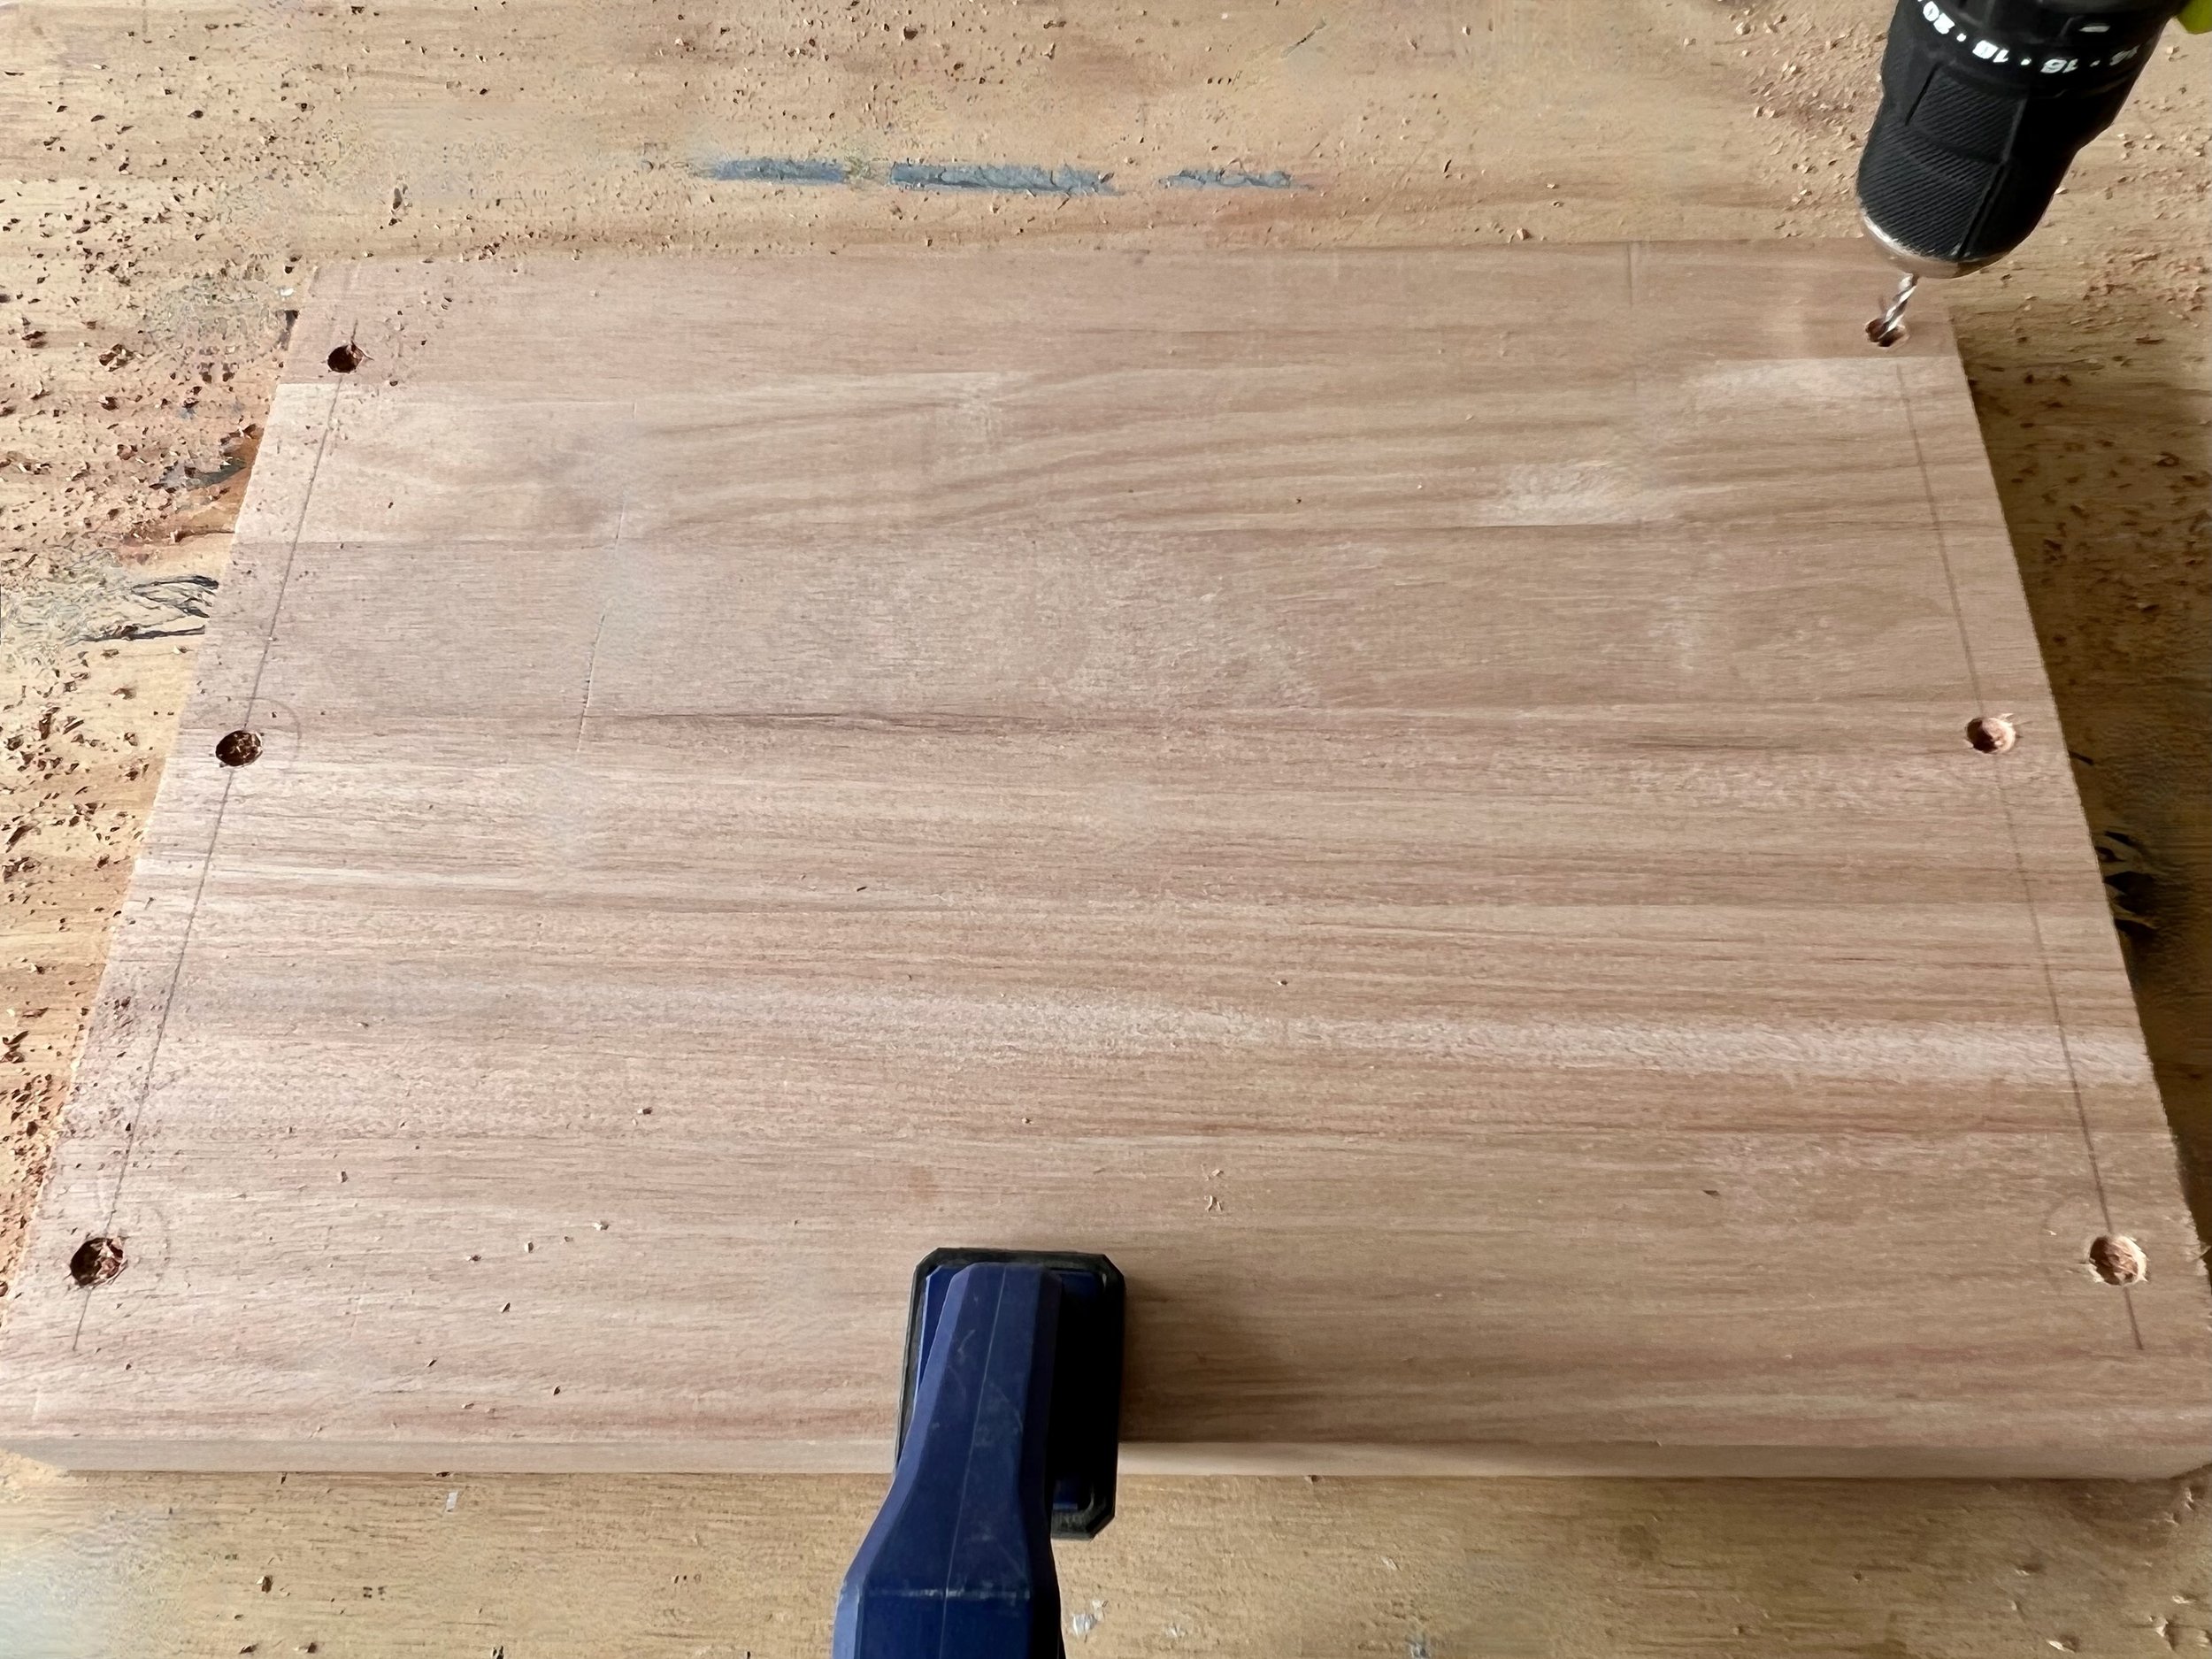
On the legs, I marked 150mm in from the edges and 115mm up from the base to drill with an 8G countersinking bit…

… and installed 8G x 50mm screws through the legs…
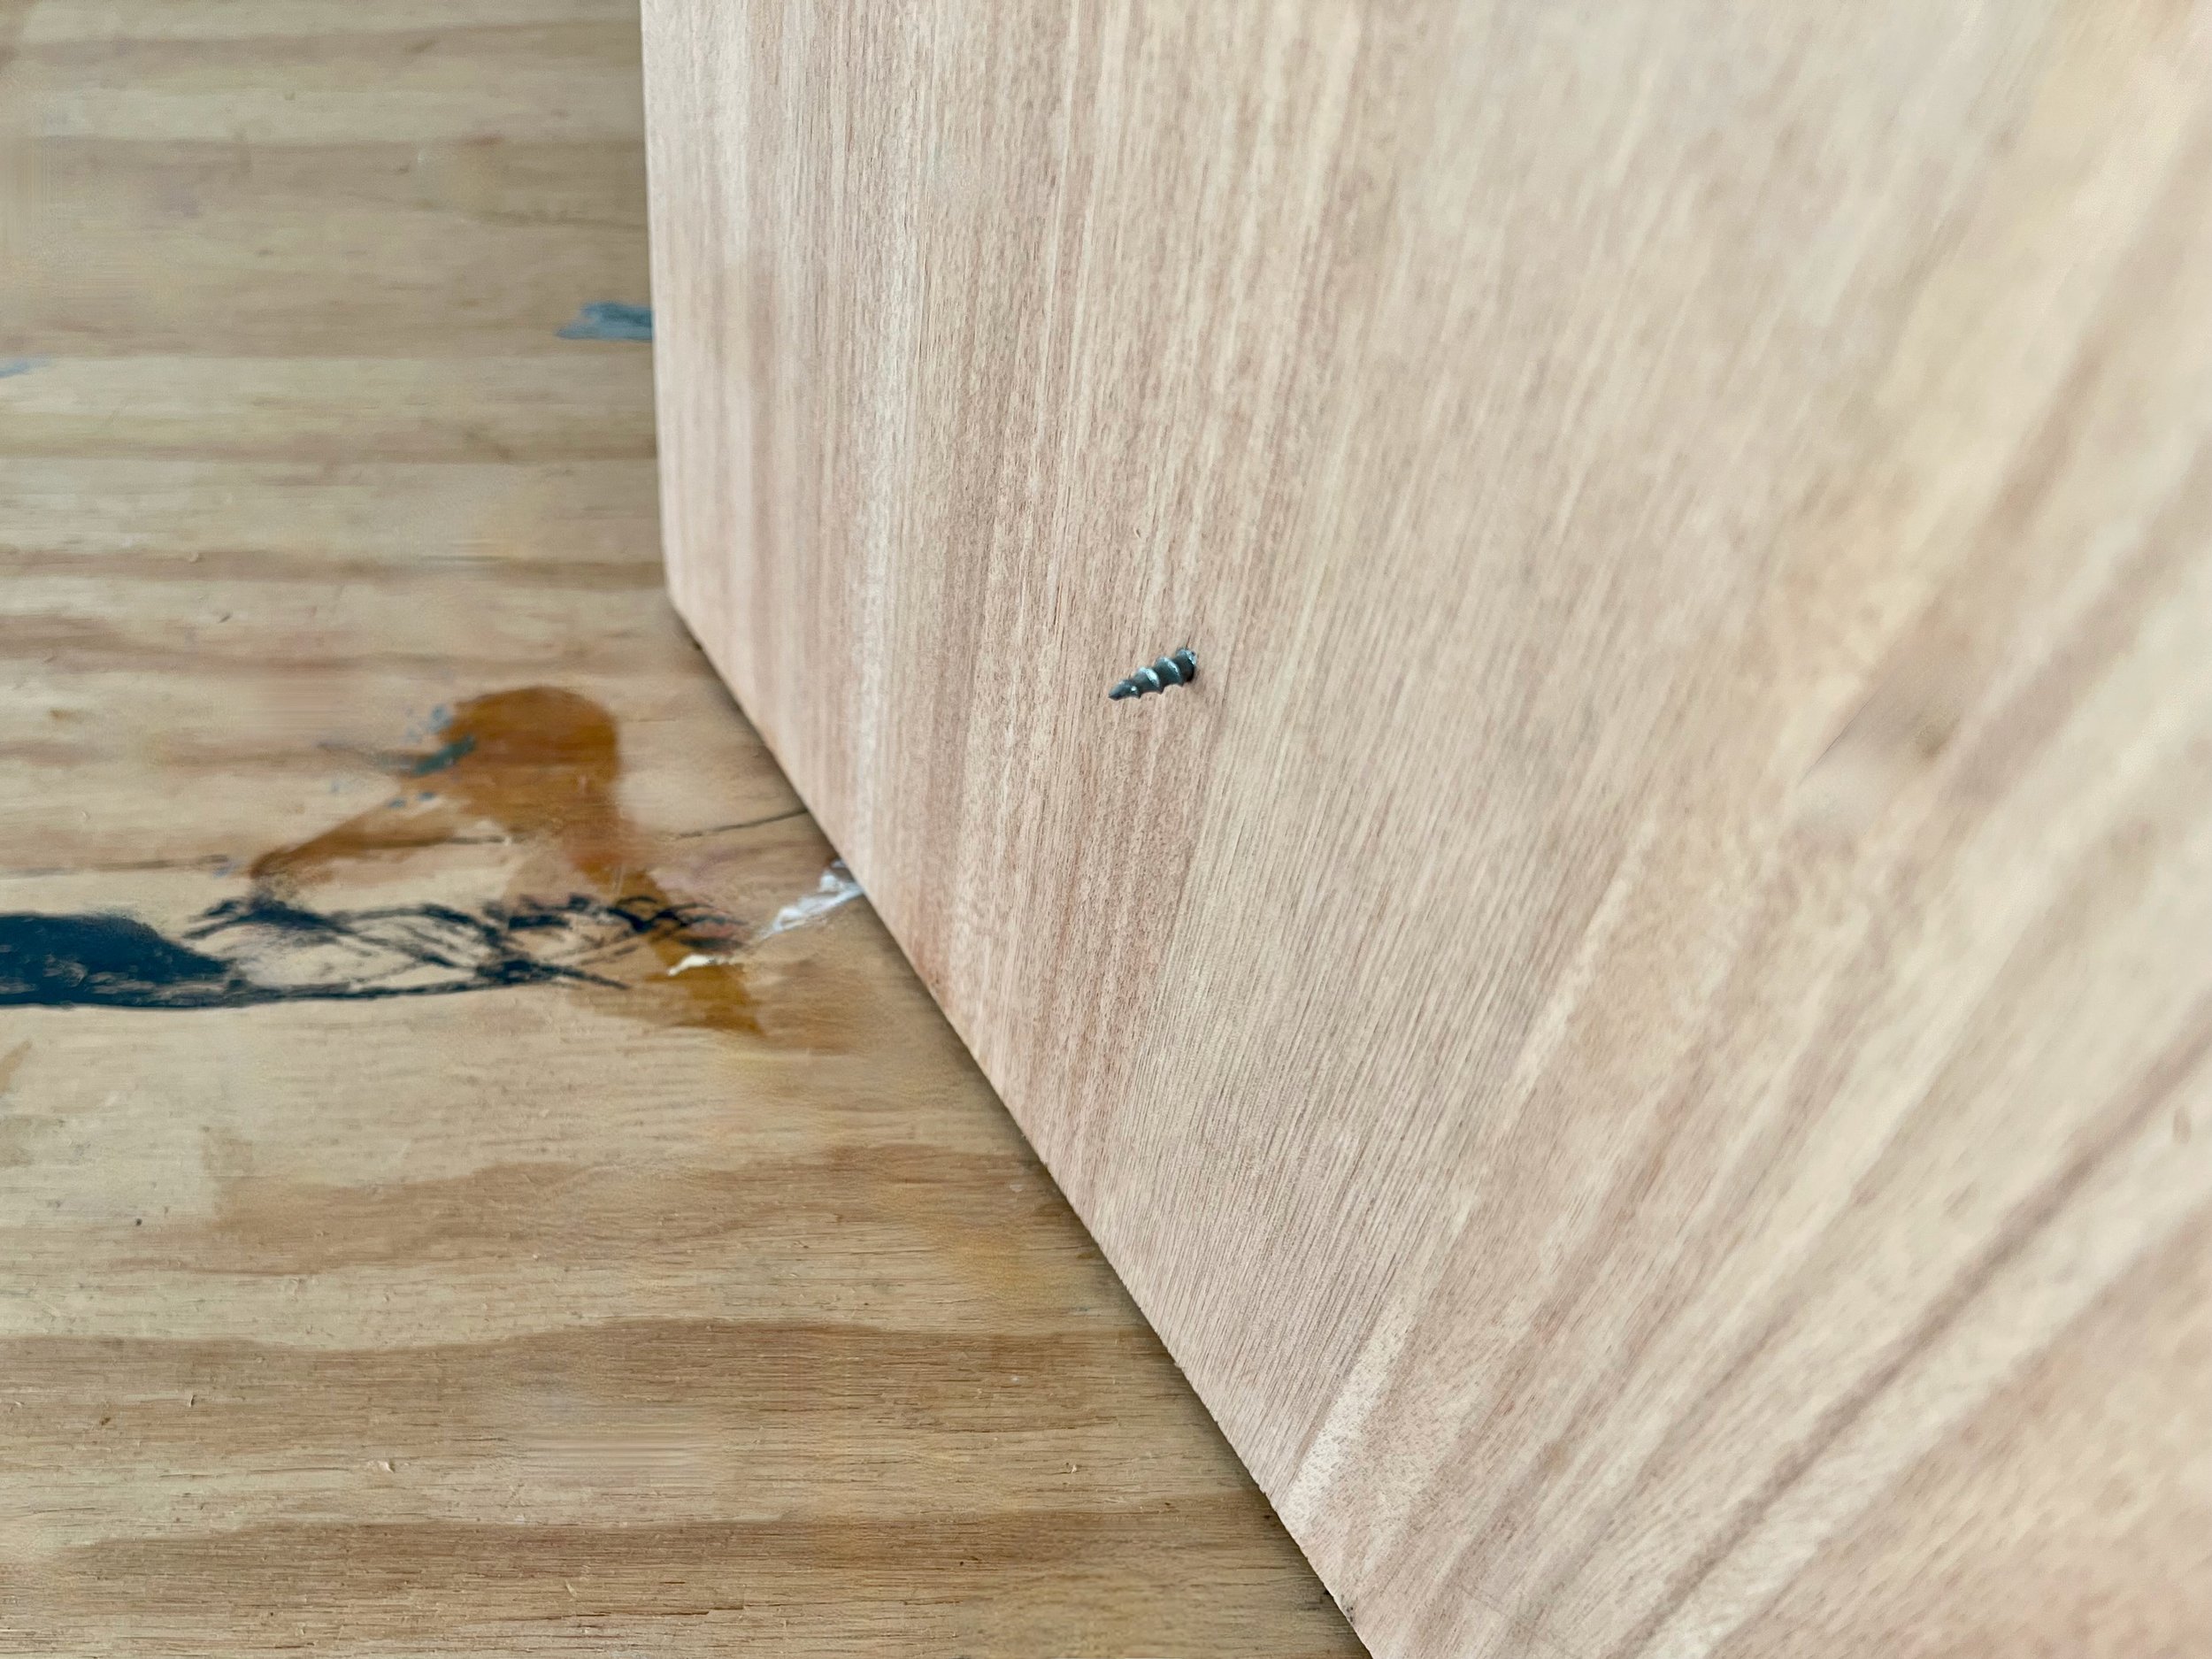
… leaving them to protrude about 5mm.
Then I cut a piece of 22mm dowel to 354mm long.
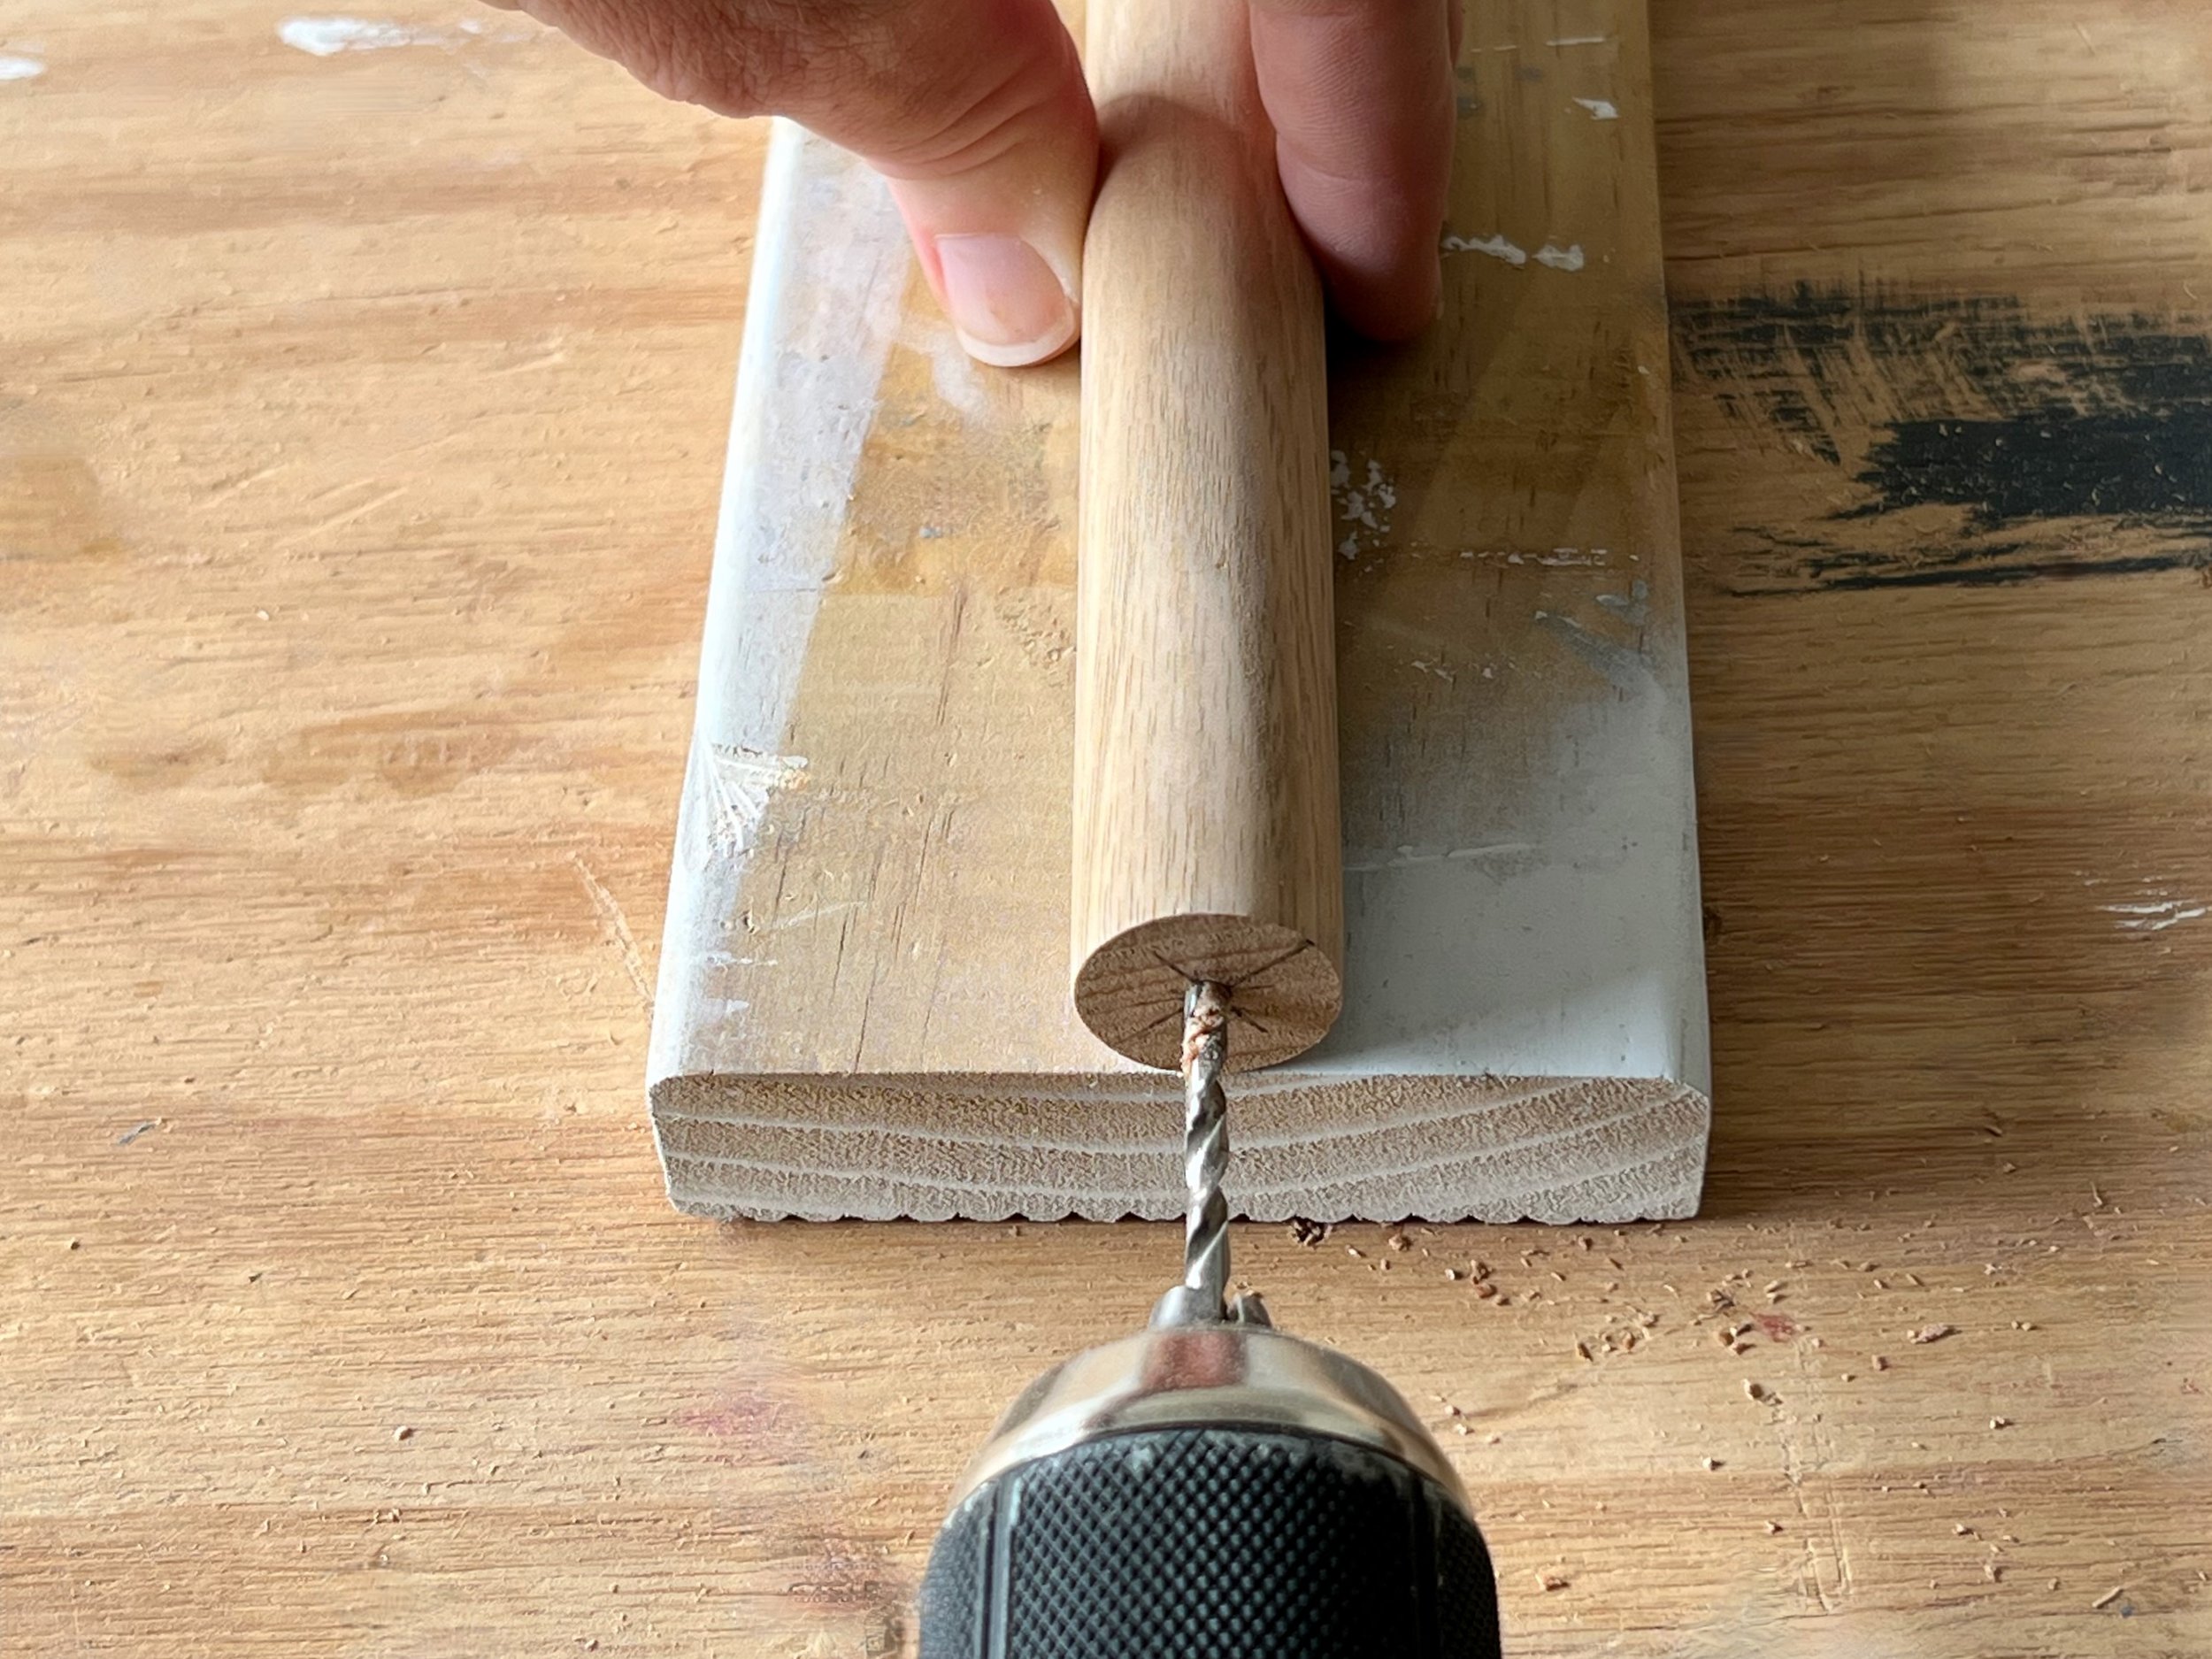
Holding the dowel on an offcut, I used a 3mm bit to drill into the end-grain.
TIP The extra height of the offcut gives clearance for the drill and makes it easier to hold straight.

After applying woodworking adhesive on the dowel end-grain, I positioned it onto the protruding screws of the legs and tightened them from outside, wiping away excess adhesive with a damp cloth.
On the top, I marked a line 15mm in from the ends to countersunk holes 30mm in from the edges and at the centre, finishing with the 3mm bit.

I applied adhesive along the top of the legs, positioned the top and clamped, then secured through the centre holes with 50mm screws. I used the square to check the legs were straight and clamped them to secure the rest of the screws.
TIP Irwin 450mm medium-duty clamps are long enough to hold the legs to the base. As part of the clever quick-grip system, you can also invest in the corner accessories that simply clip on when needed. Also great for assembling flat-pack cabinets.
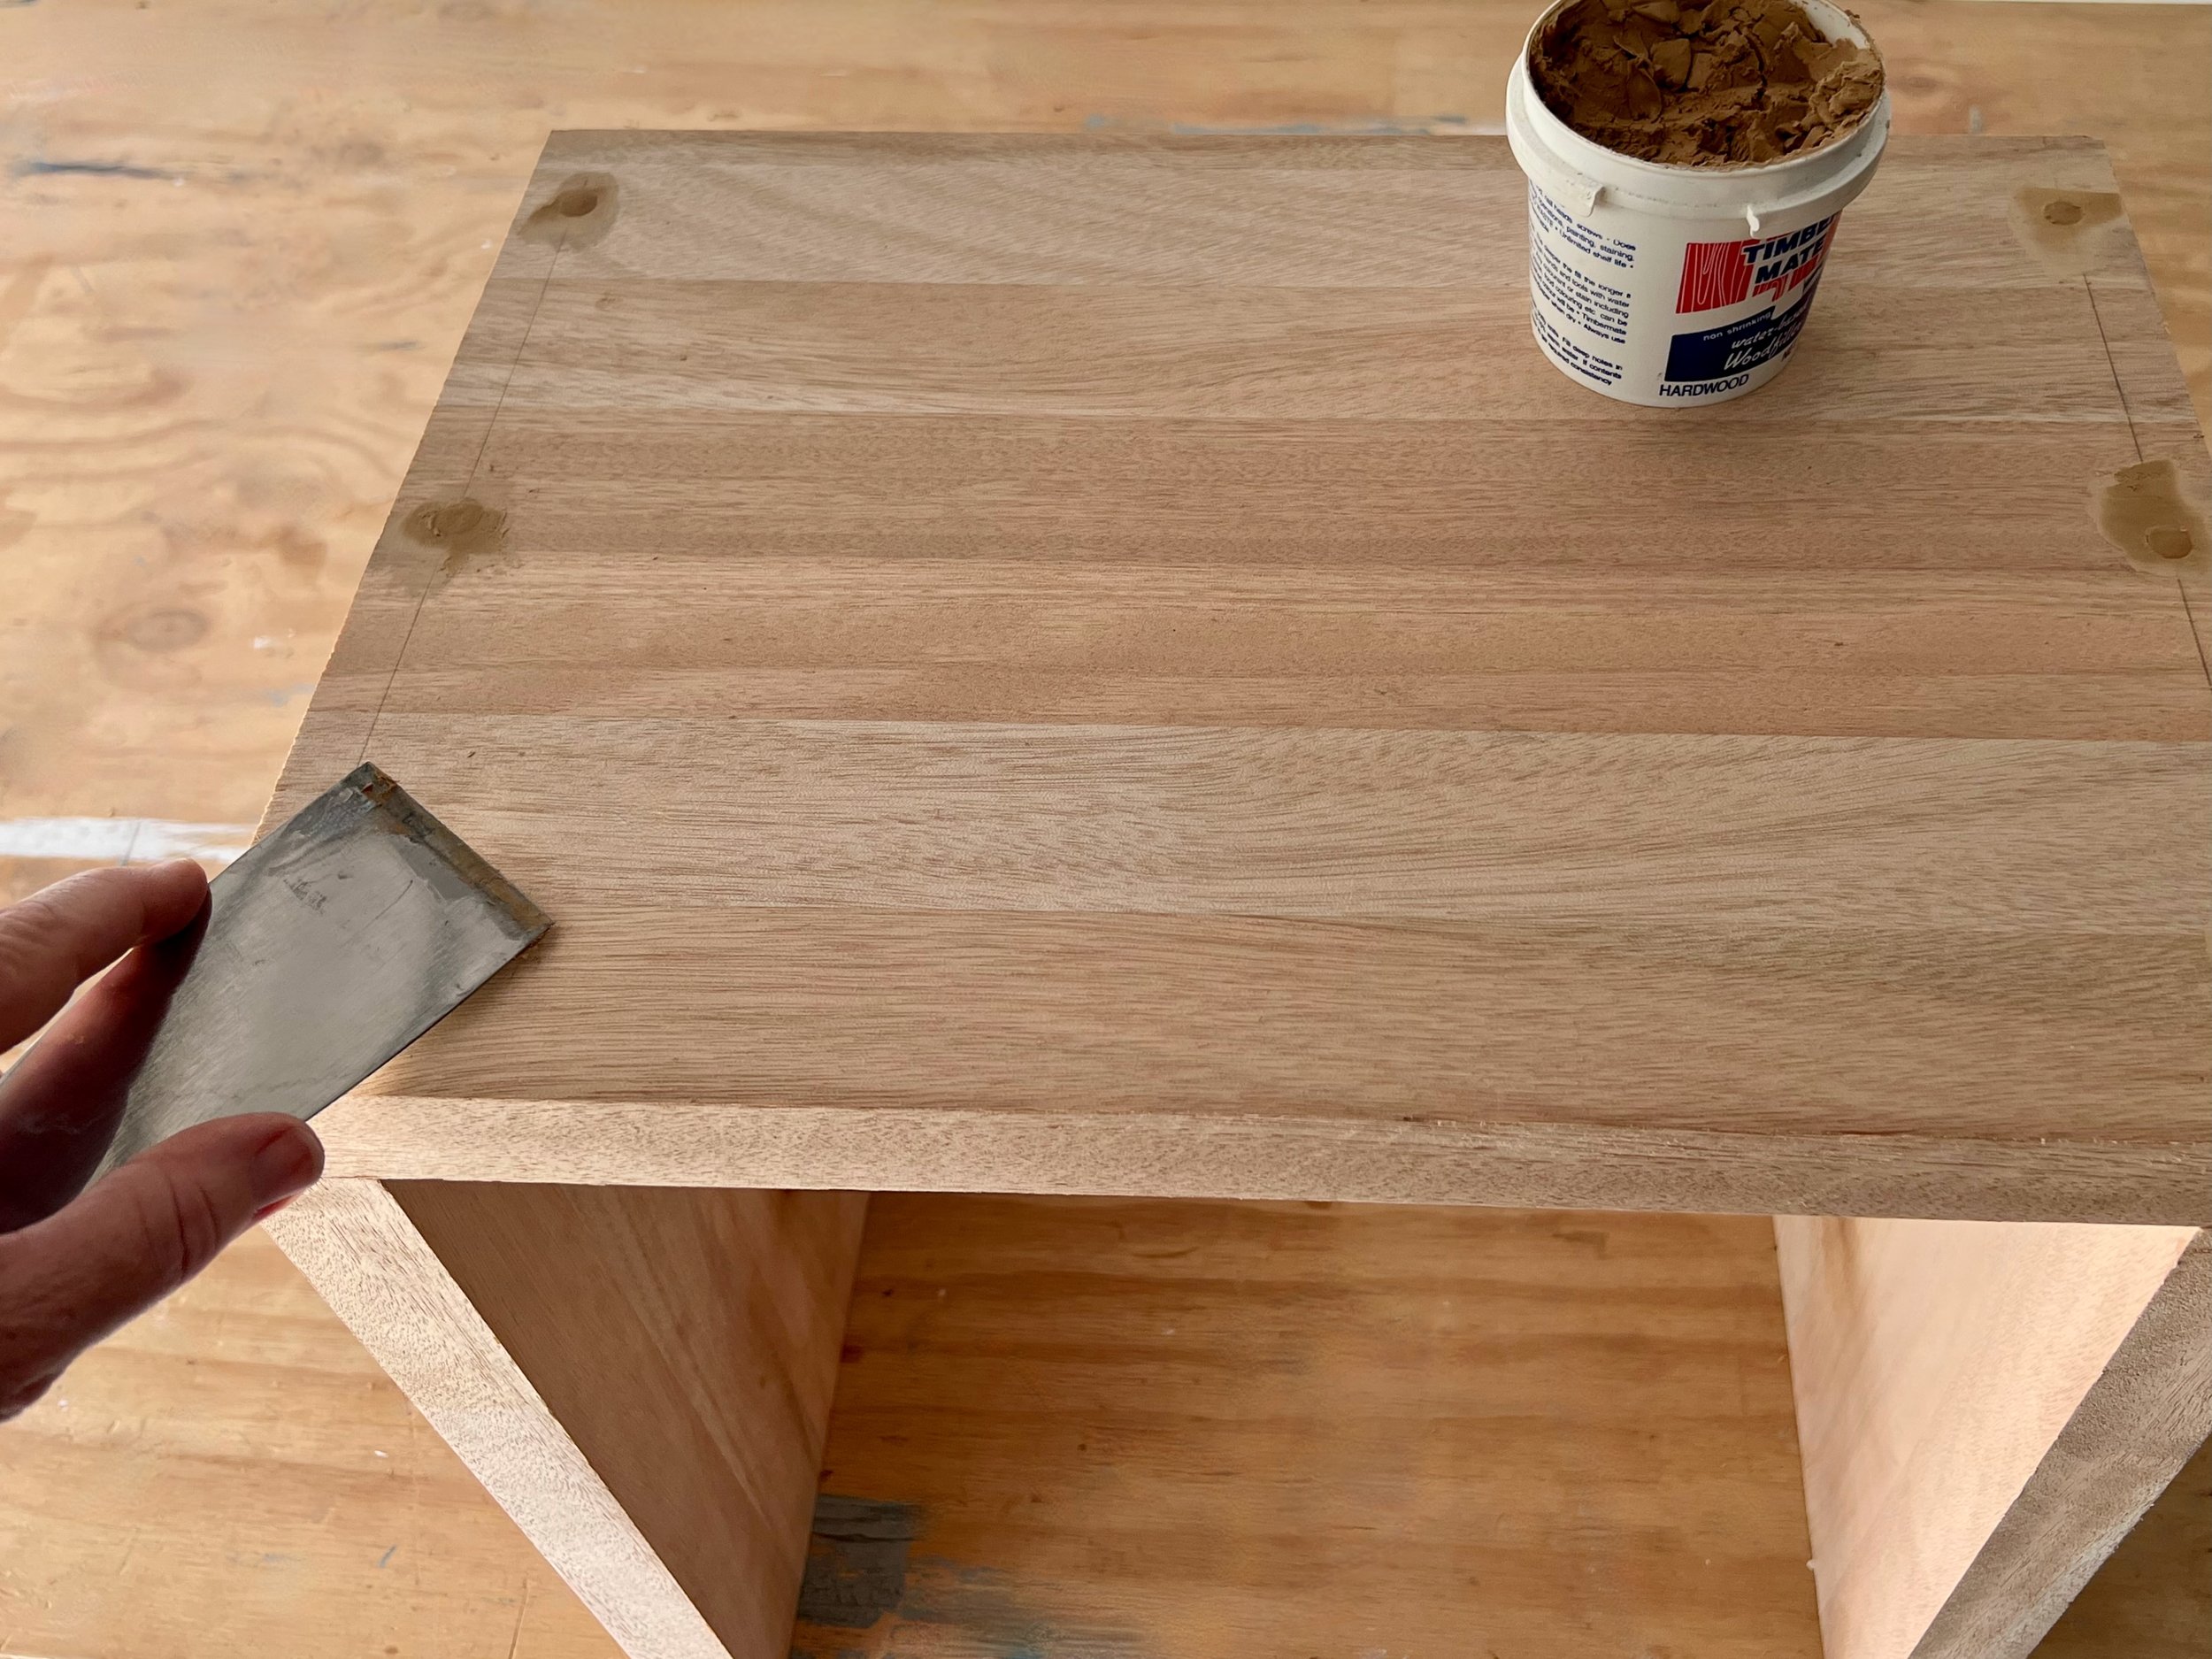
After sanding over the screws with 120-grit abrasive paper to remove any breakout, I used a scraper to smooth same-coloured filler into the holes and left it to dry.

Then I used a random orbital sander with a 120-grit disc to smooth away excess filler and remove any adhesive.
To round-over the sides, I used the trim router, working around the edges, beginning with the insides, then the outsides and around the top.
TIP Always have the tool on the right-hand side of the piece, moving it forward to trim.
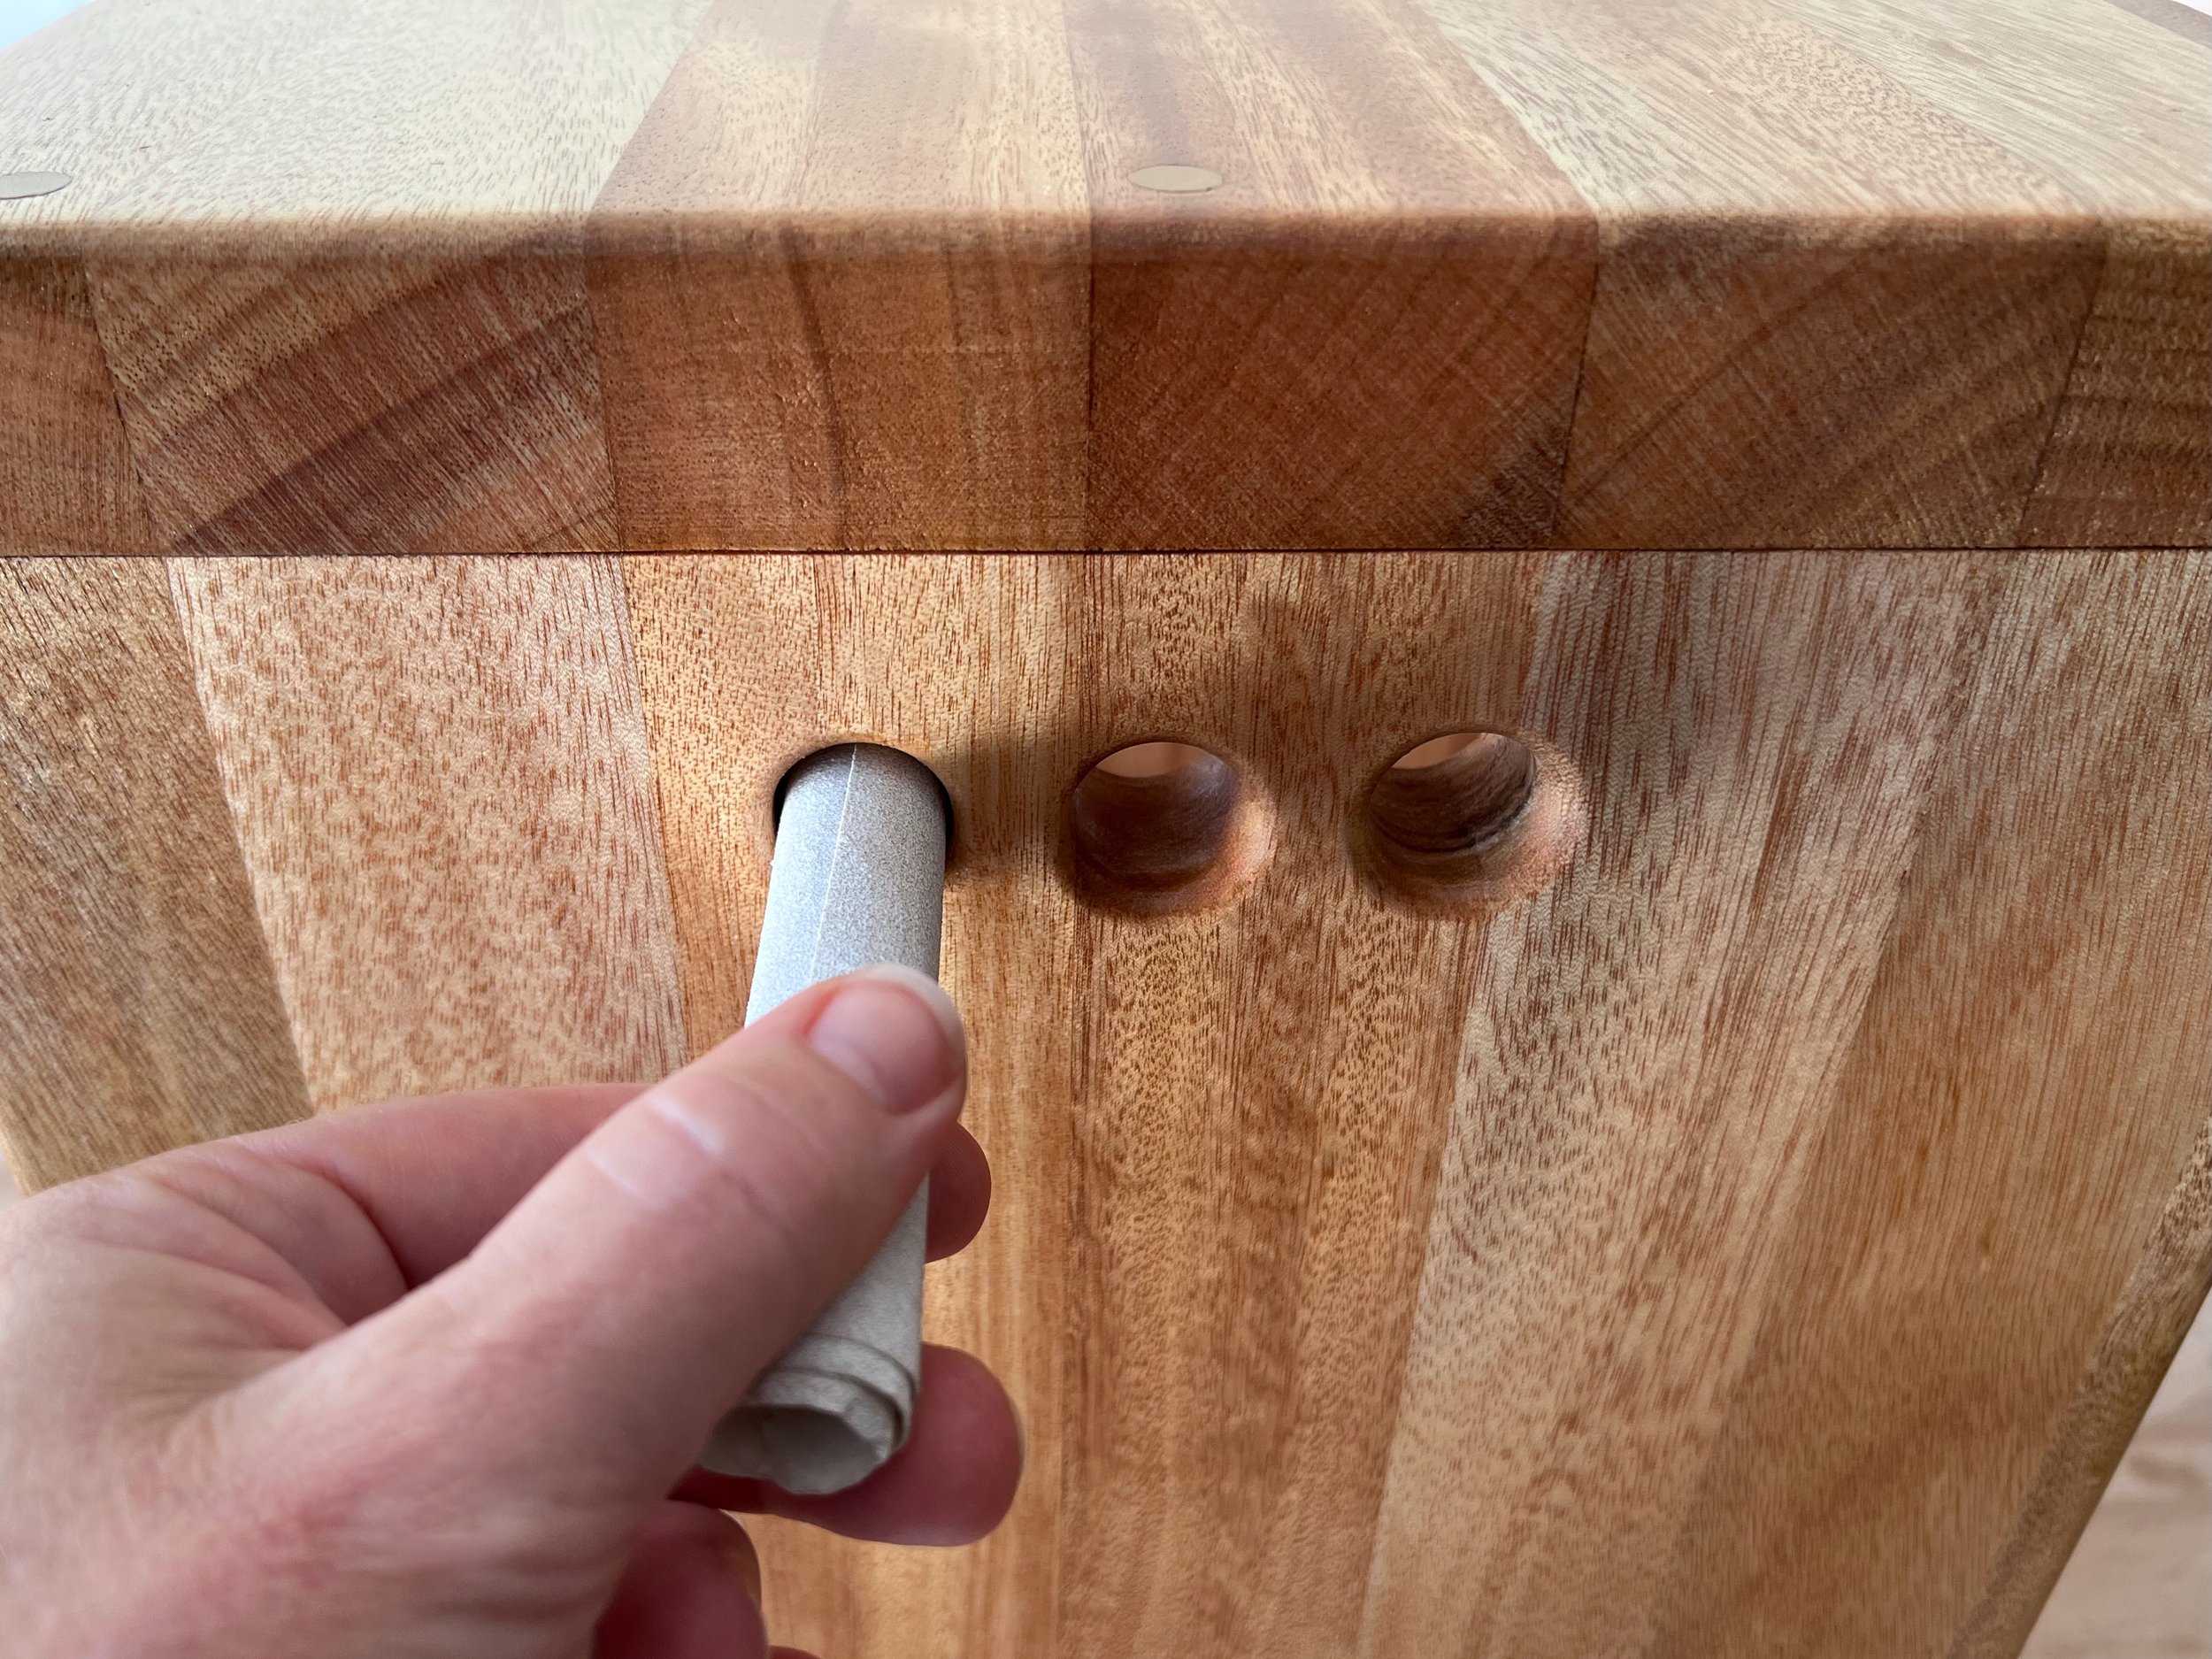
I rolled up abrasive paper to smooth inside the holes, from both sides, starting with 120-grit, then 180 and 240. For a silky finish all over, I used the sander with 180-grit, then 240, and finished with 400-grit using a sanding block to work over the edges and corners.
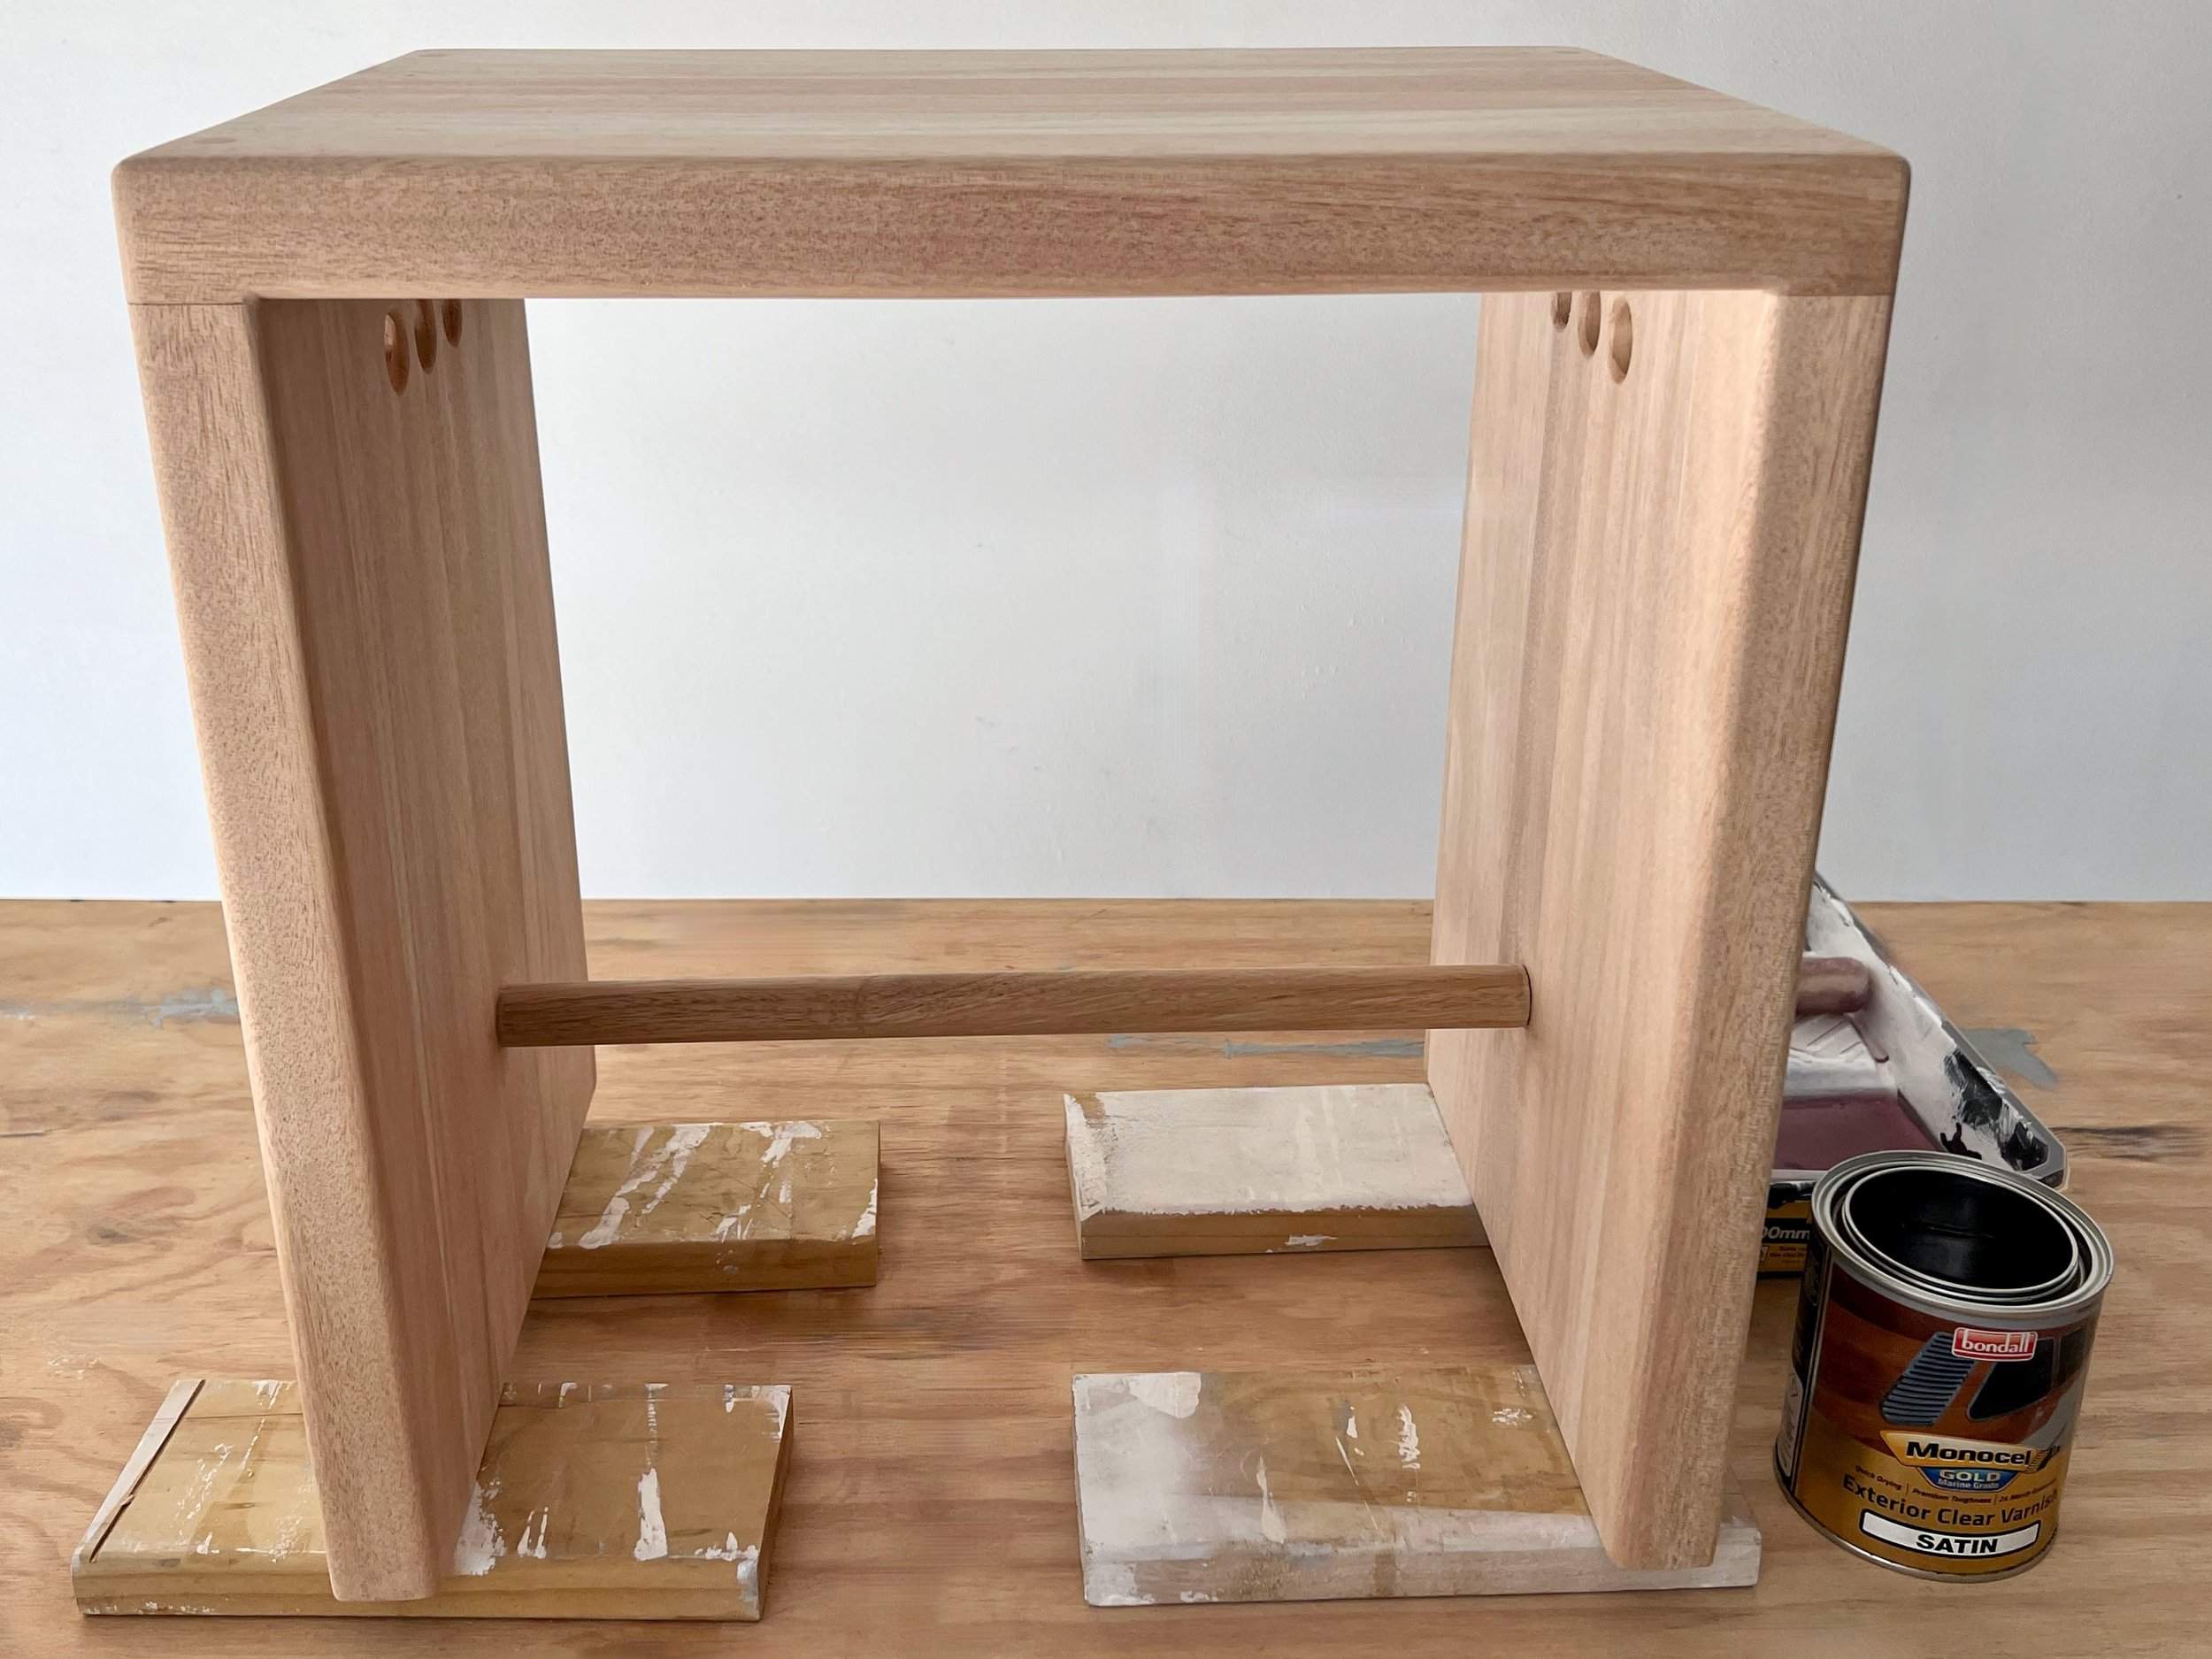
After wiping all over with a damp cloth to remove any dust, I applied a coat of Monocel Gold varnish in Satin with a mini mohair roller, leaving it to dry.
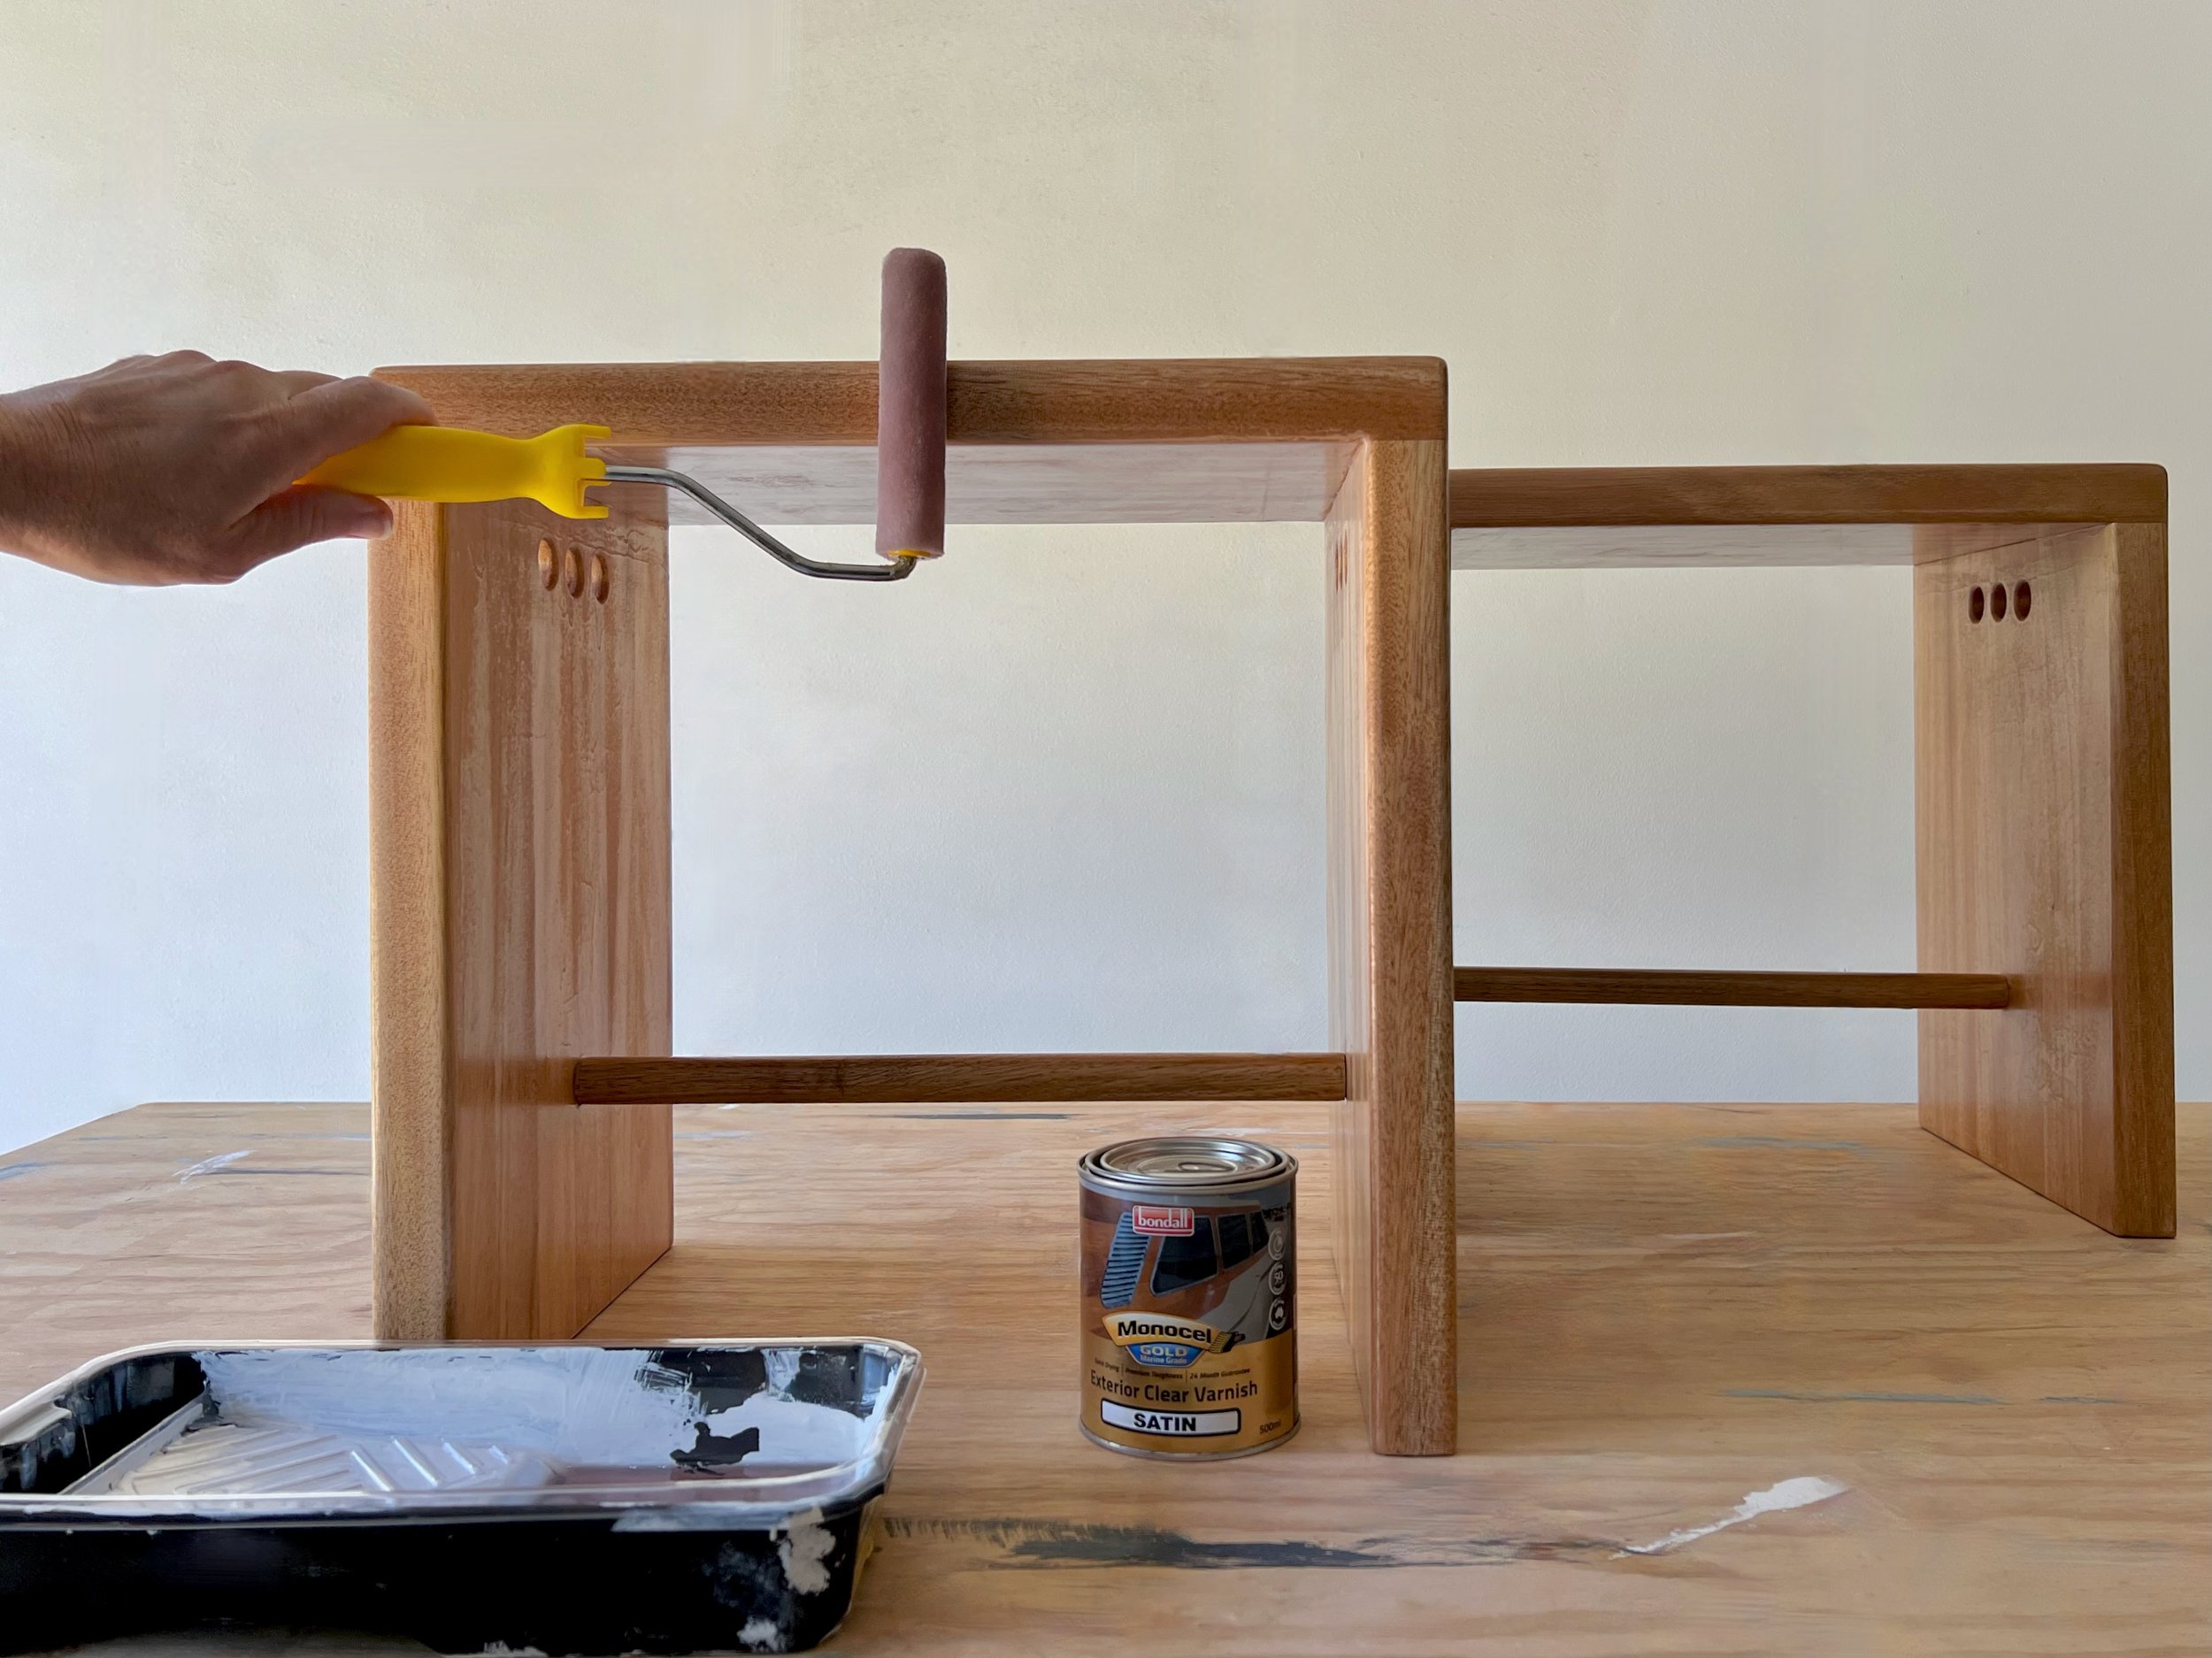
Then I lightly hand-sanded with 400-grit, wiped away the dust and applied a second coat.
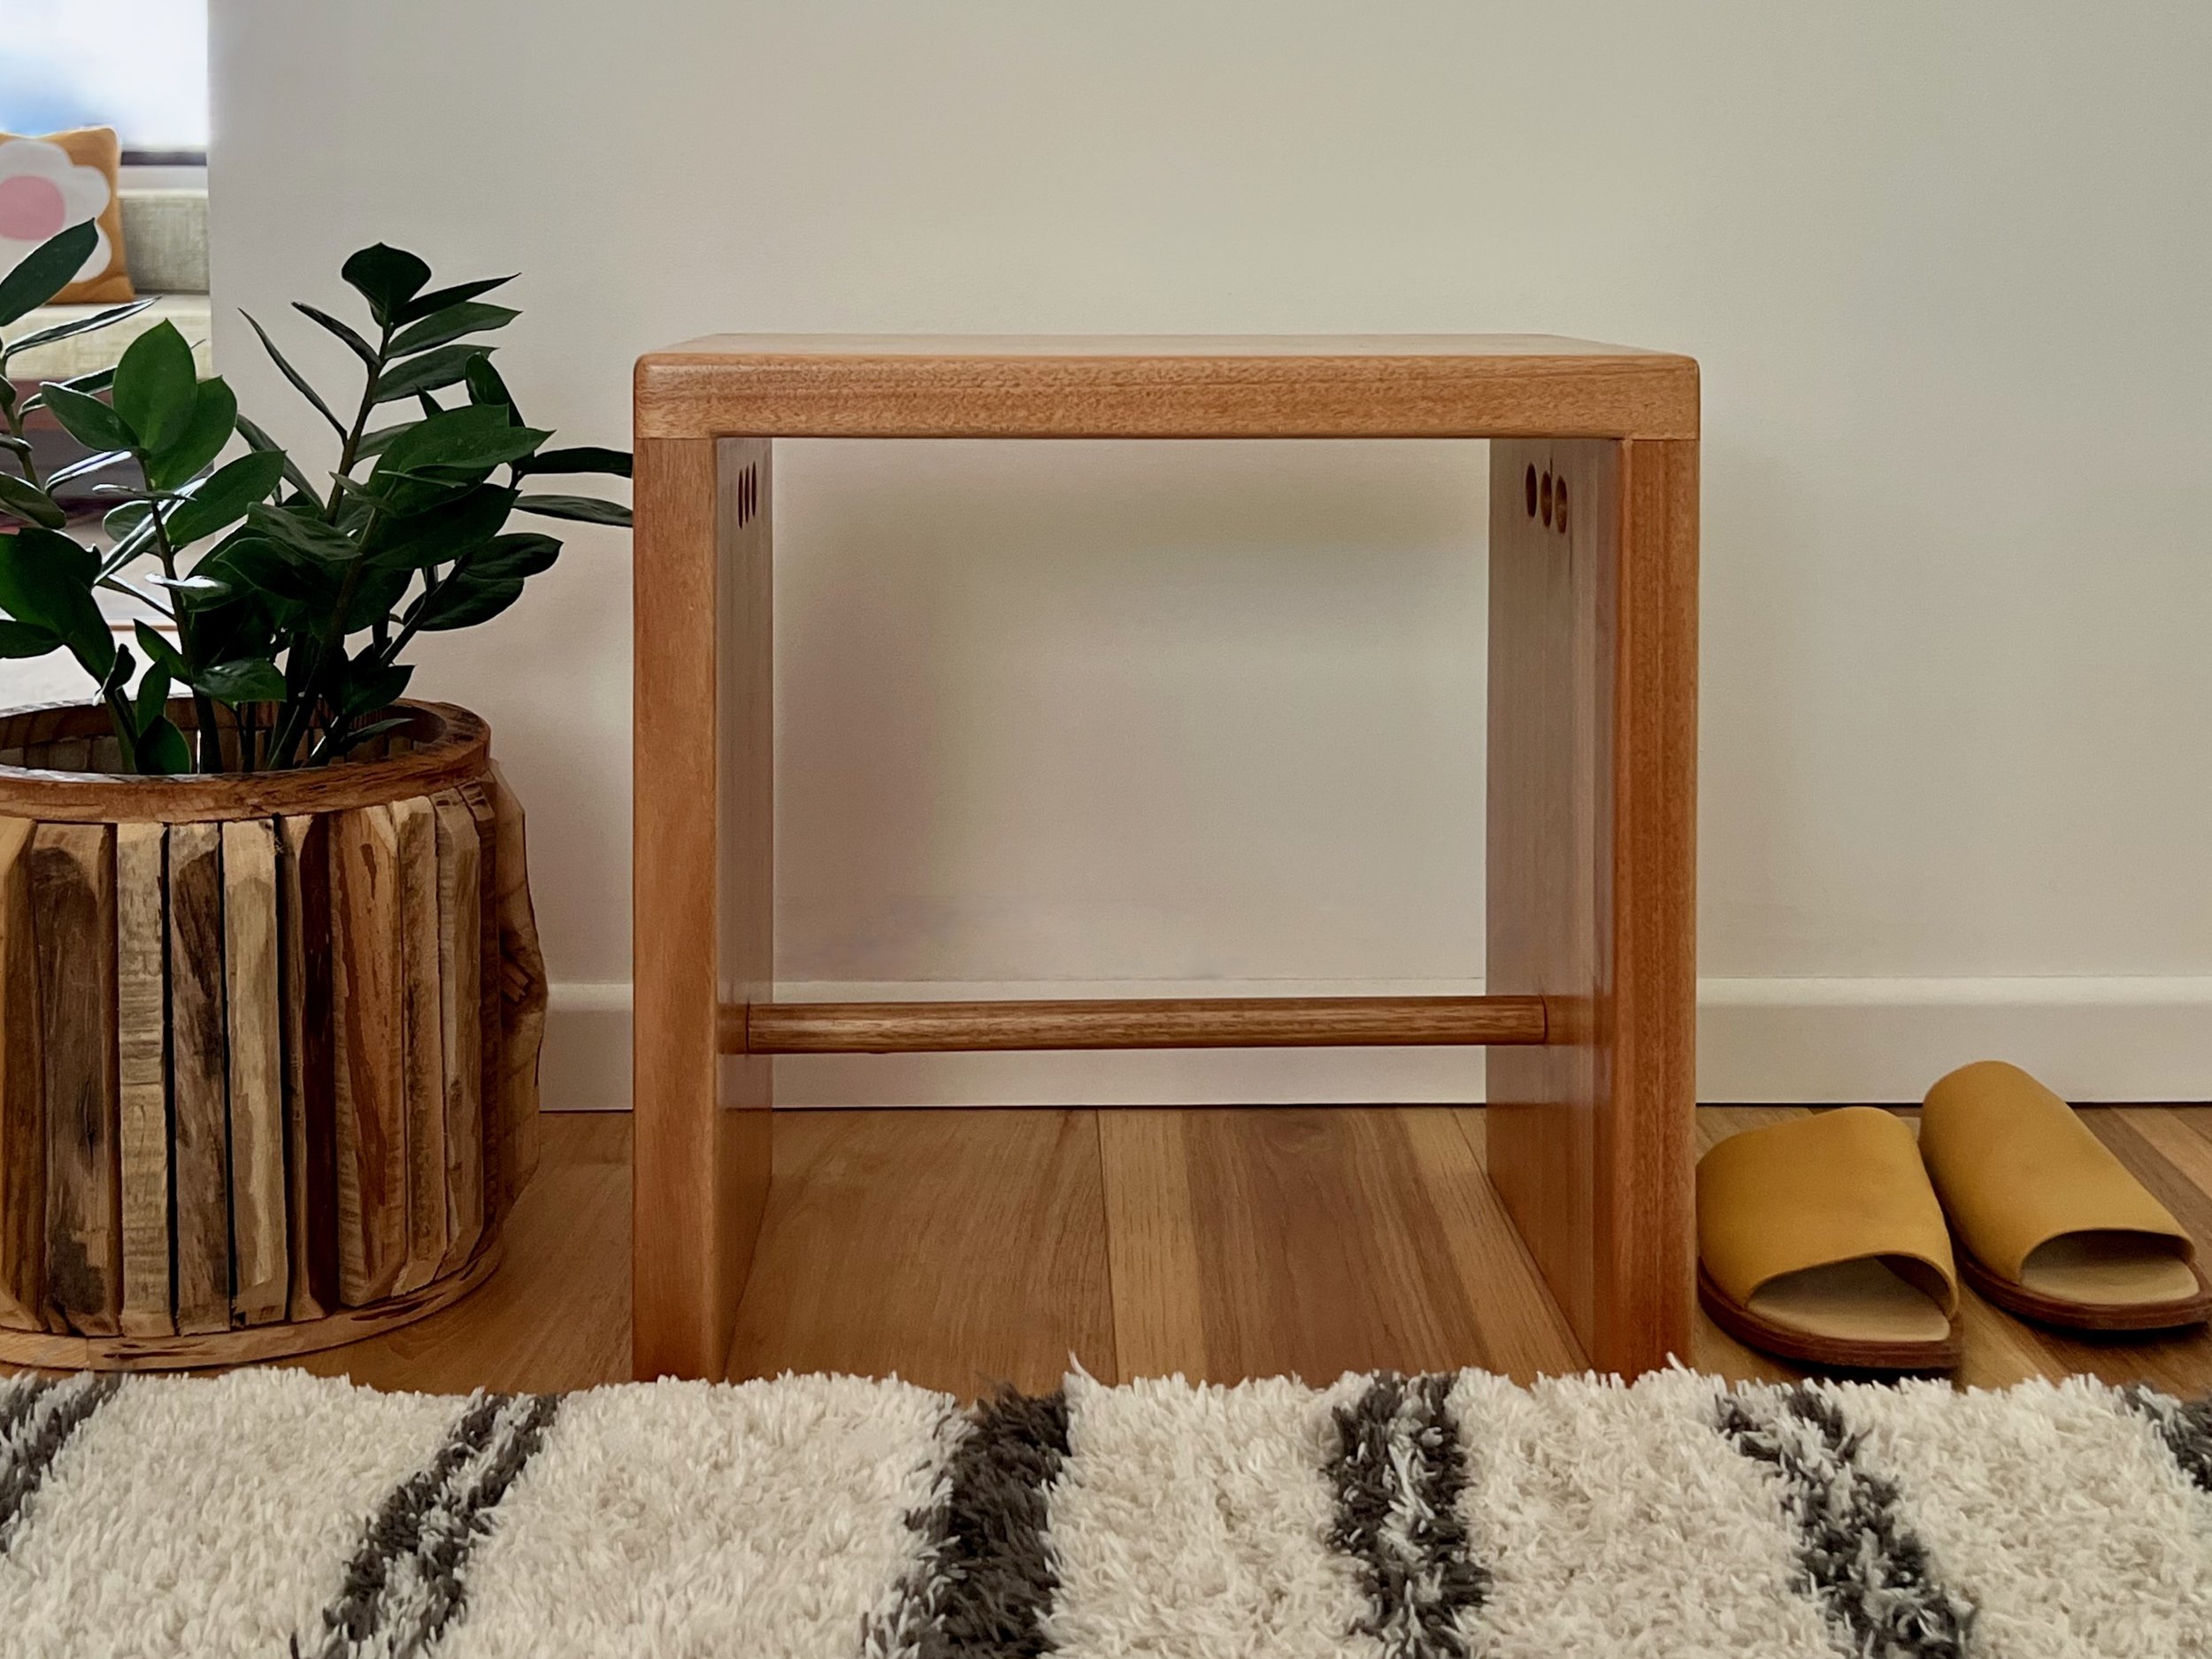
Stack, stand or sit on this multipurpose stool!

Will you be making this multipurpose piece?
Tag me on your project and follow more of my DIY journey on Instagram for tool tips, home improvement and simple building tutorials.