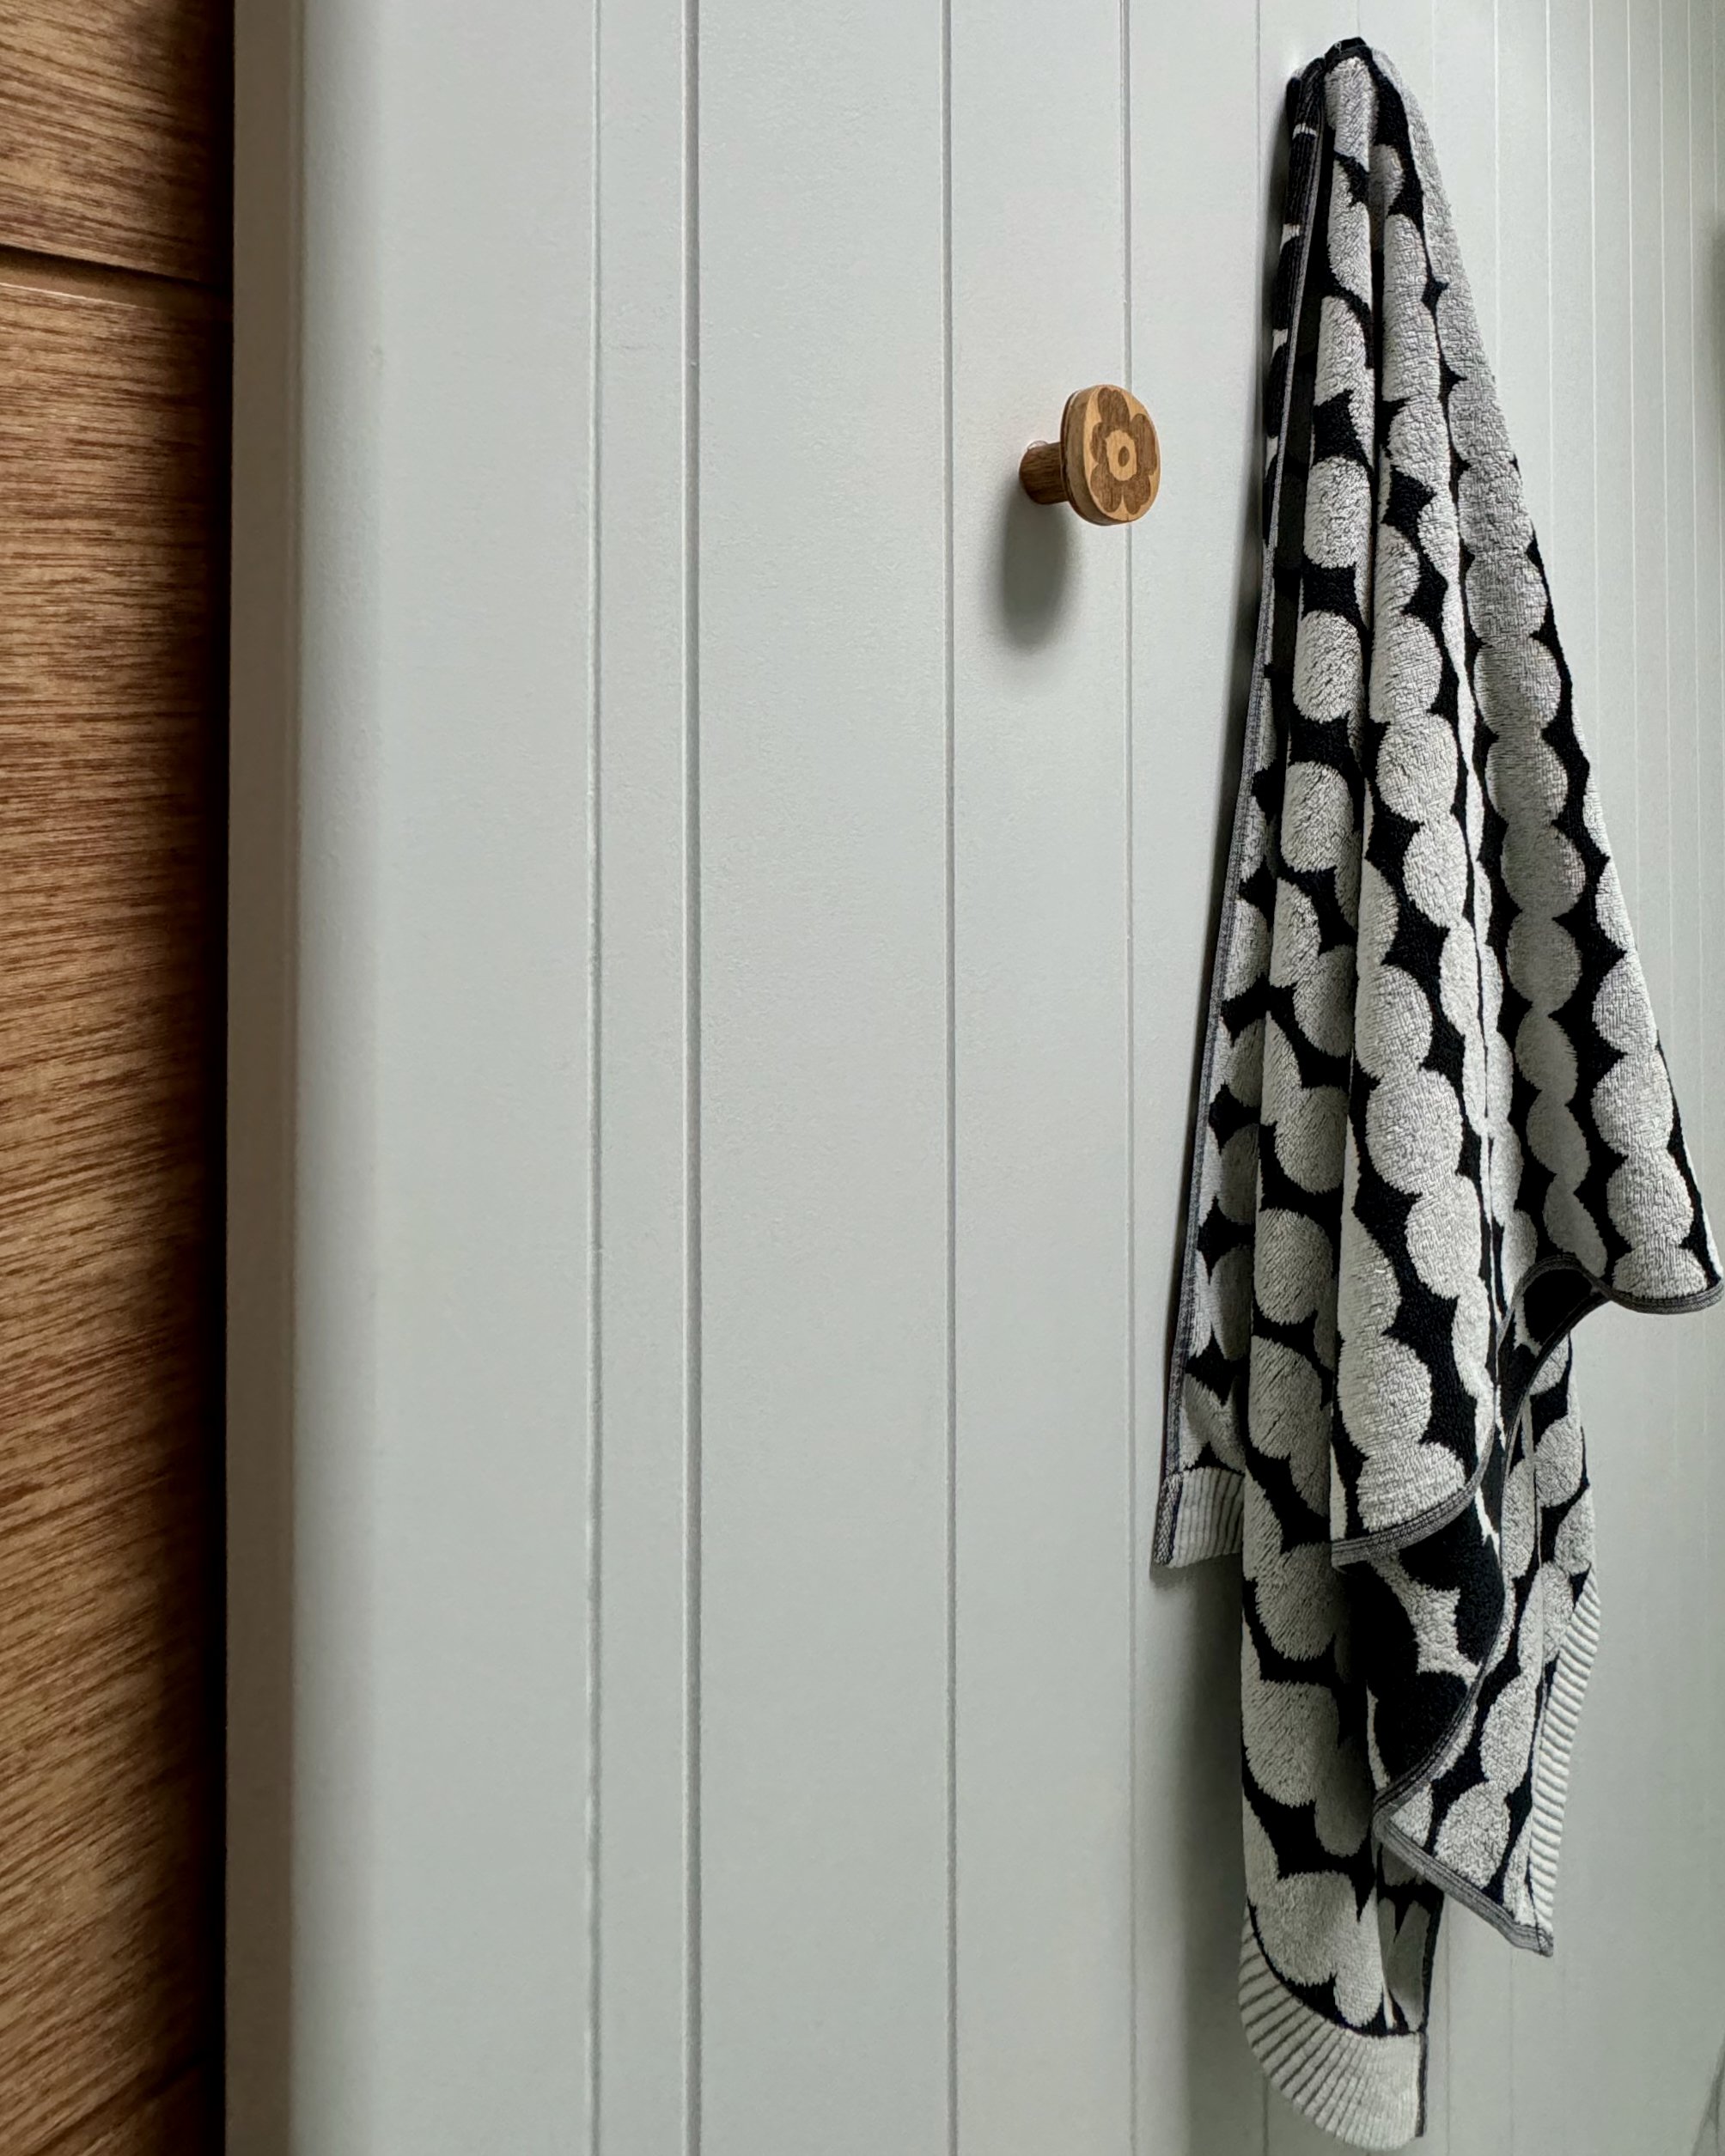
Handcrafted Towel Hooks
Alun Machin

I love adding a bespoke timber accents wherever I can and these handcrafted hooks take less space in the bathroom than towel rails.

Making them is addictive – I couldn’t stop at one! There’s a collection of wall-mounted hooks in my laundry, one next to my DIY outdoor shower and I’ve also attached them to a backing board as a hanging rack in the bathroom…
“I make the hooks from Tasmanian oak with 70mm-diameter fronts, which I’ve found is the perfect size to hang a towel from.”

Each hook is made by cutting a circle with a hole saw, gluing on a back cut from dowel, then assembling by screwing it directly into the wall or onto a backing board. The hole at the front is then filled and the hook sealed with varnish.

CUT THE FRONT
I set up my drill press with a 70mm hole saw, clamping a piece of plywood to the plate to prevent breakout under the cut. Then I drilled through dressed 12mm x 90mm Tasmanian oak to cut a circle.
TIP I used a drill press, but you could use a drill, clamping the work securely to a workbench. While you can buy an inexpensive hole saw set, I recommend adding to your collection by investing in a good one for a neater, safer finish.

CUT THE BACK
I trimmed 25mm-diameter Tasmanian oak dowel into a 20mm-long piece.
TIP I used a mitresaw to cut the dowel, making a mark on the base plate as a guide to cut more than one at the same length. You could also use a handsaw with mitre box.

COUNTERSINK THE FRONT
A quick-grip clamp held the front while I countersunk the centre hole so the screw finishes below the surface. I also made a 5mm-deep hole into the back piece to line up the screw during assembly.
TIP Use an 8G combination countersinking bit and position an offcut underneath to protect the workbench while drilling.

SAND ALL OVER
I positioned a hand-sanding block with 180-grit abrasive paper on the bench to smooth away any breakout and round-over the edges slightly.

ASSEMBLE THE HOOK
I clamped the back, dabbed Bondcrete adhesive onto the end-grain, then positioned the front and secured with a screw through the centre.
TO MAKE A WALL HOOK use a 70mm-long timber screw, checking it’s long enough to secure directly into a wall stud.
TO MAKE A RACK use a 40mm screw to secure through the hooks and attach to a backing board.

TO MAKE A RACK
I trimmed the 12mm offcut from the fronts to 850mm long, to fit the wall space behind the bathroom door. I sanded it all over, then marked the centre and 150mm in from the ends to drill shallow 3mm holes. After applying adhesive over the holes, I positioned each hook and secured the screws.

FILL THE HOLES
I sanded over the front of the hooks to remove any breakout and smoothed into the holes with timber filler, leaving it to dry for half an hour. After sanding off the excess, I wiped away the dust with a damp cloth.
TIP If you make a wall hook without a backing, attach it to the wall first, then fill the hole and sand before varnishing.

apply varnish
My go-to varnish for any timber in a wet area or outside is marine-grade Monocel Gold, which is a great protector against steam and moisture. I applied two coats with a brush, leaving to dry after each.
FOR A WALL HOOK mask the wall behind with painter’s tape to prevent smudging.
FOR A RACK seal all over before attaching to the wall.

MOUNT ON THE WALL
To hang a rack, I used a 600mm-long picture hanging rail, with one part that attaches to the wall and the other to the back of the rack – the length helps distribute the weight across the wall.
TIP If possible, screw straight into wall studs, otherwise use the supplied plasterboard anchors. Also supplied is a mini spirit level to help keep the rail straight while installing.

Will you be adding handcrafted accents to your bathroom?
Tag me on your project and follow more of my DIY journey on Instagram for tool tips, home improvement and simple building projects.