Kid’s hanging robe
Alun Machin
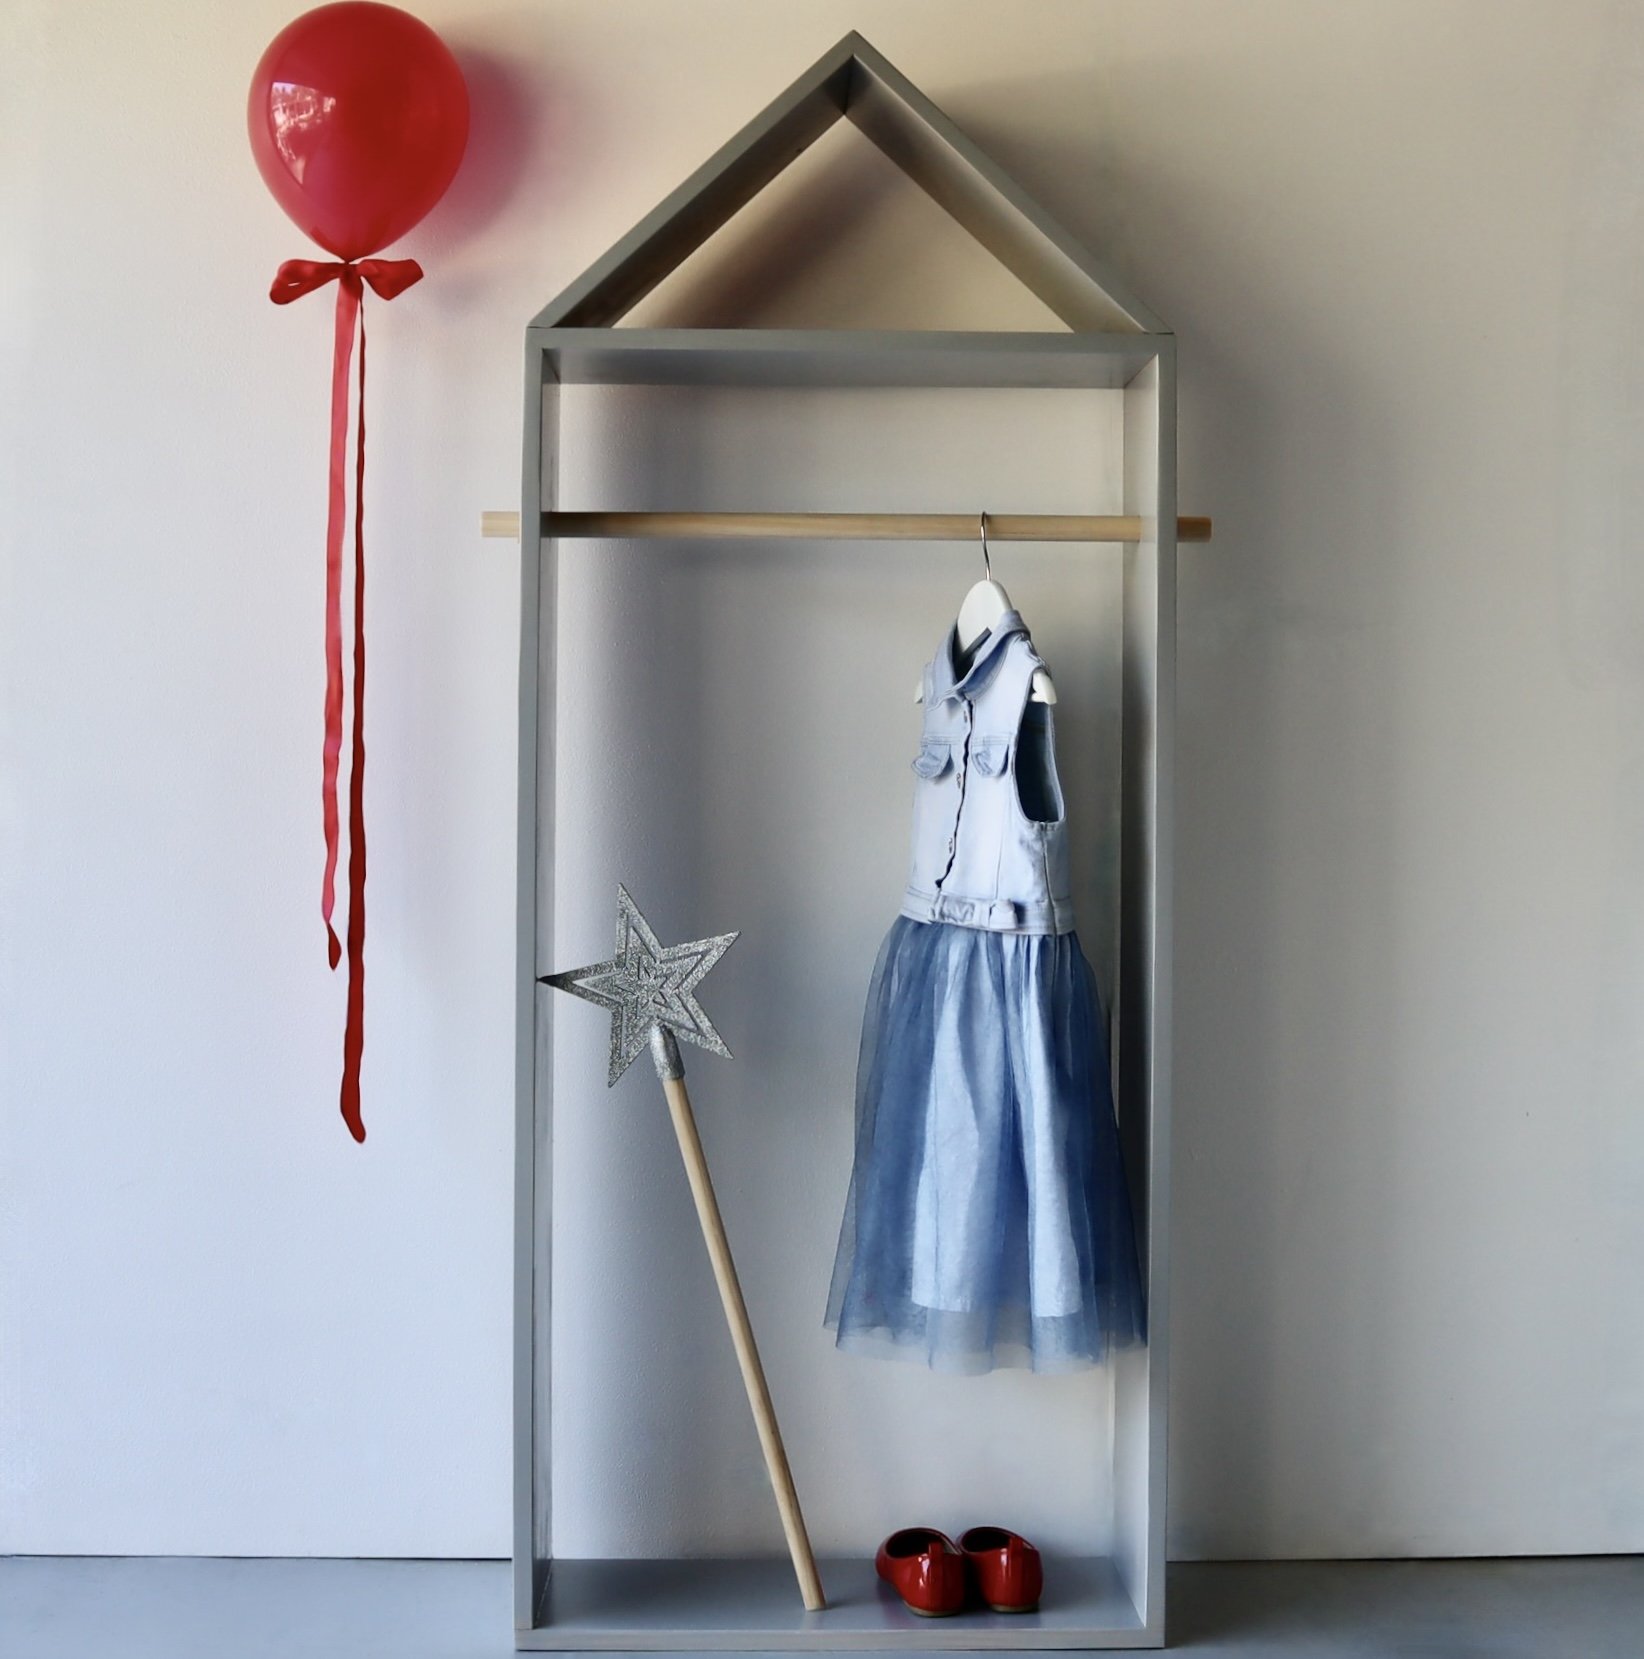
I love designing and building storage that’s practical while injecting whimsey into a space, and this house-shaped robe ticks all the boxes for a kid’s room.

I’ve used pine because it’s lightweight and easy to work with. The construction starts with a simple butt-jointed box, with two bevelled pieces joined for the roof. The end result is 1500mm high, 600mm wide and 235mm deep.
TIP While you could use a handsaw, making the 45° cuts is easier and more accurate with a sliding mitre saw.
The lovely finish is achieved with Monocel Stain & Varnish in Grey, which seals and protects from wear and tear. It’s a nice contrast to the raw-timber rail and dowel detail on the sides. One litre of varnish is enough for a couple of coats – each deepens the colour to a lovely blue-grey finish.
DIY MATERIALS
Timber filler with spatula
25mm-diameter dowel cut to 700mm long
60mm screws with anchors
DIY TOOLS
Measuring tape and marker
Drill with driver, 8mm and 8g countersinking bits
Random orbital sander with 180-grit sanding disc

From two lengths of pine, I cut two 600mm-long pieces to be the top and base of the box, keeping the offcuts for the bevelled roof pieces.
TIP The remaining 1.2m lengths of pine are for the sides and don’t require cutting.

To cut the roof pieces, I set the mitre saw to cut 45° vertically and trimmed one end of each offcut. Then I measured from the longest point to mark 410mm and cut the opposite end, checking the cuts were both angled inwards.
TIP The roof pieces should measure 410mm along the top from point to point.

To make holes for the rail, on the side pieces I marked 117.5mm from the edges to find the centre, and 150mm from the top. Then I used a 25mm holesaw to drill halfway through, flipping to finish from the other side to prevent the core from wedging in the holesaw.
TIP Position offcuts underneath to protect the work surface while drilling.

To assemble the box, I positioned the side pieces flush against the top and base, predrilling the screw holes with an 8g countersinking bit, positioning them 10mm in from the edge, 40mm from the sides, and in the centre. I applied adhesive along the end-grain and secured through the top and base with 40mm screws.
TIP Have a damp cloth to wipe away excess adhesive as soon as it squeezes out.

To assemble the roof, I positioned the bevelled ends together to create a right angle, countersinking three holes 10mm in from the edge, 40mm from the sides, and in the centre. I applied adhesive and secured with 40mm screws.
TIP Position the drill on the marks, holding it straight to ensure the screws go through both pieces.

I positioned the roof against the box and countersunk the holes on both sides, 20mm up and 60mm in from the edges, securing with adhesive and screws.
TIP To prevent slipping, angle the drill toward the centre of the robe to make a 3mm-deep hole, then angle the drill down towards the box to make a hole deep enough to cover the screw heads.
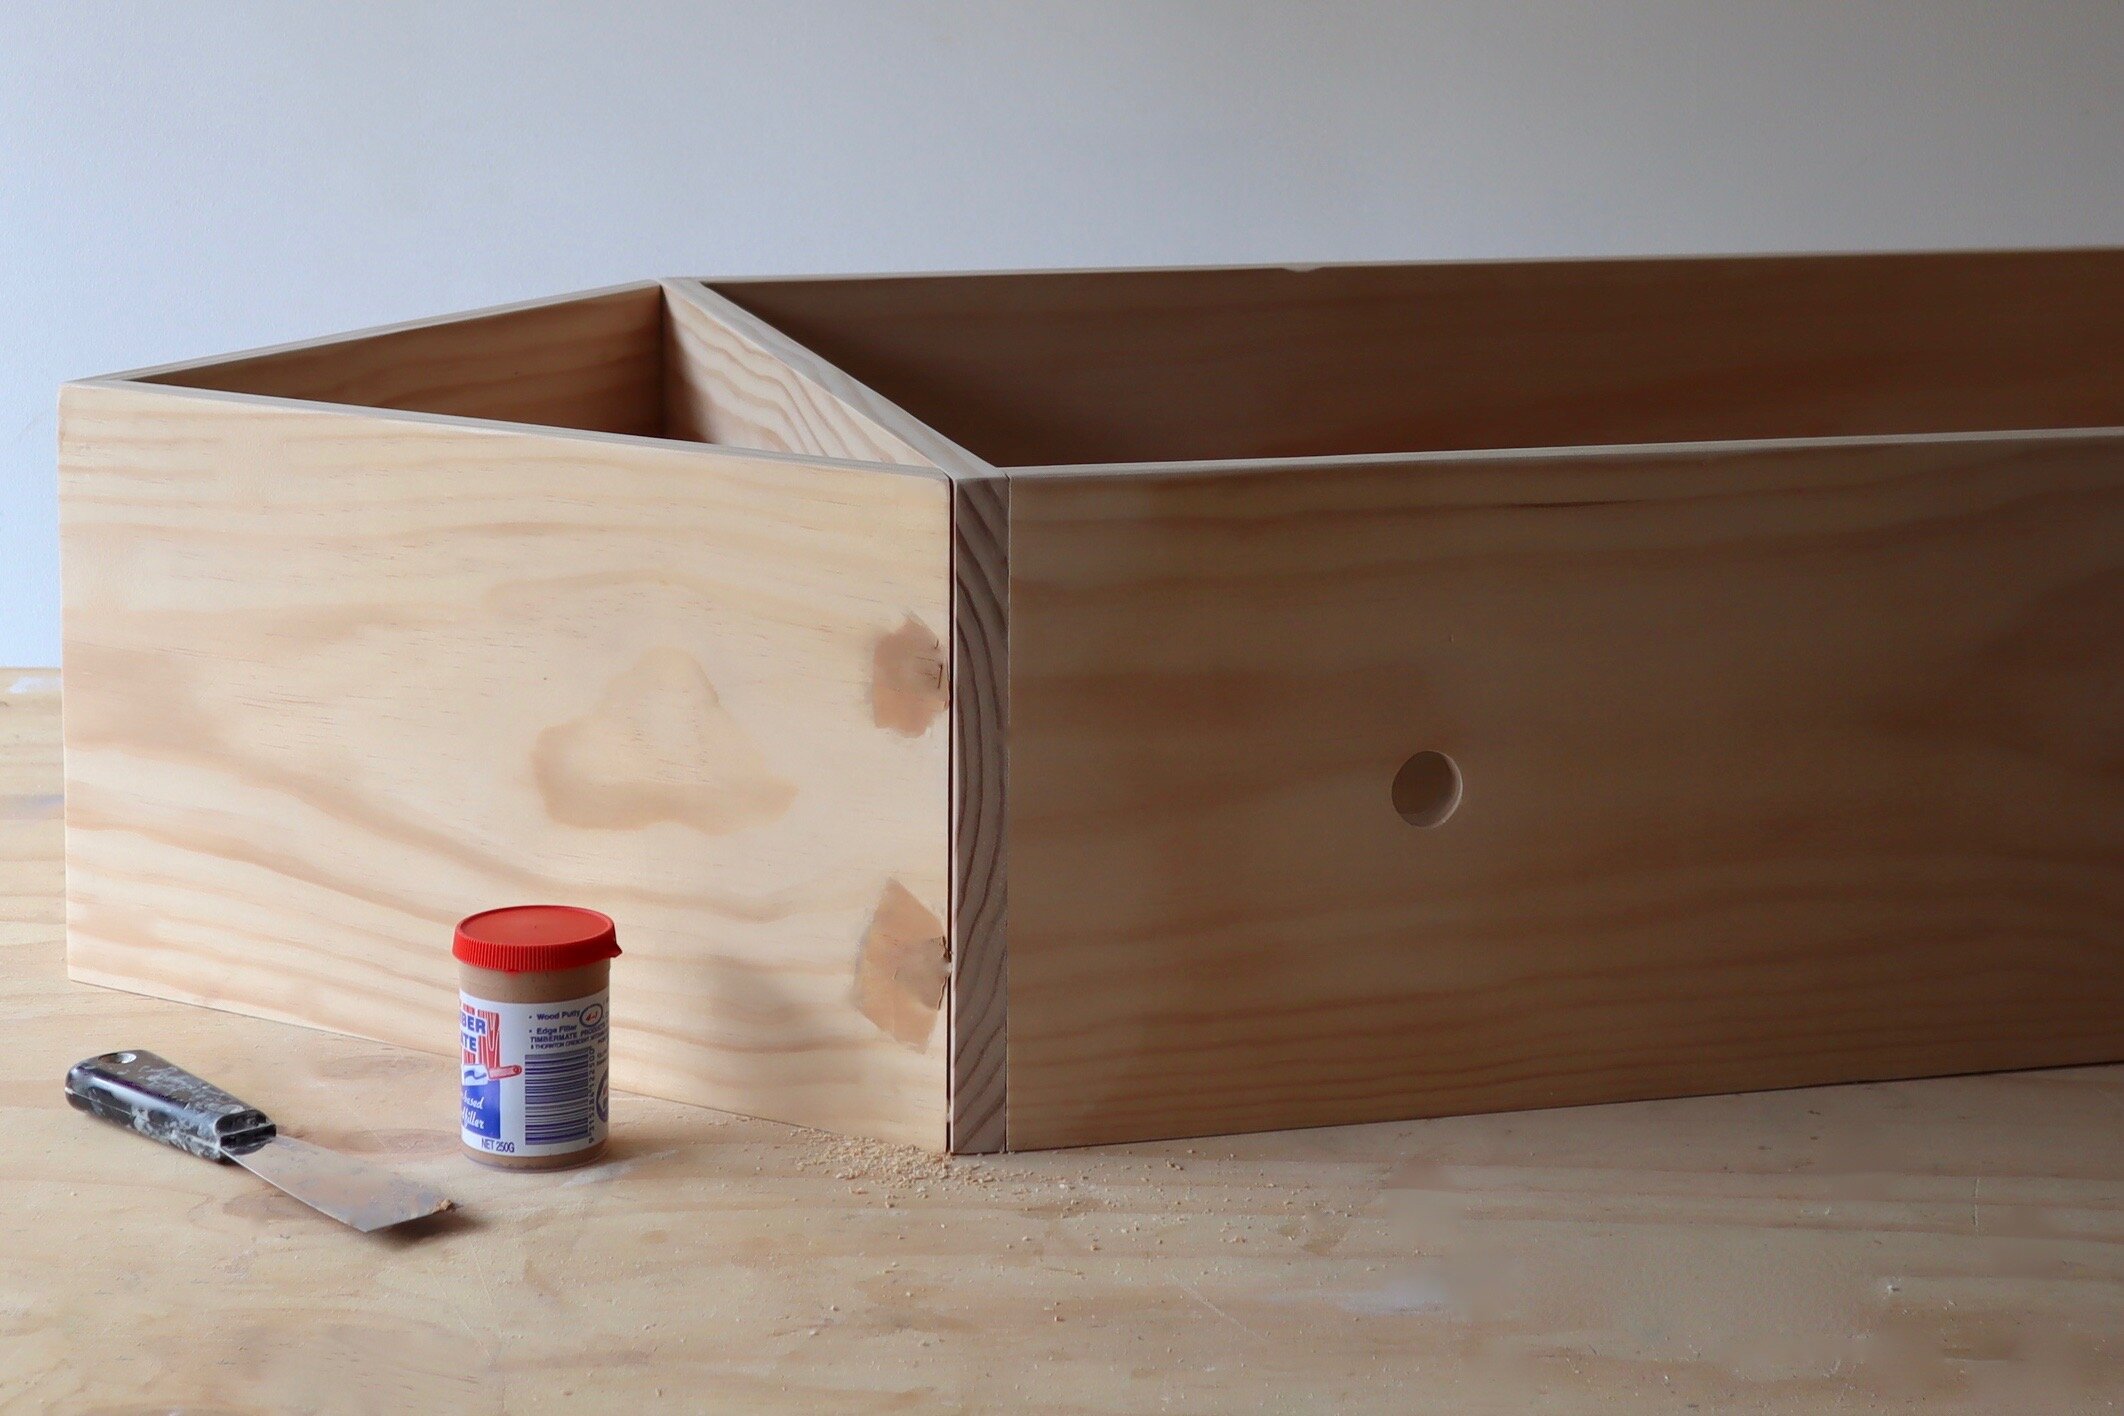
After sanding over the countersunk screws to remove any breakout, I applied timber filler with a spatula, left it to dry, then sanded the robe all over to smooth the filler and round over the edges slightly.
TIP Rounding over the bevelled edges helps even out the edges and point of the roof.

To remove any dust I wiped all surfaces with a damp cloth, then applied a light coat of Monocle Stain & Varnish in Grey using a mini mohair roller, leaving it to dry for a couple of hours before applying a second coat and leaving to dry overnight.
TIP To seal into the corners, I pushed the tip of the roller along the joins then rolled over the surrounding areas to mop up any drips.

To make the rail, I marked 30mm from the ends of the 25mm dowel, drilled through with an 8mm bit, then sanded over the holes. I tapped the rail through one side of the box and through the other, then tapped 8mm fluted dowels into the holes either side.
TIP If your rail doesn’t slide through the holes smoothly, roll up a discarded sanding disc to sand inside and widen them slightly.

To secure the robe to a wall, I attached two L brackets underneath the top of the box with 15mm screws, then secured through the brackets and into the wall using 60mm screws with anchors.
TIP Make sure your brackets protrude enough to allow for the depth of the skirting board and use plasterboard or masonry anchors to suit your wall type.

To install a shoe shelf, add two rails (the same as the hanging rail), using the 25mm holesaw to drill two holes into the sides, 30mm in from the edges and 150mm up from the base.
TIP To keep the frame natural, seal it with a clear varnish or furniture oil before adding the rails.

Is it time to spruce up the kids’ rooms?
Tag me on your project and follow more of my DIY journey on Instagram for tool tips, home improvement and simple building projects.