Bird Nesting Box
Alun Machin

Installing a weatherproofed nesting box in the backyard is a nice way to observe local birdlife. It also provides a much-needed alternative to natural hollows in trees for many species including owls, kookaburras, parrots and pardalotes.
TIP While there are lots of pretty native birds, some are over-bred and don’t need encouragement to nest, so get in touch with your council to check which species need homes.

Once you know the species, go to Birds in Backyards or Nest Box Tales to find out what size home suits them. There’s lots of info on how they breed and where to install the nesting boxes.
Most boxes slope forward, with an overhanging roof to shelter the window opening from rain. Many also require a ladder of shallow grooves on the outside for birds to grip while feeding, with the same inside so baby birds can climb out.
“This nesting box is designed is for the Grey Strike-Thrush that inhabits most parts of Australia (and our backyard), but it can be adapted to suit different species.”

The box is weatherproofed by using 12mm-thick marine plywood for the base, finished with Monocel Furniture Oil. I’ve used 18mm-thick hardwood for the roof, spacer and fixing plate at the back, with the roof sealed in Monocel Stain & Varnish in Grey for extra moisture protection.
To avoid corrosion, choose stainless steel or galvanised screws and nails. Solid brass hinges and screws are also rustproof, although avoid brass-coated.
TIP There’s enough material to make two boxes. You could use also 18mm hardwood offcuts for the roof and fixing plate instead of buying a full panel.

DIY MATERIALS
12mm x 1220mm x 610mm marine plywood panel
Offcuts from 18mm x 1200mm x 600mm hardwood timber panel
30mm x 2mm galvanised bullet head nails
Mini mohair roller with tray
DIY TOOLS
Tape measure and pencil
Circular saw with straight edge
Multitool with saw blade or jigsaw
Drill with driver, 2mm and 4mm bits
Cloth
180-grit abrasive paper with sanding block
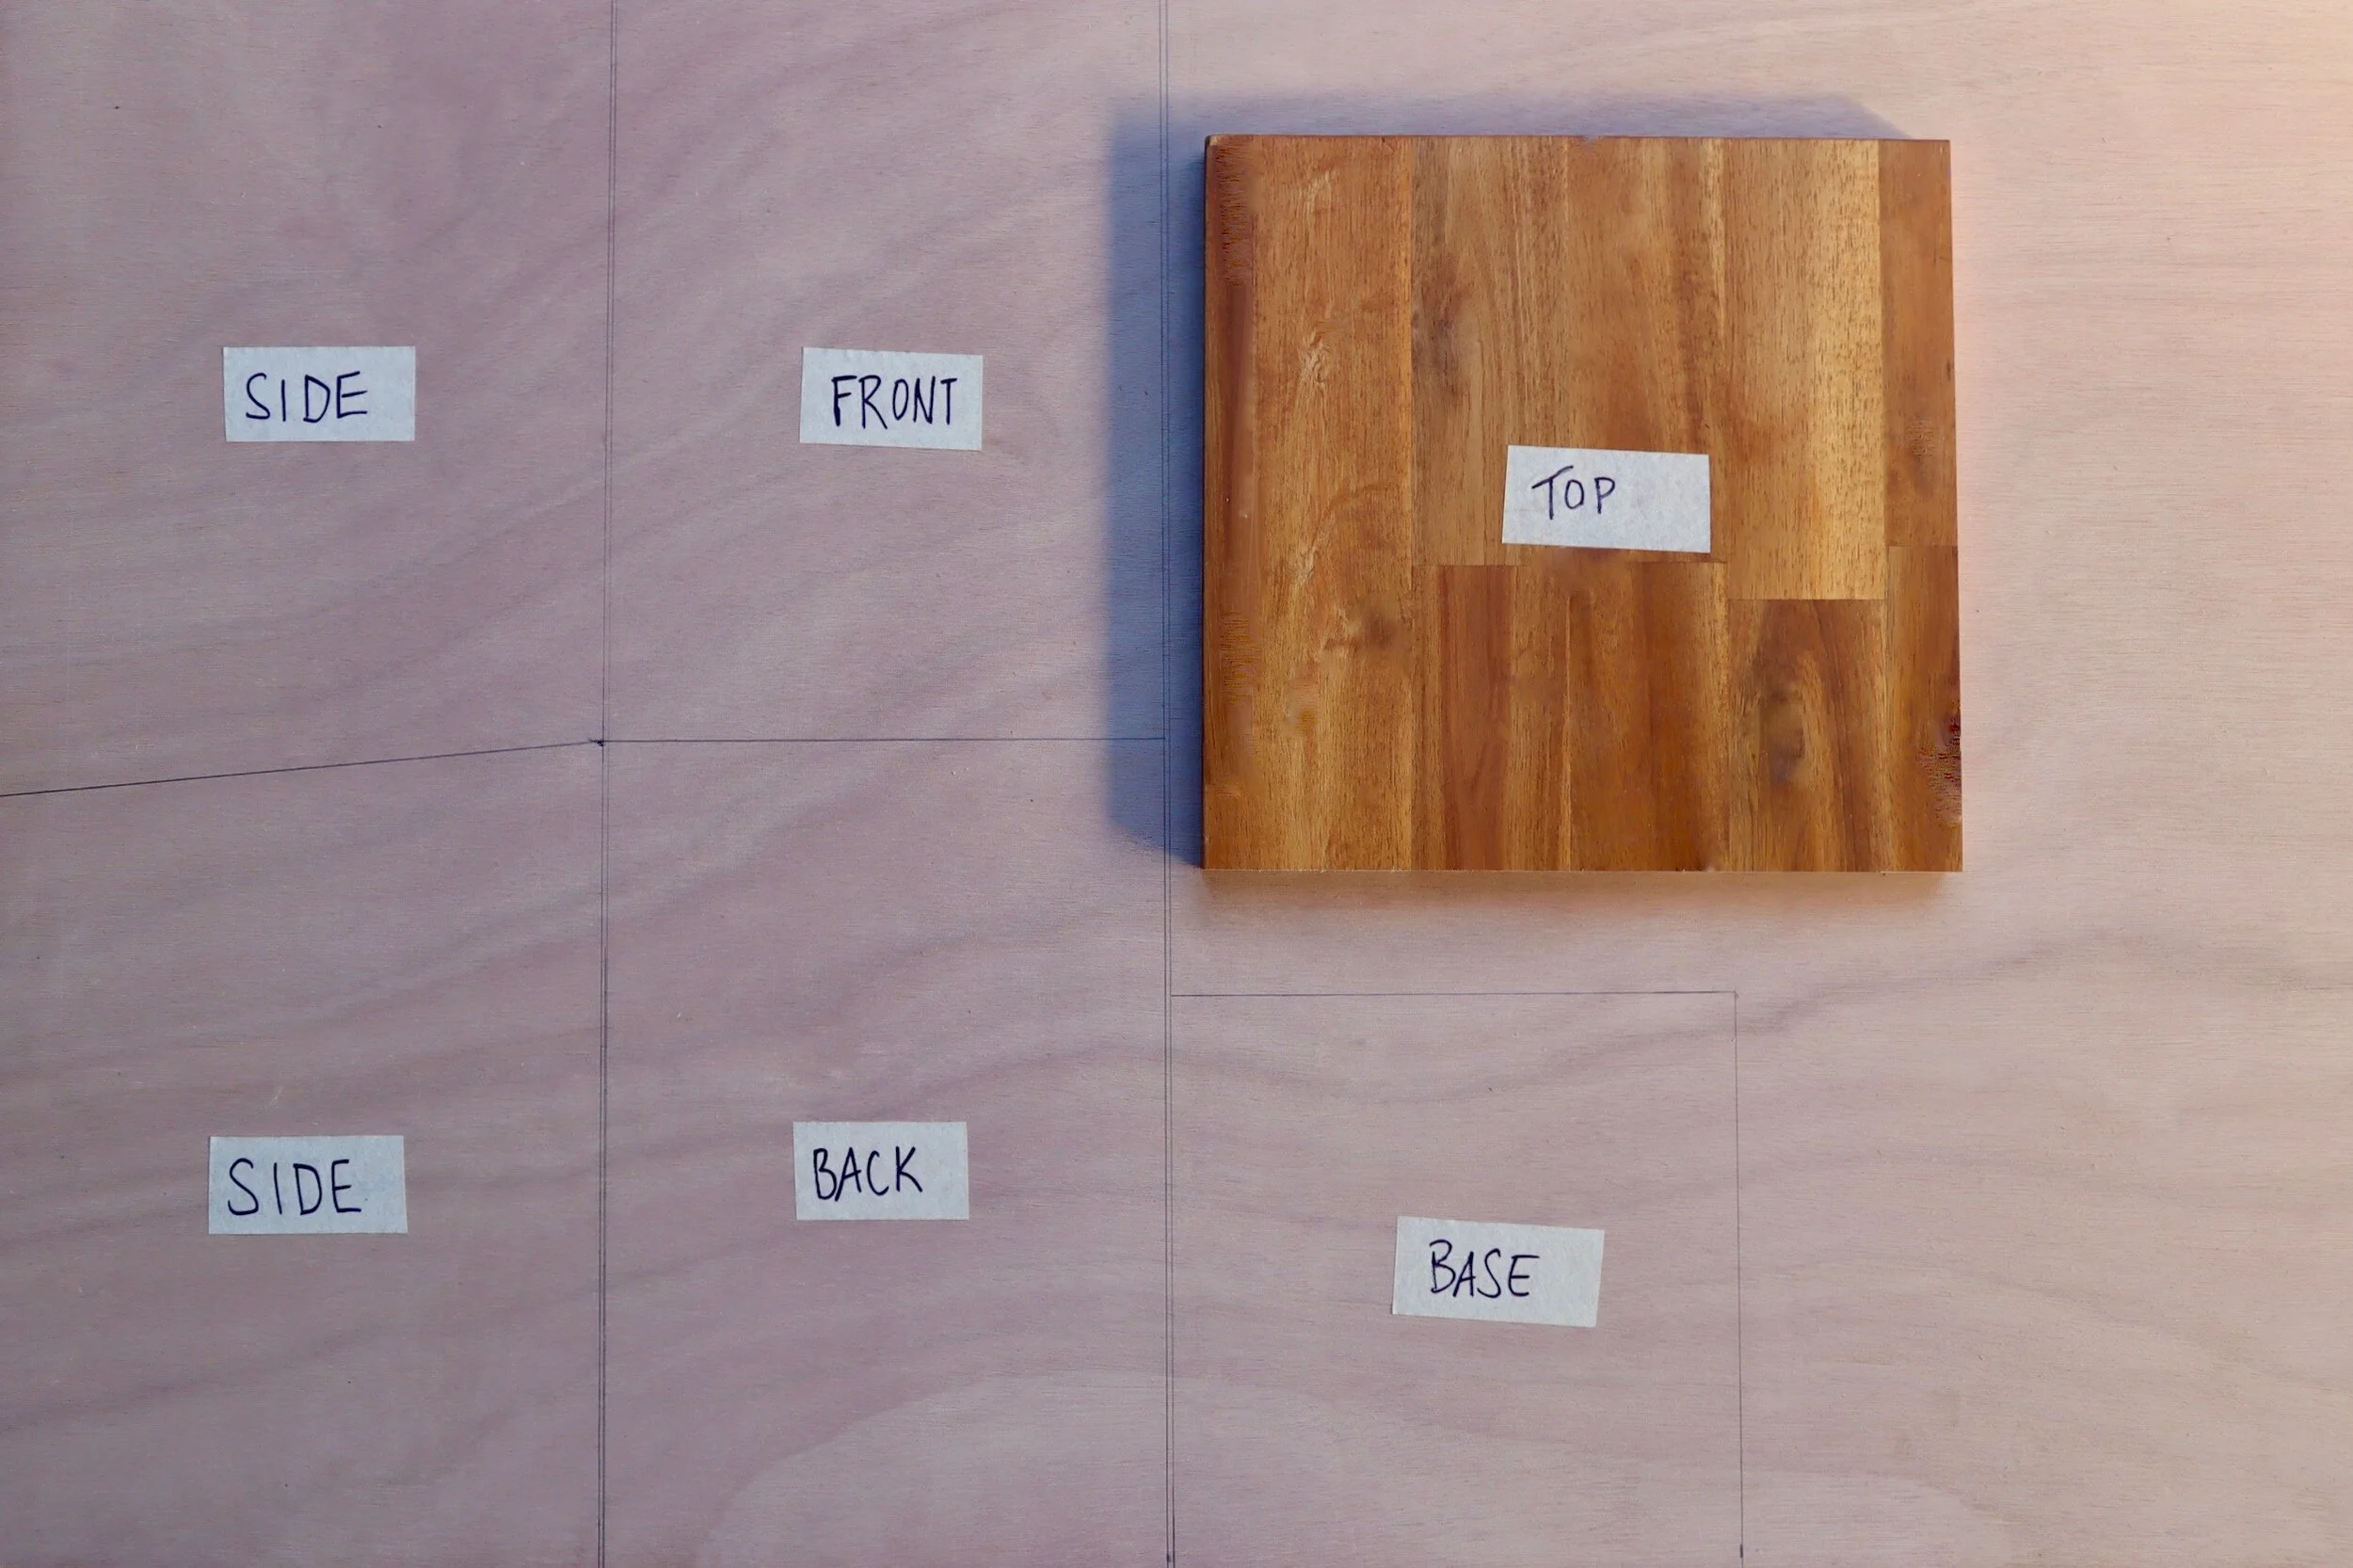
On the plywood, draw a vertical line 240mm from the end (to be the width of the side pieces), measure 315mm down one side and 295mm down the other to mark a diagonal line.
Draw a vertical line 3mm along, measure along 210mm to draw another line (to be the width of the front and back), measure down 295mm and mark a line across for the front piece (the back is 315mm). Draw a line 3mm along to mark out the 196mm x 216mm base.
Make the vertical cuts first, using a circular saw with a straightedge, then make the crosscuts with a mitre saw, adjusting the blade to 11° for the diagonal line.
From the hardwood, cut a 275mm x 280mm roof. Then cut a 600mm x 110mm piece and trim it to 420mm for the fixing plate. The remaining 180mm is the spacer.
TIP Leaving 3mm between the vertical lines allows for the kerf, which is the thickness of the saw blade. For accurate crosscuts, centre the mitre saw blade over the marked lines.

To measure the cutout on the front piece, I marked 30mm and 120mm down from the top, and 50mm in from the sides to draw a 90mm x 110mm window.
TIP Use a combination square to mark out repeat measurements.

I clamped the piece to a solid surface and cut with a multitool, trimming from both sides to get into the corners.
TIP If you don’t have a multitool, use a jigsaw by first drilling into a corner with a 10mm bit so the blade can fit through it to begin the cut.

I used the mitre saw to make a ladder of shallow grooves on both sides of the front piece by locking the plate to adjust the depth screw so the blade cut 2-3mm deep, setting them about 10mm apart, finishing 20mm up from the base.
TIP Use a plywood offcut to check the depth of the grooves and practice bringing the blade down then releasing it for neat cuts.

On the base piece, I used a 4mm bit to drill holes into the corners 15mm from the edges and at the centre. I applied Bondcrete woodworking adhesive to the spacer and centred it over the back piece, tapping in four 30mm bullet head nails to hold it.
TIP Avoid tapping nails into the corners of the spacer where the fixing plate will be attached with screws.

To assemble the box, I glued the front and back pieces to the base, clamped and left it to dry, then glued and clamped the sides to dry. Then I hammered in bullet head nails 6mm in from the edge and about 100mm apart, tapping them just below the surface with a nail punch.
TIP Use a damp cloth to wipe away excess adhesive as it squeezes out with the pressure of the clamps.

Sanding all over with 180-grit abrasive paper removes any splinters and rounds over the edges of the window. Then I applied Monocel Furniture Oil, rubbing it into the joints and along the edges of the plywood with a cloth.
TIP Seal inside and around the top, flip the box upside-down to finish outside and leave the oil to absorb. Repeat with a second coat, leaving to dry thoroughly overnight.

I applied Monocel Stain & Varnish in Grey to the fixing plate and outside the roof, leaving the underside natural so the inside of the box can be fully sealed with oil.
TIP Use a mini mohair roller to apply varnish, leaving to dry for a couple of hours, then apply a second coat. When it’s completely dry, sand then seal the underside with oil.

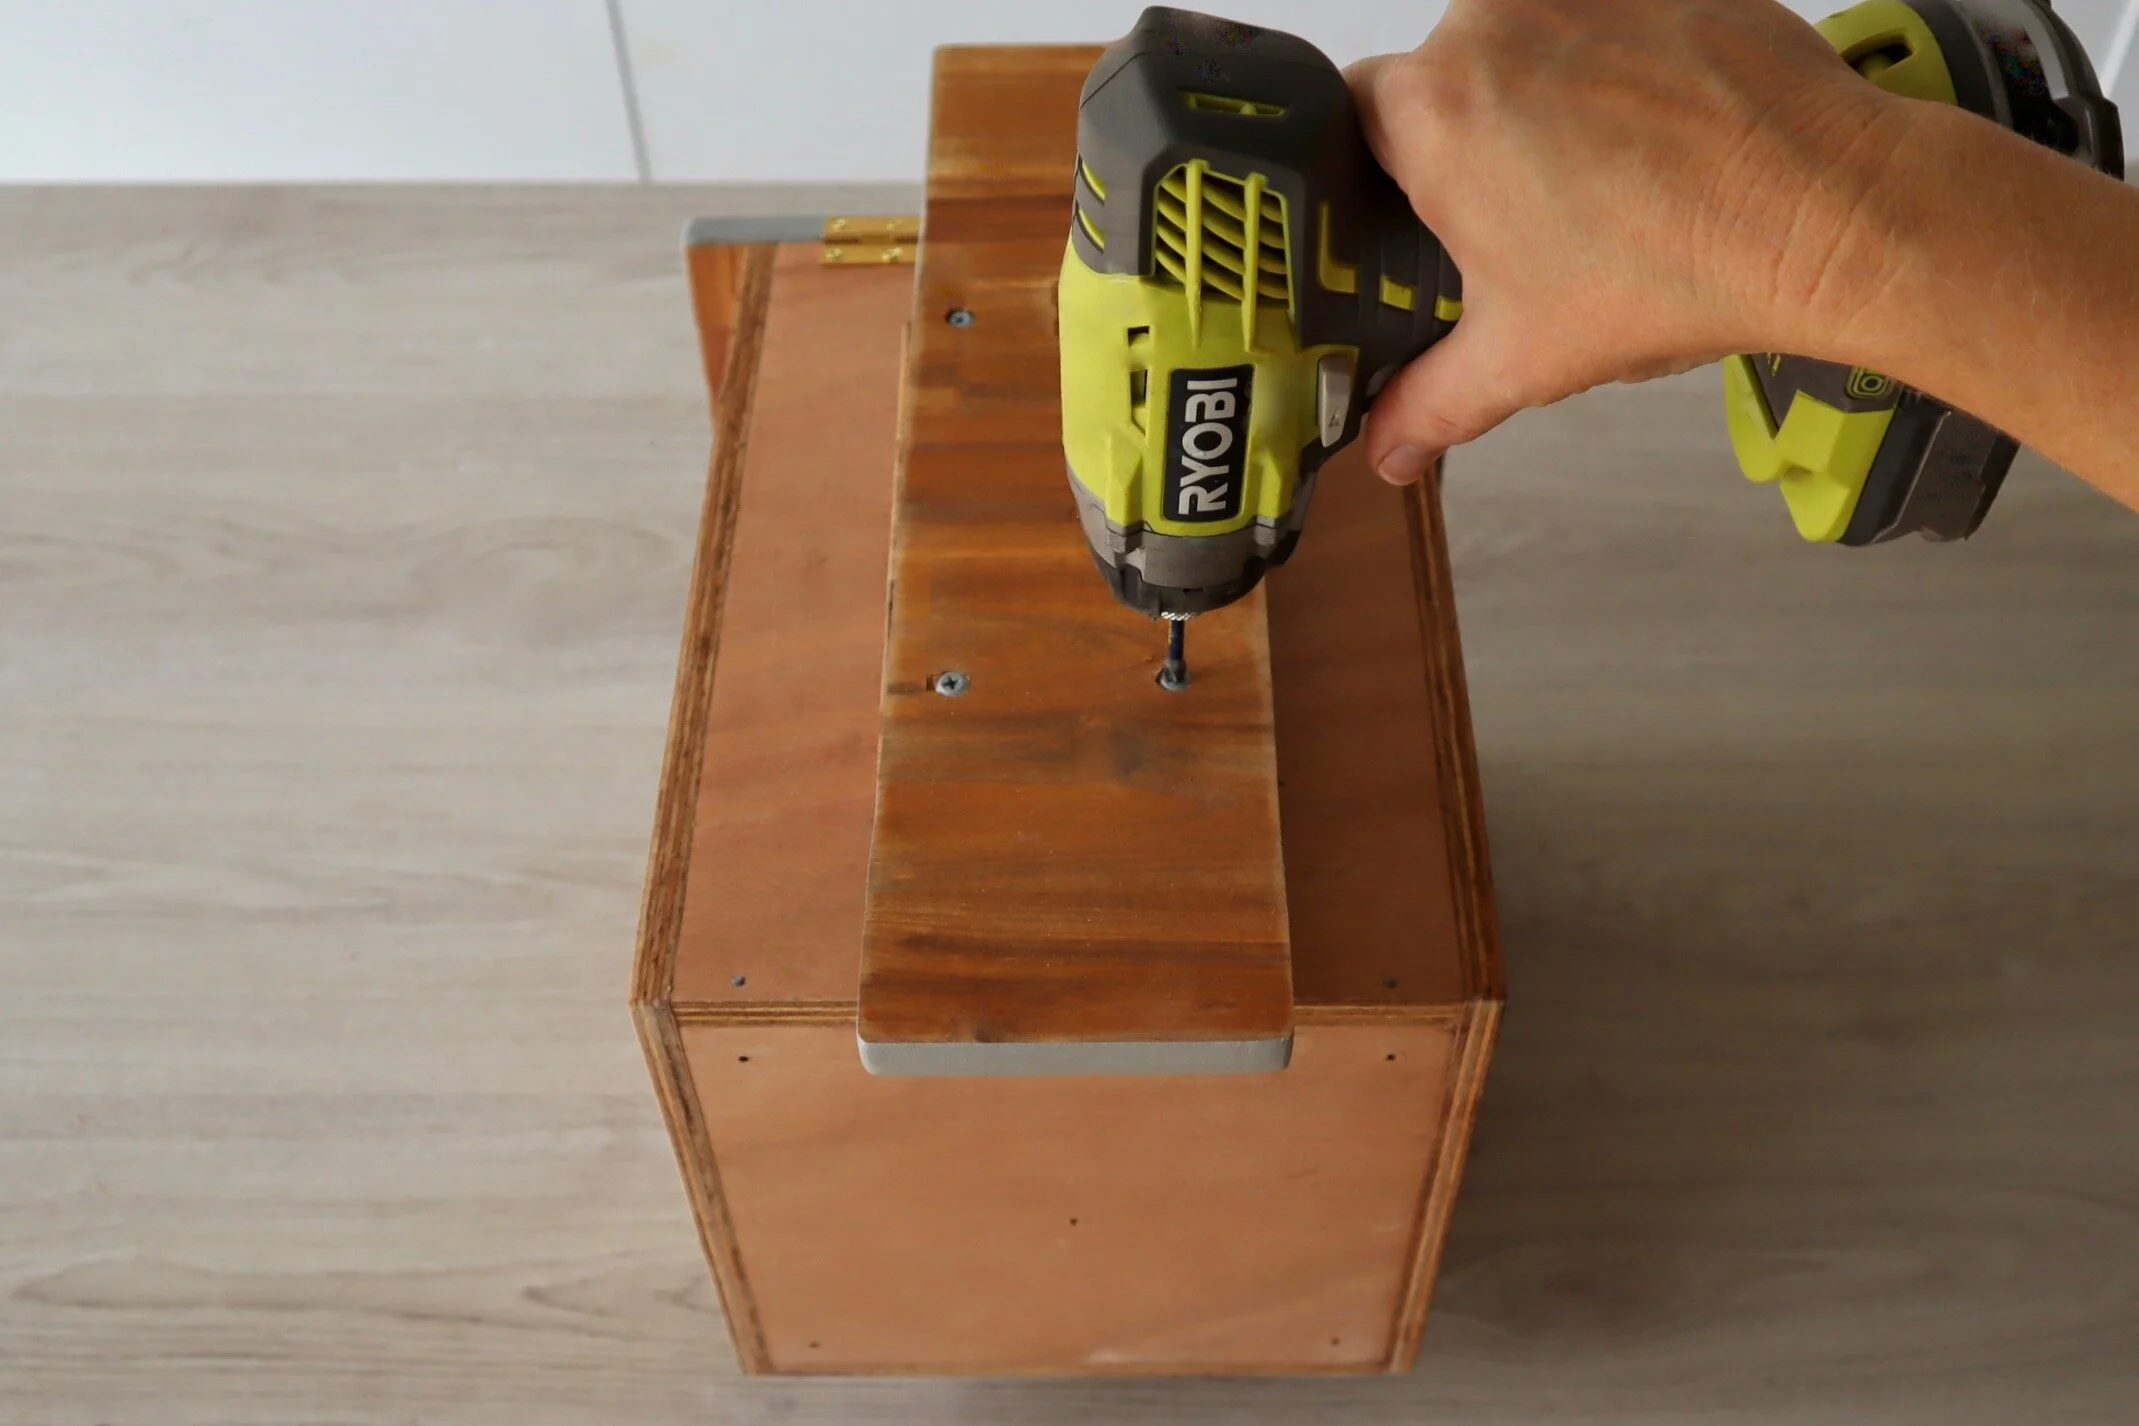
At the back of the roof, I measured 50mm in from either side, folded the brass hinges over the edge, predrilled holes with a 2mm bit and secured them with 12mm brass screws. Then I positioned the roof over the box to predrill and secure with the screws.
TIP Centre the roof over the box, flush with the back, using a combination square to check the overhang on the sides is even.
To finish assembling the box, I centred the fixing plate with the varnished side against the spacer. Using a 4mm bit, I predrilled holes into the corners of the spacer and secured with 45mm galvanised screws. I also predrilled two holes through the fixing plate at the top and base for installation.
TIP The screws are long enough to secure through the fixing plate, spacer and into the plywood.

To hang the nesting box, I secured 45mm galvanised screws through the top and base of the fixing plate, although you may need longer screws, depending on where the nesting box is installed. This one is attached two metres up from the ground, on the fence where our Grey Strike-Thrush perches.
TIP Position the box on the south or south-eastern side to avoid the hot westerly afternoon sun, and check online for a guide to the best height.

Have you made nesting boxes for local wildlife?
Tag me on your project and follow more of my DIY journey on Instagram for tool tips, home improvement and simple building projects.