Record Cabinet FROM A Flatpack
Alun Machin

While experimenting with different ways of storing our extensive record collection, I’ve found it’s best to be able to flip through the album covers because they’re easier to read than the tiny fonts on the spines. It’s also more fun than stacking them sideways, like books in a shelf.
My solution to indulging in crate digging at home was to customise a flatpack drawer cabinet into an accessible display.

“Crate digging is the satisfying act of flipping through milk crates stacked with vinyl while looking for records to buy in vintage stores and second-hand markets”
I chose a flatpack four-drawer Kaboodle cabinet because it’s a simple system to assemble. The melamine pieces are also cut accurately and the drawer runners are easy to install in the predrilled holes.
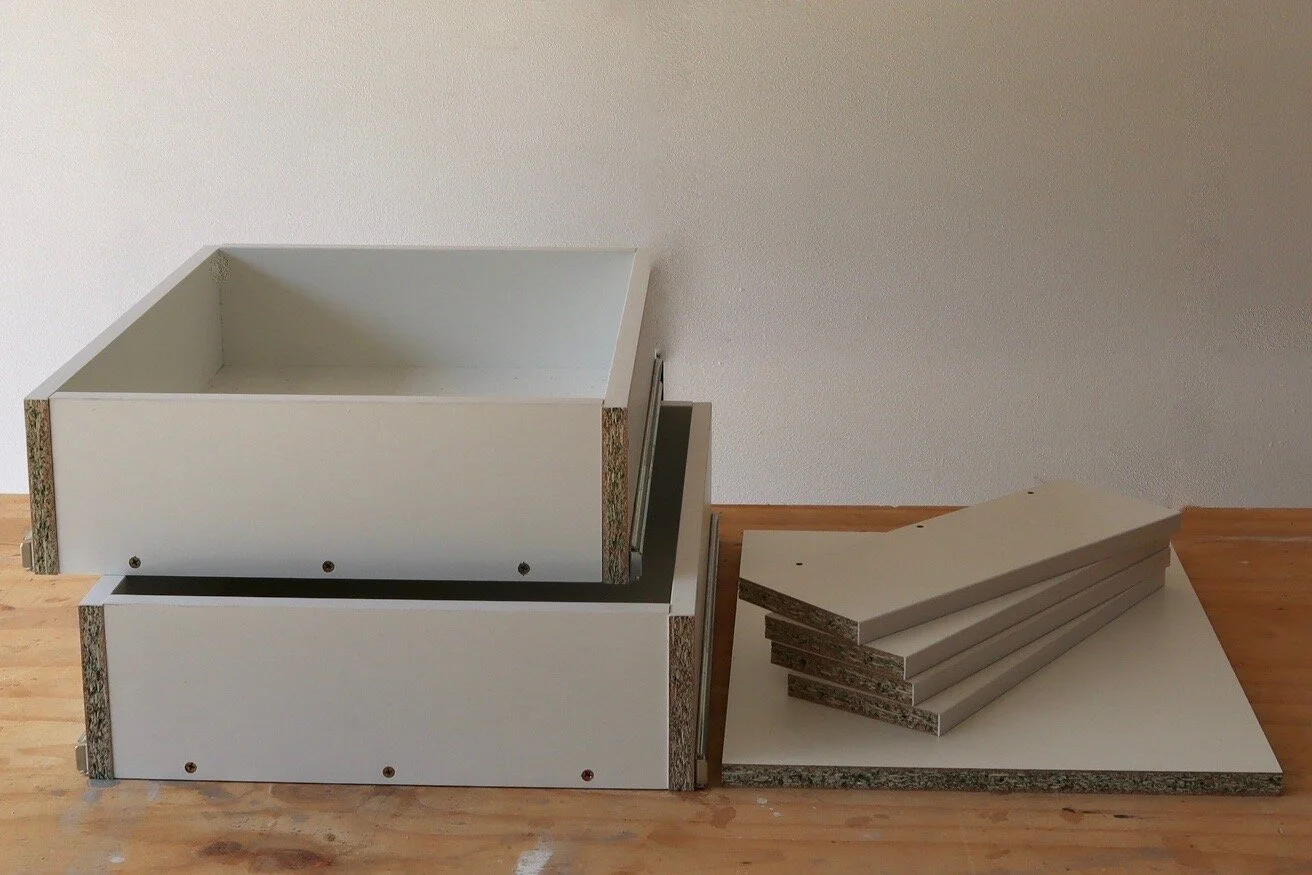
Using only the second and fourth drawers, meant the leftover drawer pieces could be used to make extra drawer dividers and a cabinet top strong enough to support a record player.
TIP Rather than include the plywood measurements here, I recommend cutting it as you go by transferring the measurements directly from the cabinet.

My cabinet is clad in an A-grade red oak plywood that has a lovely grain highlighted by using Monocel Waterbased Clear Wood Varnish, which glides on evenly and smoothly, and dries super fast with a matt finish.
TIP I did a one-stop shop and bought everything I needed to make this project at my local hardware store.

DIY MATERIALS
Two pairs of soft-close drawer runners
Two 2.4m lengths of 18mm x 6mm Tasmanian oak half-round flybead moulding
Selley’s Liquid Nails construction adhesive
15mm bullet head nails
Mini microfibre roller with tray
DIY TOOLS
Tape measure and pencil
Combination square
Drill with driver bit
Combination countersinking bit
Circular saw with straightedge
Quick-grip clamps (at least four each of 300mm and 915mm)
Mitre box and handsaw
Painter’s tape
Caulking gun
Hammer

To assemble the cabinet, I used a drill to attach the base panel to the back using the supplied screws, then added the side panels, leaving off the support rail at the top and the feet.
I separated the soft-close drawer runners from the guides to secure them along the predrilled holes for the second and fourth drawers.
TIP Most pieces from the flatpack are reused in this project, except one drawer base and the top support rail, the feet and some screws.

To create support along the top (and replace the original rail that would be too low for the drawer to open with records), I cut two spare drawer sides to the same width as the cabinet, predrilling through the tops and into the sides of the cabinet to secure with screws.
TIP Adding these top supports just 18mm higher than the original rail leaves enough space for the records. It also provide a larger surface area to support the plywood cladding.

For the cladding, I measured the sides of the cabinet (height and width), then cut matching pieces from 7mm plywood with a circular saw.
TIP Measure and cut each piece as you go, using a straightedge clamped to the plywood as a guide for the circular saw.

I applied Liquid Nails construction adhesive around the side of the cabinet and positioned the plywood, clamping and leaving it to dry.
TIP Glue and clamp both sides if you have enough clamps. I did one side at a time, leaving them to dry for about two hours each.

Measure the top and base of the cabinet (width and depth) to cut matching pieces from plywood, checking the measurements take in the attached plywood sides.
TIP I wanted to keep offcuts from the red oak plywood to use for another project so I used some standard 7mm-thick plywood for the base, which isn’t visible from the front.
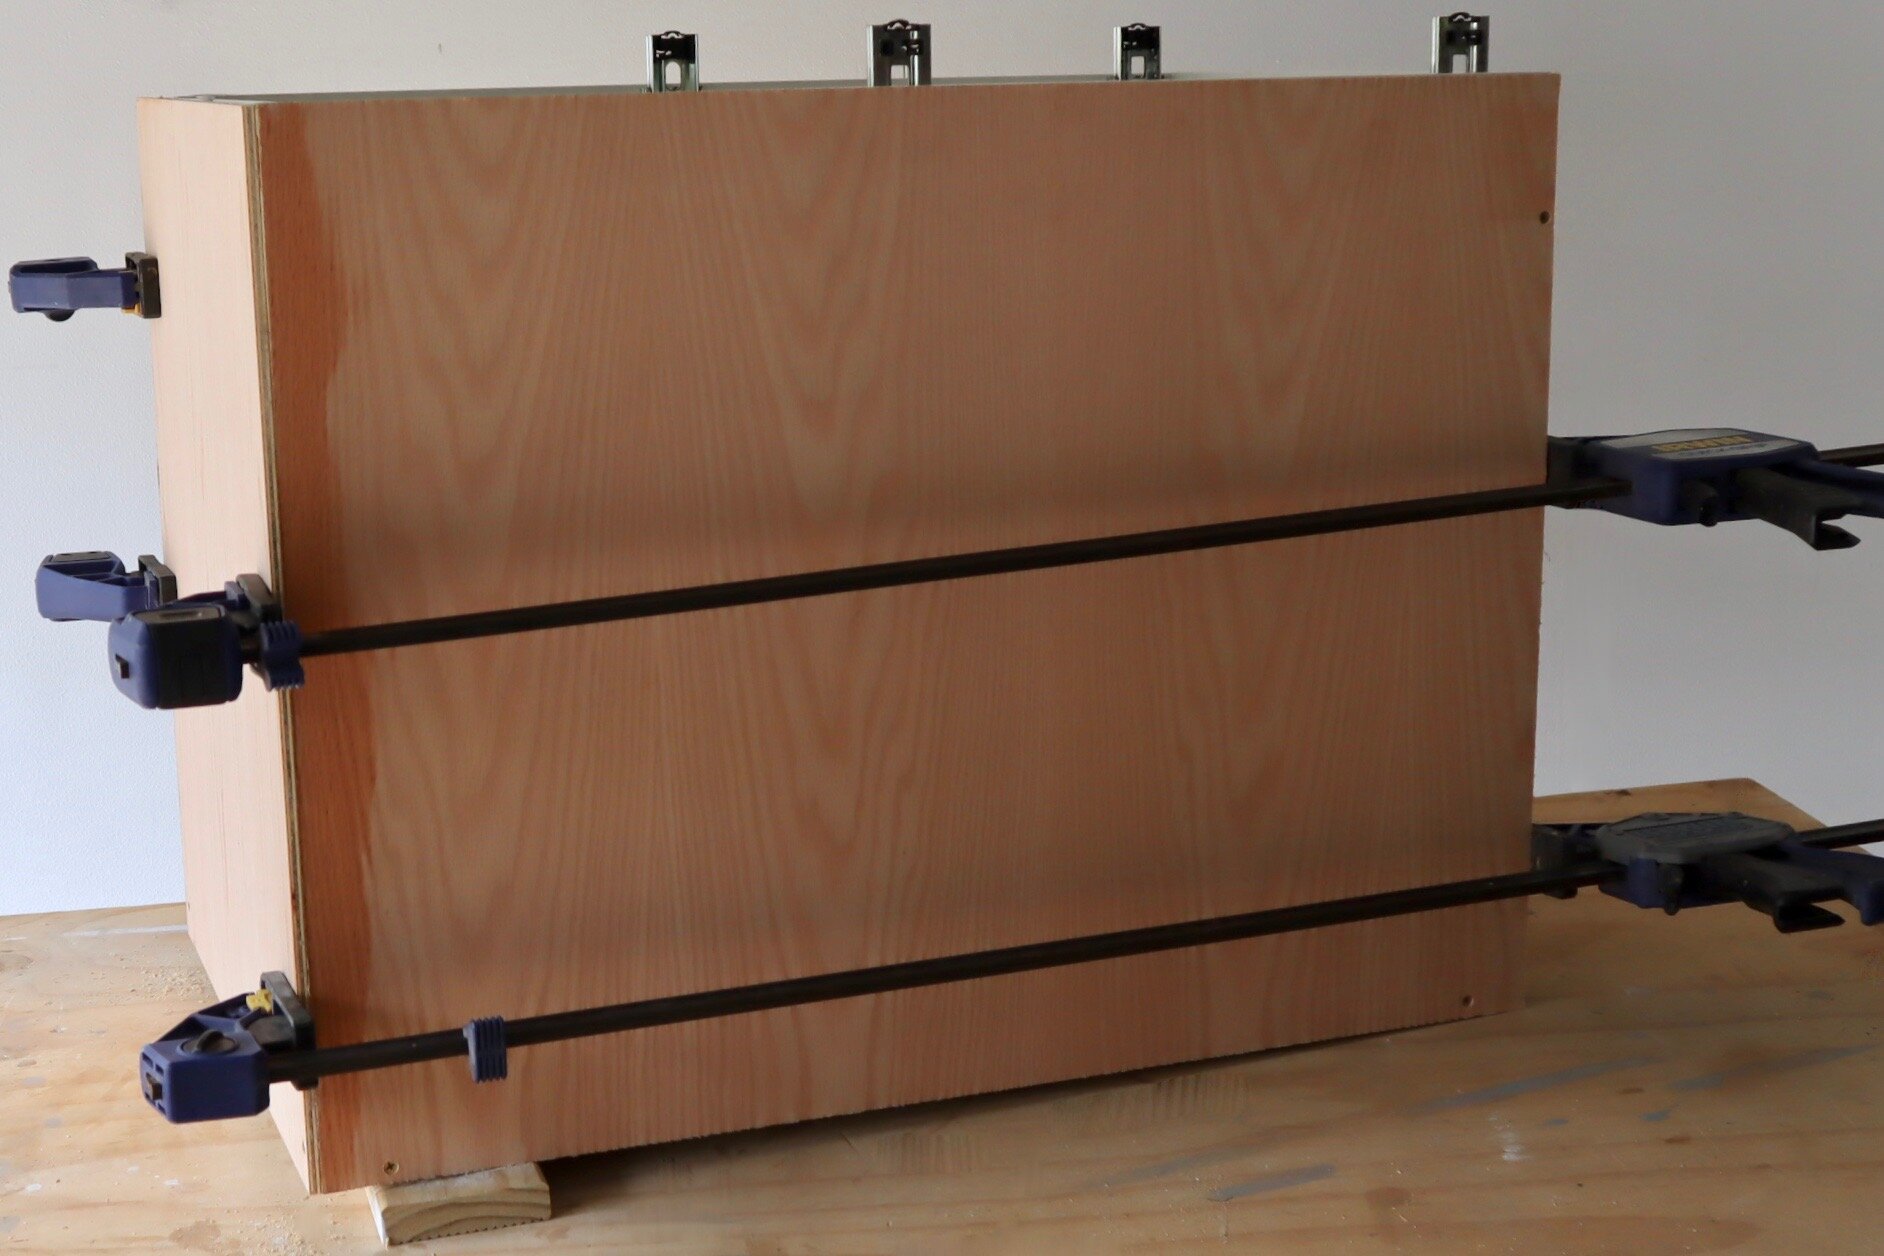
I applied construction adhesive over the top and base of the cabinet, positioned the plywood and held it in place with long clamps.
TIP If you don’t have long clamps like these Irwin 915mm quick-grip heavy-duty bar clamps, secure the top first, leaving to dry before removing the clamps and attaching the base.

To raise the cabinet off the ground I attached two spare drawer sides under the cabinet as the feet, positioning them equally from the front and sides, making sure the white finished edges were facing outwards.
TIP You could leave the ends raw or paint them white, but I ironed on CustomPine 21mm x 10m melamine edging in white before attaching them.

To dry-fit 18mm-wide flybead moulding around the front of the cabinet and cover the plywood edges, I used a mitre box with a handsaw to make a 45° cut at one end. I fitted the moulding against the cabinet to mark the opposite corner with a pencil, then cut and taped it before fitting the next piece.
TIP Cut and tape the base piece first, then the sides and the top last. Check they fit neatly, trimming the corners if necessary.

To secure the trim, I removed the top piece, ran a bead of construction adhesive along the back and replaced it, adding tape to hold. Then I attached the sides and base, adding extra tape around the corners and tapping in small 15mm bullet head nails at least 50mm from the ends to avoid splitting.
TIP Wipe away excess adhesive with a damp cloth and avoid getting it on your skin. Leave the trim to dry for about two hours before removing the tape.
To assemble the drawers I positioned the front and back panels against the base, adding the right and left sides, then installed the drawer guides along the predrilled holes.
This project only requires two drawers with the remaining drawer parts used as dividers to hold the records upright.
TIP When installing the drawer guides and runners, use all the supplied screws for maximum strength.

On a spare drawer base panel, I used a combination square to mark halfway lengthways, then cut with a circular saw. I slotted the pieces into the back of the drawers to prevent the records from falling out.
TIP You could use a handsaw, although I prefer to use a circular saw for cleaner, more accurate cuts.

To prevent the records from slipping, I added more dividers by slotting the remaining drawer front and back panels into the drawers, spacing them 150mm apart. Then I predrilled into the sides with a countersinking bit and secured with screws.
TIP I picked up an extra packet of white screw caps to cover all the screws in the drawers and any visible holes inside the cabinet.

To make the drawer fronts, I cut the plywood wide and deep enough to just hide the runners while leaving a slim gap between the trim.
TIP To attach the drawer fronts, apply adhesive around the outside of the drawer face then clamp and leave to dry.

Using 180-grit abrasive paper with a sanding block, I smoothed over the face and along the edges to remove any splinters, being careful not to press too hard on the face of plywood.
TIP After sanding, wipe all over with a damp cloth to remove the dust. I also vacuumed inside the cabinet and drawers to make sure there was no sawdust to collect in the records.

To apply Monocle Waterbased Clear Wood Varnish in Satin, I stirred then poured it into a tray, loaded a mini microfibre roller and worked from the top down to apply two coats.
TIP Leave the first coat to dry thoroughly for a couple of hours, then lightly wipe over the plywood and trim with a fresh piece of 180-grit paper to remove any grain that rises with the moisture. Wipe away dust with a clean cloth, then apply a second coat and leave to dry for about two hours before moving the cabinet.

Do you have records that need sorting out? The best way to look after them is to play them! Go through your stash regularly to dust and scare the bugs away.
TIP Don’t stack vinyl horizontally as it can eventually buckle, which compromises the listening experience. Also, display the collection away from open windows or exterior doors that let moisture and damp into the room.

Follow my DIY journey on Instagram for tool tips, more home improvement and simple building projects.