Vintage Tool DISPLAY
Alun Machin

I’ve collected lots of vintage tools over the years, some are family heirlooms, others have been found at markets.
While exploring ways to display them, I came up with a new spin on the classic pegboard tool storage that’s quick and simple to make as a vintage-style display.
“This pegboard would work for all kinds of DIY essentials, from workshop hand tools and upholstery equipment to craft supplies.”

I used black Monocel Stain & Varnish with an aerosol application to spray the pegboard and coat into all the little holes without pooling.
The frame is made from Tasmanian oak with mitred corners and sealed in fast-drying Monocel Waterbased Clear Wood Varnish in Satin.
DIY MATERIALS
610mm x 915mm x 4.8mm pegboard
20mm timber screws
32mm timber countersinking screws
Timber filler with spatula
25kg heavy-duty D rings for attaching to the wall
DIY TOOLS
Compound mitre saw or handsaw with a mitre box
Drill with driver bit
Combination countersinking bit
180-grit abrasive papar
Cloth
Drop cloth
Small paintbrush
Hammer

Since the pegboard isn’t thick enough to hold a timber frame, it needs a backing, which also helps space it off the wall to allow for the pegs to hook through. From 42mm-wide pine, I cut two long and two short lengths to fit around the board and positioned them around the back.
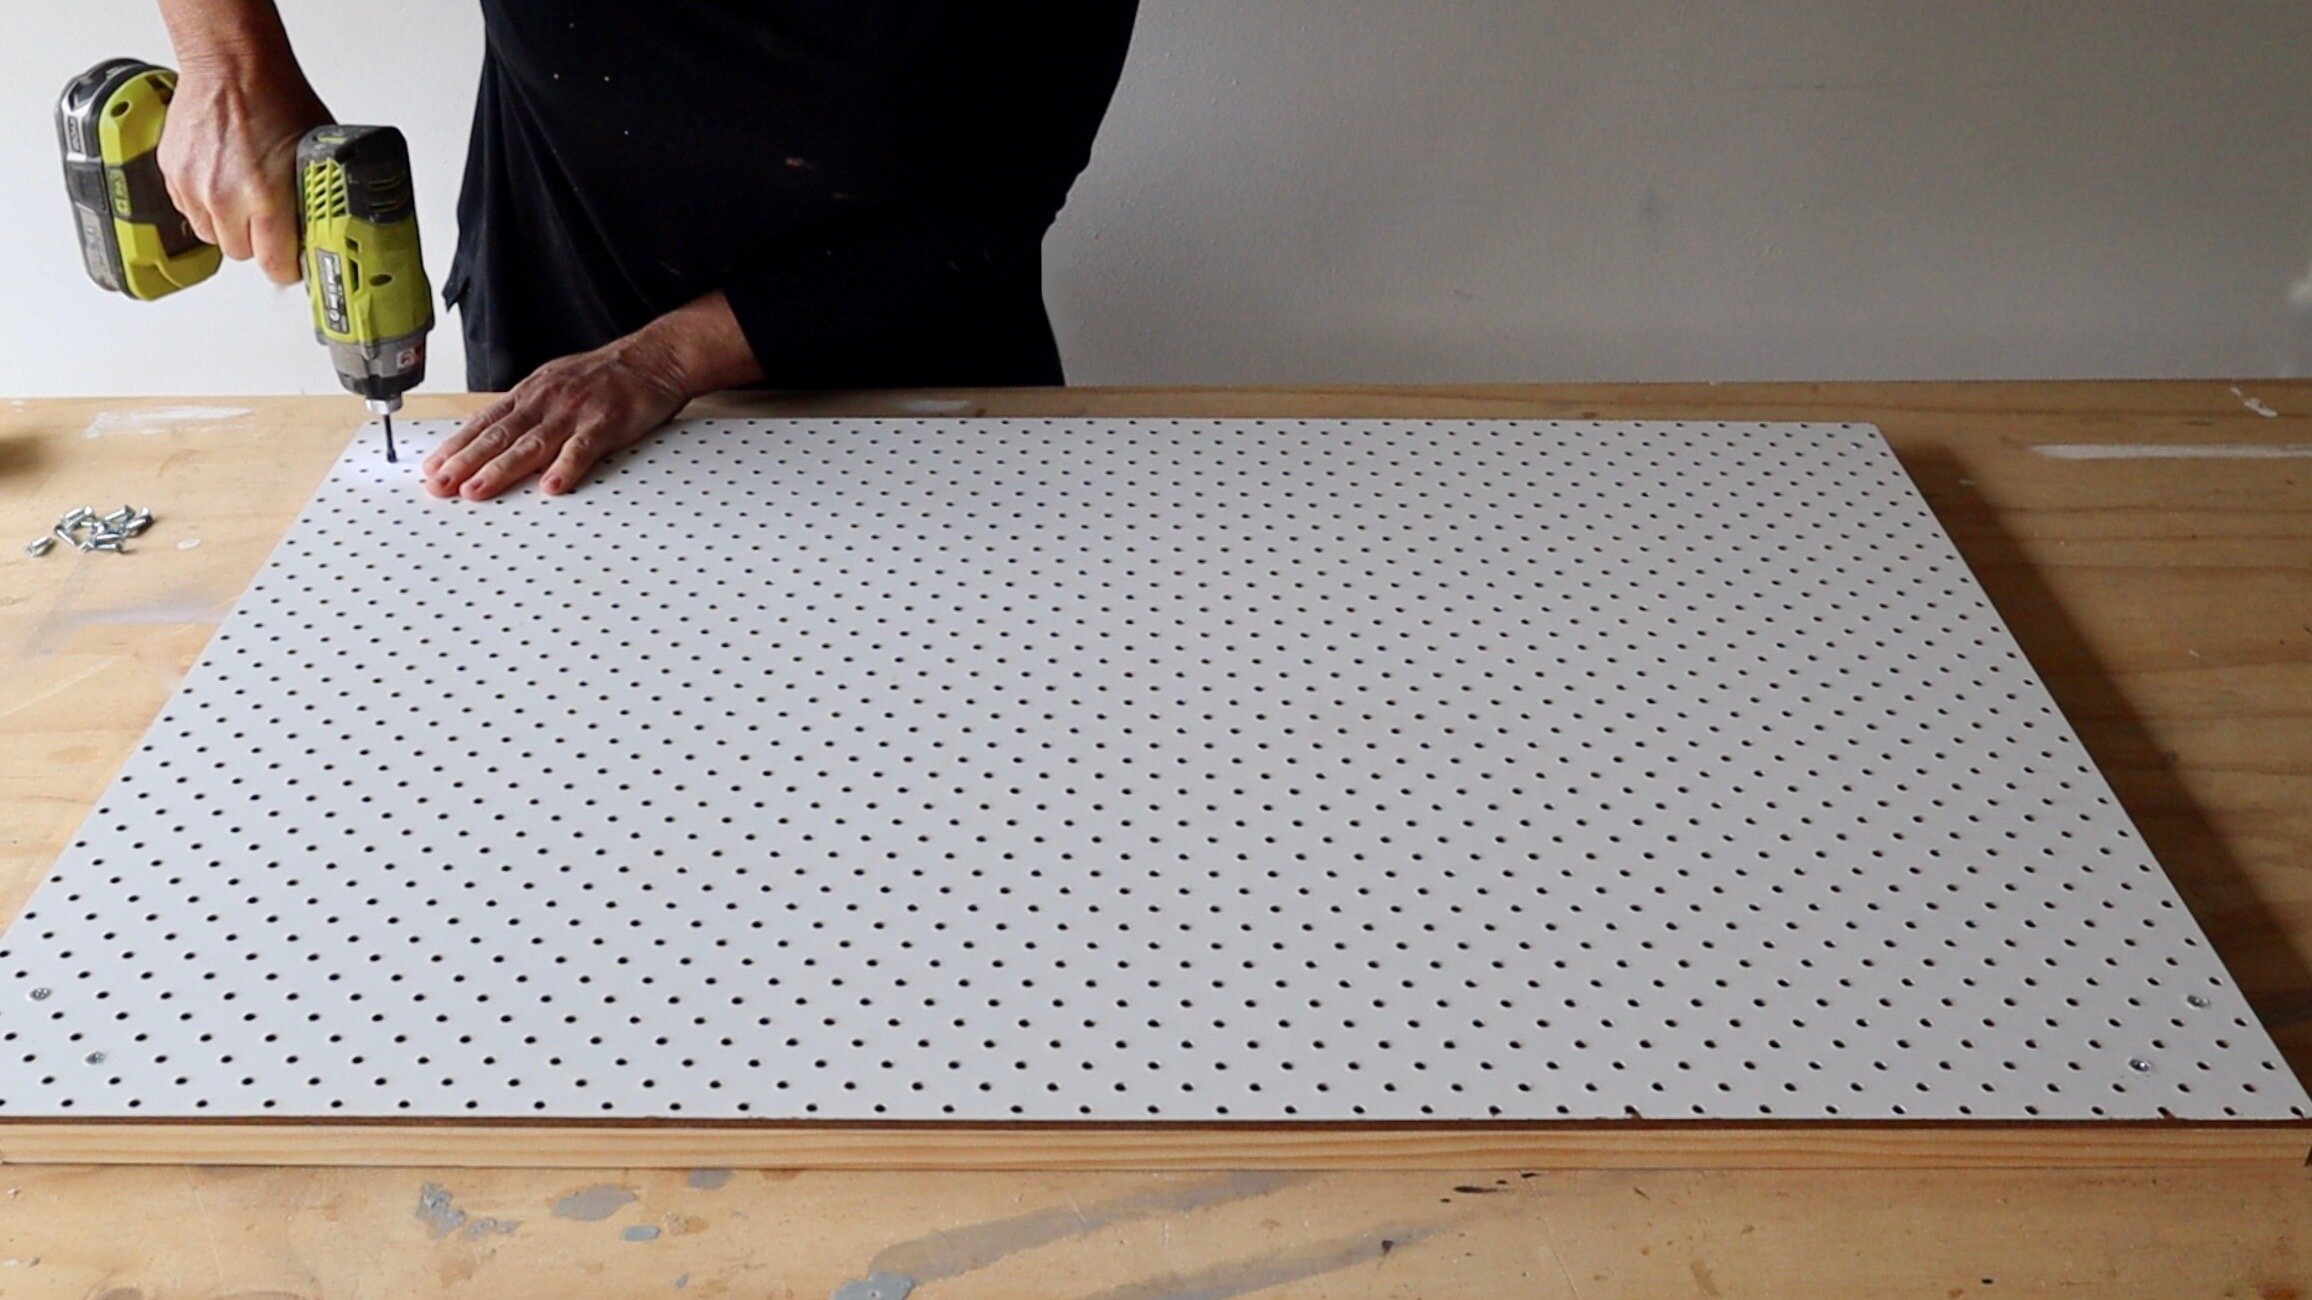
Then I attached the backing through the front with 20mm screws, positioning them at the corners and through the holes in the pegboard.

To fit the frame, I mitred one end of the Tasmanian oak, positioned it with the short corner against the board and marked the opposite corner, added 1mm, then cut at 45° with a mitre saw. I positioned it against the board and repeated for the other lengths.
TIP If you’re not confident cutting mitres, simply cut pieces to fit around the board using butt joints.
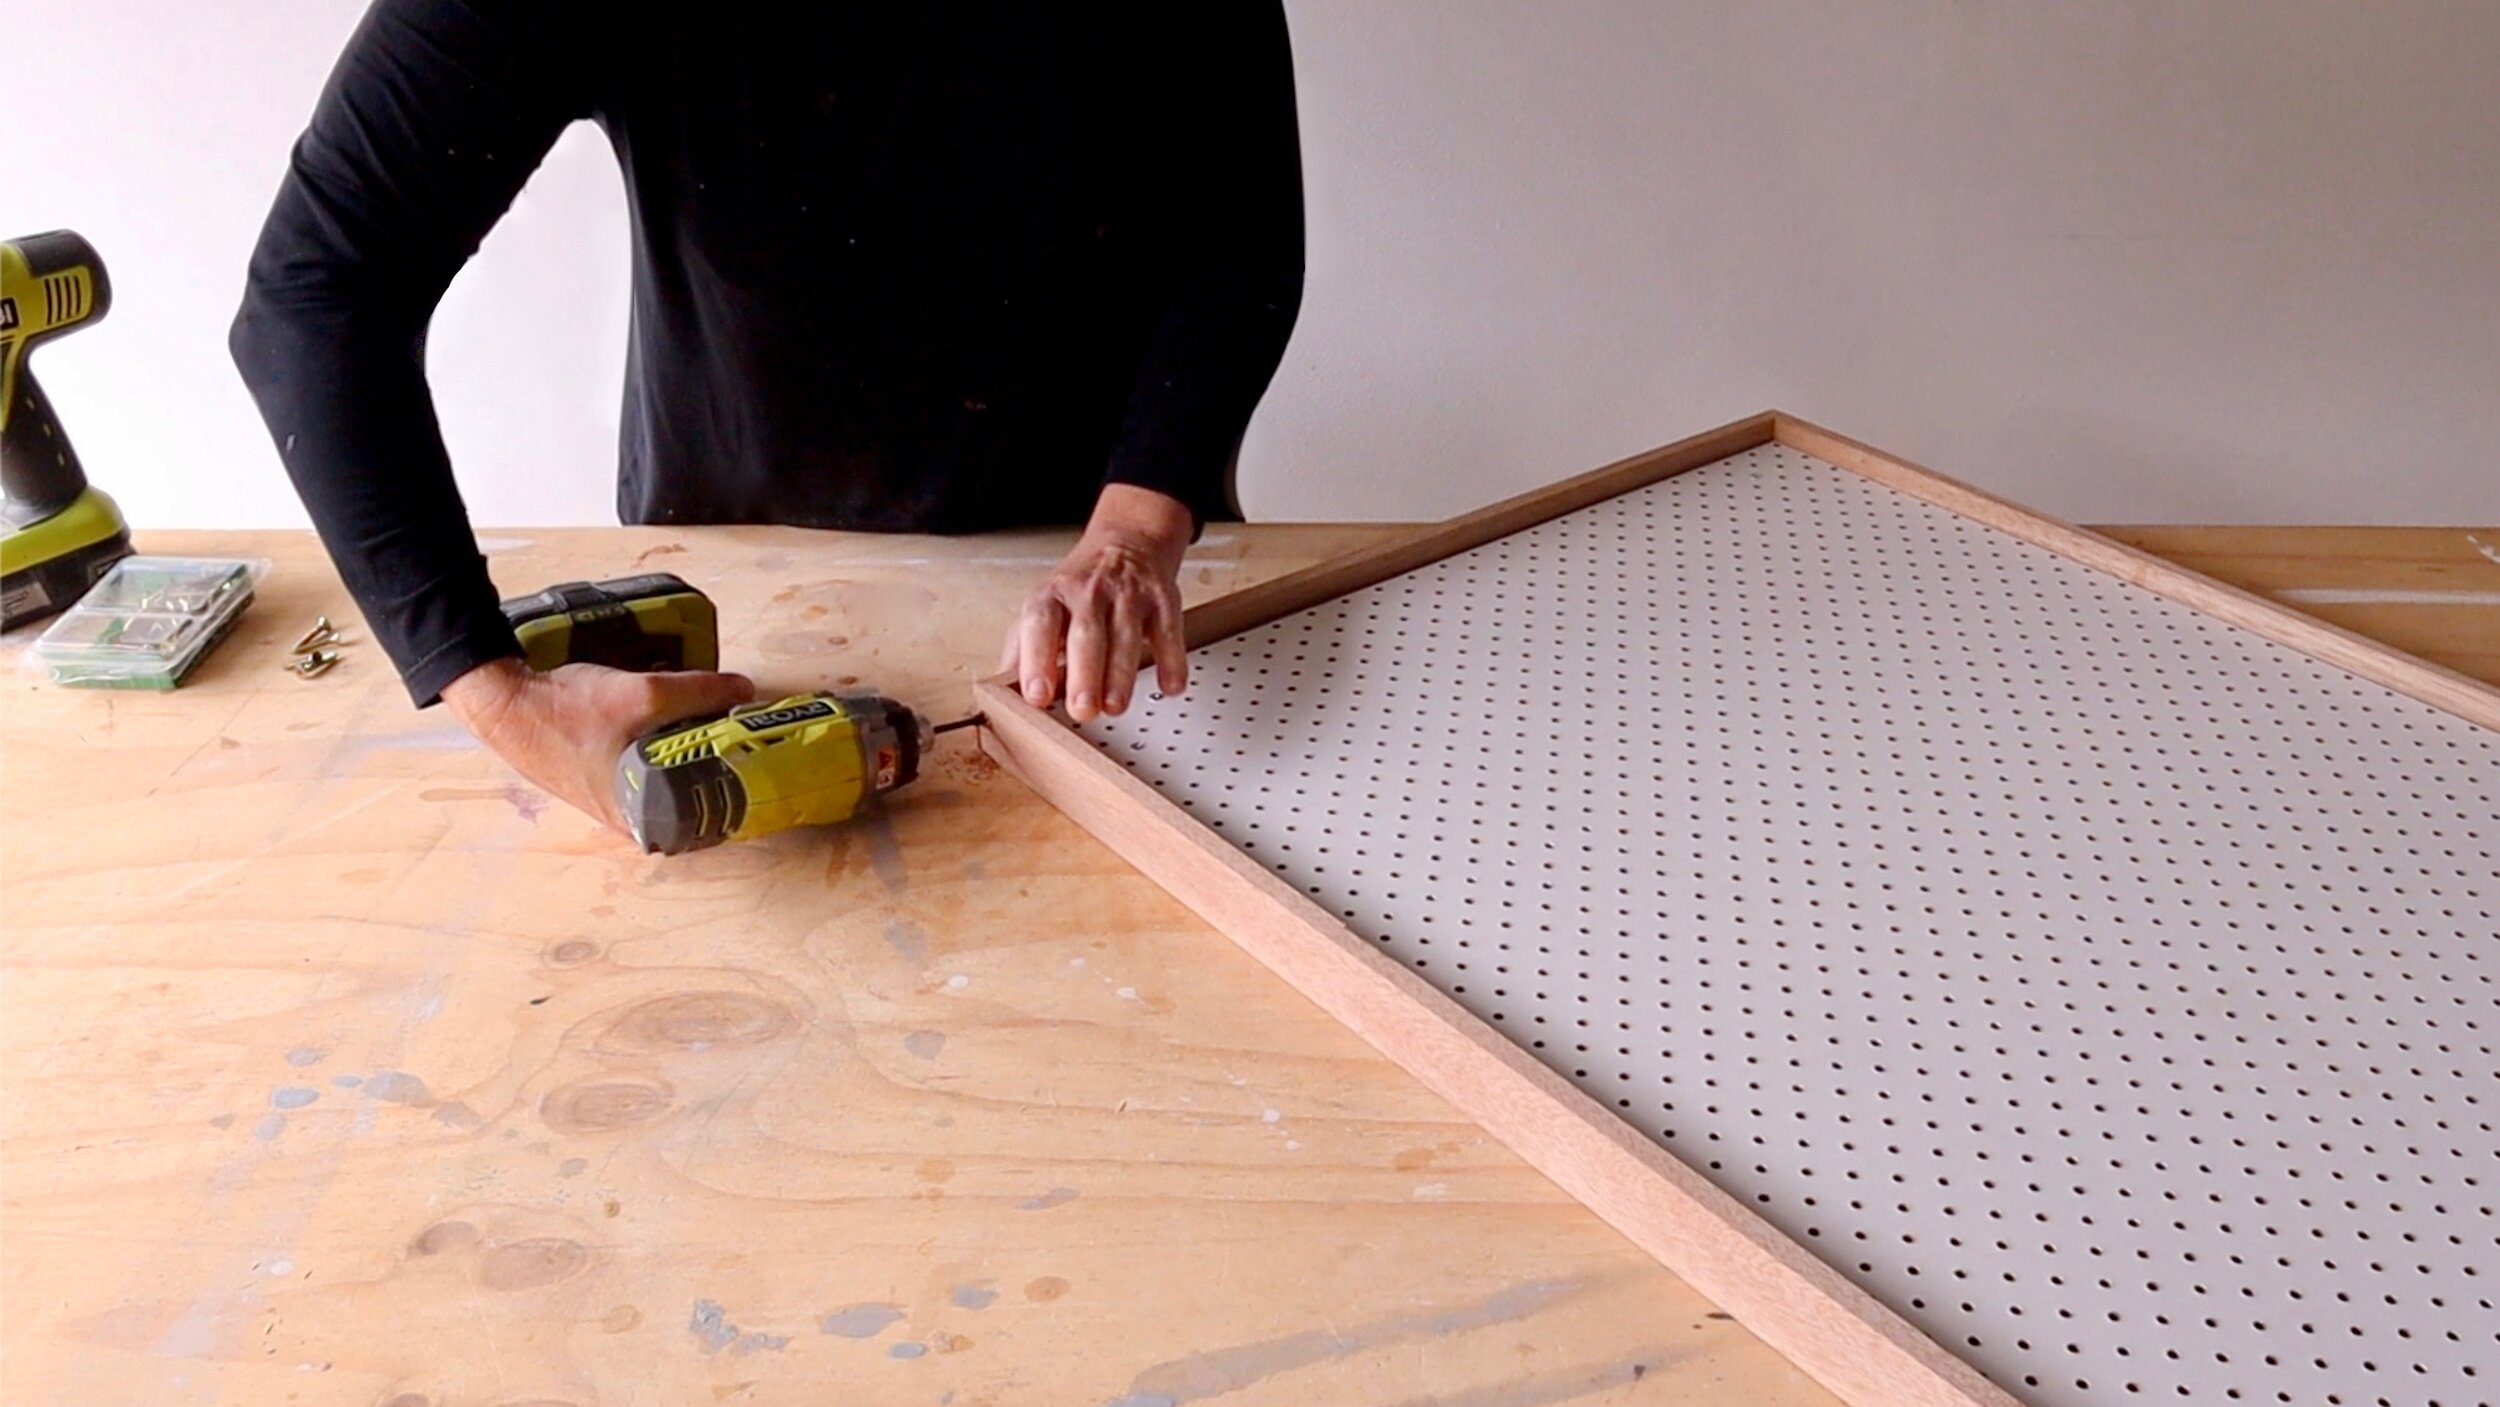
To assemble the frame, I used a countersinking bit to pre-drill through the side of each corner, into the top and base rails, applied Bondcrete adhesive to the ends then secured with 32mm screws, making sure the heads finished below the surface.

To seal the pegboard separately, I tapped it out of the frame and smoothed over the screw heads in the frame with timber filler and left it to dry. I smoothed the frame with 180-grit abrasive paper, wiped away the dust with a cloth then sealed it using a brush to apply two coats of Monocle Waterbased Clear Wood Varnish, leaving to dry after each.
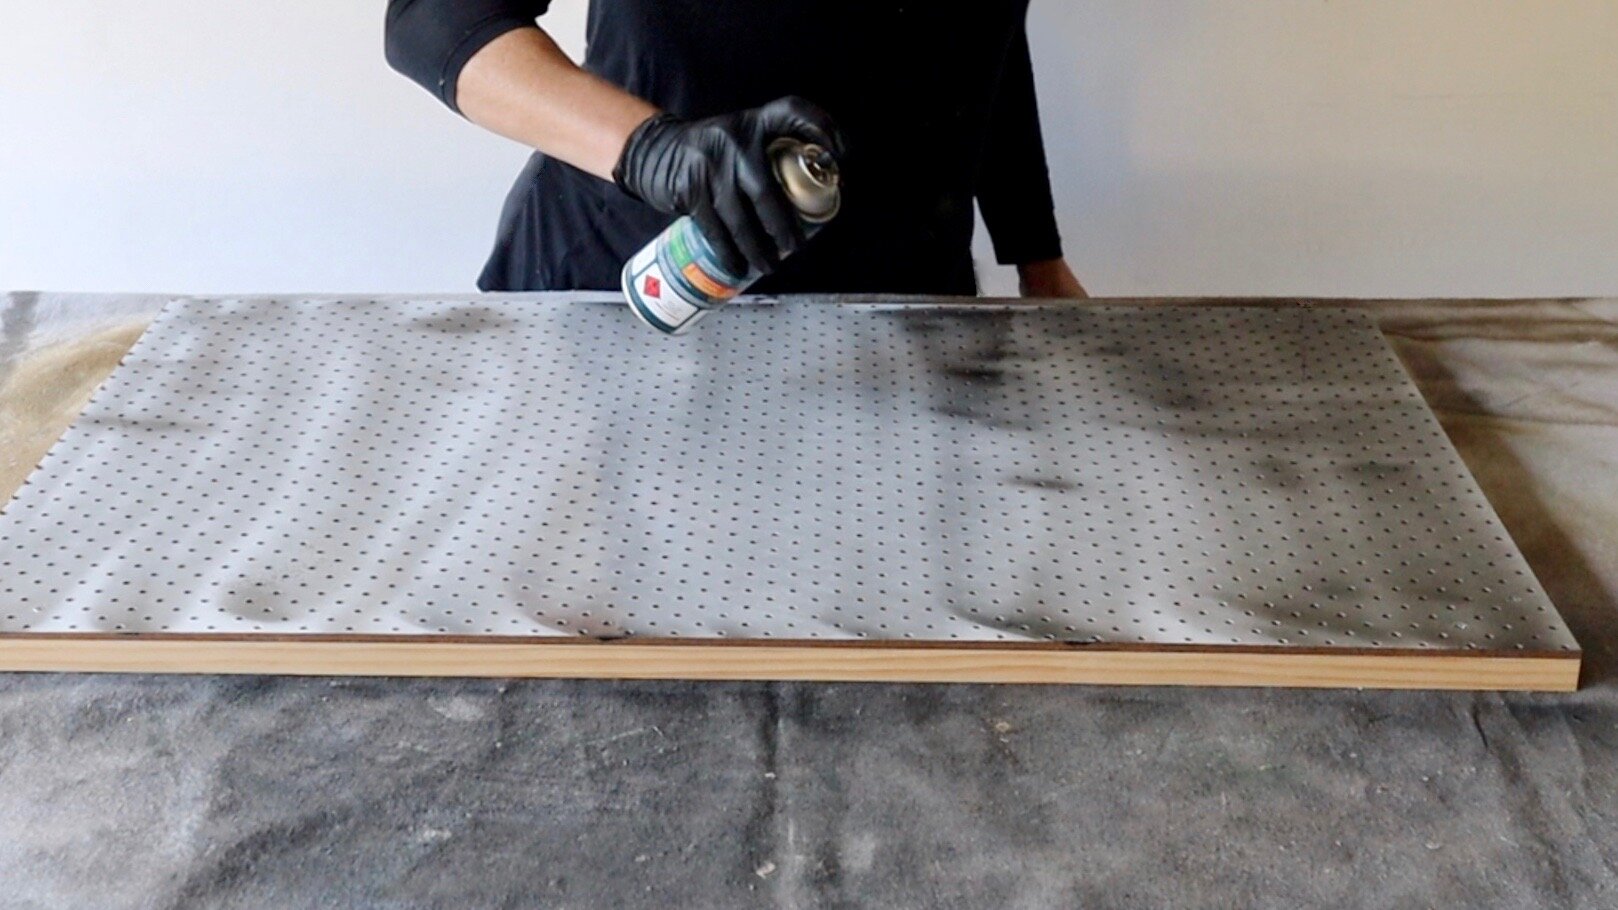
I positioned the board on a drop cloth and applied light, even coats of Monocel Stain & Varnish in Black aerosol, leaving it to touch dry between each and using about two.
TIP If you prefer to use Monocel Stain & Varnish in Black, apply three coats with a mini mohair roller leaving it to dry between each.
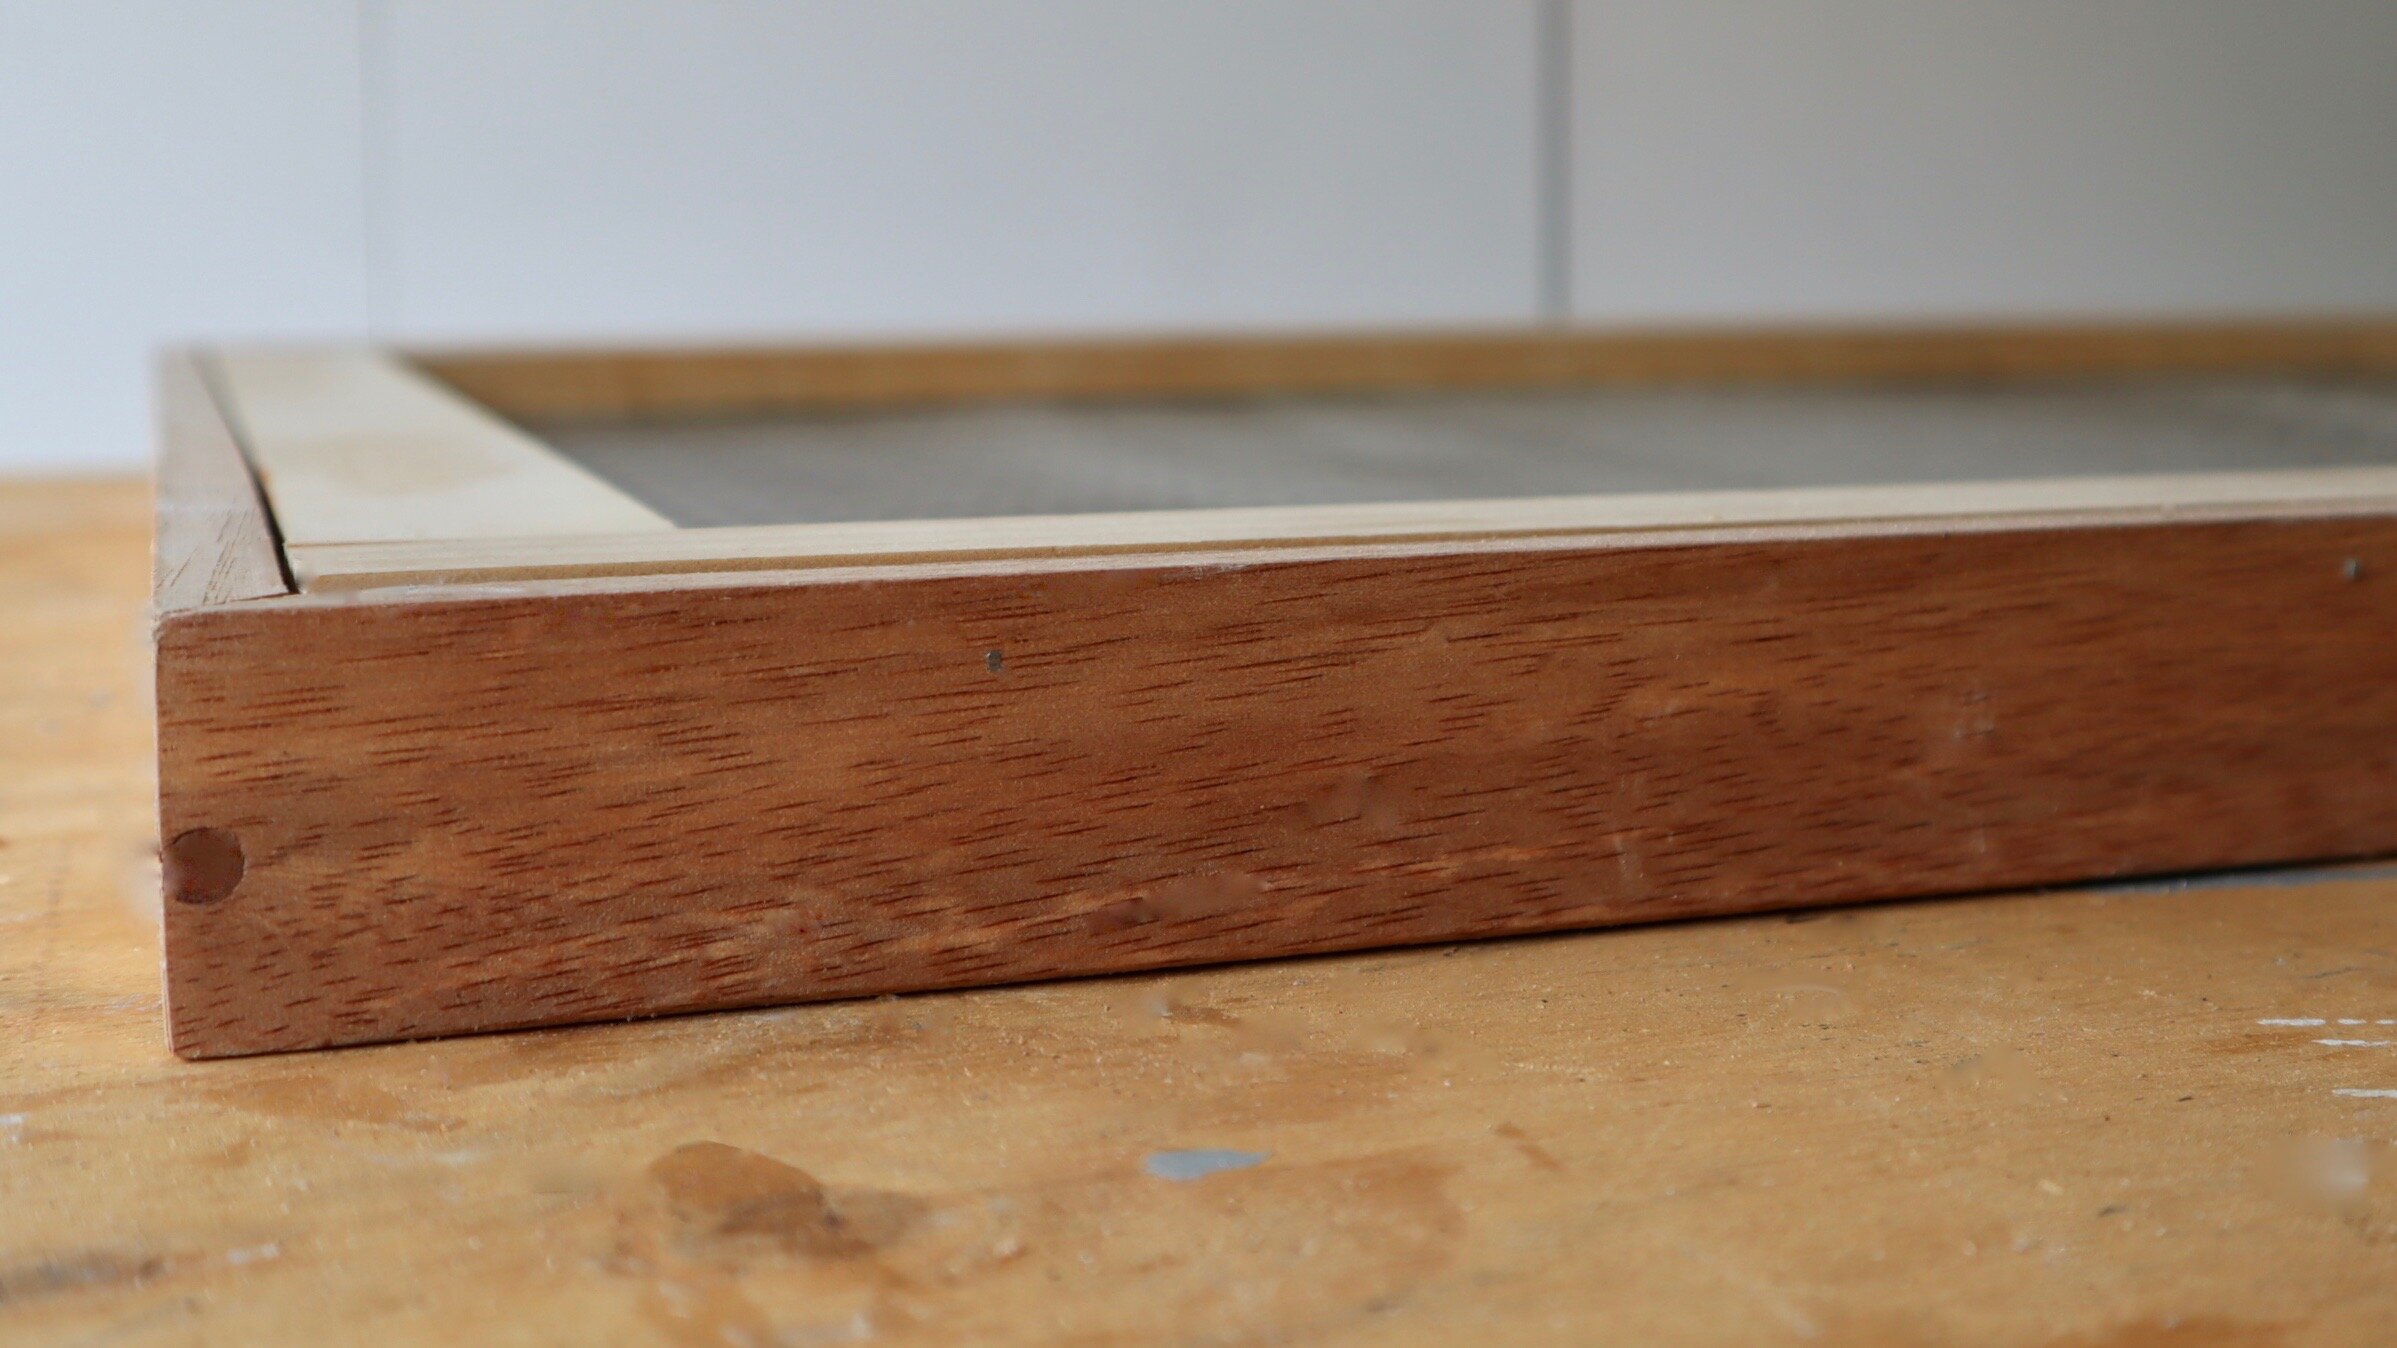
I fit the frame back onto the board, positioned it flush with the back then tapped in small 25mm bullethead nails around the edges.
TIP The frame should fit firmly, but if it is a little loose, use 20mm screws instead of nails, countersinking the holes, filling, sanding and touching up with waterbased varnish.

To hide the screws on the pegboard I tapped in black screw caps, and added heavy-duty D-rings at the back for securing to the wall. Then I installed pegboard hooks to display tools.
TIP The board becomes front heavy when the tools are set out, so it is essential to ensure it is securely fastened to the wall at the top.

Follow my DIY journey on Instagram for tool tips, more home improvement and simple building projects.