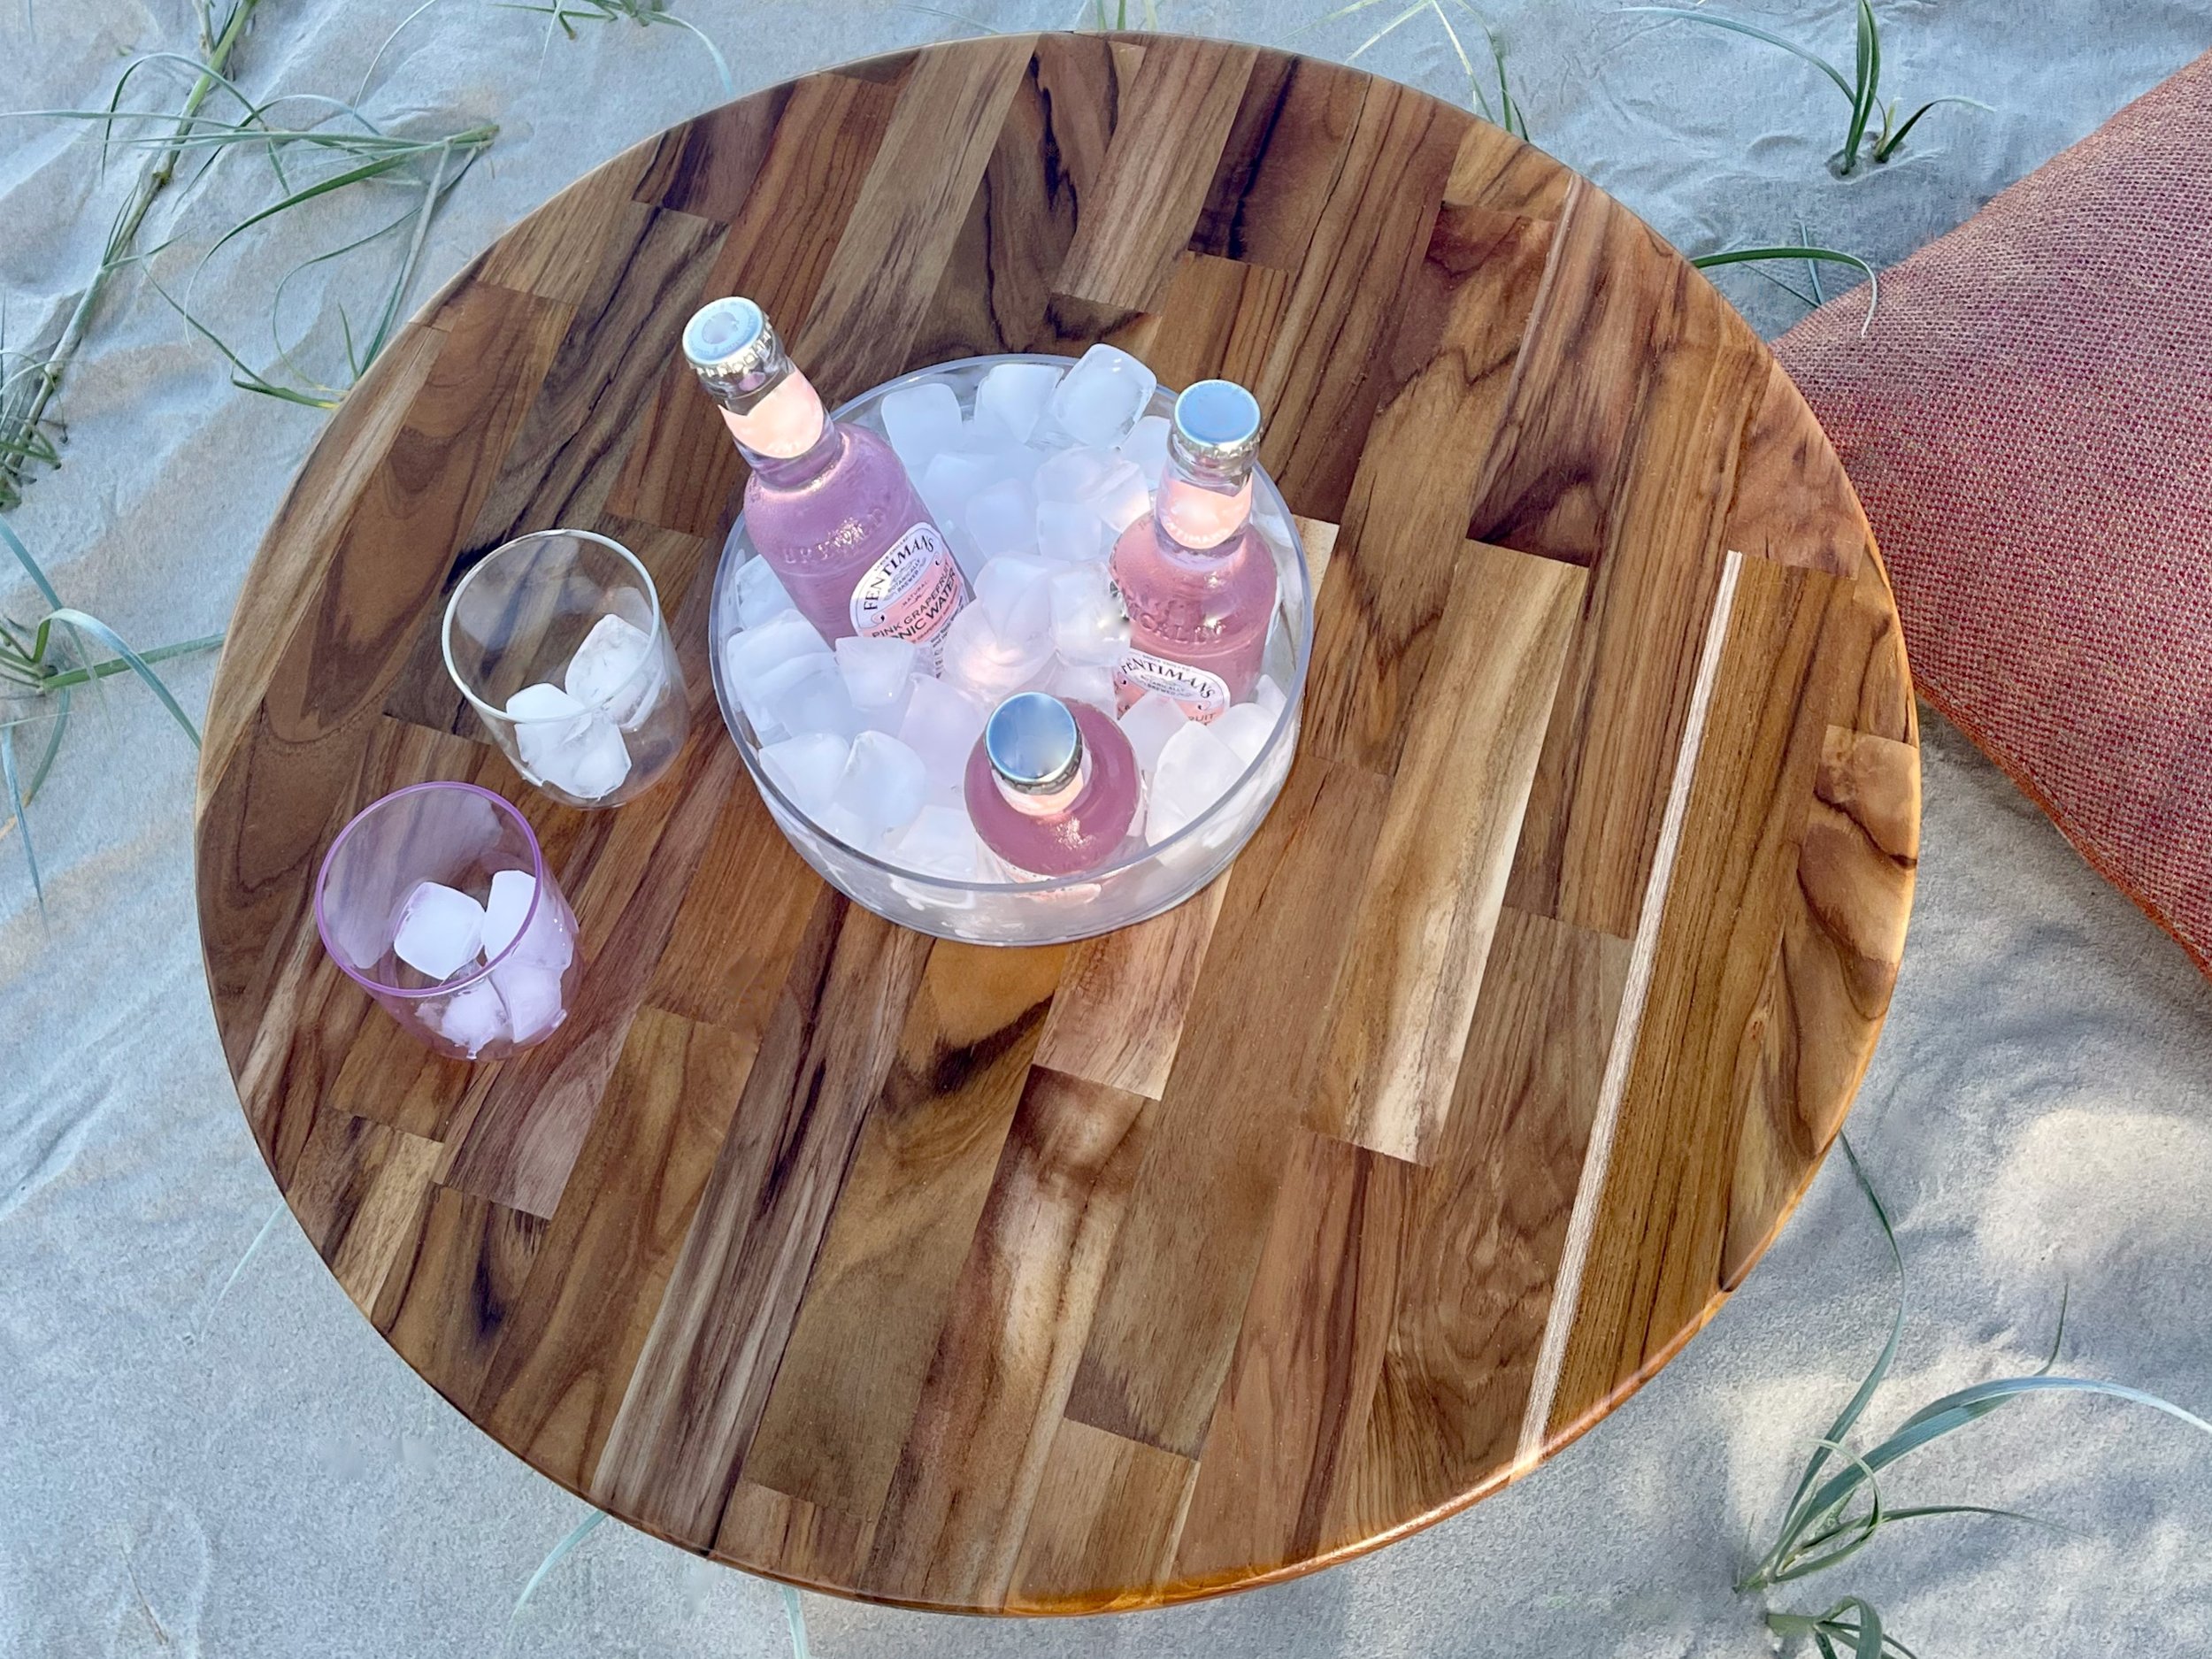
Picnic table with ice bucket
Alun Machin

Picnics are a fun, but they come with the challenge of eating and drinking comfortably while sitting on the ground.
My solution is this super-low table that provides ice for keeping beverages cool and a stable surface to prevent them from being knocked over.
“This take-anywhere table is the perfect height for dining alfresco. Just don’t forget the ice!”
DIY MATERIALS
Four 280mm round tapered legs with attached 3/8” thread
Two pairs of 3/8” angle leg plates with supplied screws
DIY TOOLS
Combination square and pencil
Drill with driver bit
Jigsaw
120-, 180- and 240-grit abrasive paper
Mini mohair roller and tray
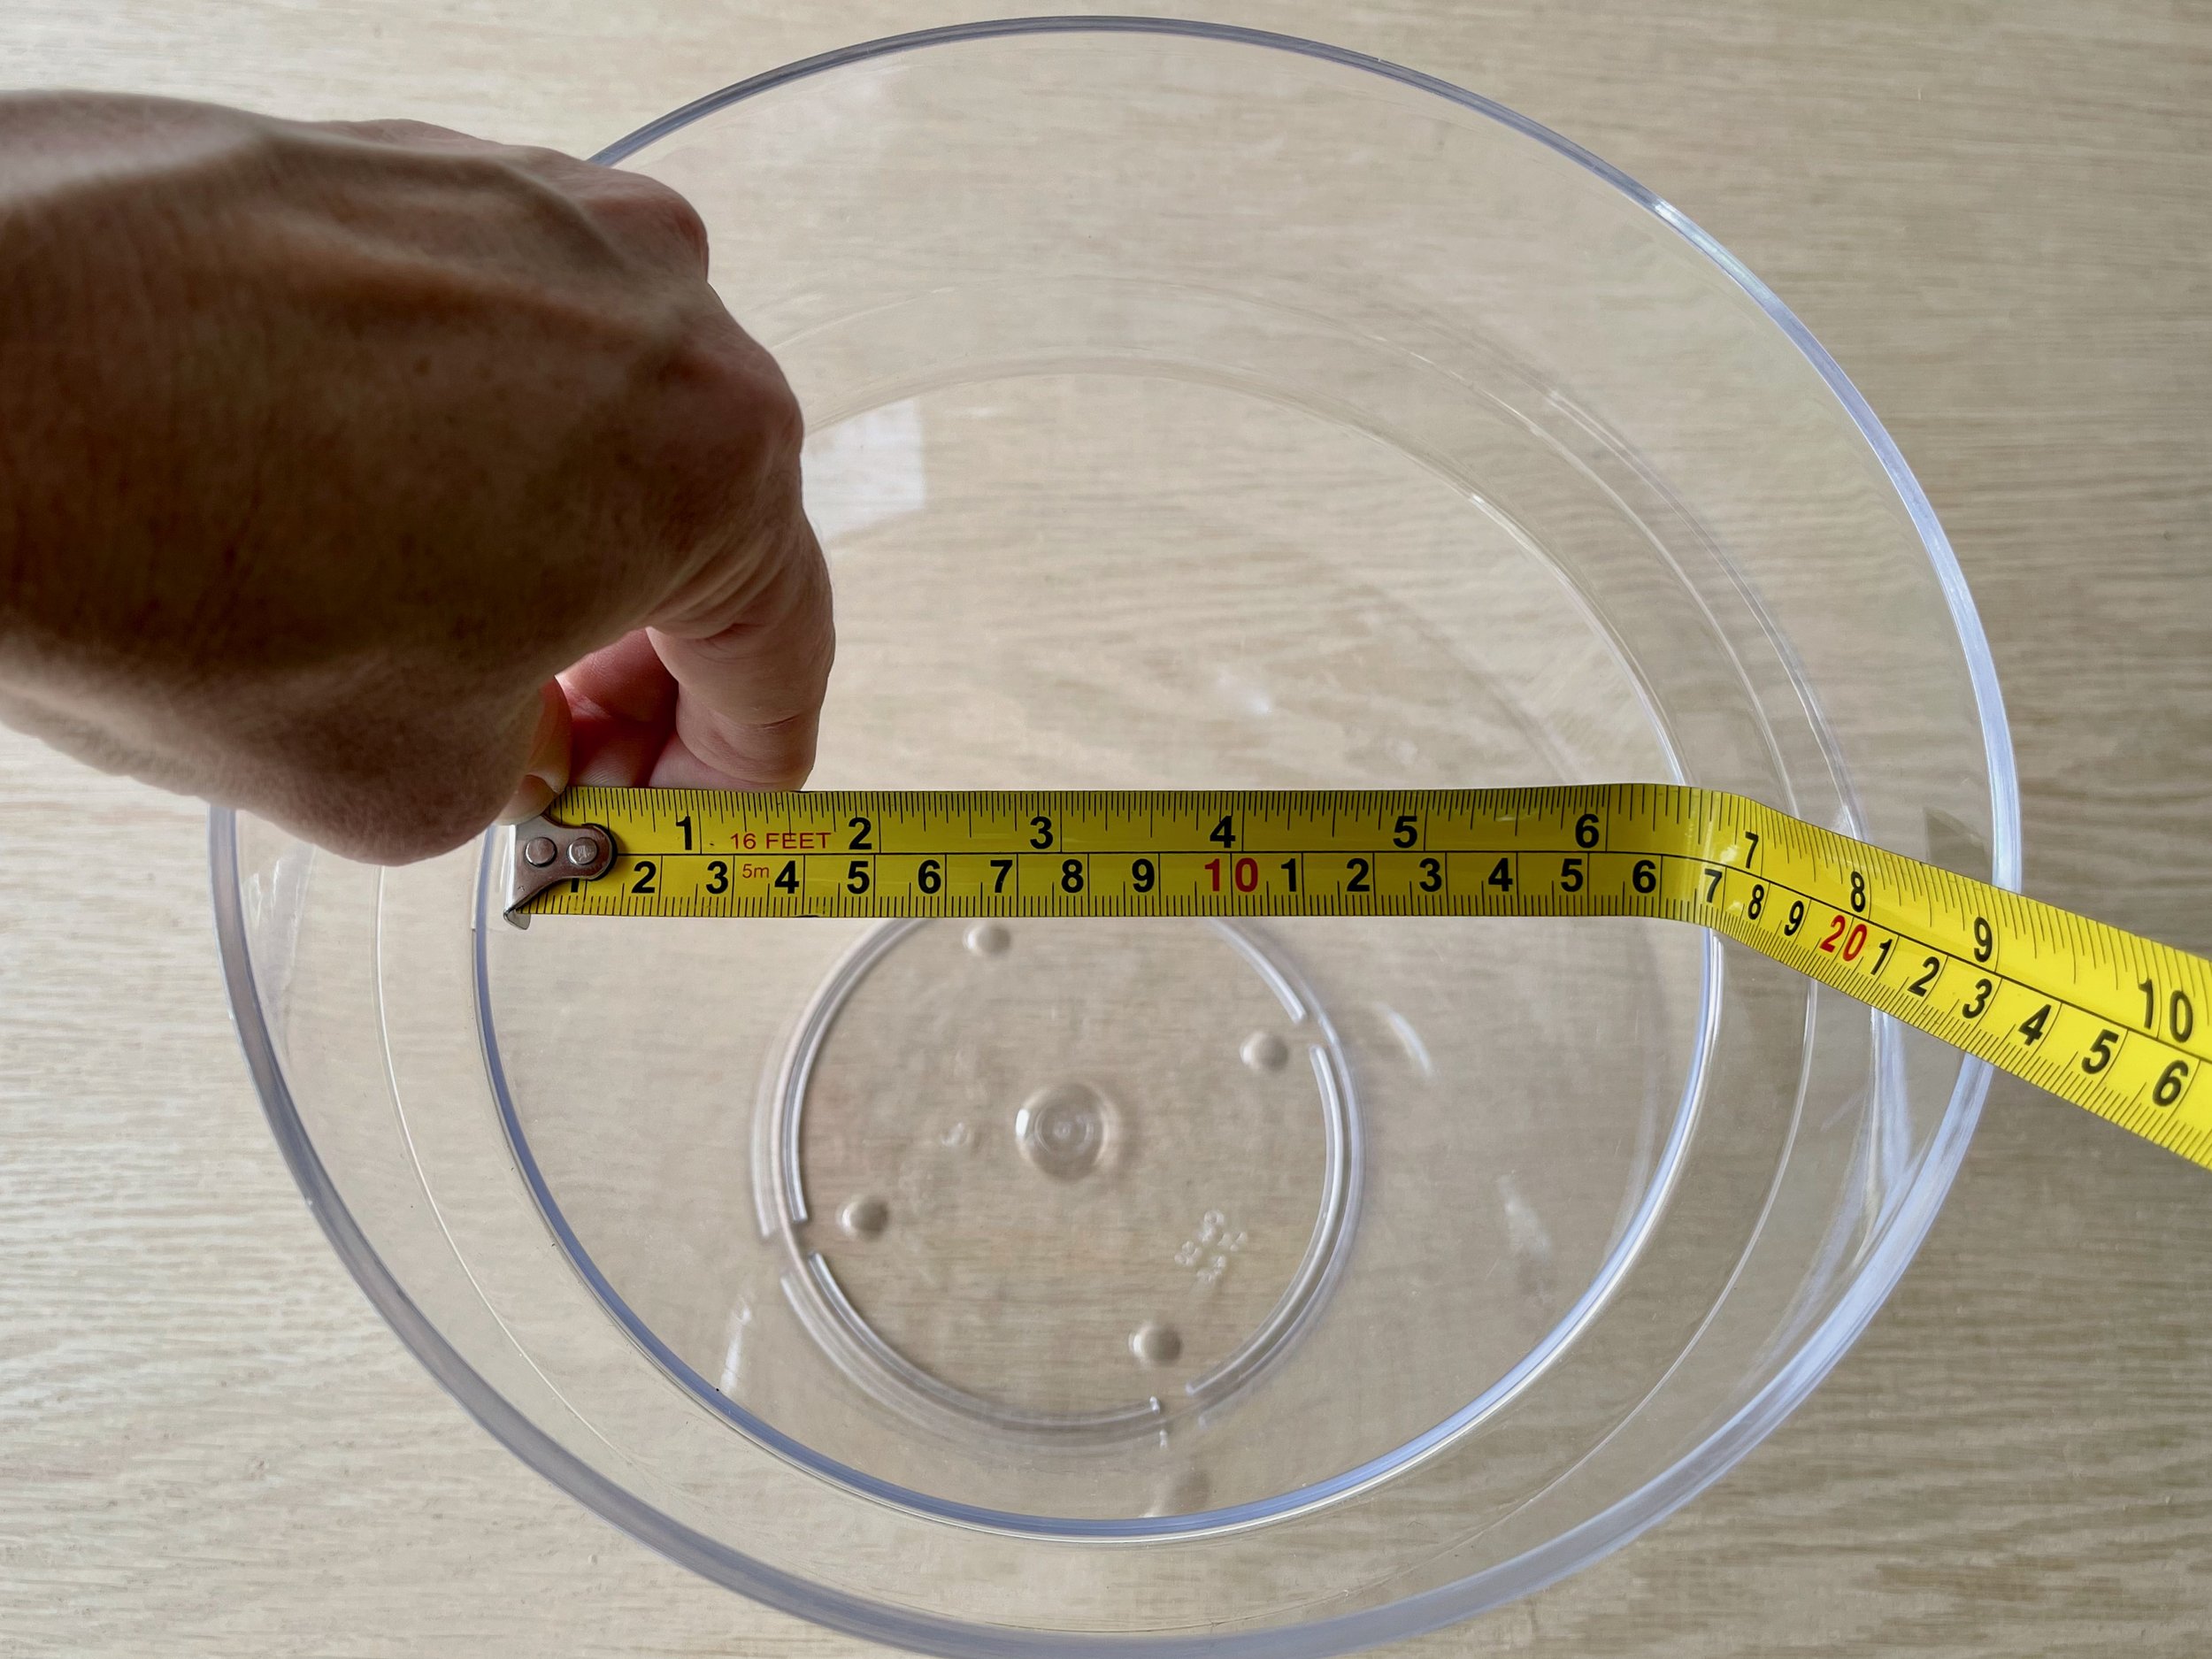
When picking up a 600mm x 18mm teak round panel from Bunnings to make the table, I also found this 200mm clear planter pot, which is a perfect ice bucket.
To do the cutout, I measured the diameter of the pot under the rim, where it would be suspended…
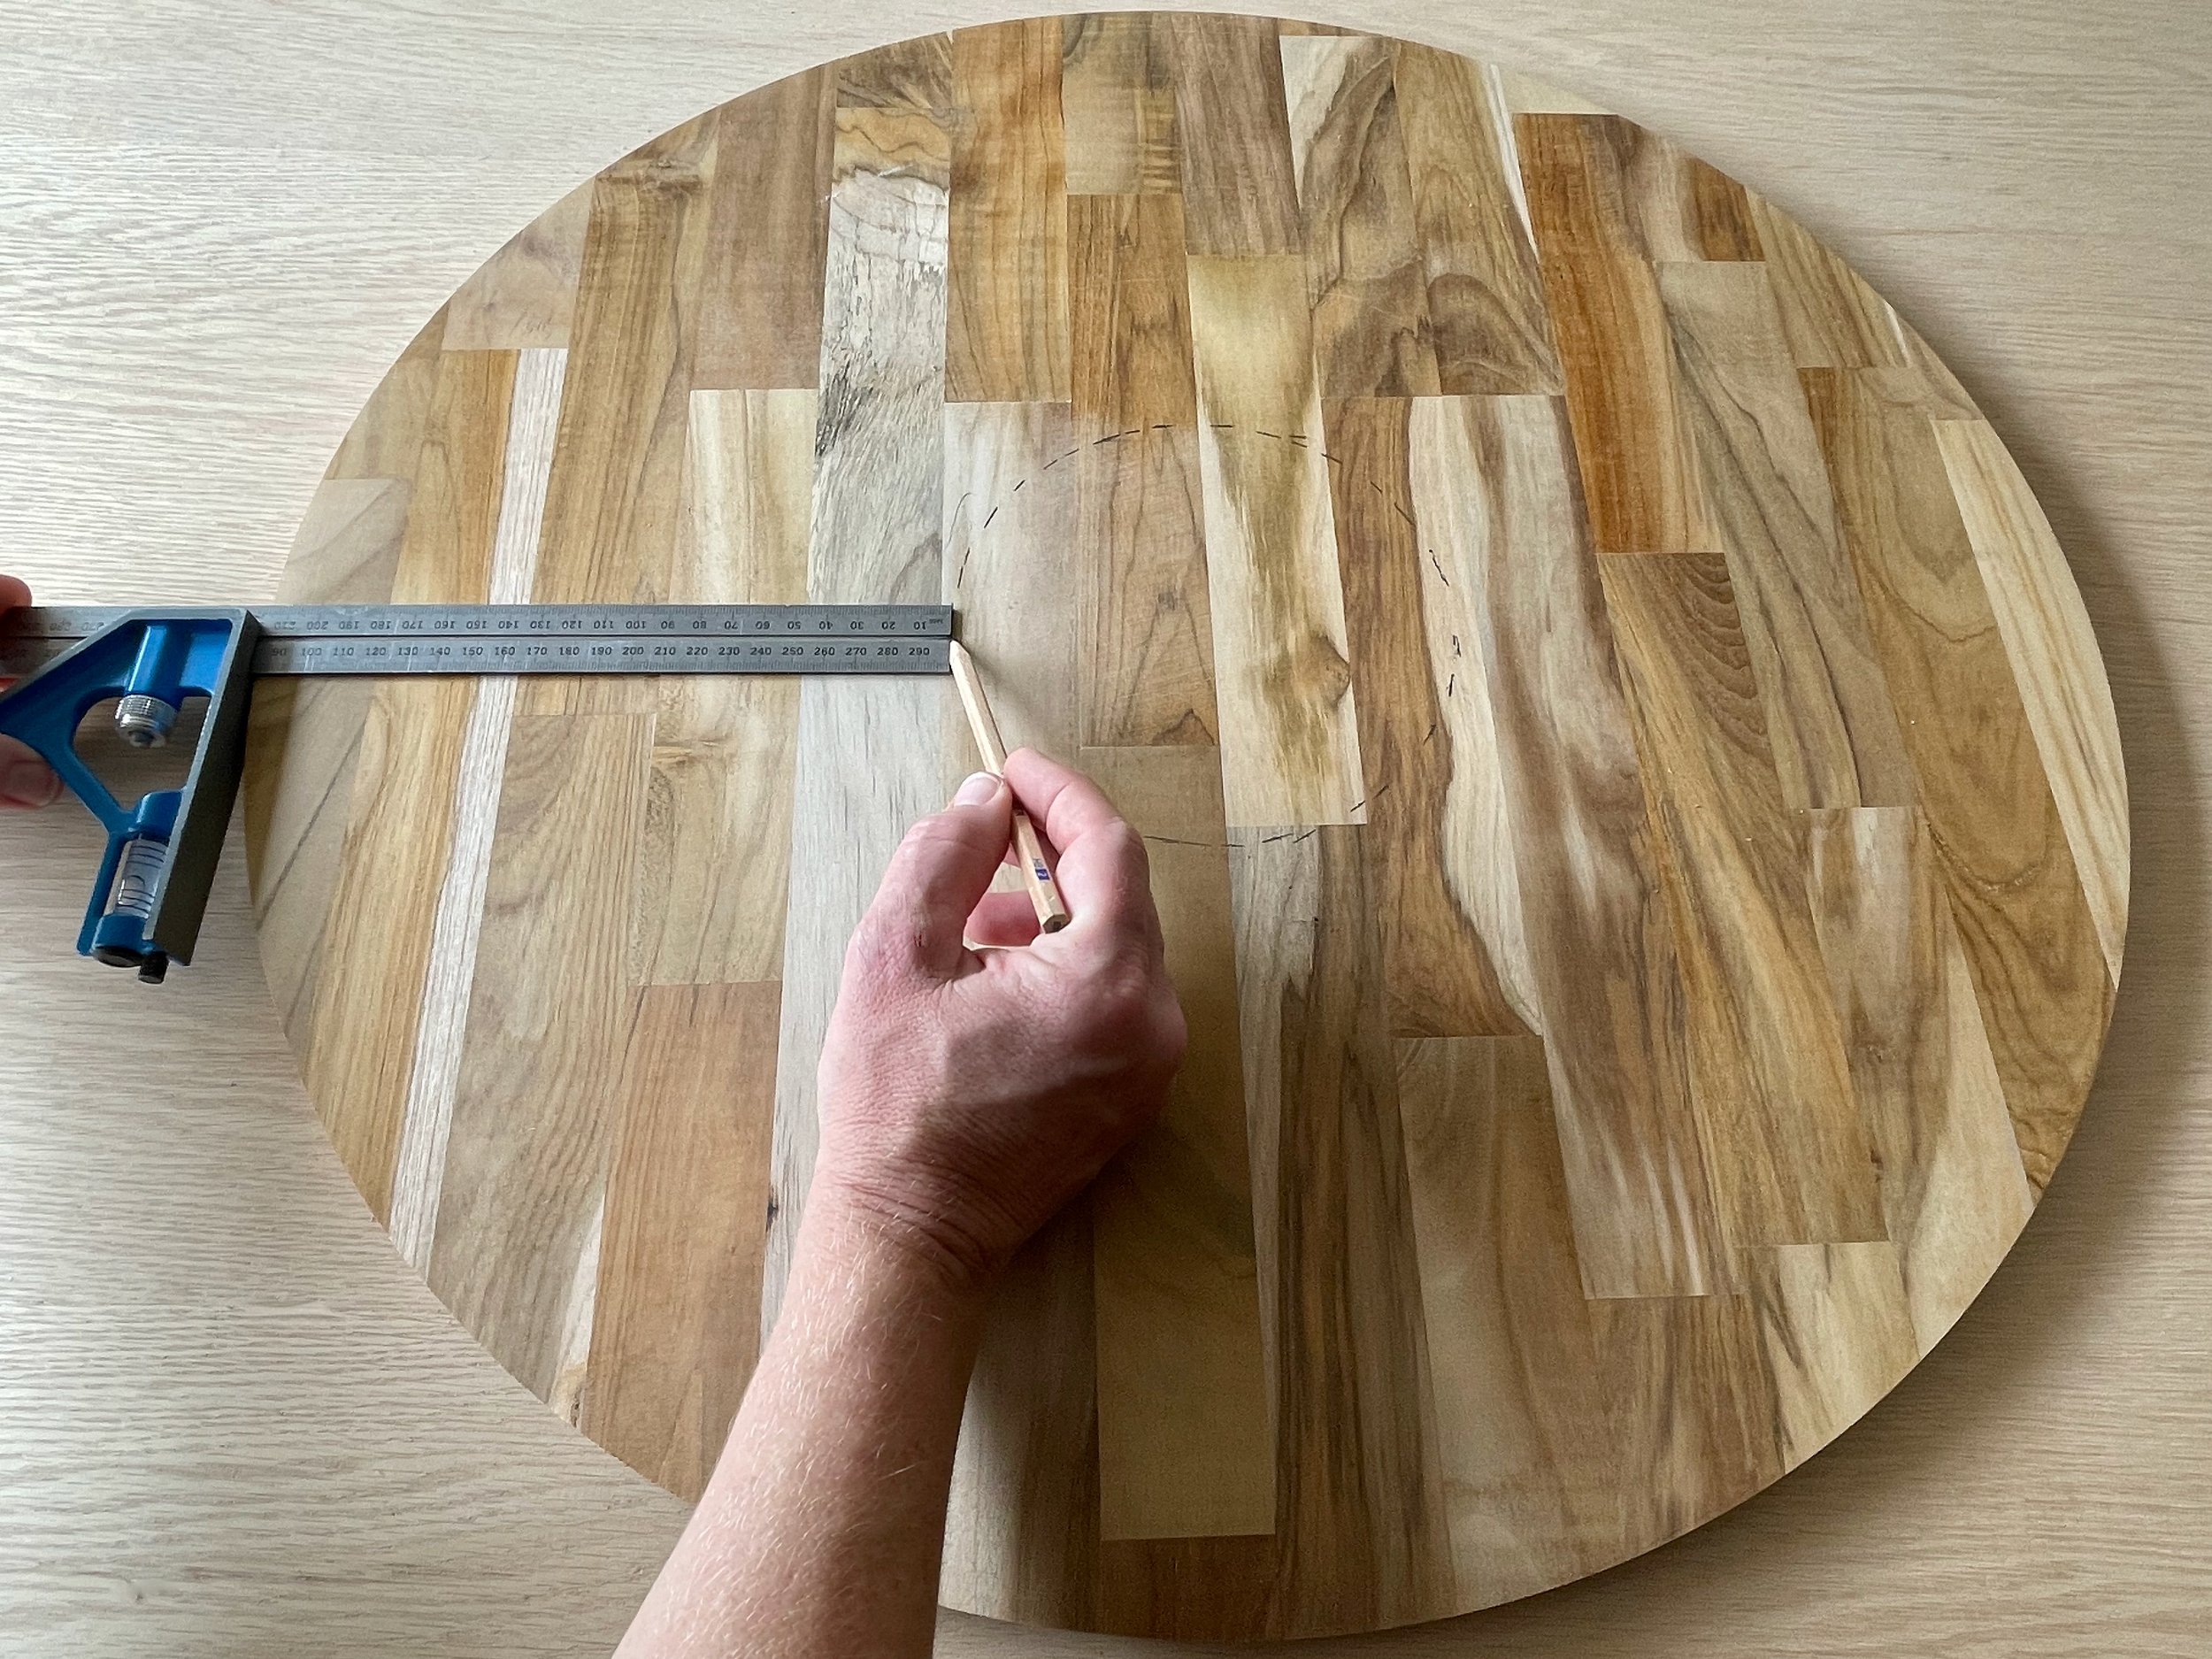
… and transferred this onto the panel with a combination square set at 210mm.
TIP Ensure the combination square is flush against the panel as you move it around the edge. You could also use a compass or a piece of string to mark out a centred 180mm-diameter circle.
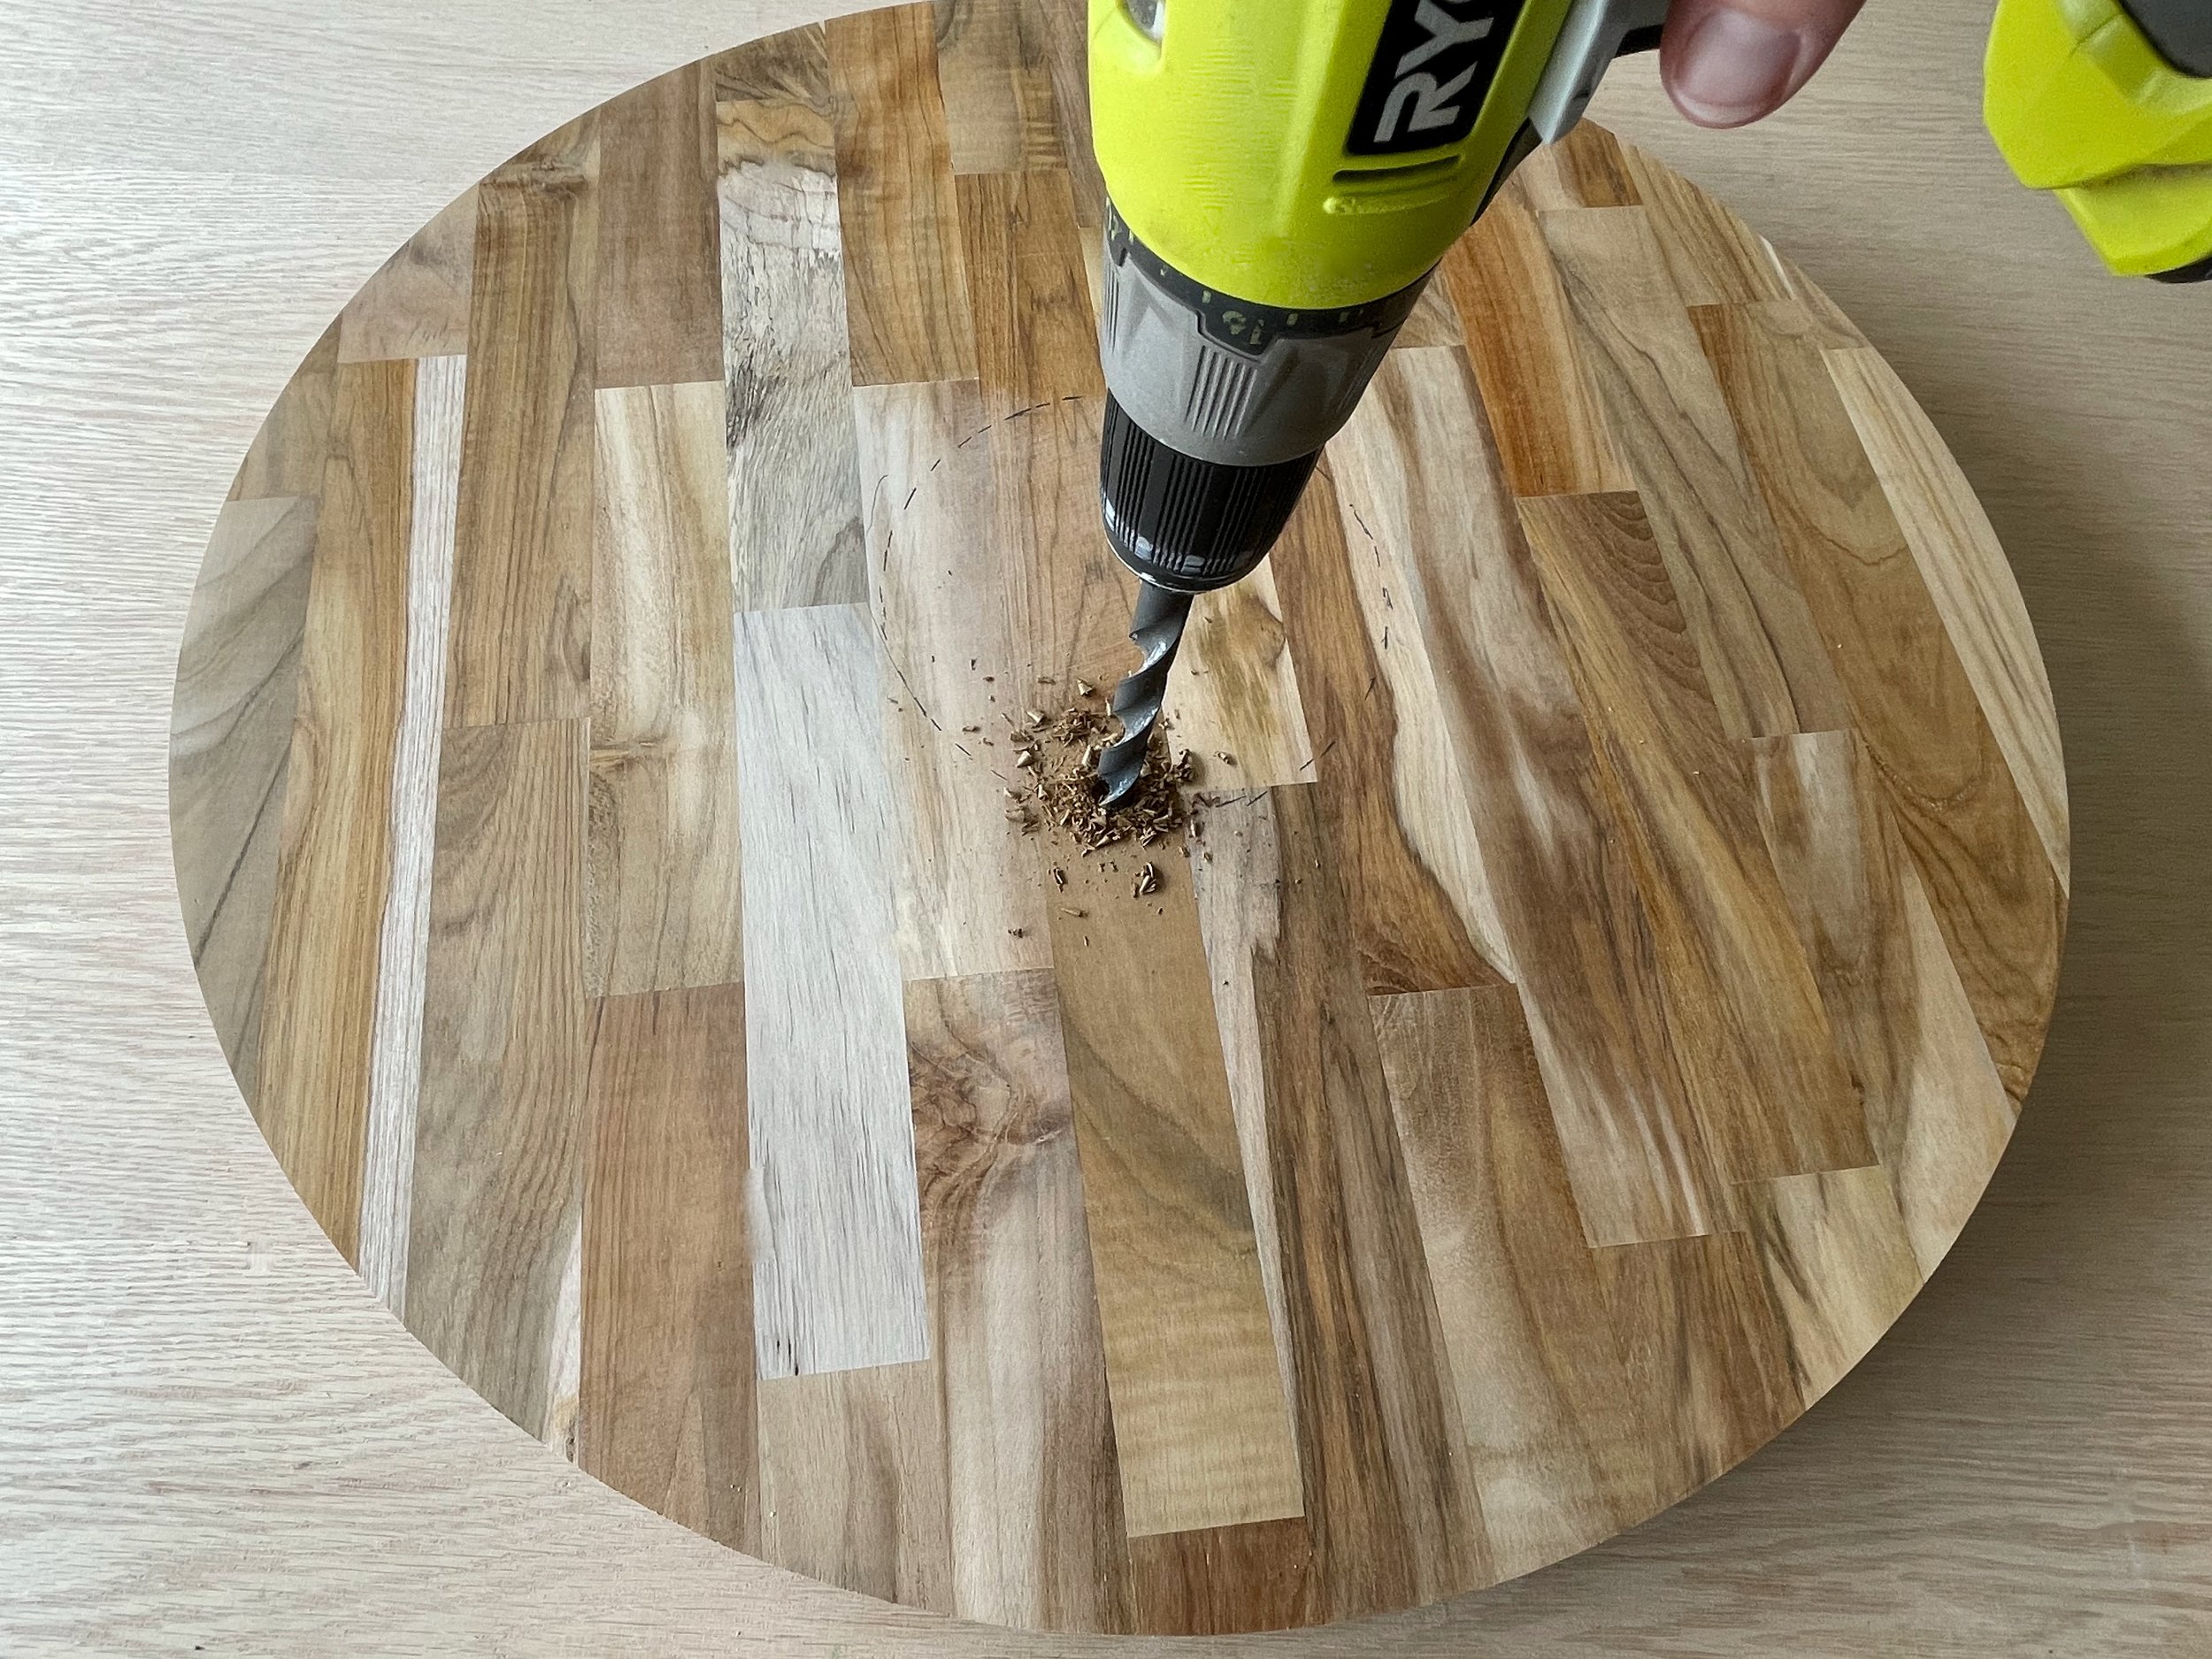
I used a 10mm bit to drill a starter hole for the jigsaw blade just inside the circle.
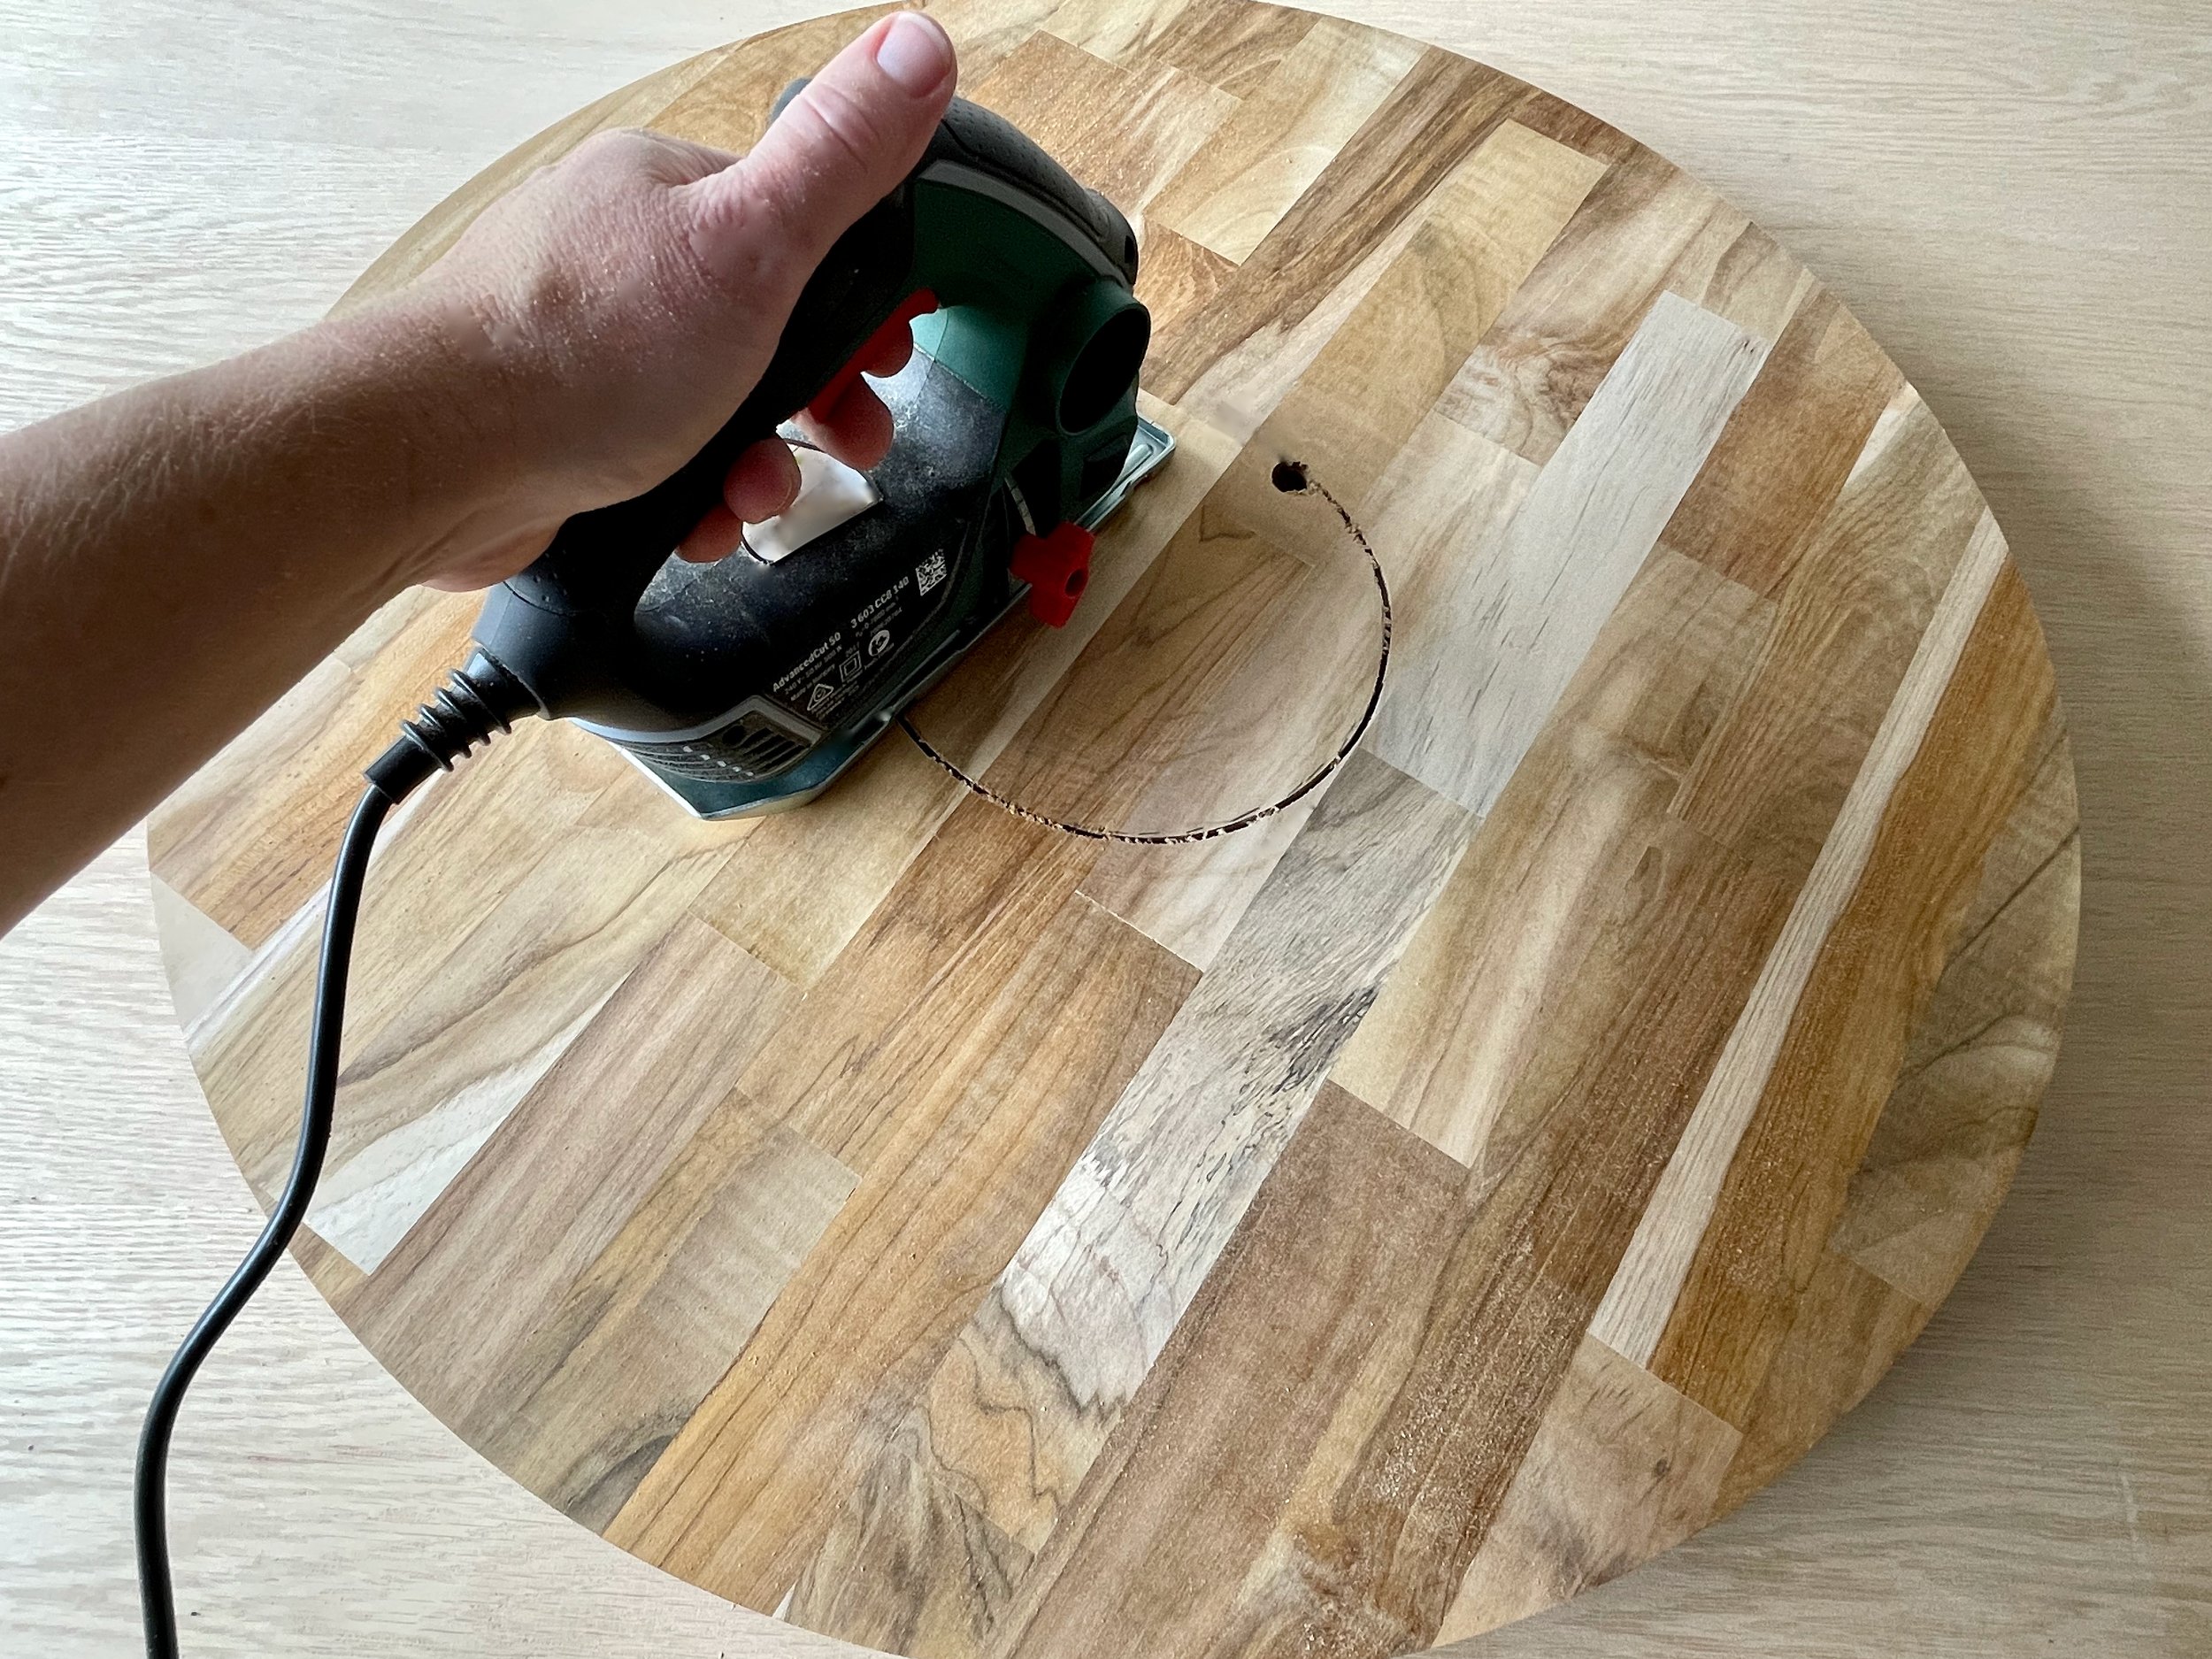
After placing offcuts underneath for clearance, I started the jigsaw in the hole and slowly moved the panel while cutting around the dotted line.
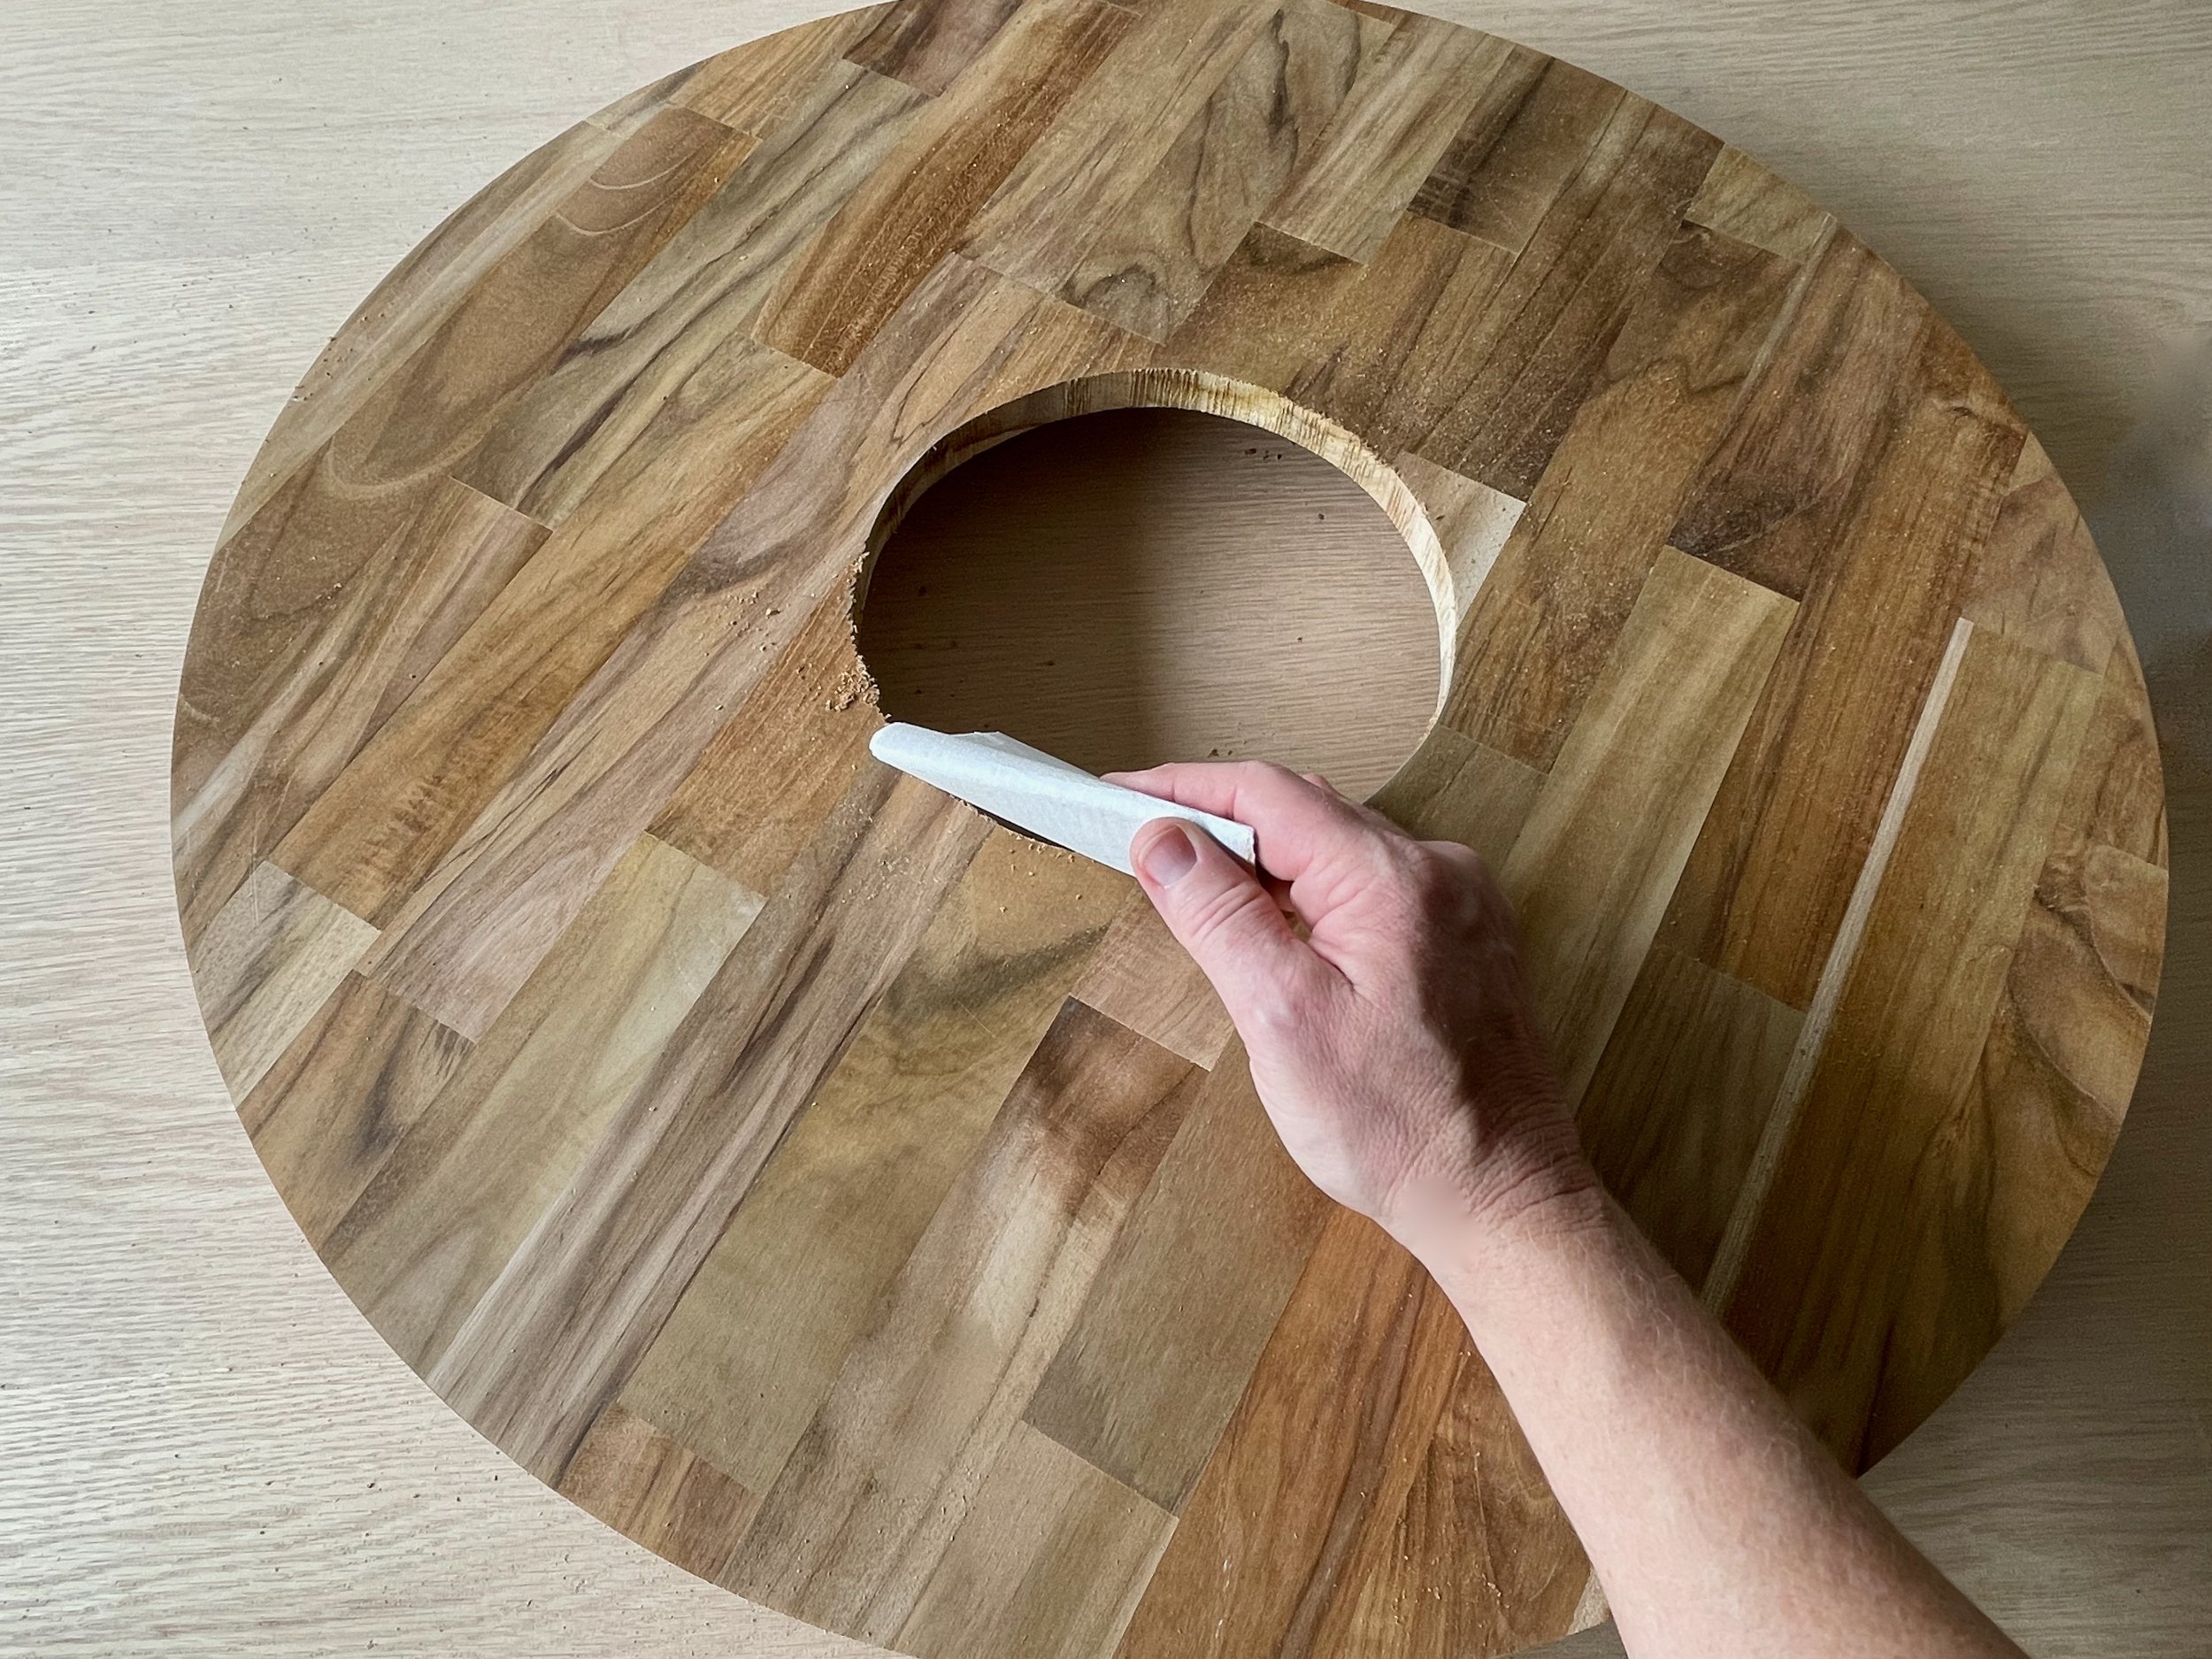
To smooth inside the cutout and round over the outside edges of the panel, I used 120-grit abrasive paper, then sanded all over with 180-grit.
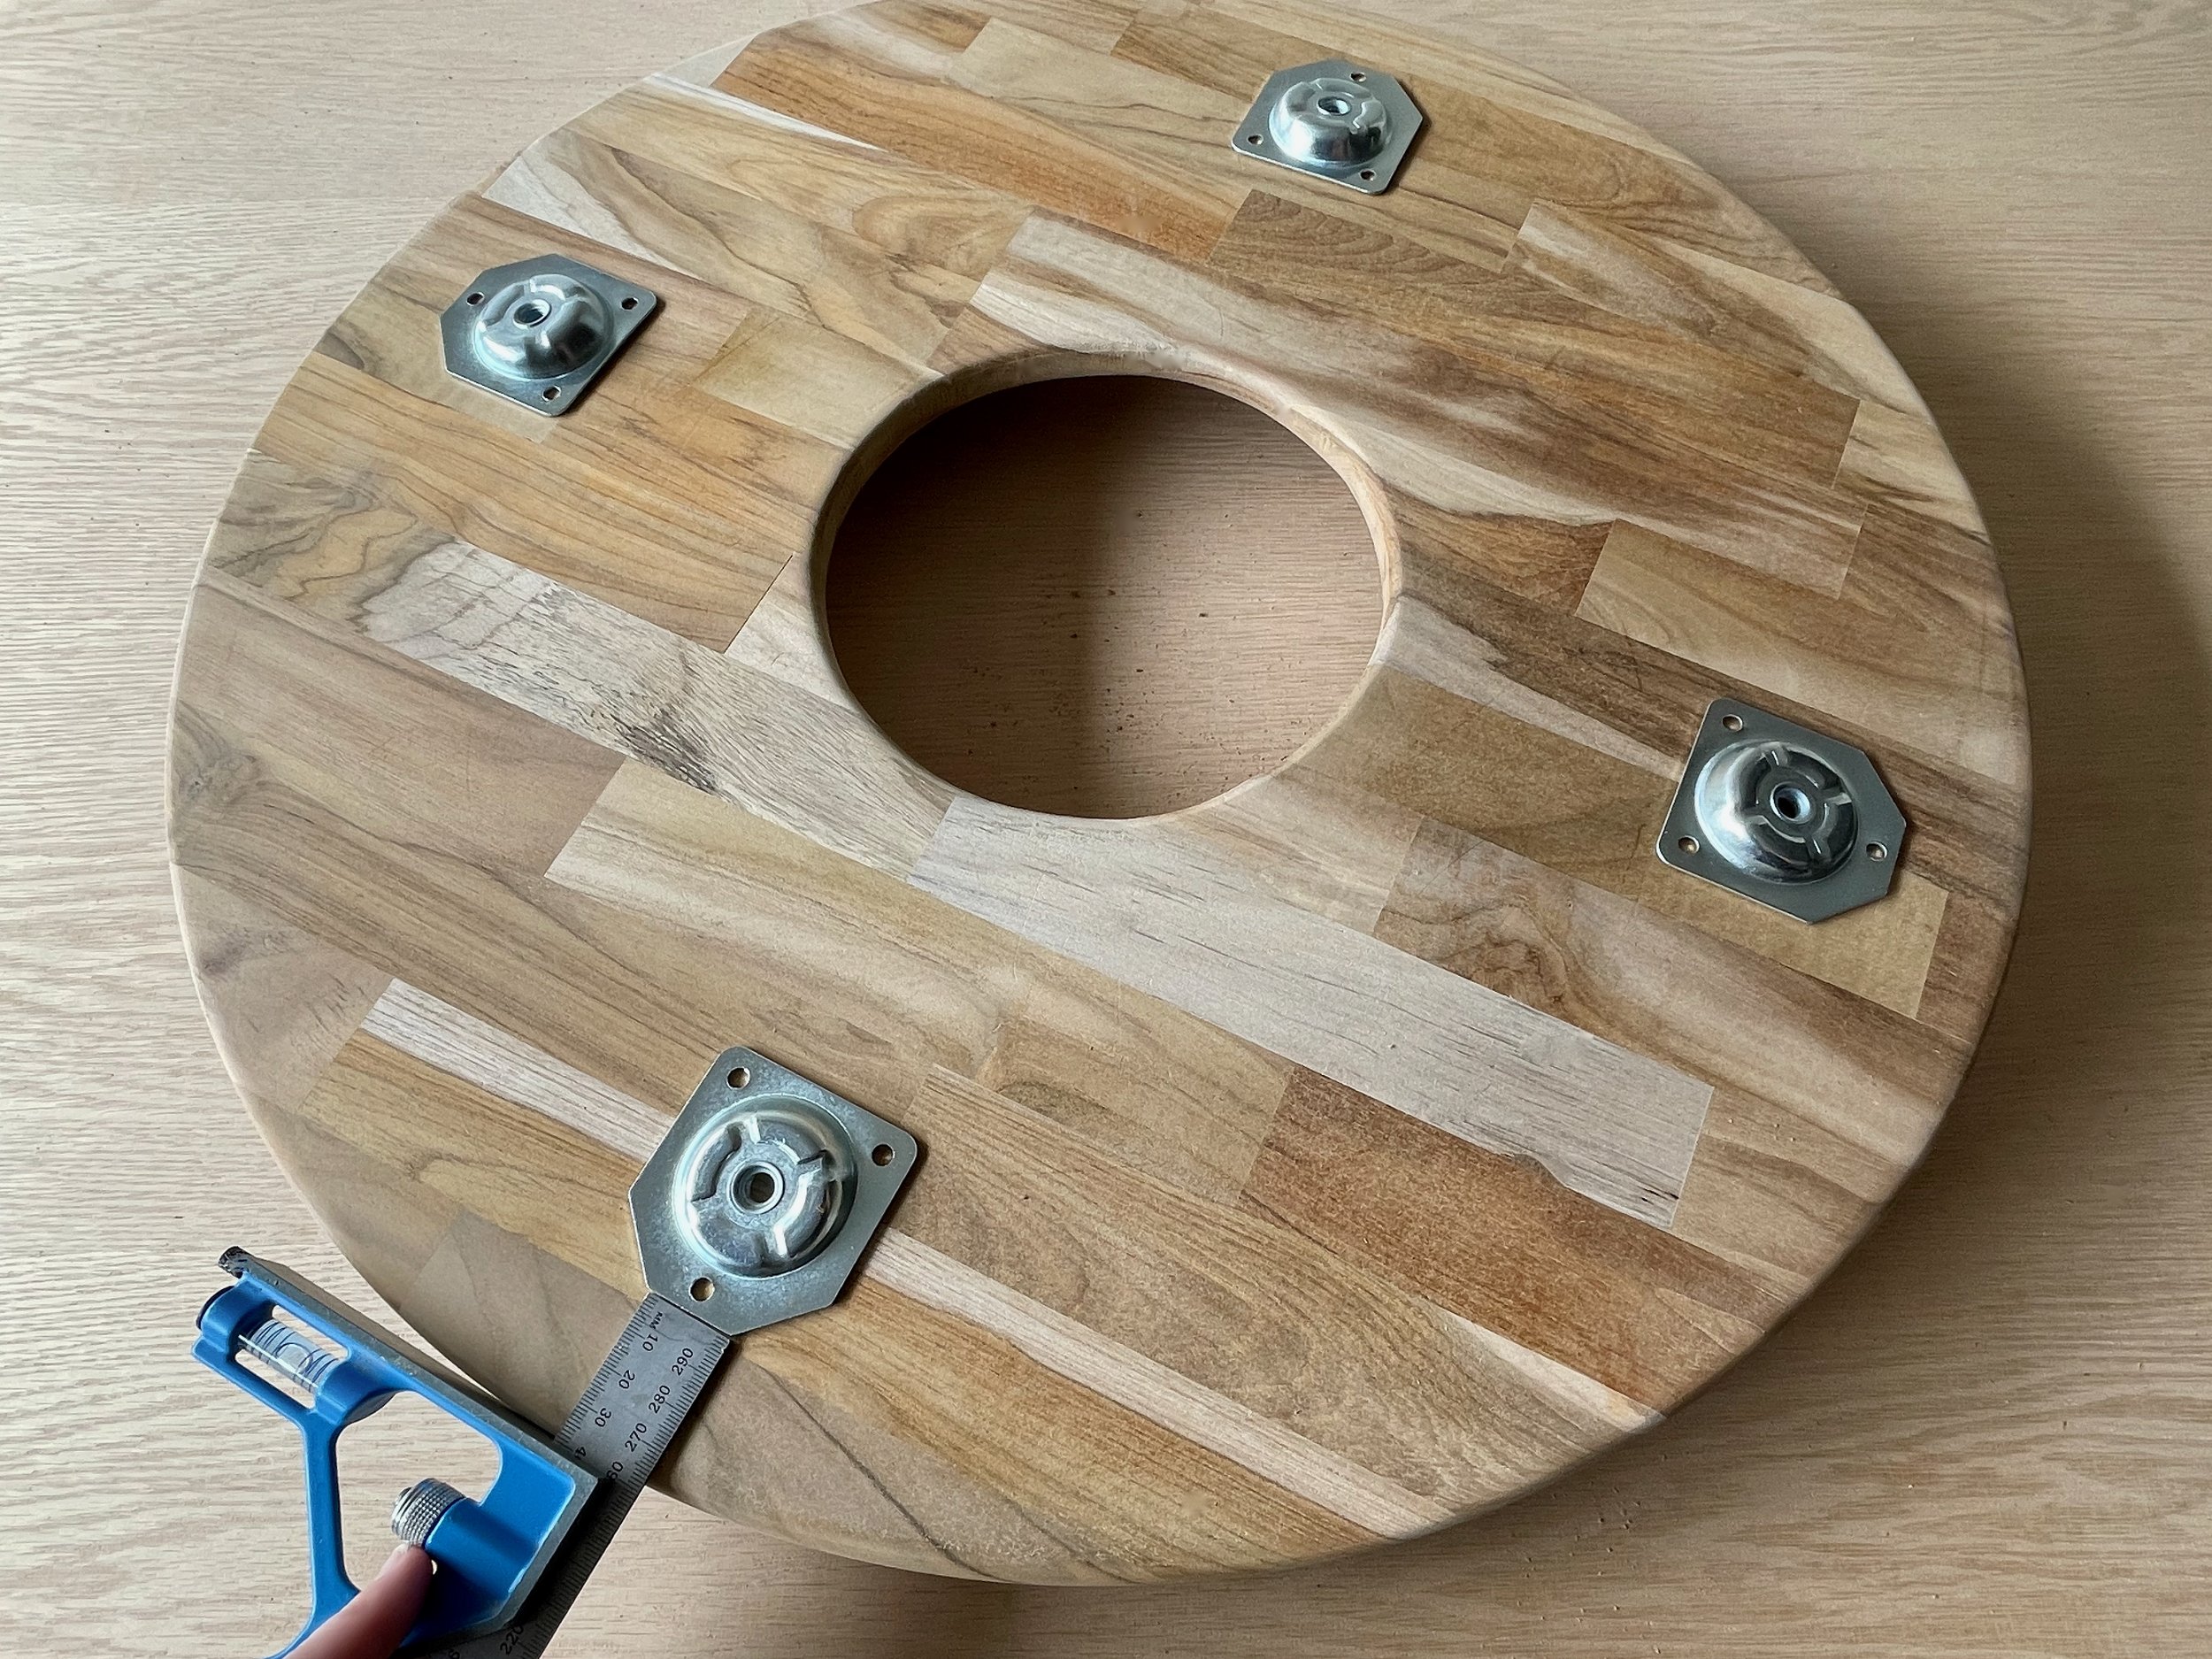
On the back, I positioned four angled leg plates, 40mm from the edge, checking the points were facing forward so the legs angle outwards.

Using a 2mm bit, I drilled shallow starter holes through the plates, then secured them with the supplied screws.
TIP These screws required a flat head driver bit instead of the usual Phillips head.

I wound tape around a 7mm bit, 20mm from the end, as a depth gauge to help prevent drilling right through the panel when making the centre holes.
TIP Hold the drill at the same angle as the plate and stop when the tape swipes it.

I twisted in the legs, making sure they finished tightly against the plates.
TIP When purchasing your materials, check the centre holes of the plates are the same size thread as the legs.
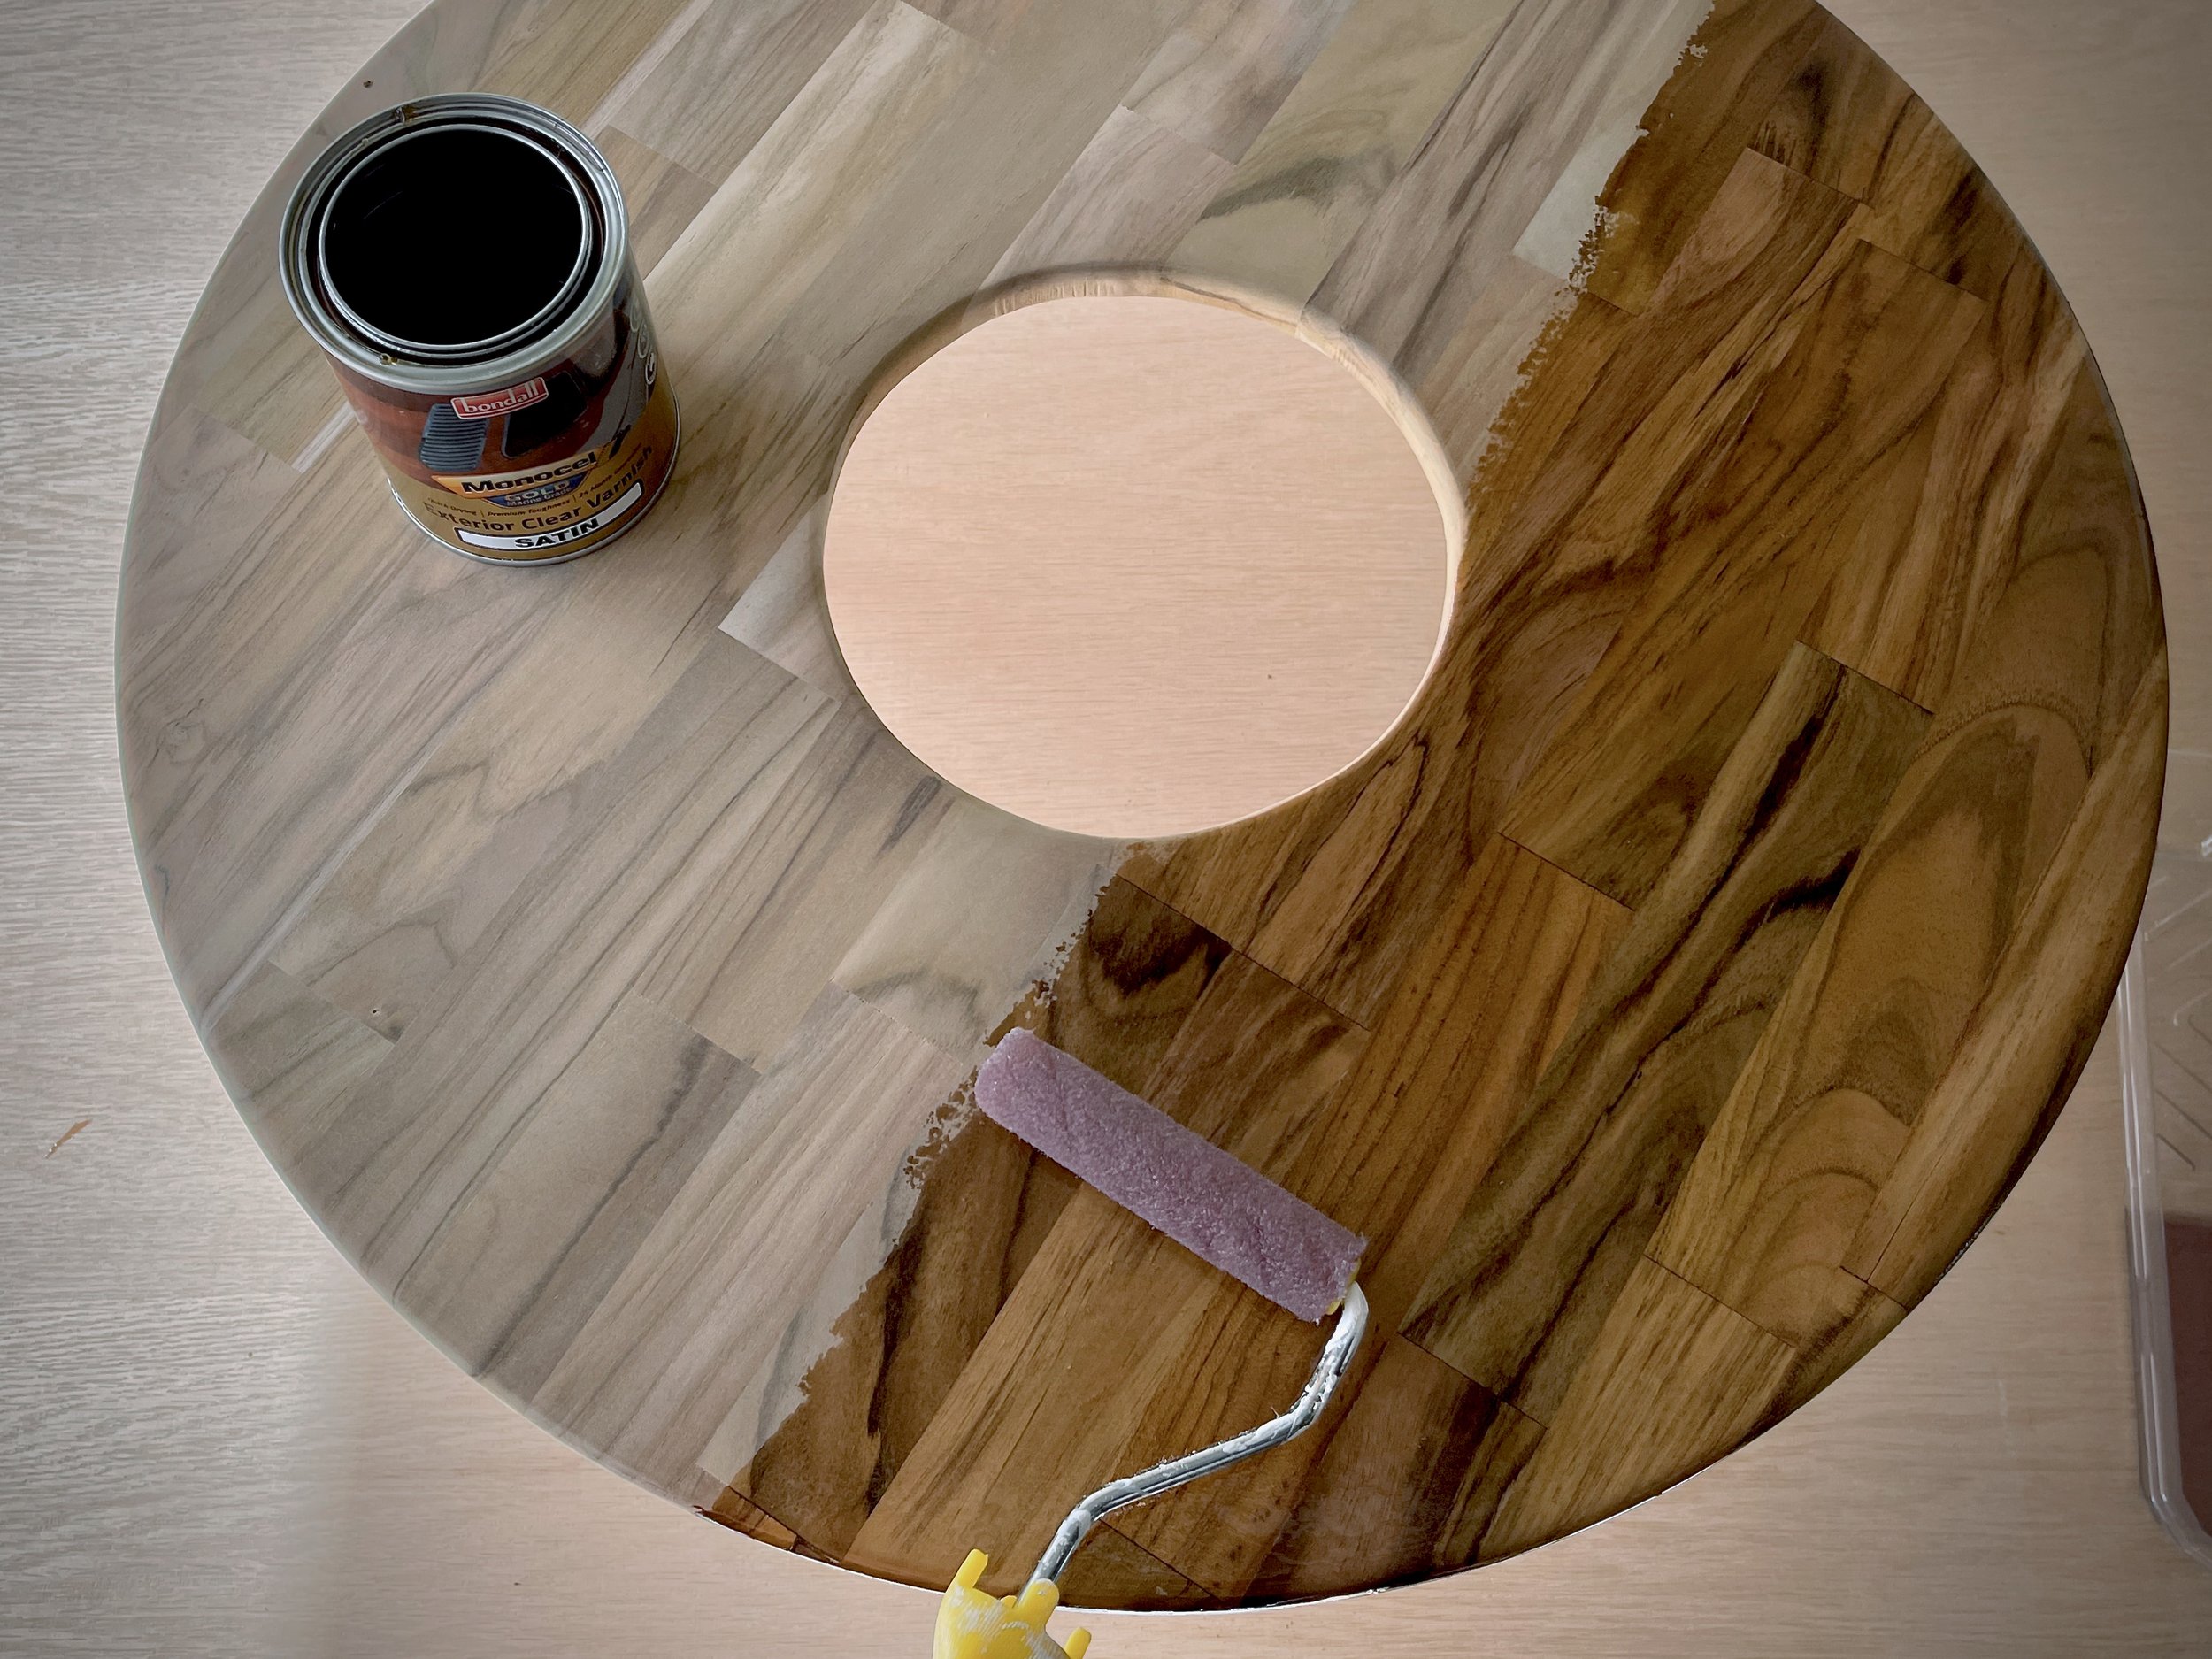
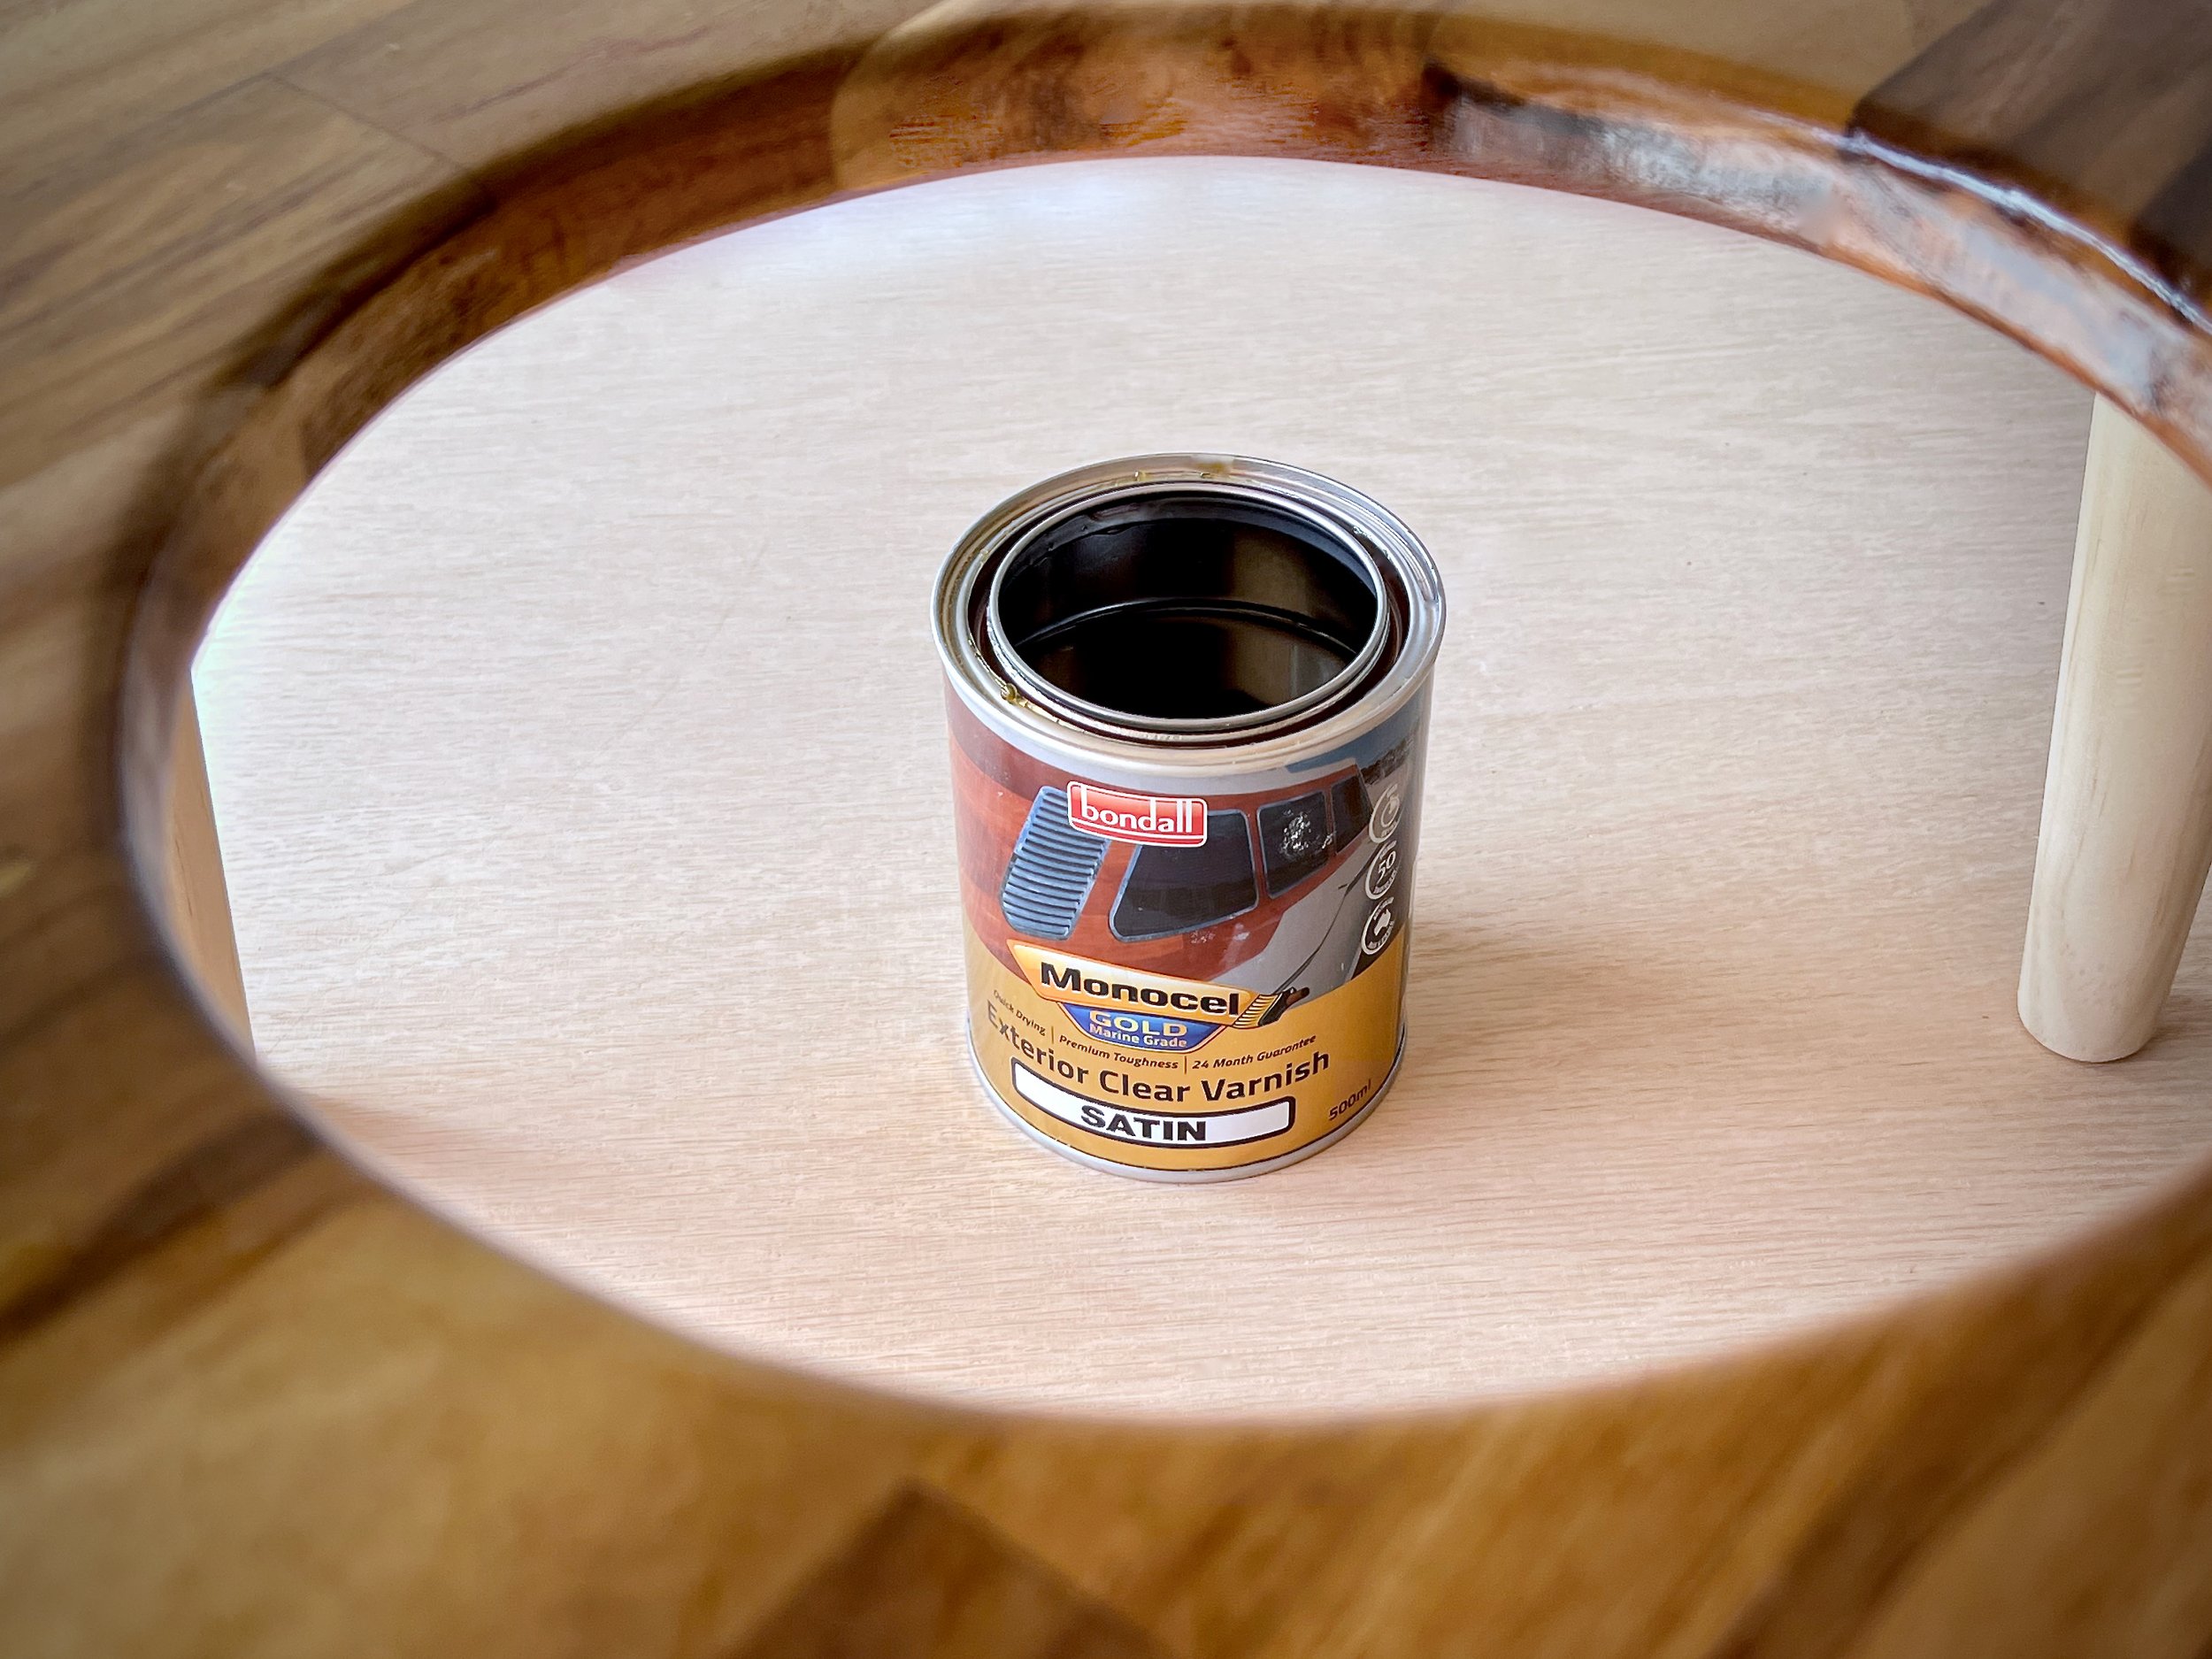
After wiping away dust with a damp cloth, I applied marine-grade Monocel Gold Clear Exterior Varnish in Satin protect from moisture damage while highlighting the lovely grain of the teak. I used a mini mohair roller to seal the legs, then flipped the table upright to seal the rest, leaving it to dry.
I lightly sanded with 240-grit abrasive paper, wiped away the dust, then applied a second coat. A quick third coat over the top and inside the cutout adds an extra layer of moisture protection.
Then all I needed to do was drop in the clear pot, add ice and say cheers to happy summer catch-ups on the beach!

Will you be making a picnic drinks table?
Tag me on your project and follow more of my DIY journey on Instagram for tool tips, home improvement and simple building projects.