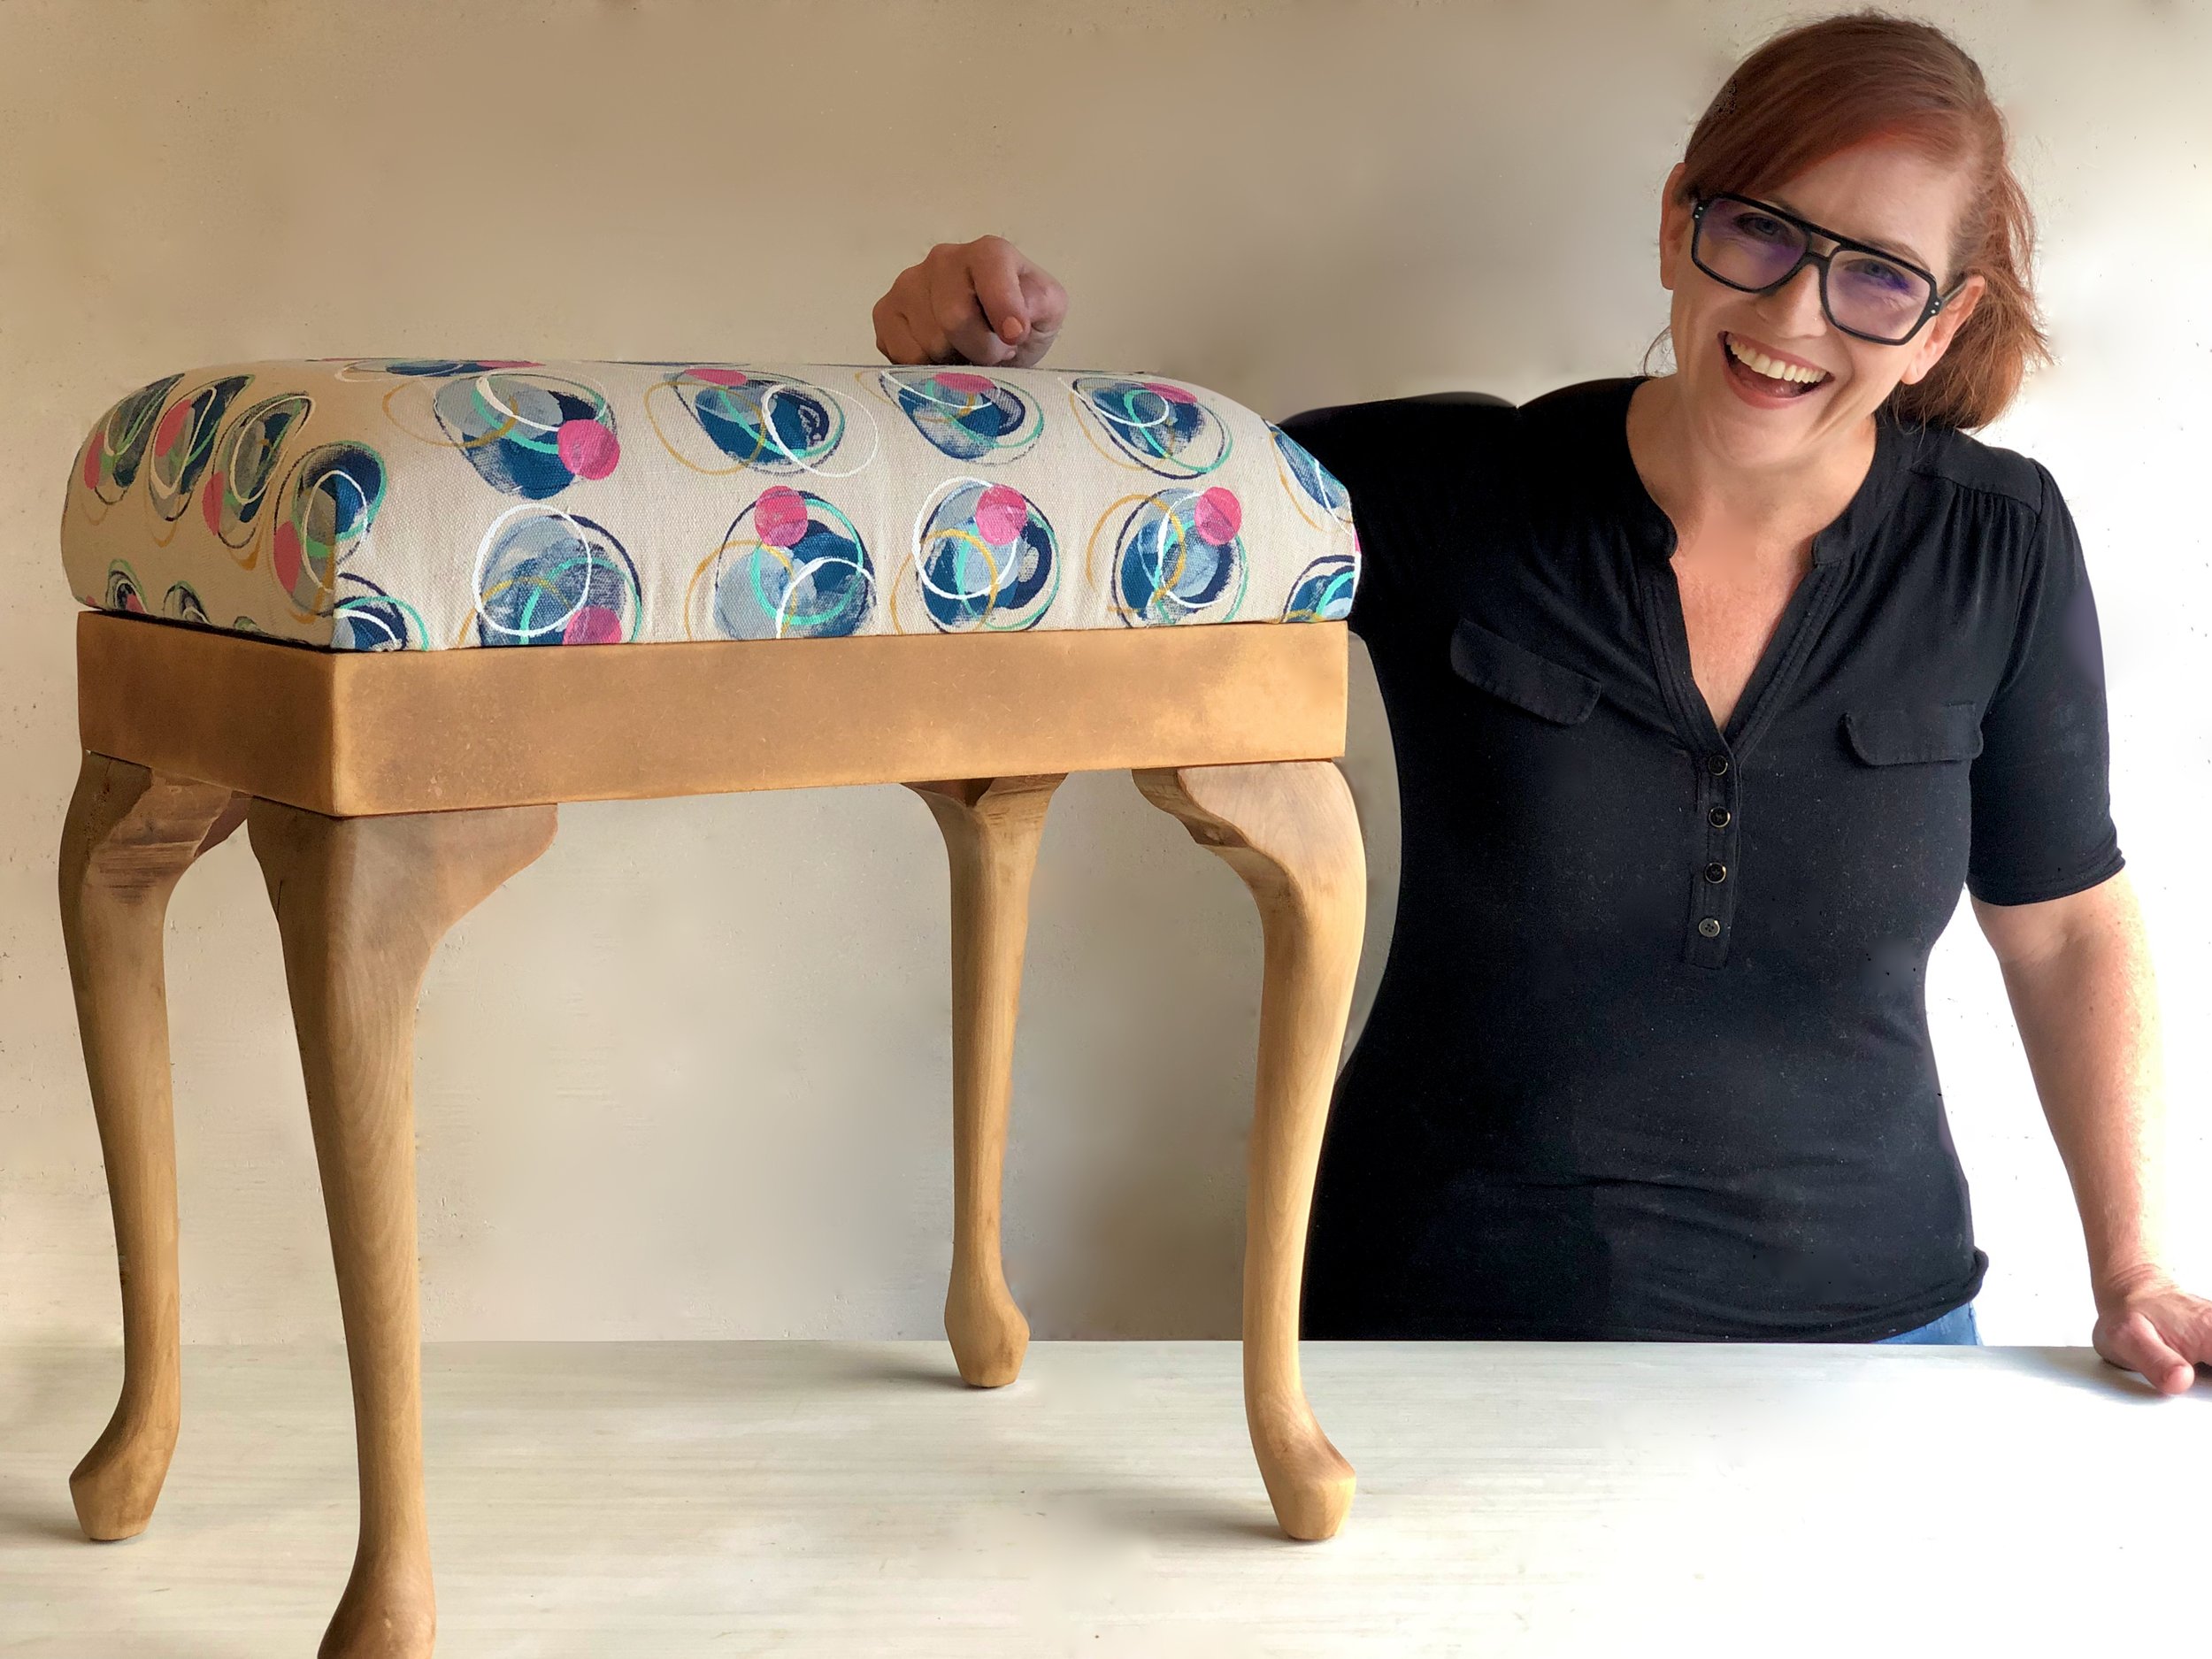
Stool Makeover with DIY Fabric
Natasha Dickins
I have a three-step makeover process that works for most refurbs, whether it’s a furniture revamp or a full room renovation. The plan is to…
① REMOVE the most dated or broken part.
② ADD a modern element while improving the function.
③ UPLIFT the experience by making it more sensory.
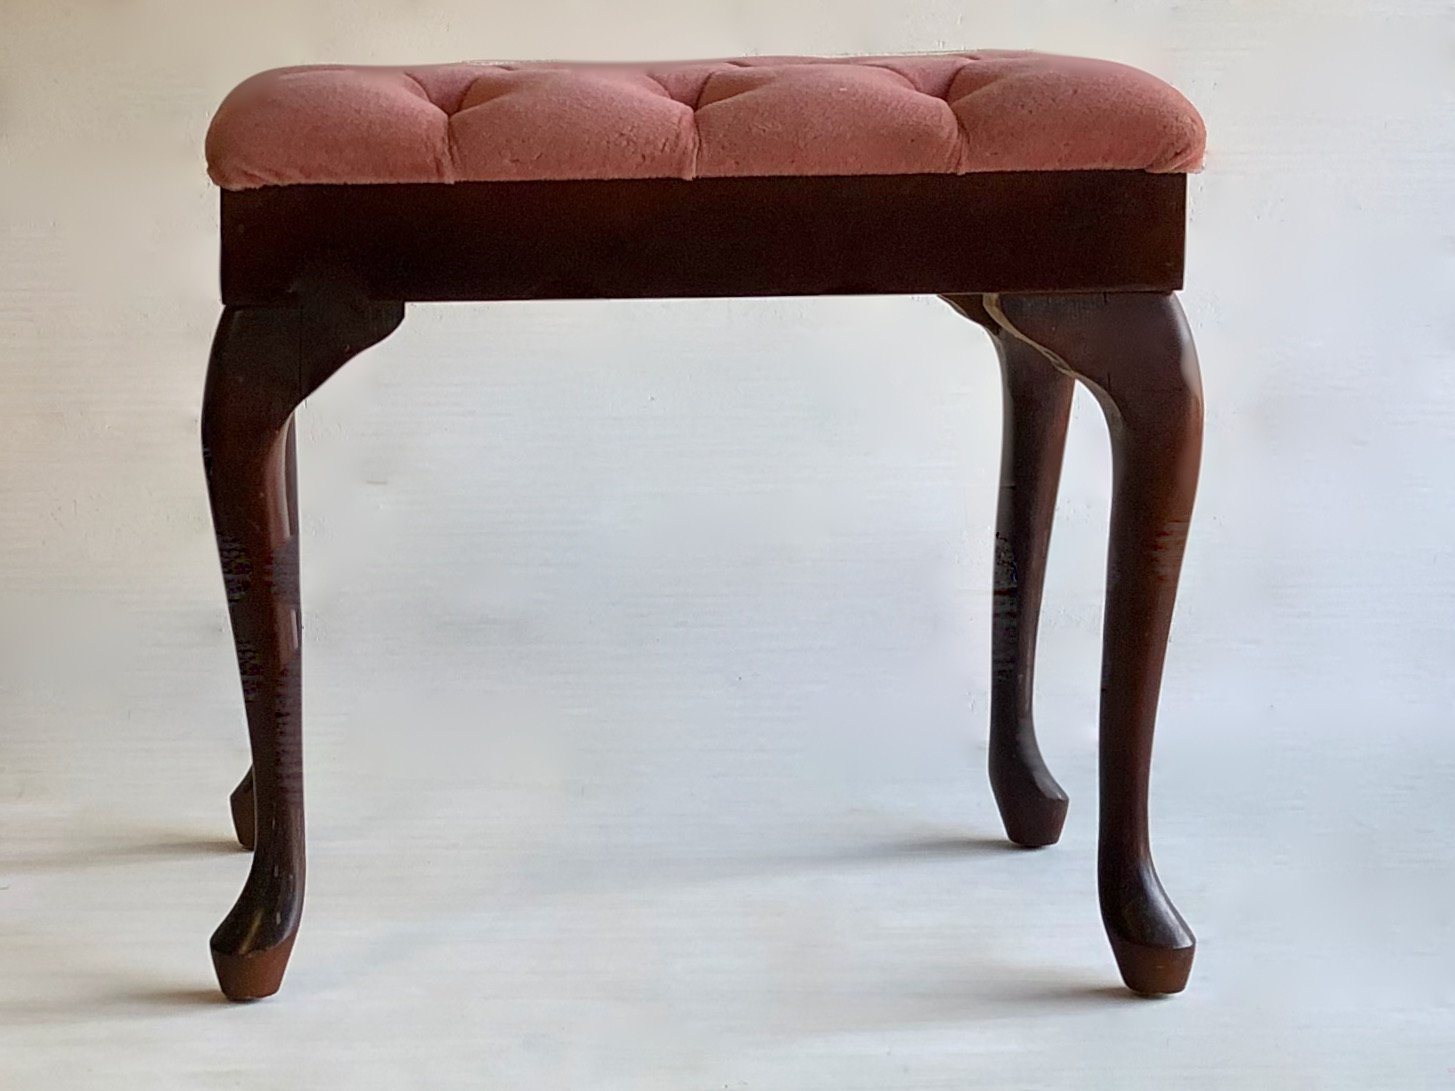
BEFORE This elegant footstool is a classic shape, but the pink velvet is worn and the seat foam is crumbling.
My plan was to remove the upholstery, add new foam and fabric and uplift by removing the varnish and sealing with furniture wax for a lighter, more textural finish.
“My secret to revamping most vintage furniture is to remove the dated varnish to reveal the natural woodgrain of the timber”
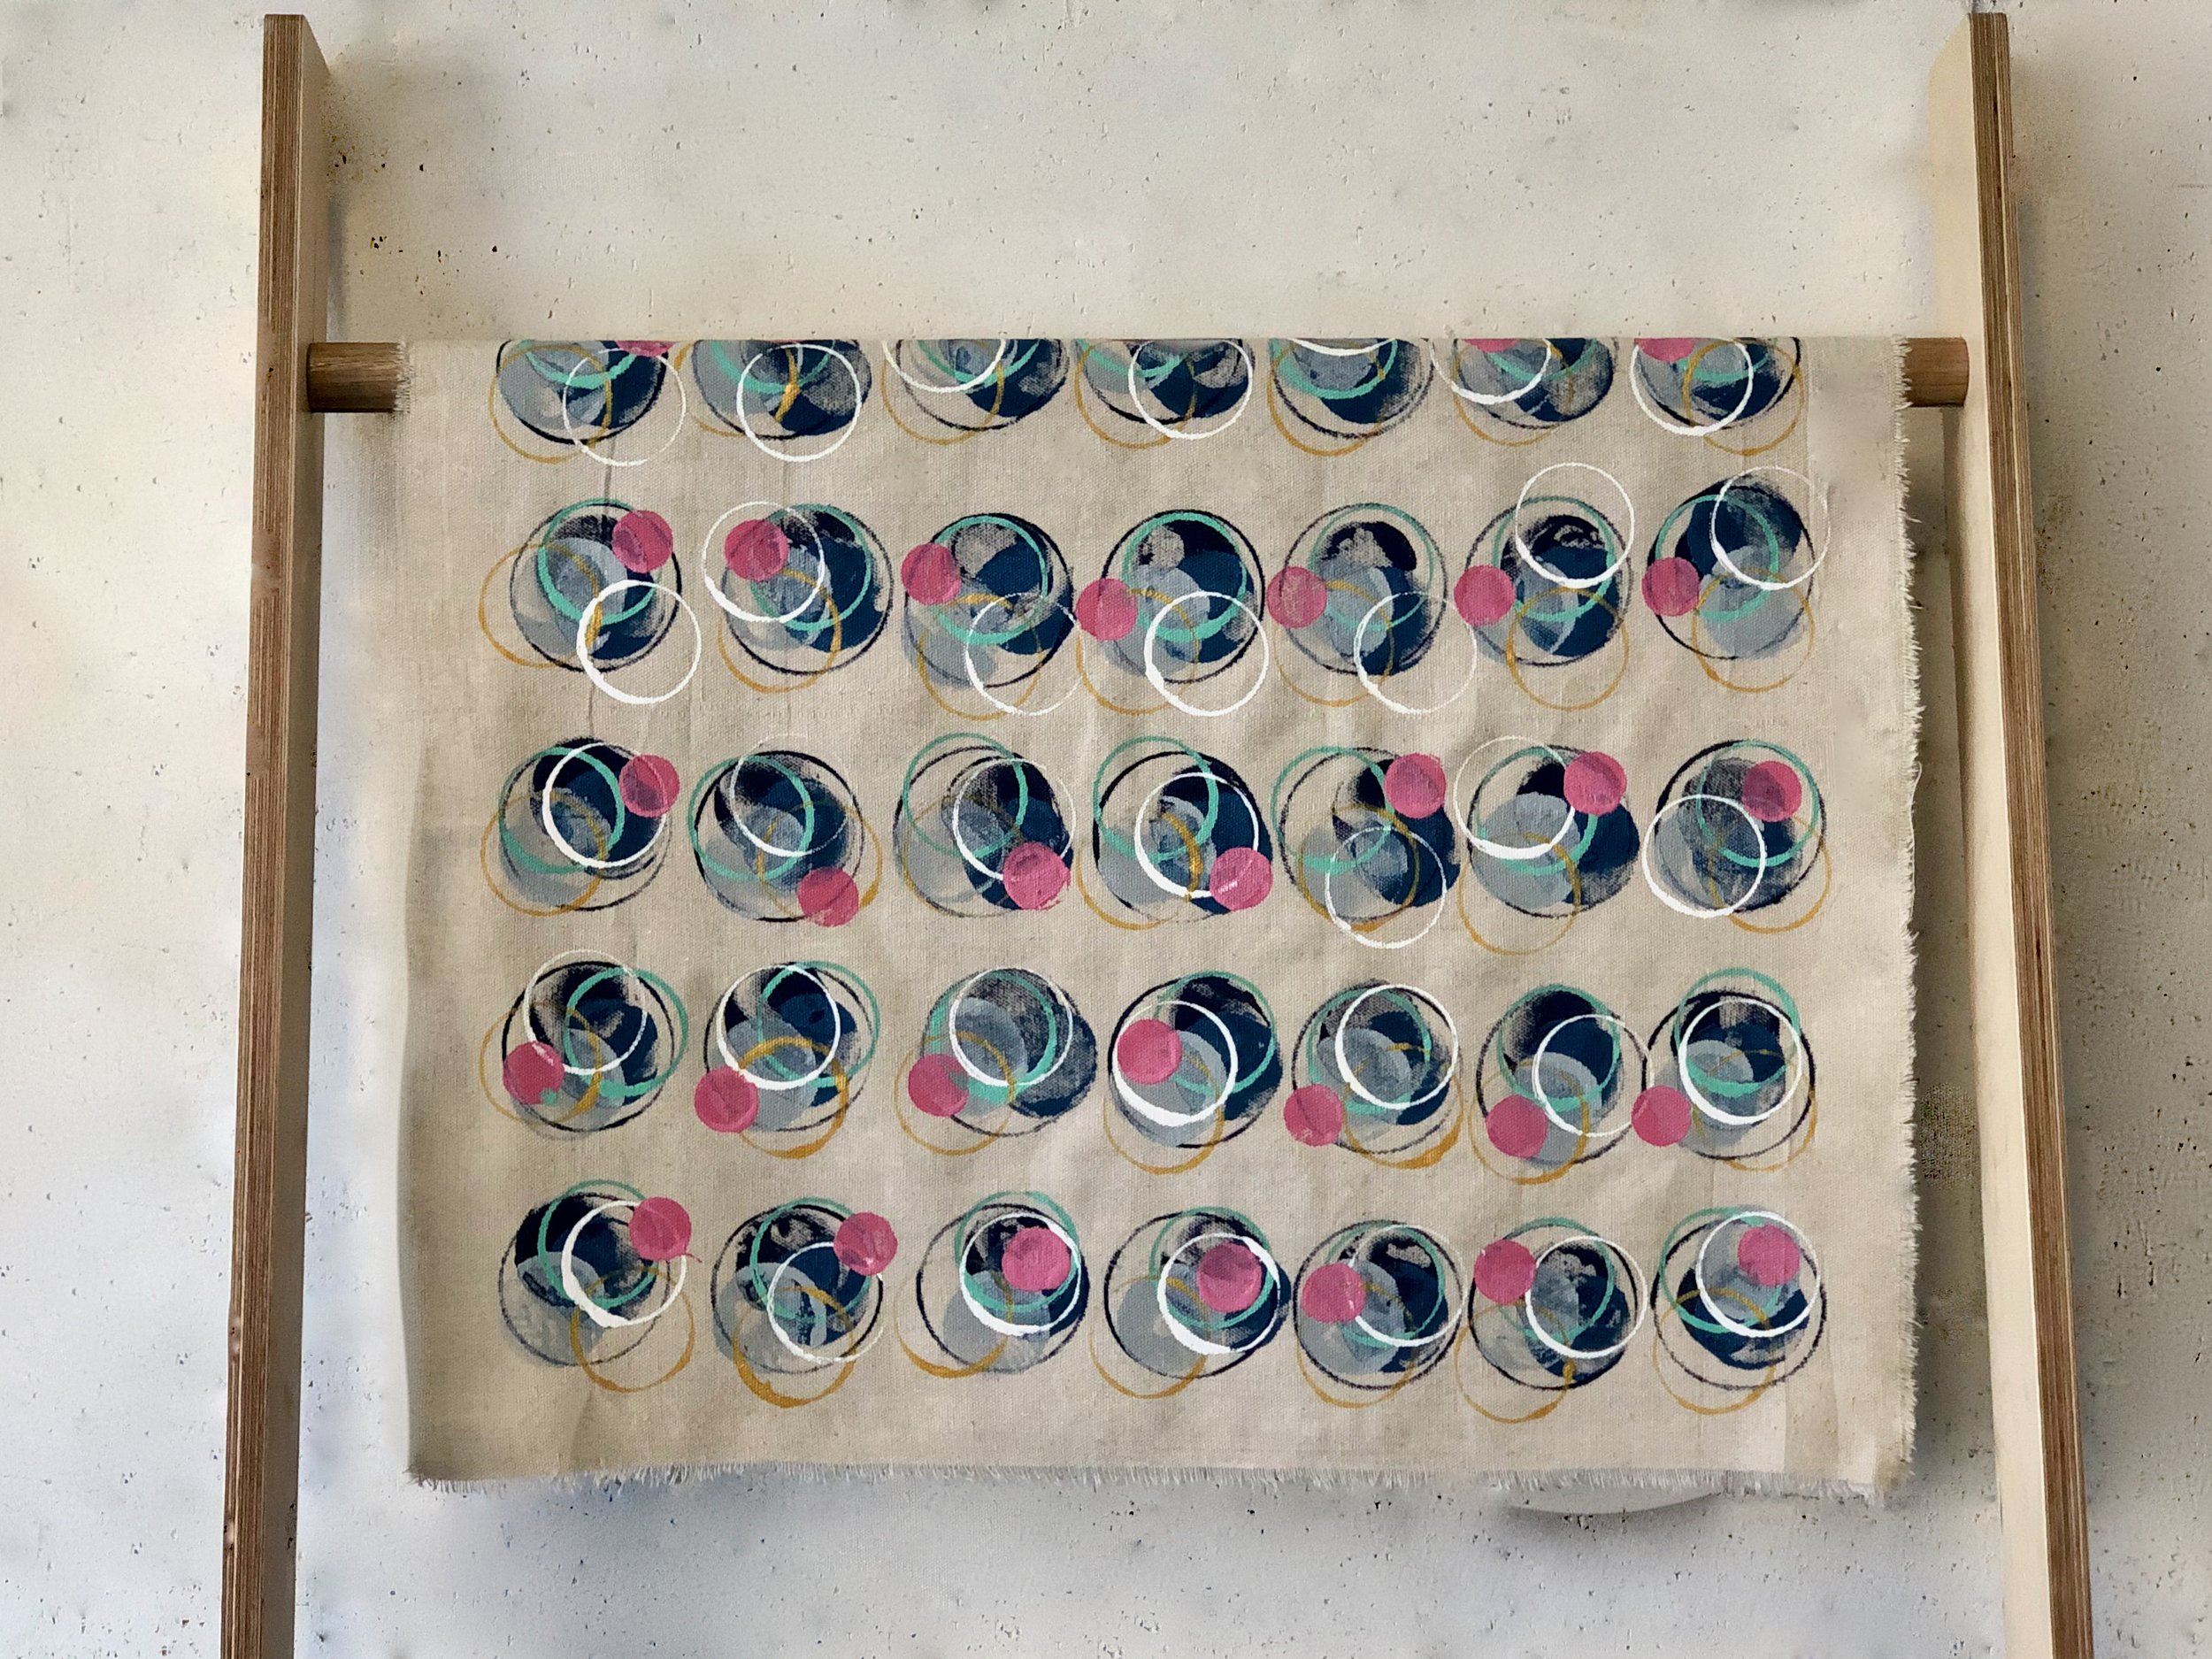
Using a drop cloth as the backing fabric meant everything for this makeover was already in my workshop. I had fun creating the pattern with paint tin lids, a paper cup and a piece of dowel as printmakers.
I dismantled the stool and removed the upholstery with a screwdriver to loosen the staples while pulling the fabric away.
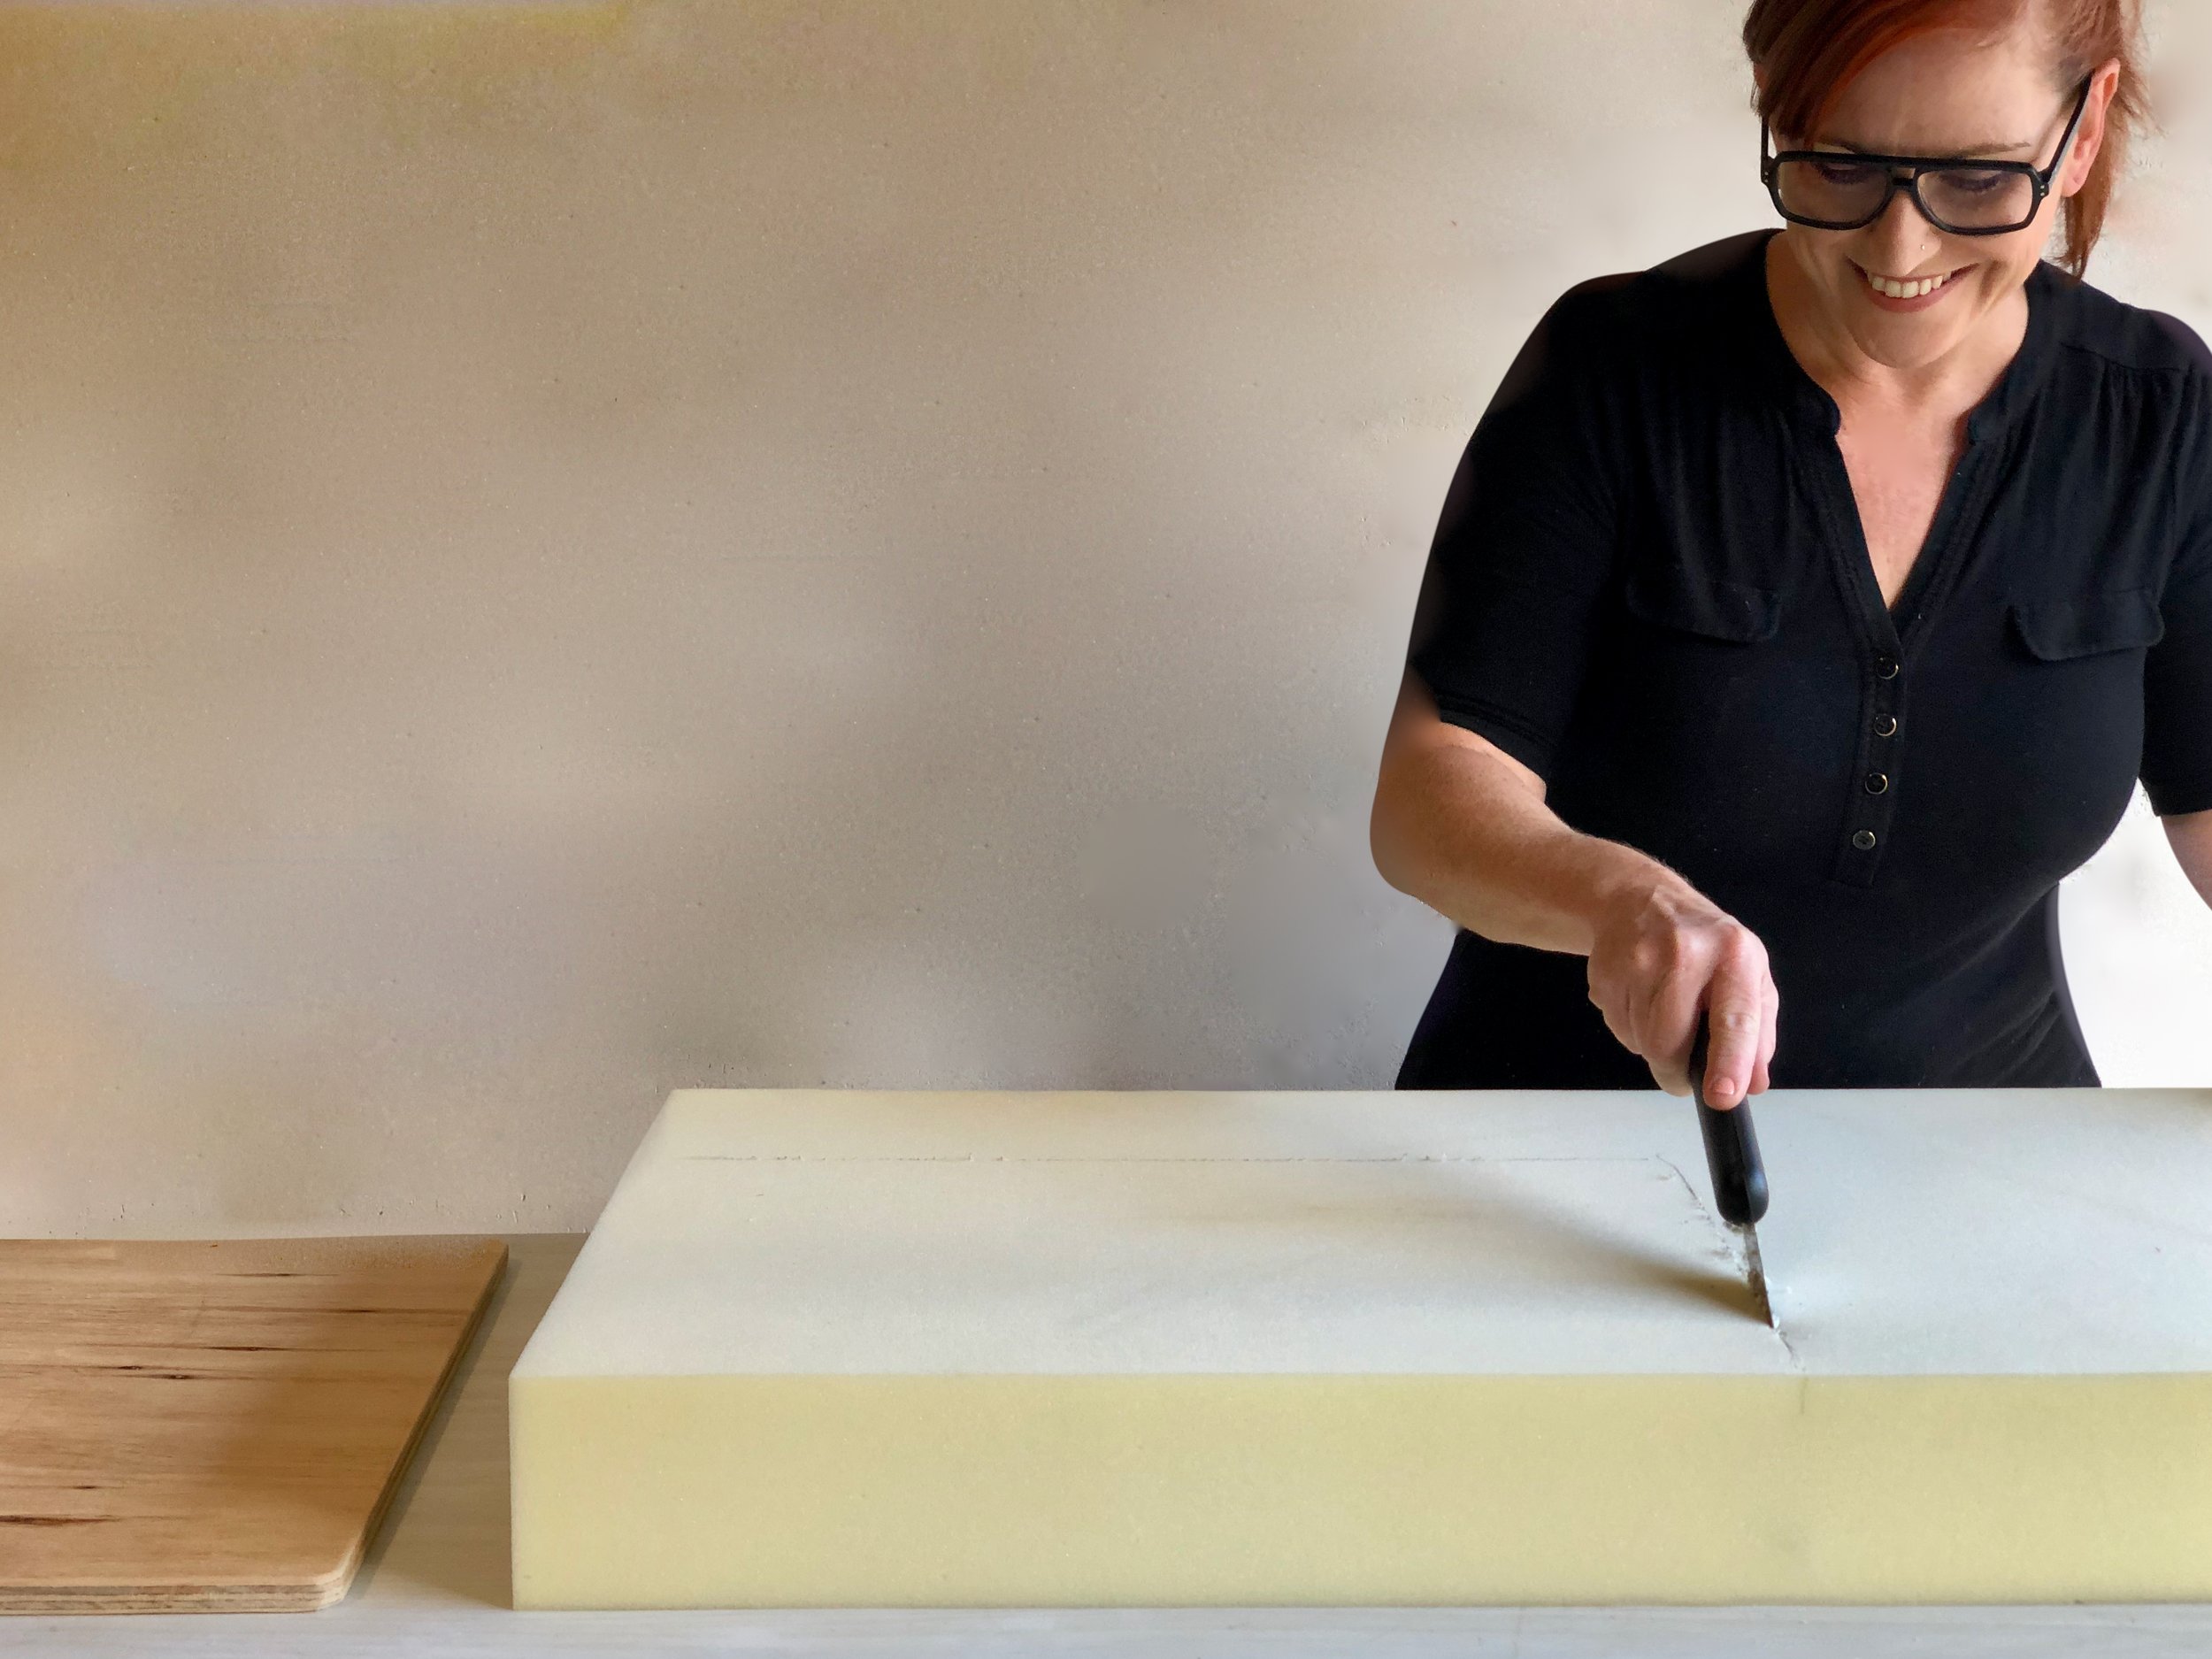
To cut new foam, I traced around the seat base 5mm out from the edges and cut with a small dovetail pull saw (you could also use a serrated bread knife).
I checked there was enough cloth to wrap over and around the foam, with 50mm excess underneath, then snipped with scissors, ripped it to size and taped it down.

To make layers of solid circles, I used the paint tin lids from 100ml sample pots of White Knight Splashes water-based enamel in navy, mid blue and pale grey.
Working from dark to light, I stamped onto the cloth in rows about 50mm apart, offsetting each shade slightly.

To contrast, I used a paper cup to stamp circles, beginning with the top to apply navy and the smaller base for mint, gold and white.
TIP Use a gold craft paint to add a little sparkle and apply white last for a crisp, clean finish to the pattern.

To finish, I added a solid pop of colour in contrasting pink, using a piece of dowel.
TIP Leave the paint to dry thoroughly before unpeeling the tape and moving the cloth.
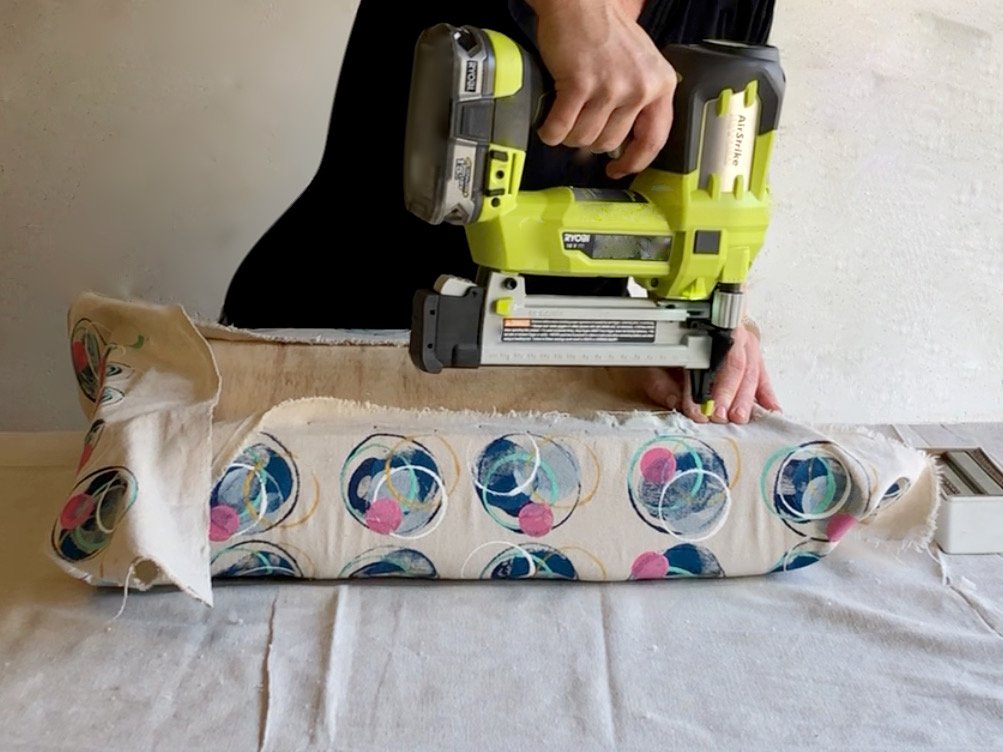
To make the seat, I centred the foam on the cloth, checking the pattern is straight, then used a hot glue gun to position the base on the foam.
Beginning on one side, I folded the cloth over and secured the centre with staples, then stapled around the seat from opposite sides, pulling the cloth to ensure the top and sides are smooth.
I folded the corners the same as wrapping a gift, tucking the sides into the ends, then trimmed away the bulk of excess cloth with scissors.
TIP Adding a layer of wadding between the foam and the cloth will help it sit smoothly.
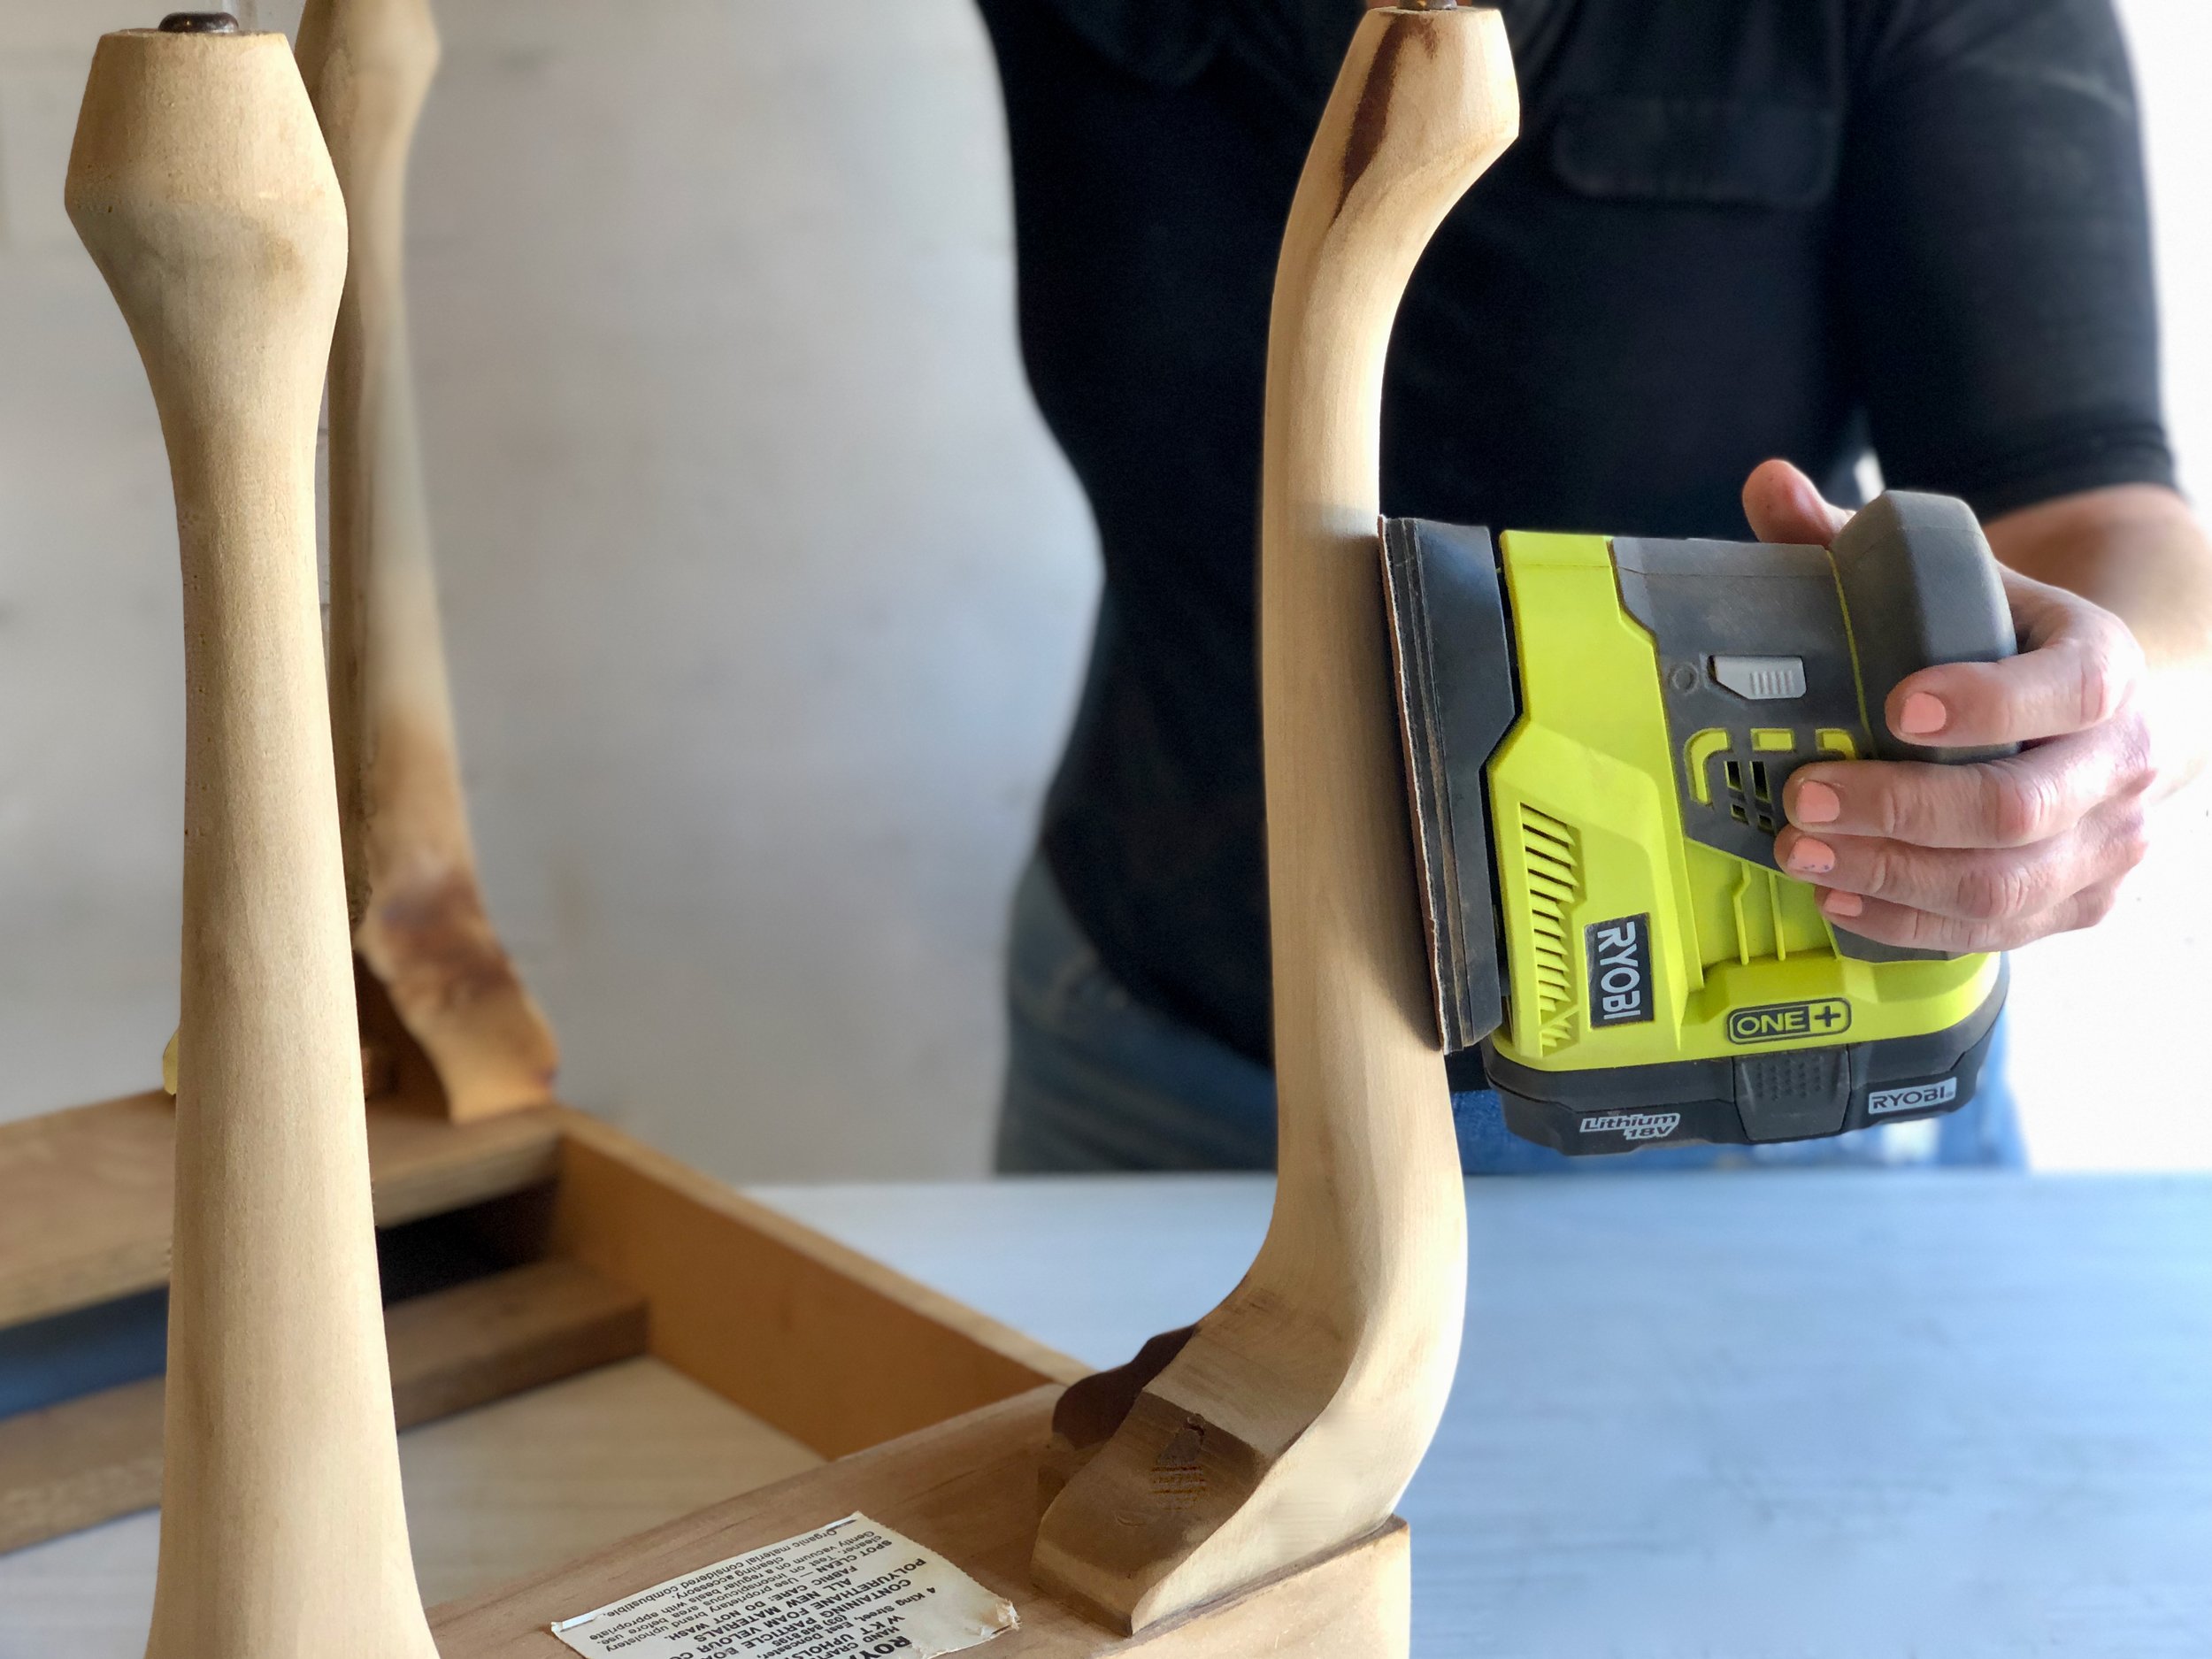
Most of the varnish is removed using a corner sander with an 80-grit sanding pad, then I finished with 120-grit.
To smooth all over I used 180-grit abrasive paper with a hand-sanding block then wiped all over with a damp cloth to remove any dust.
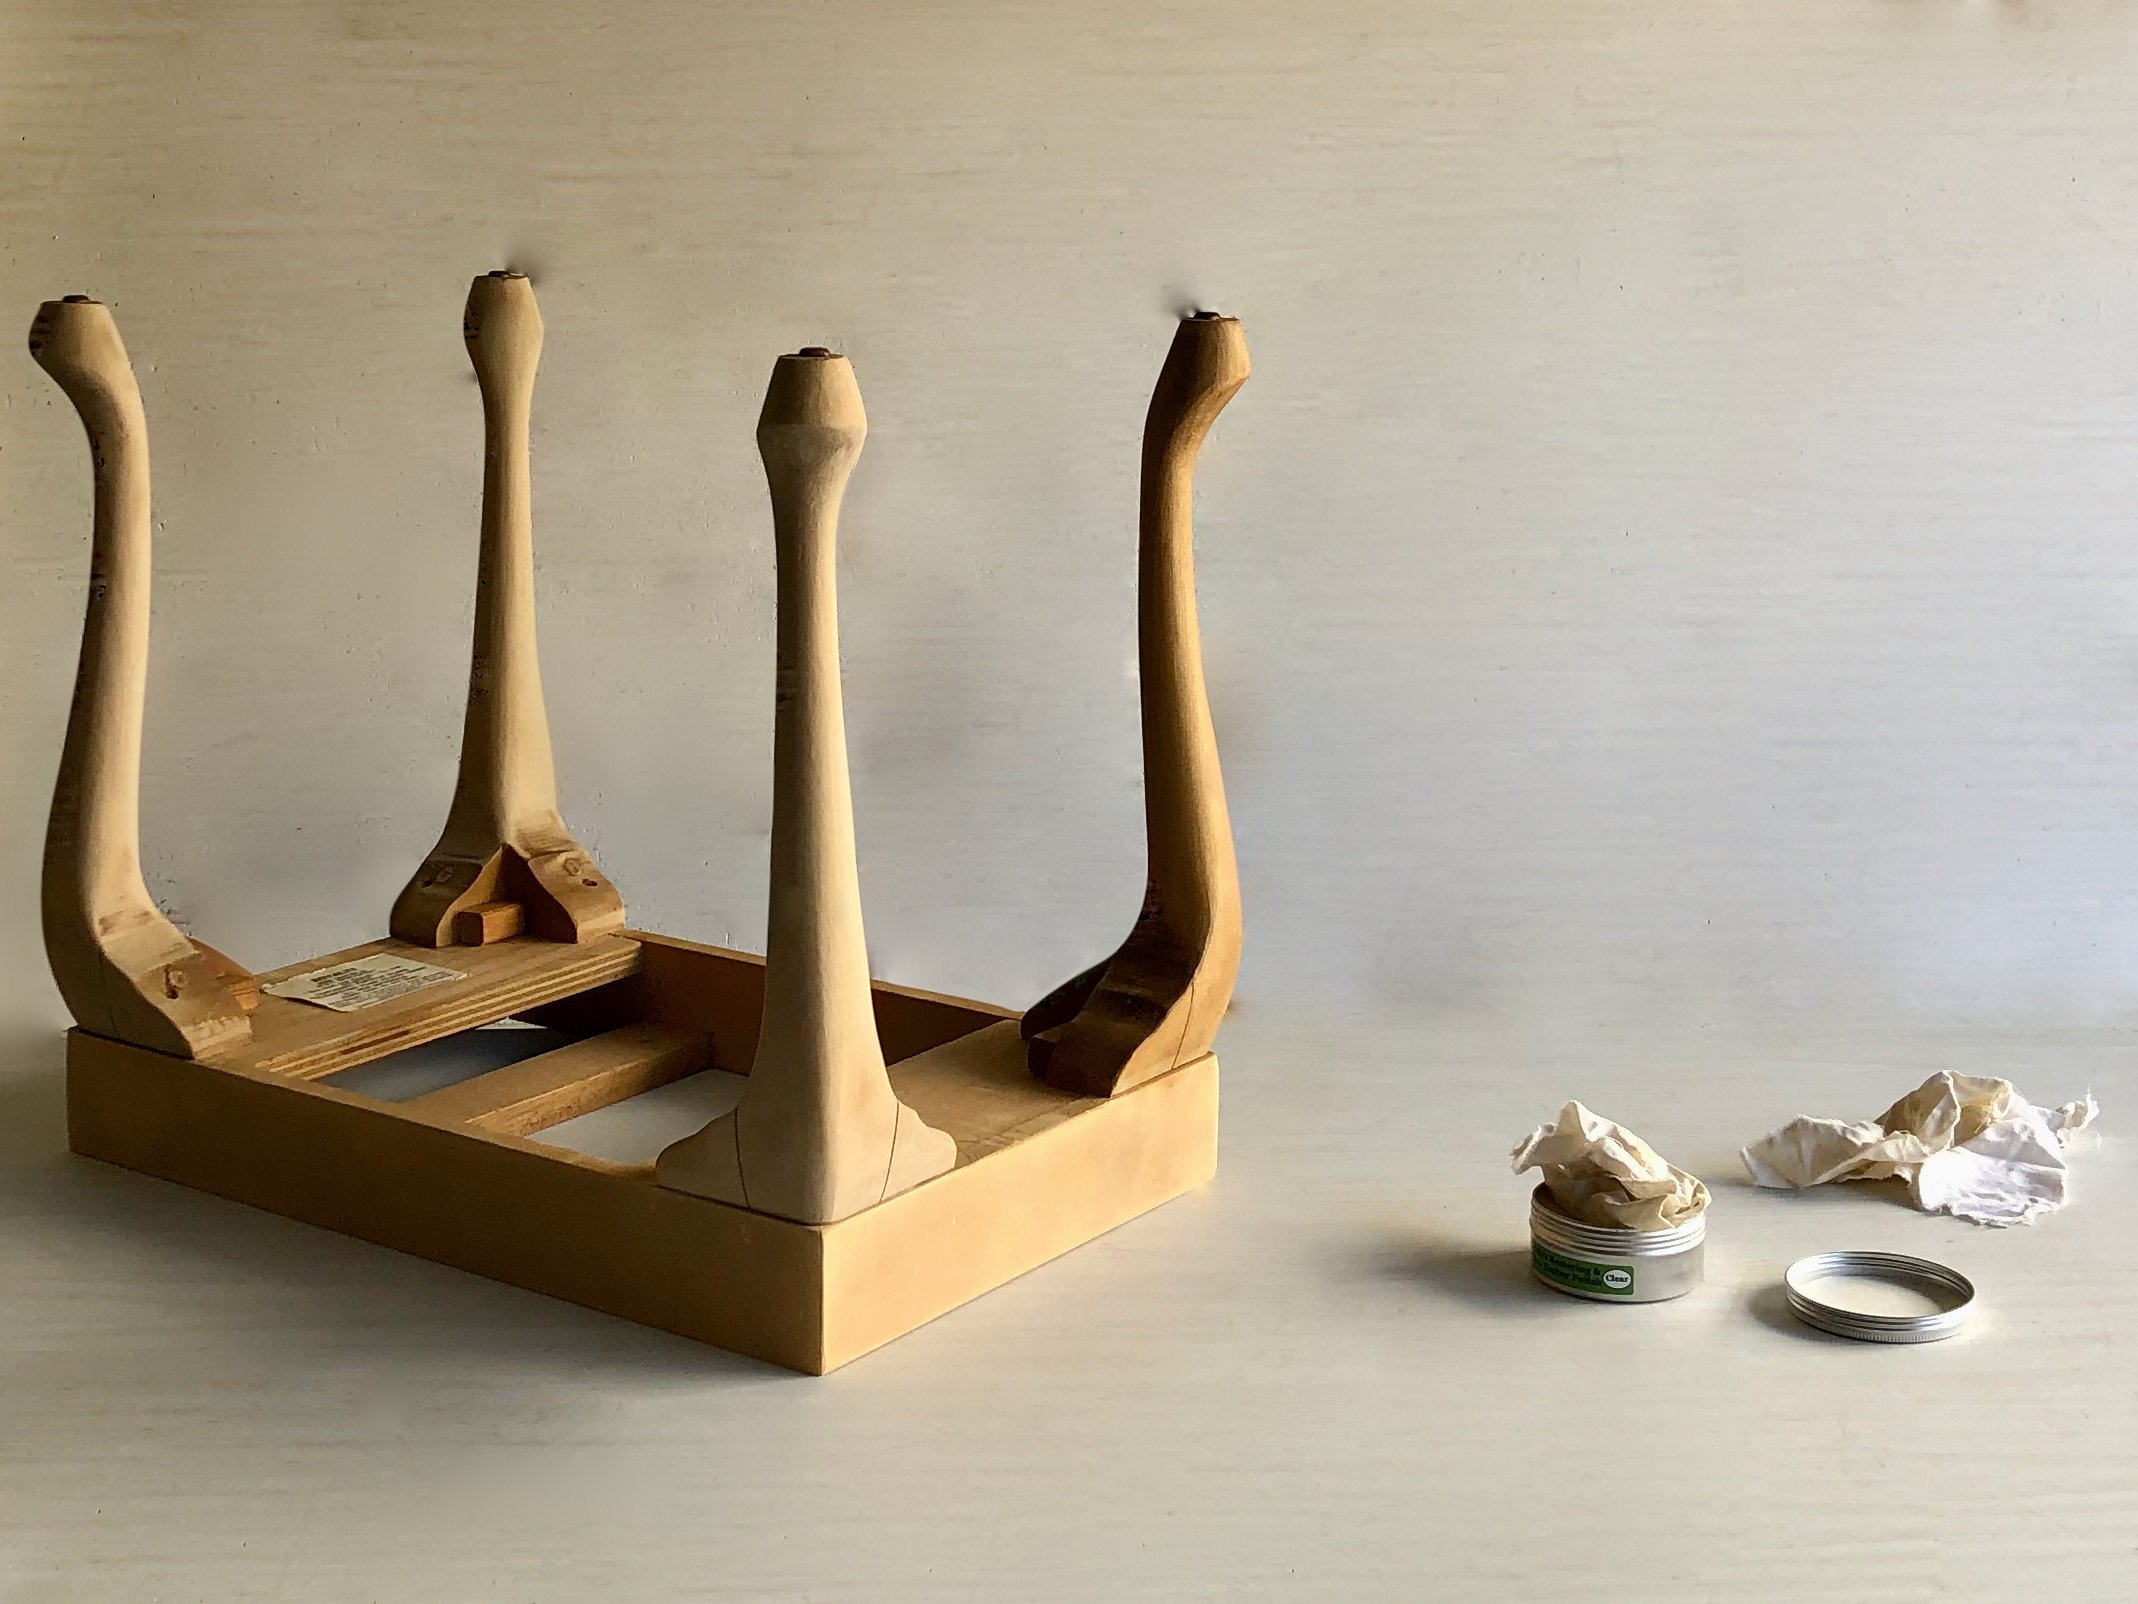
I used two small clean cloths to apply two coats of furniture wax, with one to rub the wax into the timber and the other to buff.

I used the original fasteners to reattach the base. The end result is refreshed, renewed and more comfy to use!

Click through to my Retro Chair Makeover to see another project using a similar technique.
Follow more of my DIY journey on Instagram for tool tips, home improvement and simple building tutorials.