Tile a Box
Alun Machin
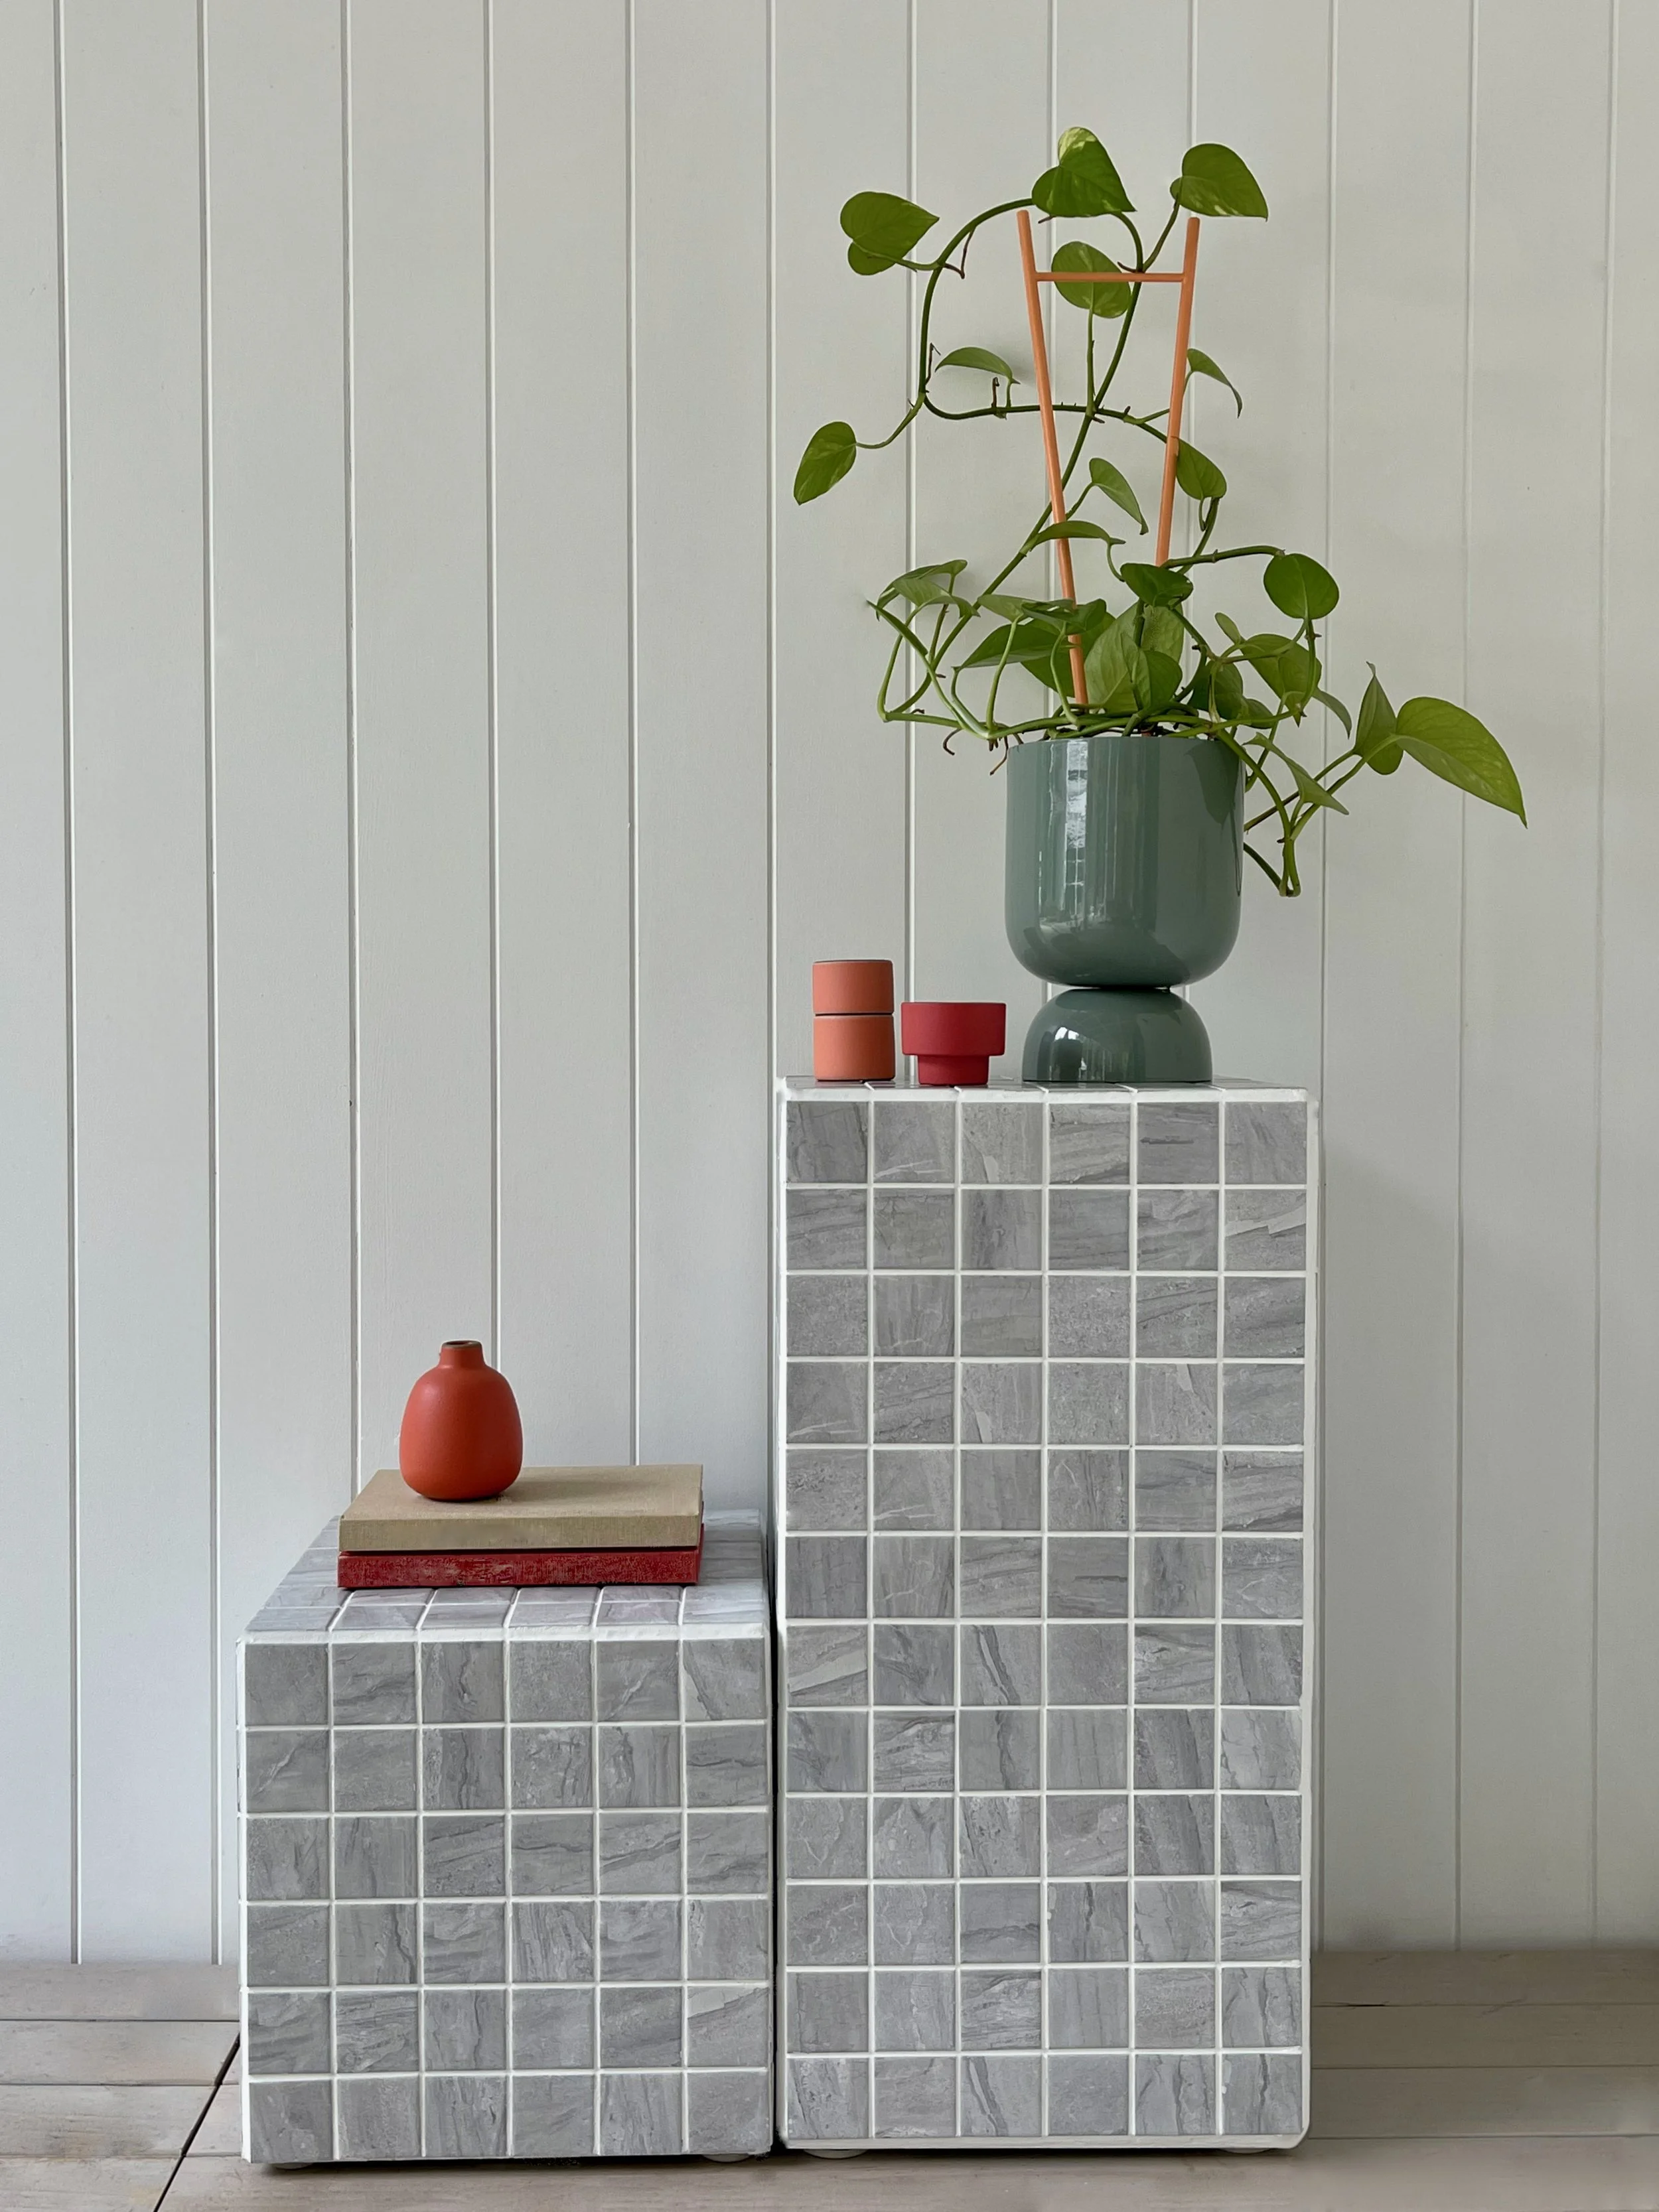
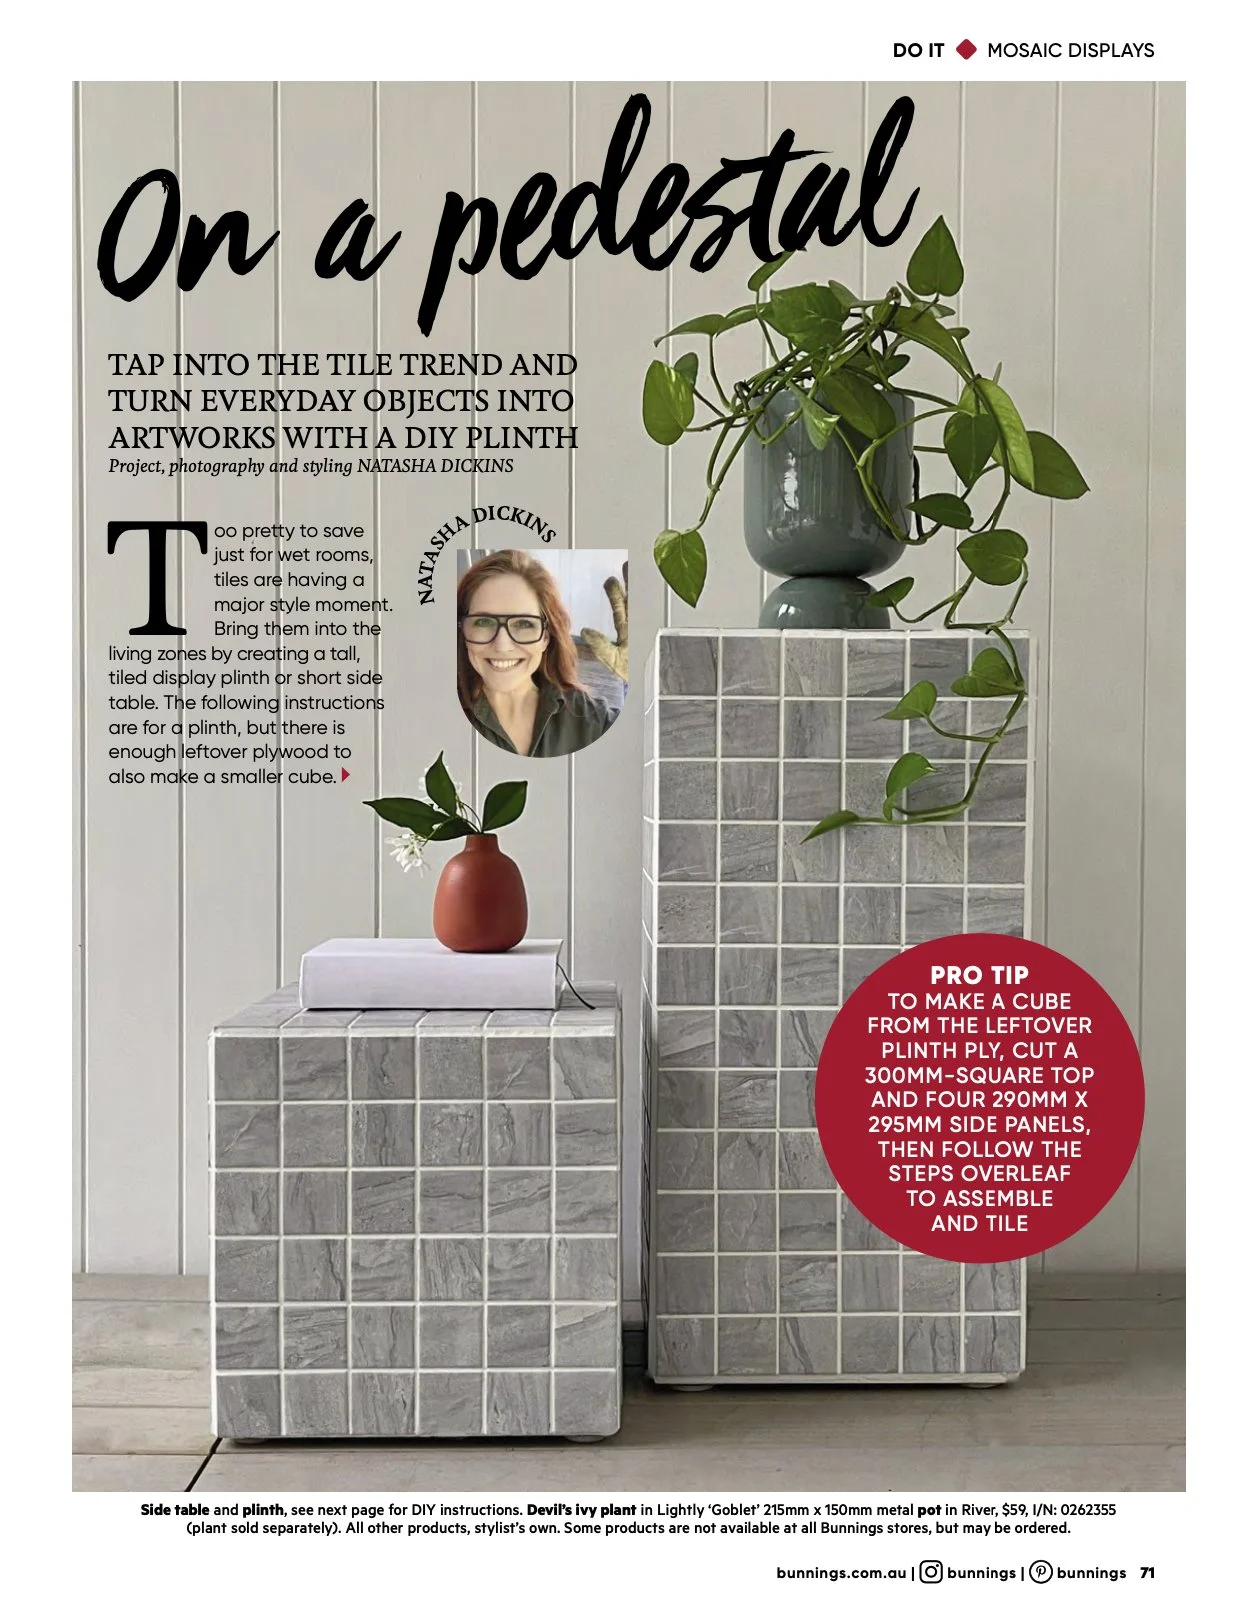
Tile-clad furniture is resilient, easy to clean and right on trend! So I made this matching plinth and cube as pieces that can be used inside and out.
“I often see two mistakes with DIY tiling. The first is not sealing the grout, the other is not finishing the piece with glides or feet to protect the base from chipping”
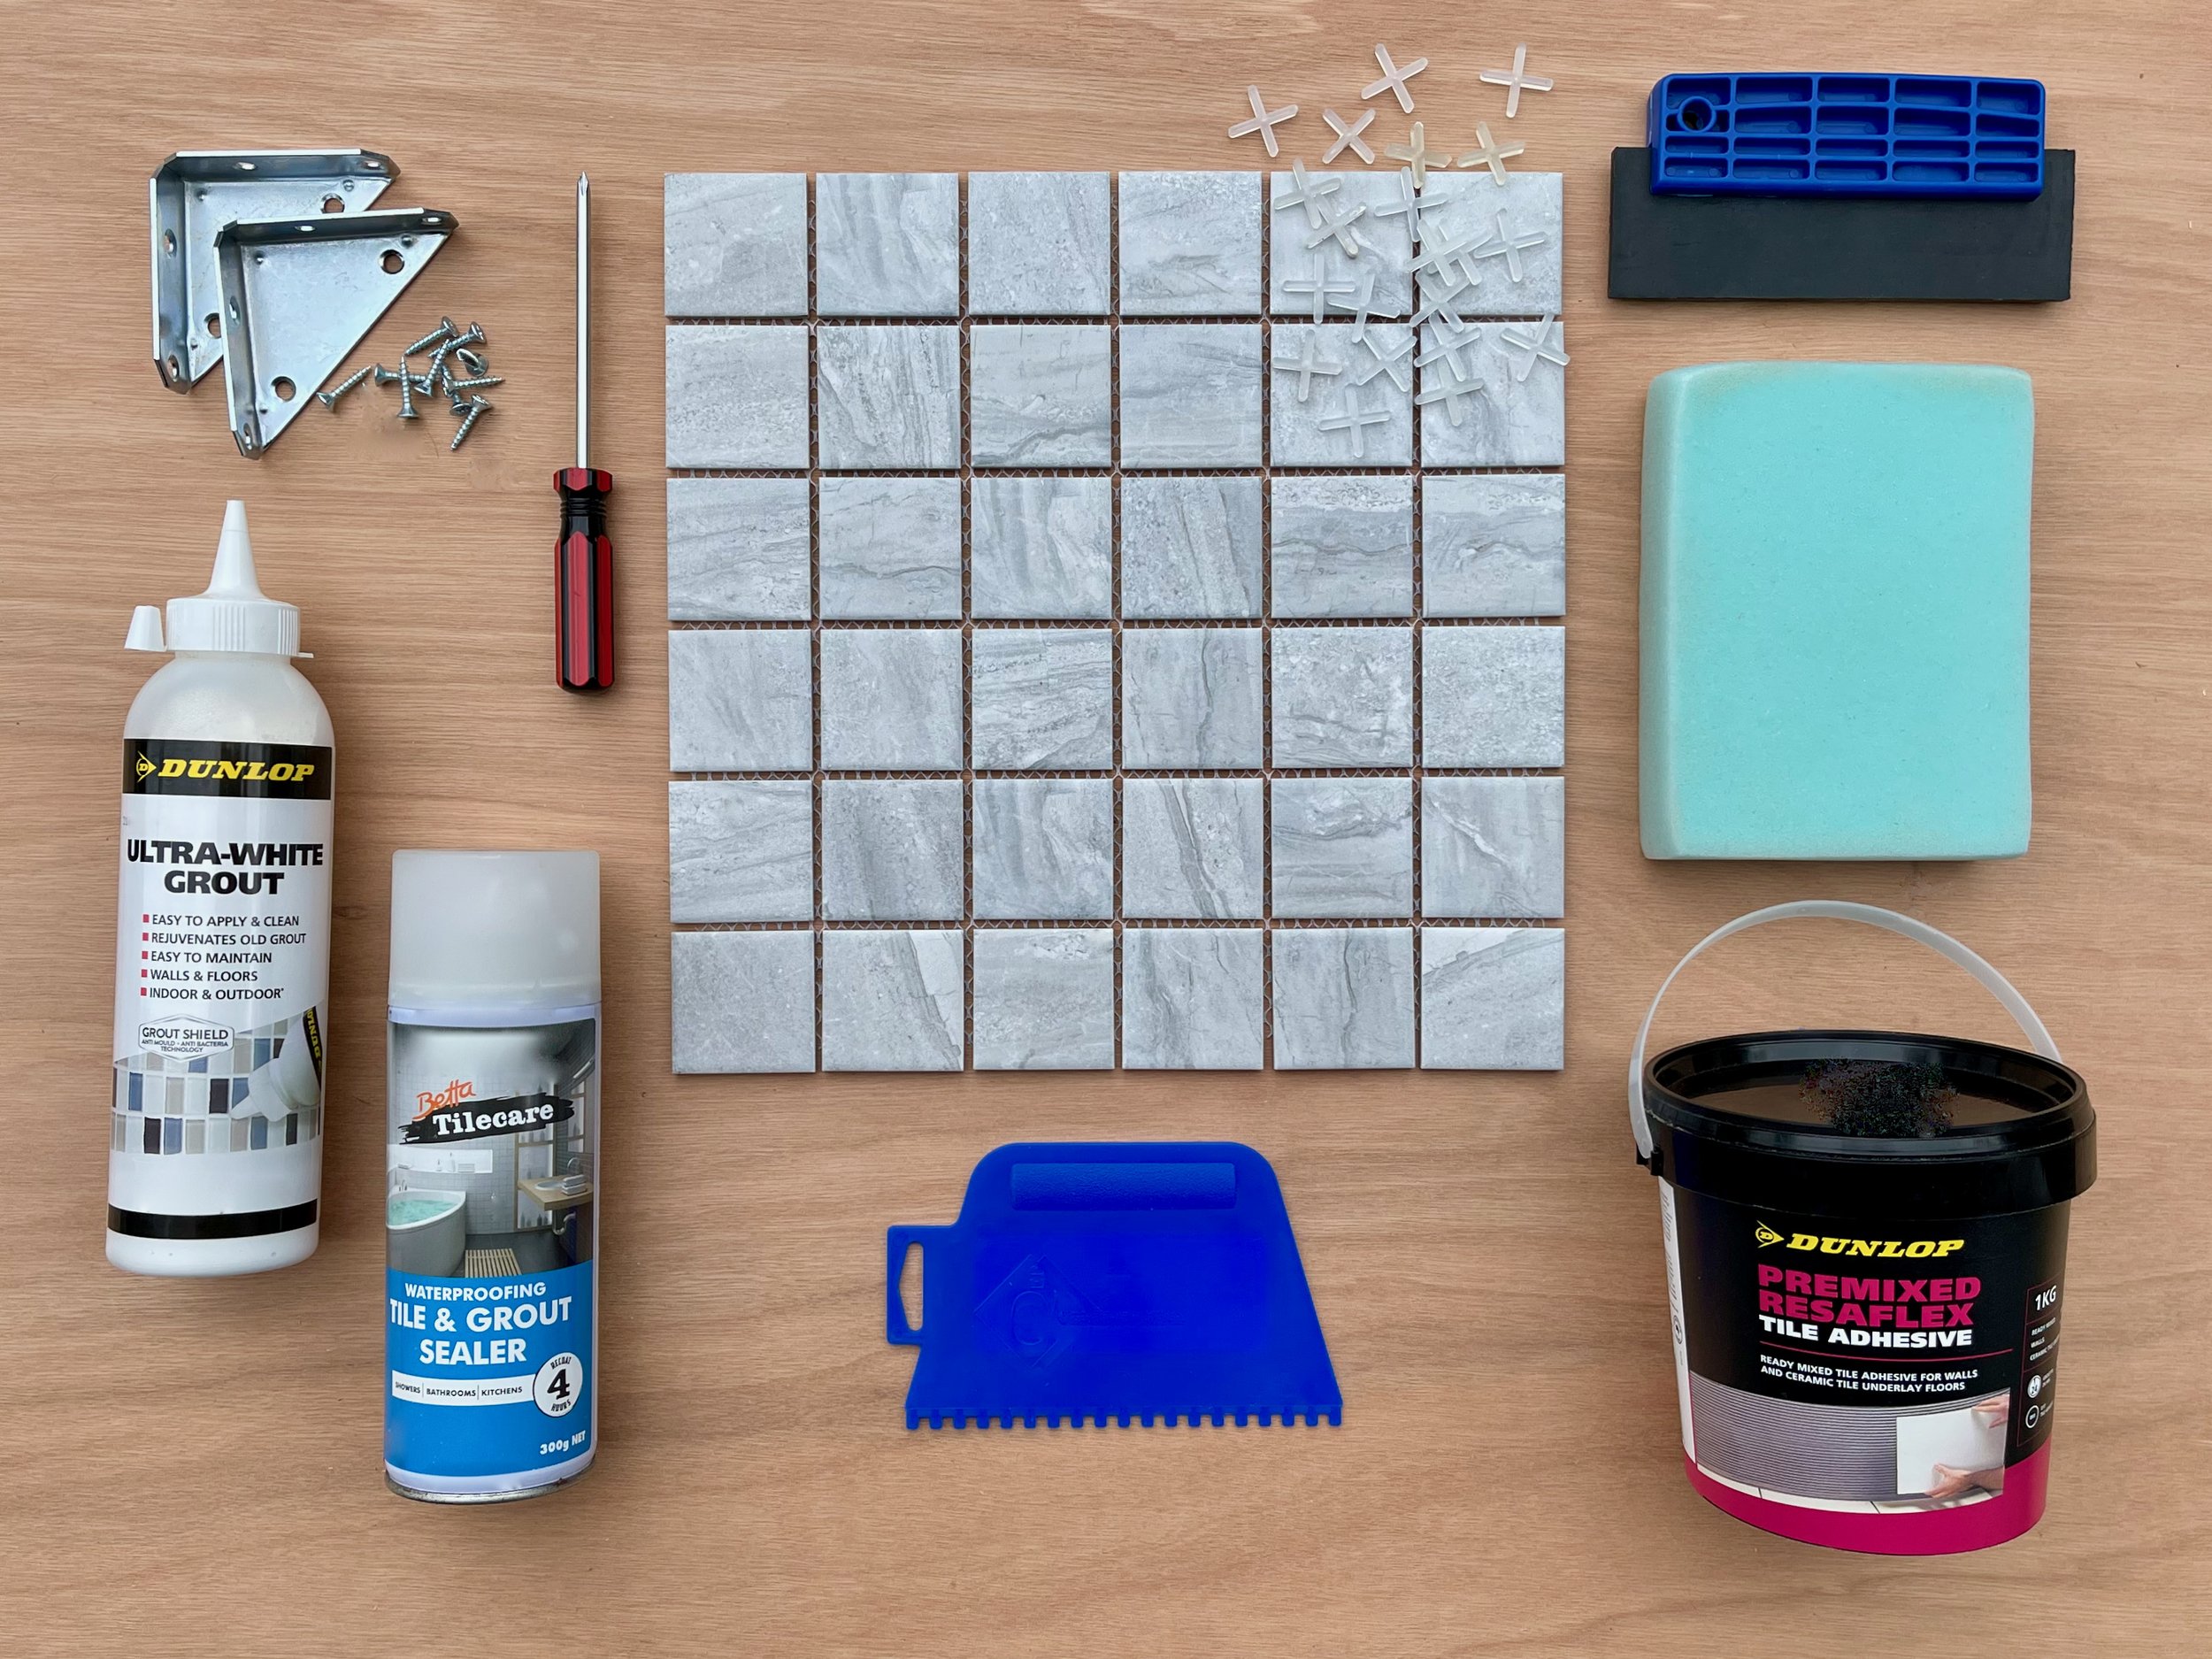
I used Decor8 Tiles 306mm-square Como Grigio porcelain mosaics in Grey with Dunlop premixed adhesive and white Ready-to-go grout to keep the process simple. Betta TileCare Tile & Grout Sealer in an aerosol can is in keeping with my aim to choose products that limit the mess.
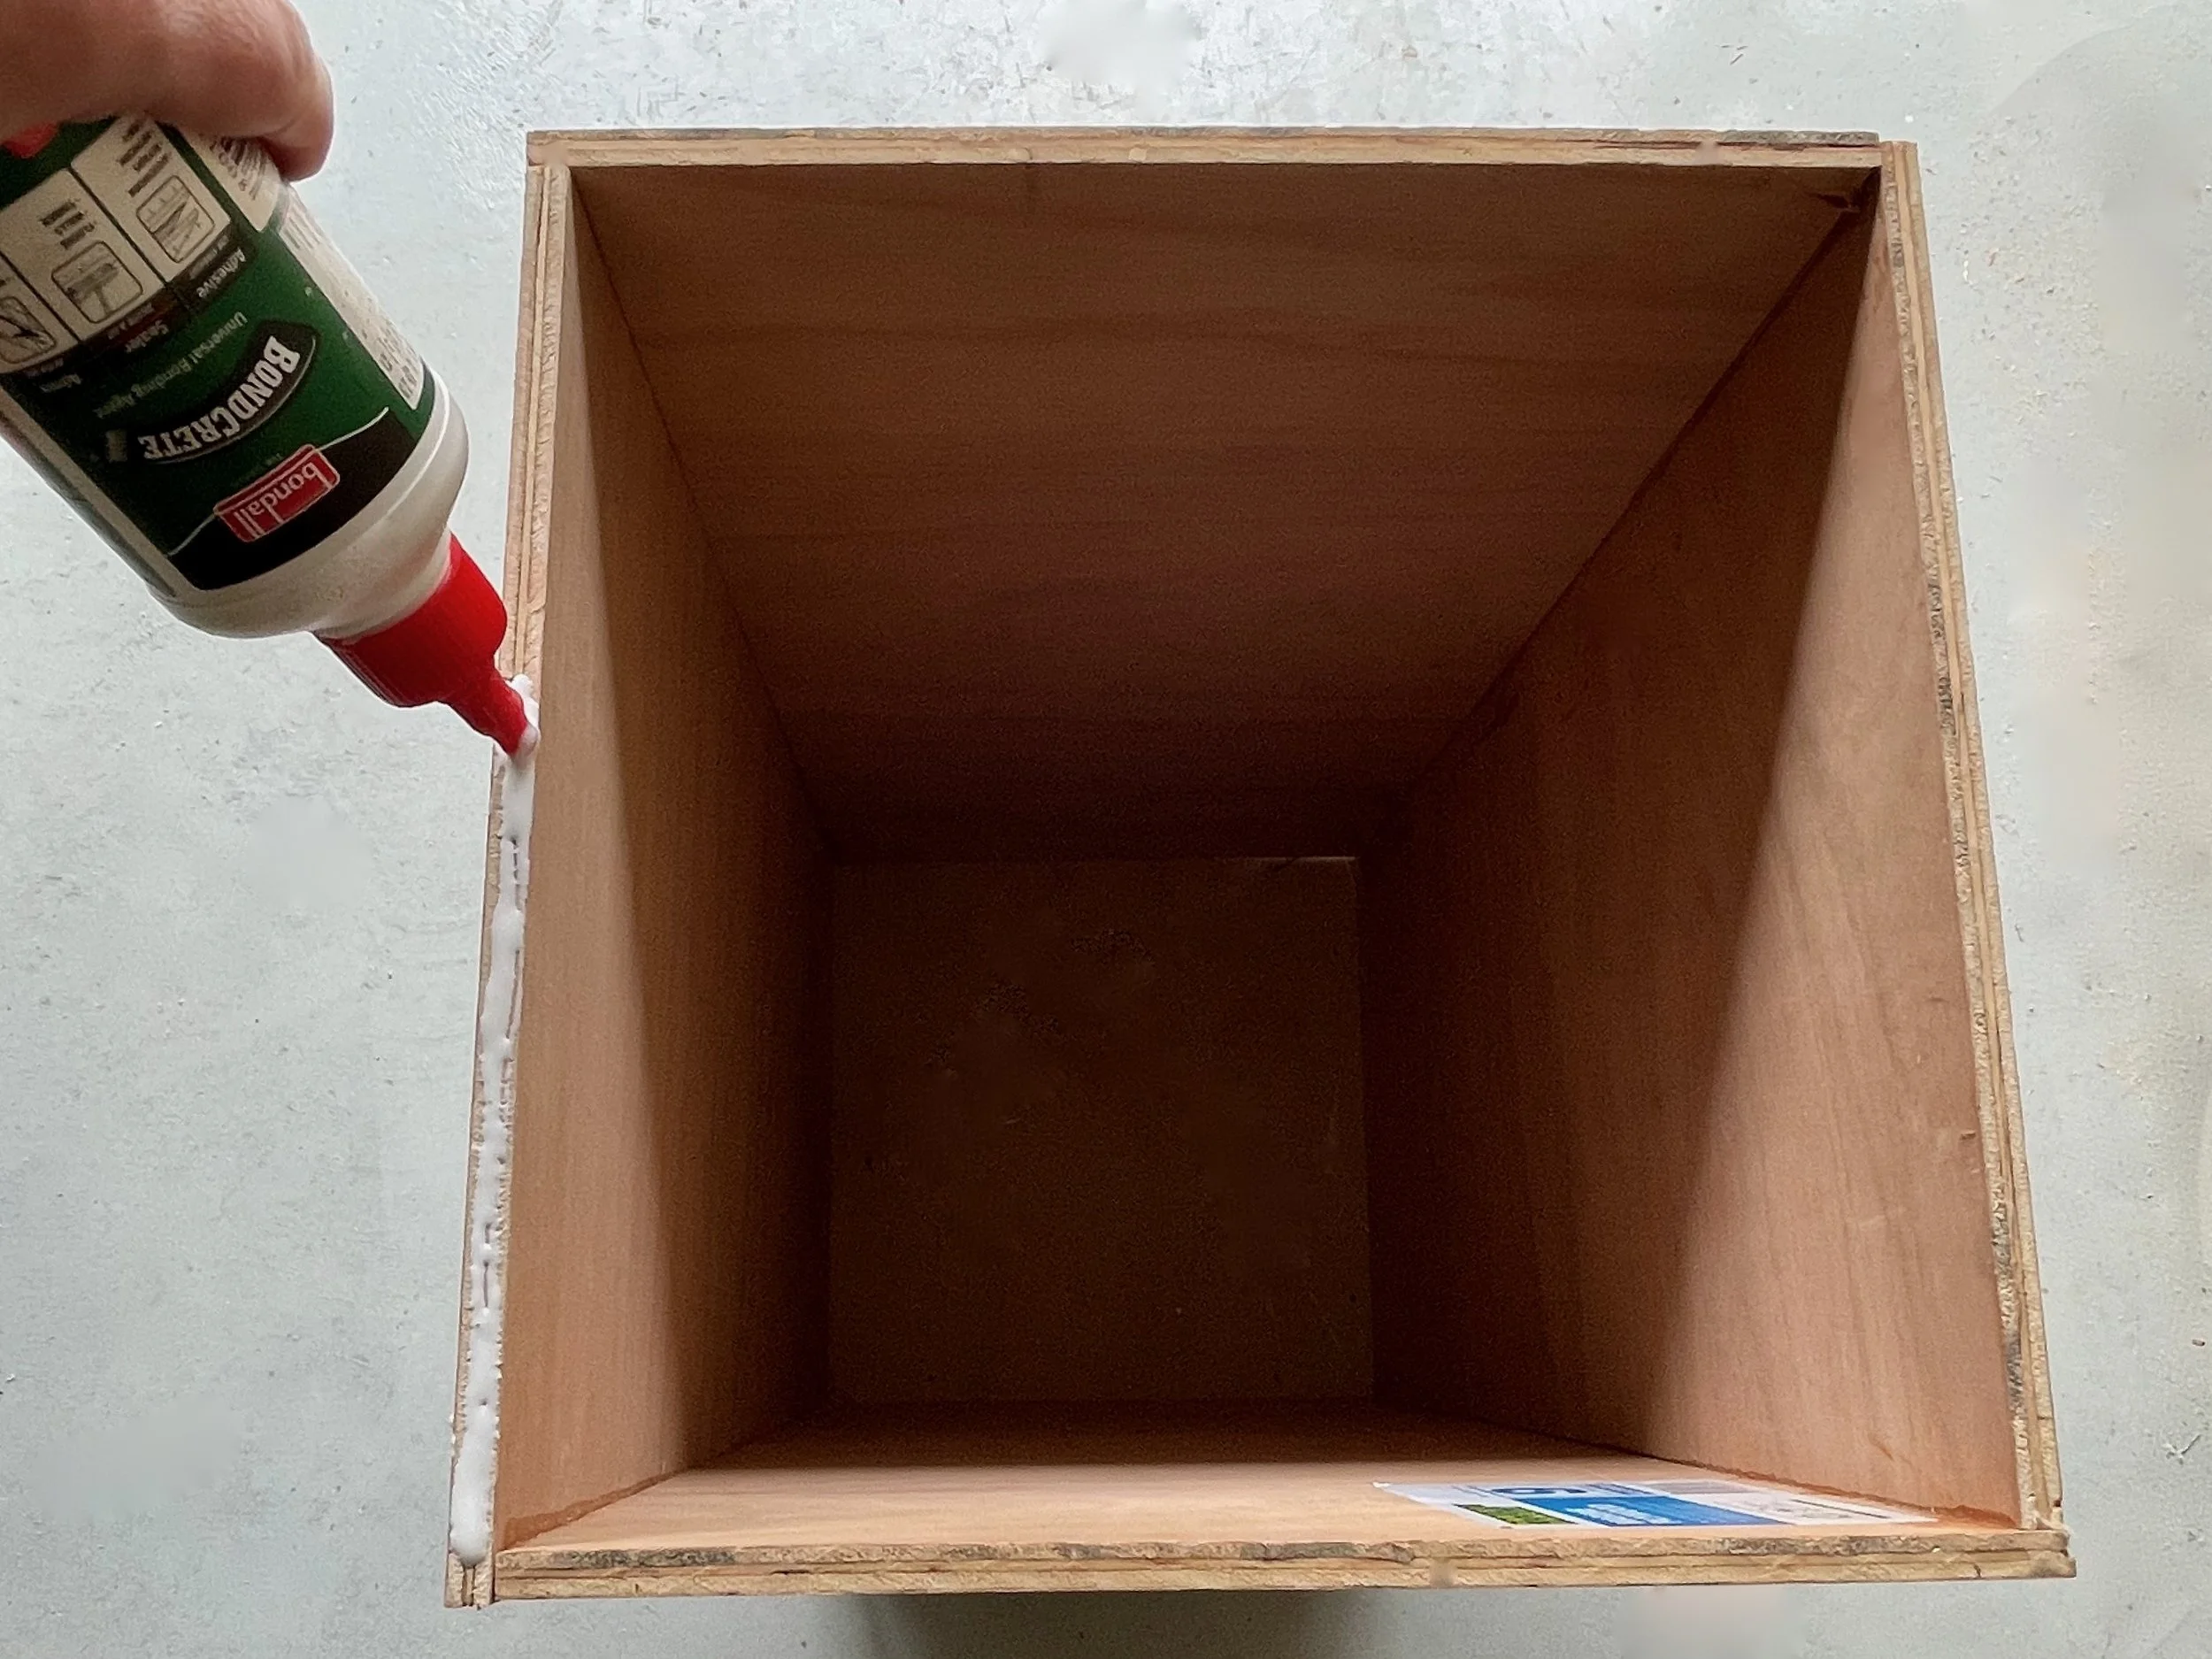
Each box is made from 9mm marine plywood for better moisture resistance than standard ply so it can be left outside undercover. I also used Bondcrete woodworking adhesive and stainless steel flathead nails.
TIP Use two 1220mm x 610mm sheets to make the plinth, with enough left over for the cube. The boxes are sized to fit standard 306mm-square mosaic sheets.
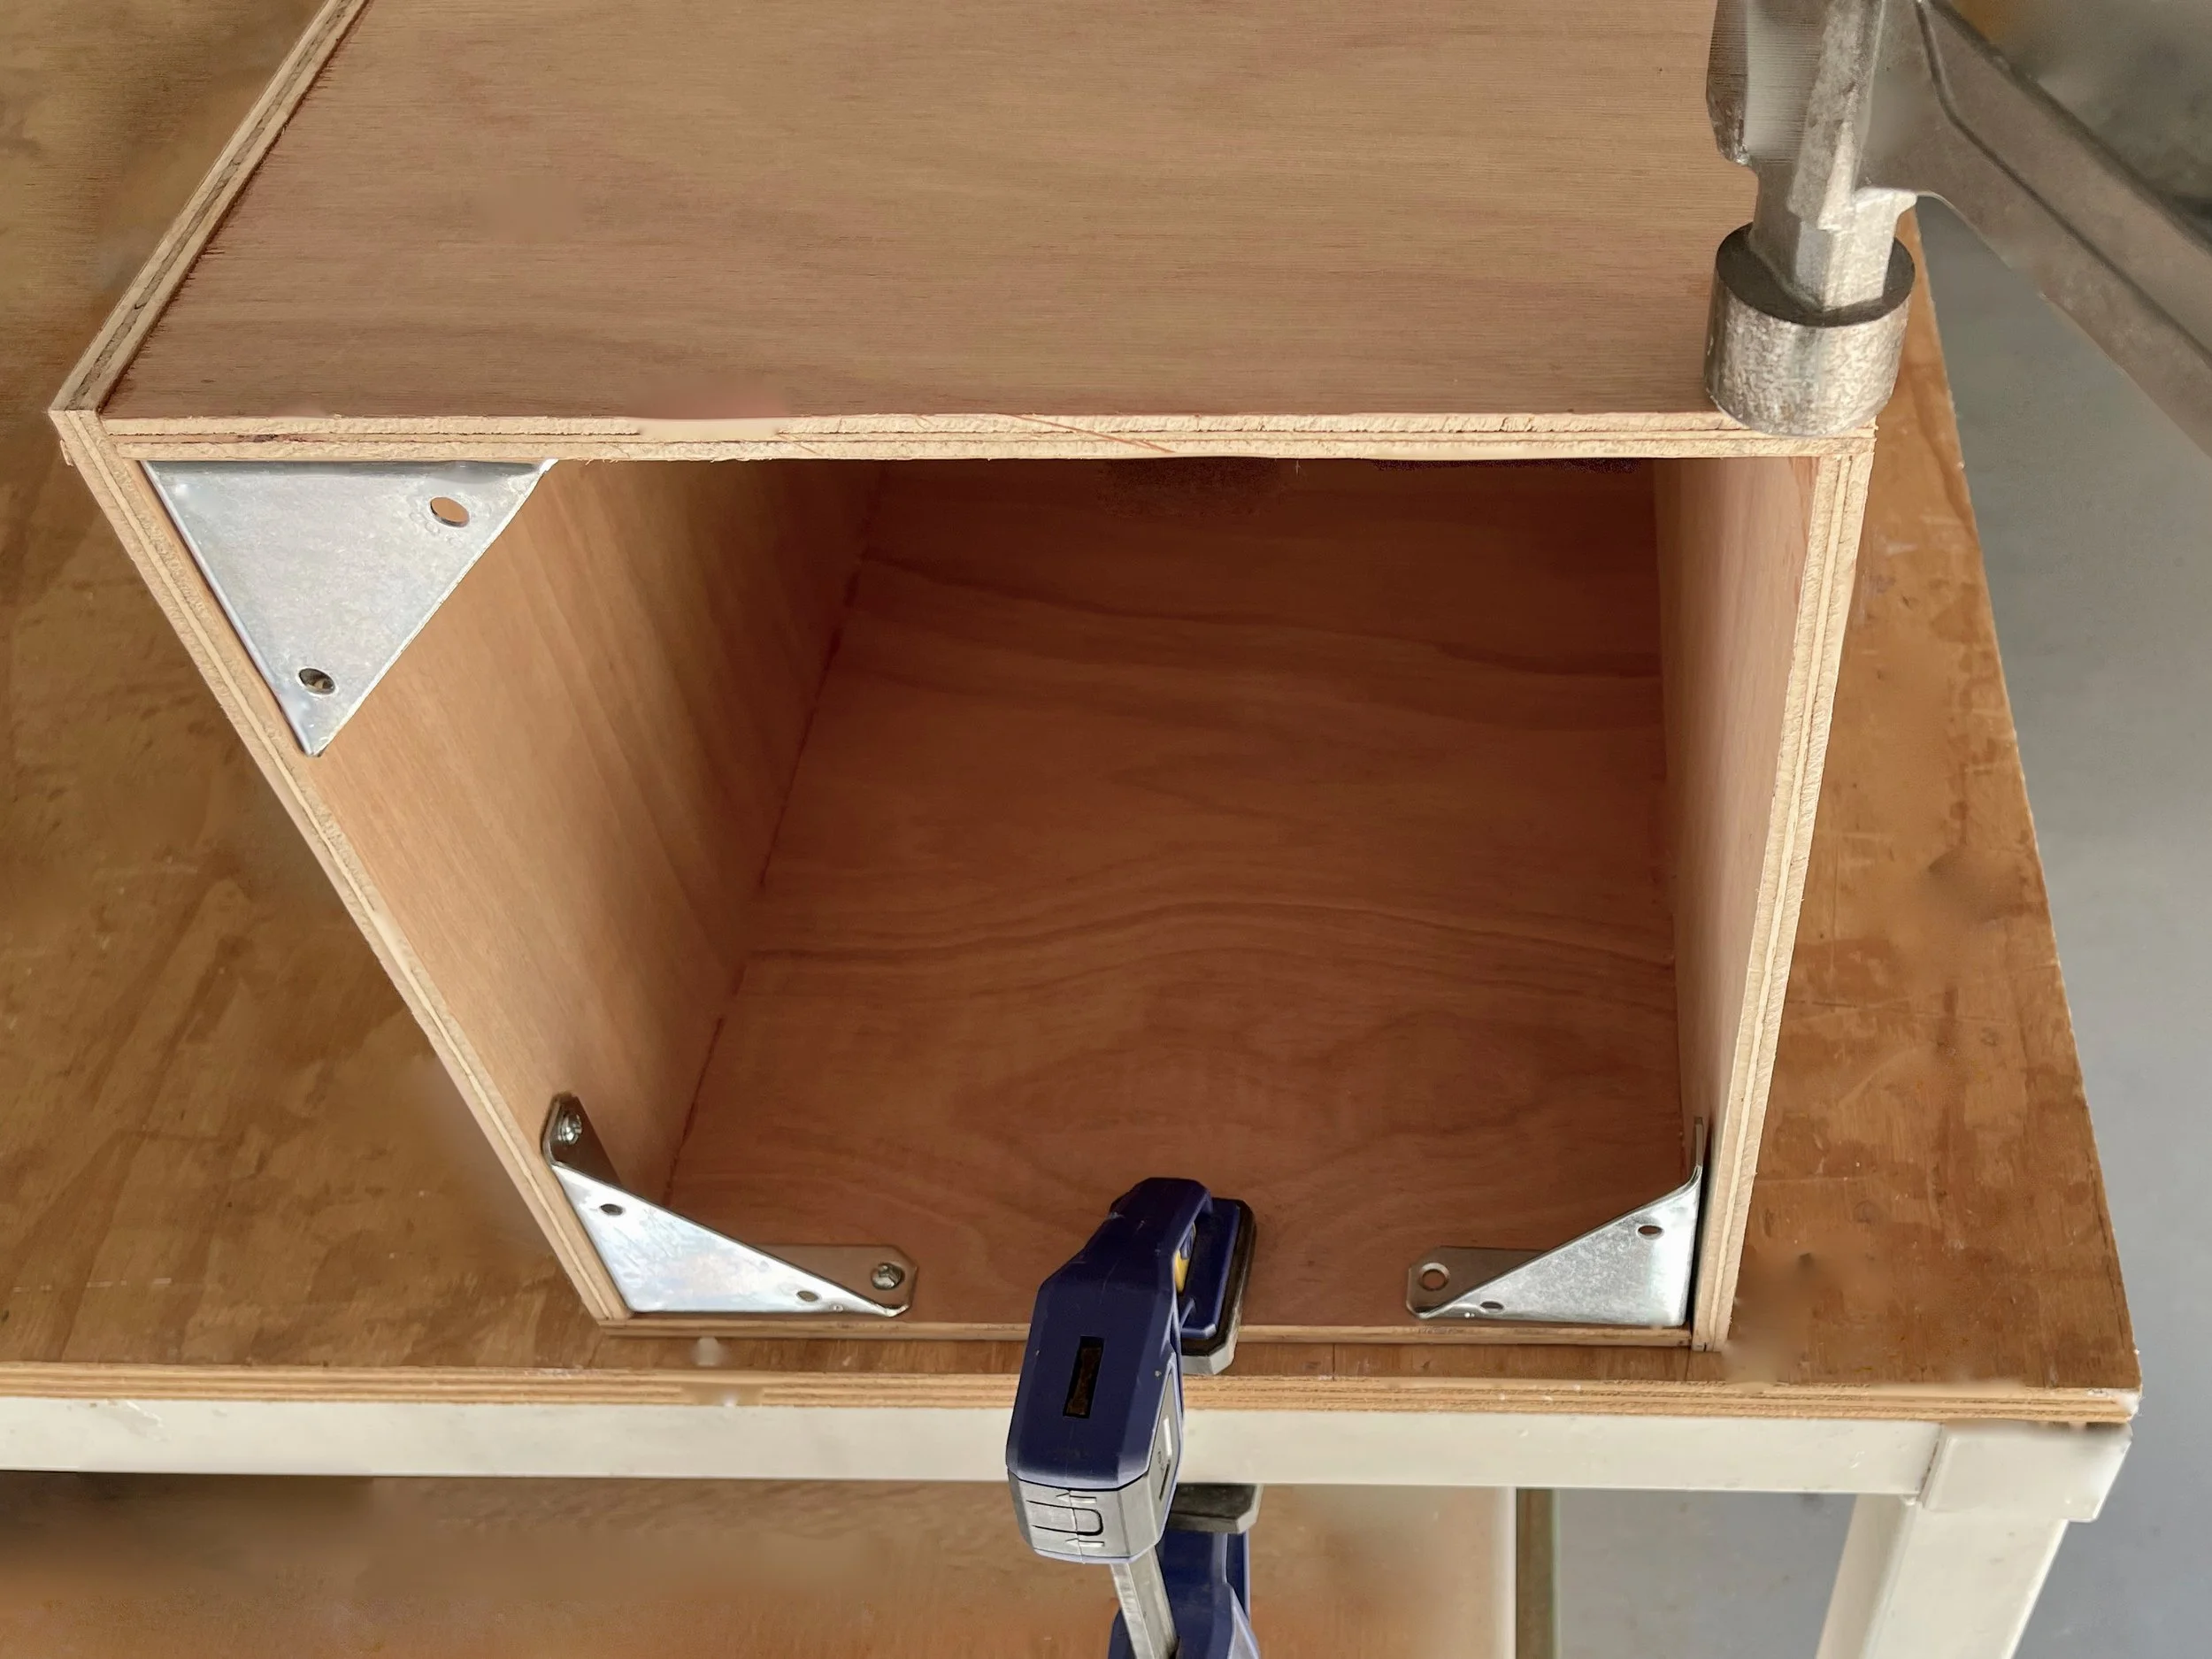
I added four tri-corner braces at the base of the boxes to keep them square while providing a platform for self-adhesive glides.
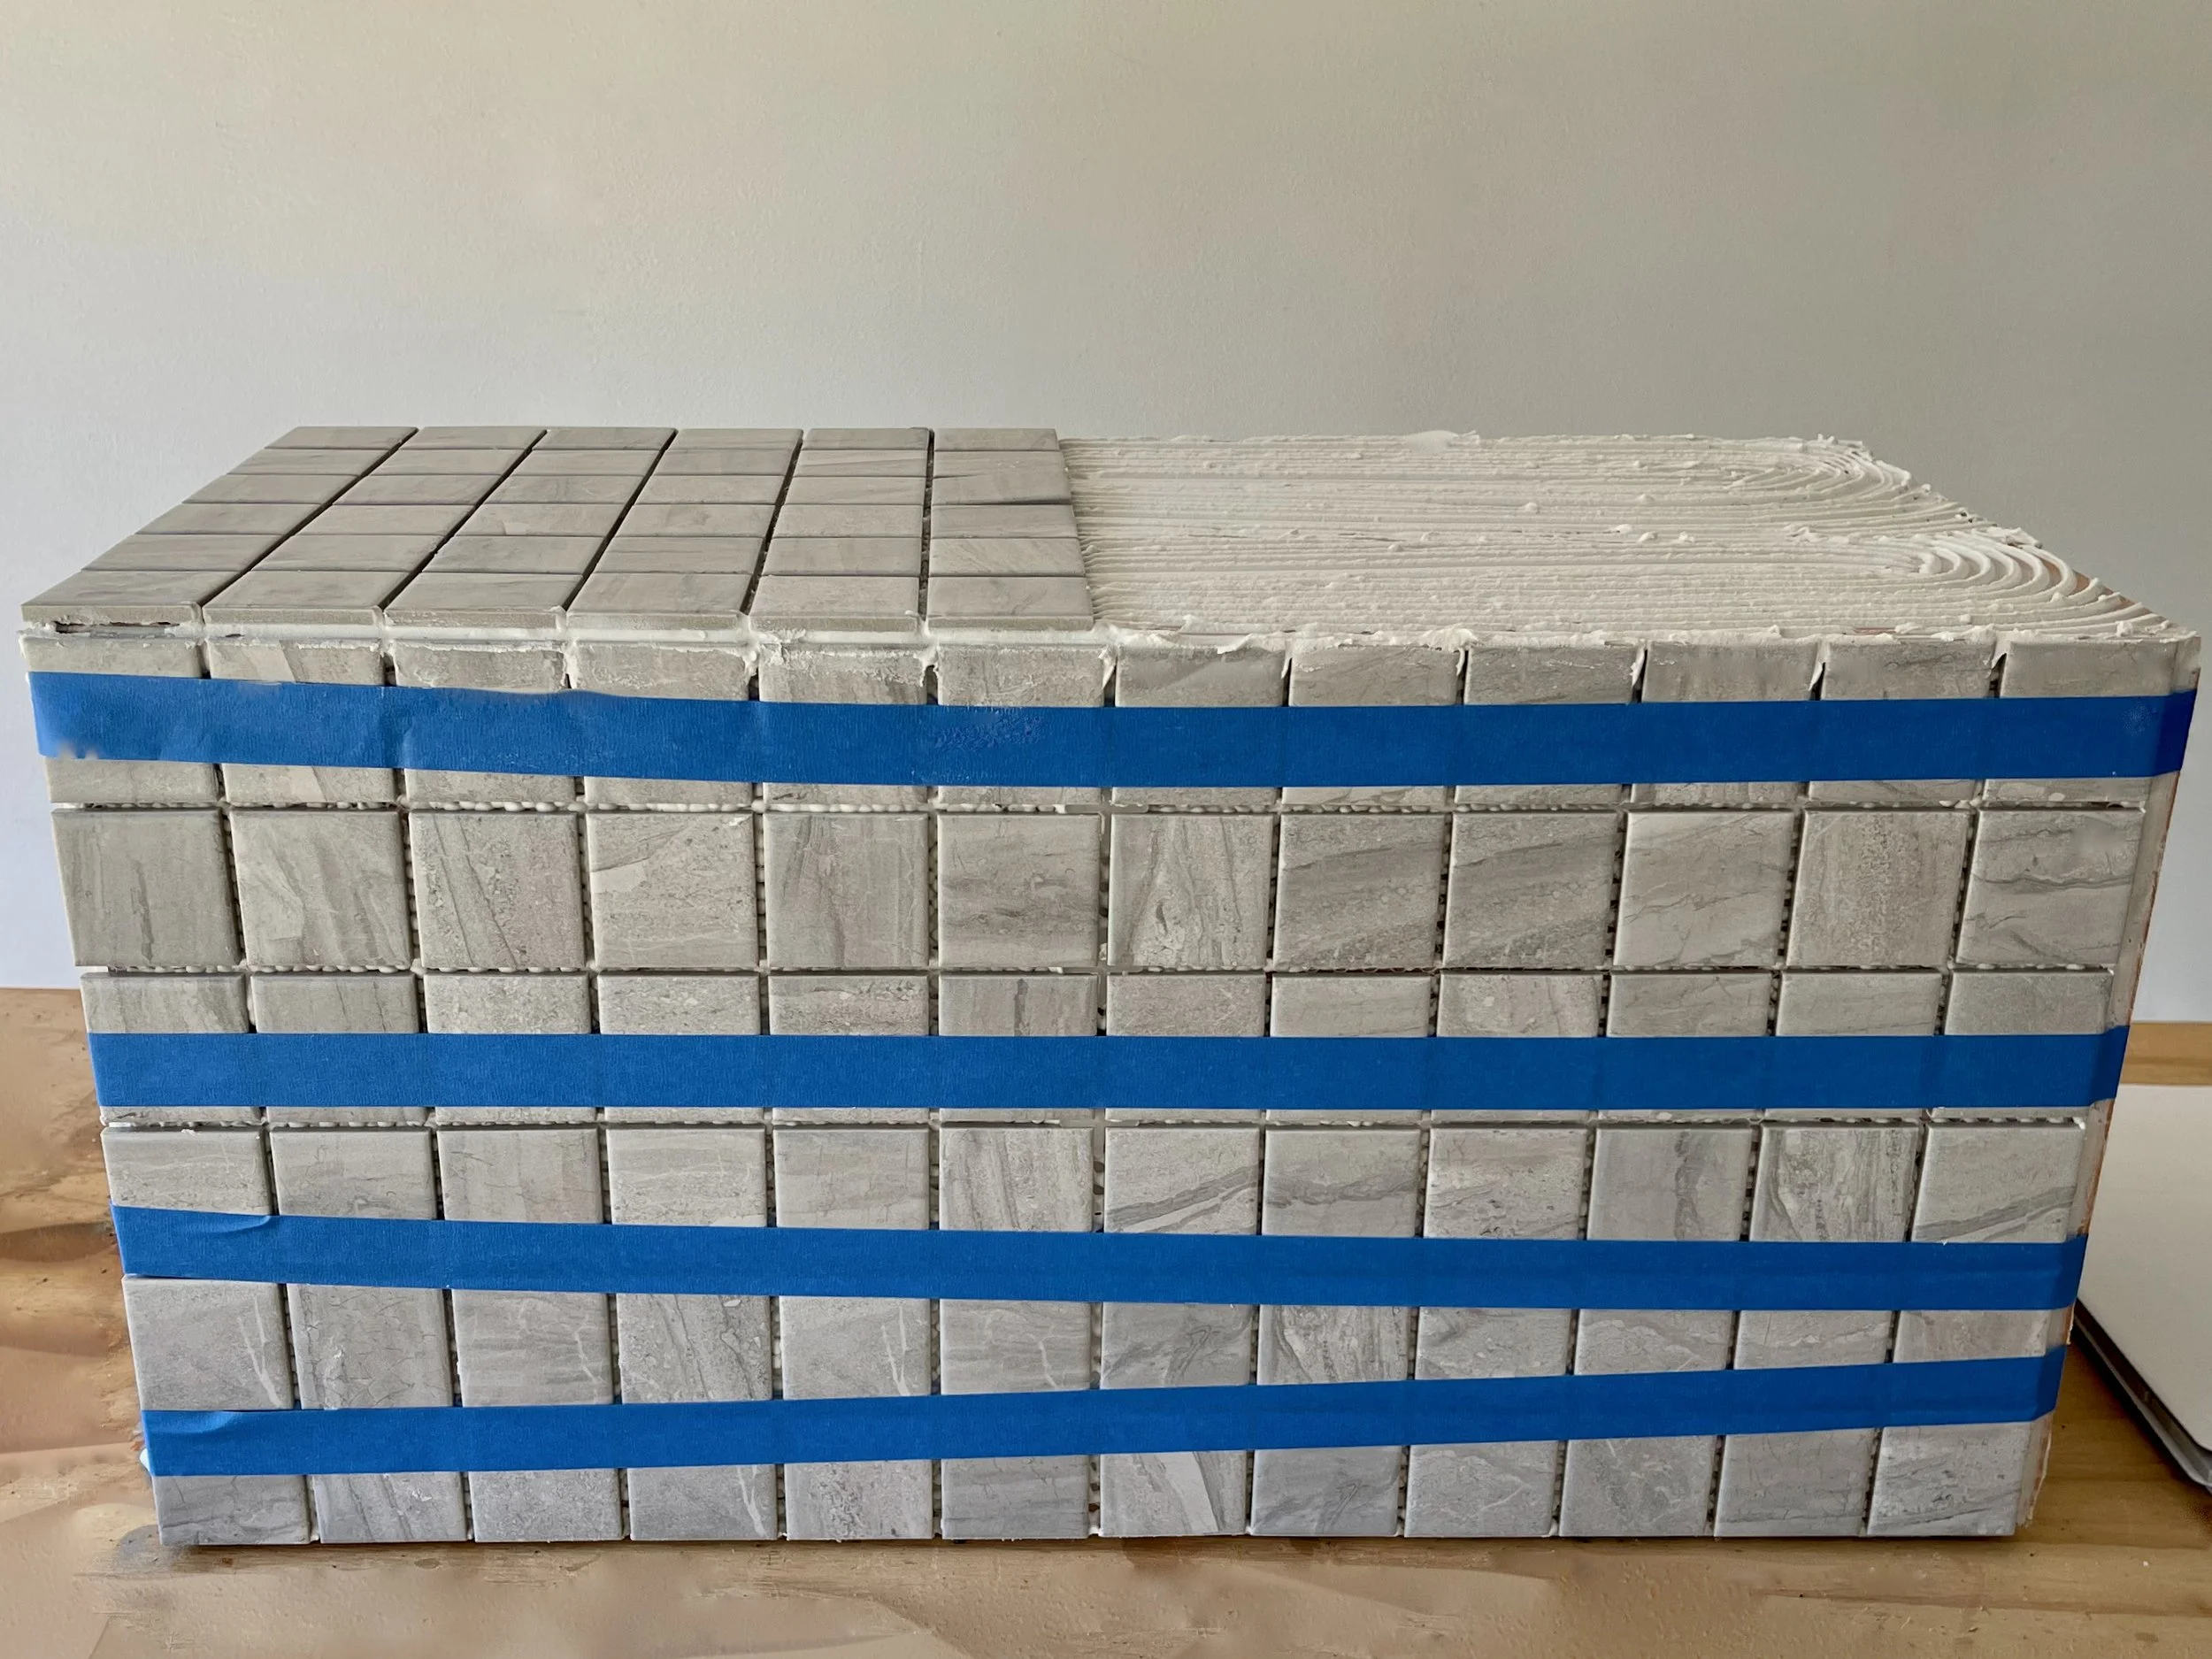
Working on one side at a time, I applied premixed tile adhesive and taped the mosaic sheets to hold them in position while it cured.
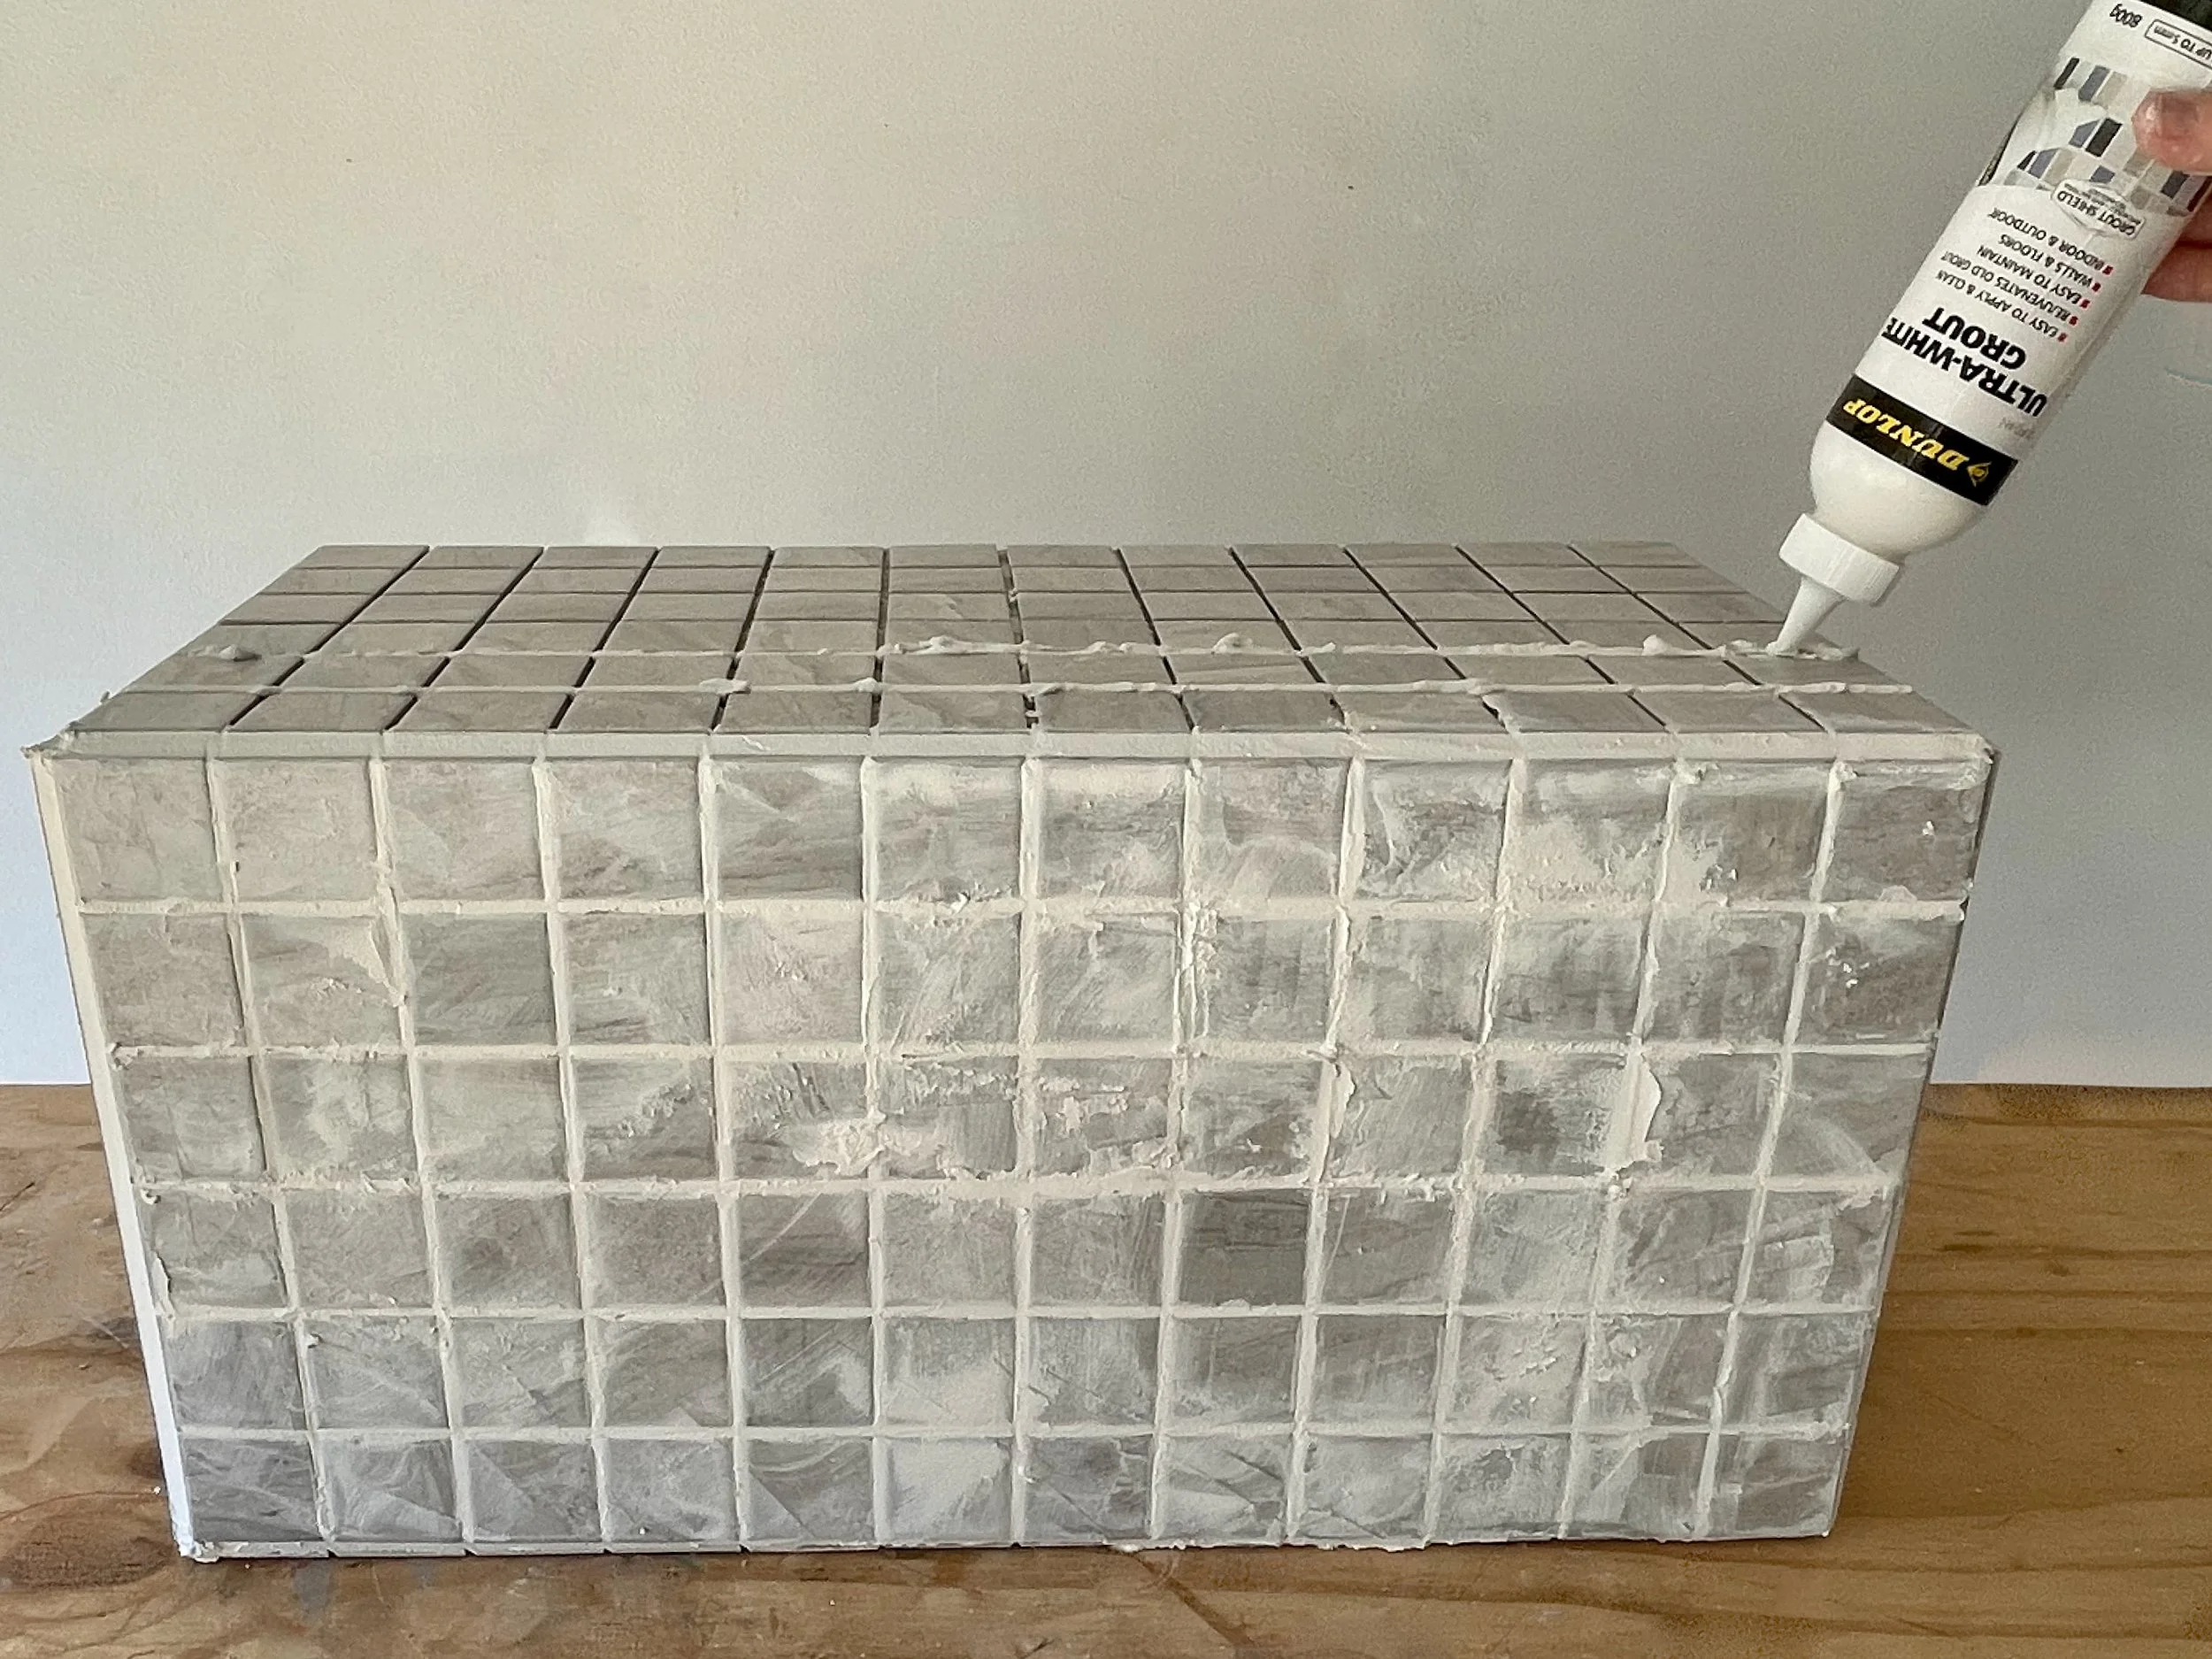
The premixed grout comes with an applicator, but still requires a rubber squeeze to spread it evenly. I sponged off the excess and left it to dry overnight.
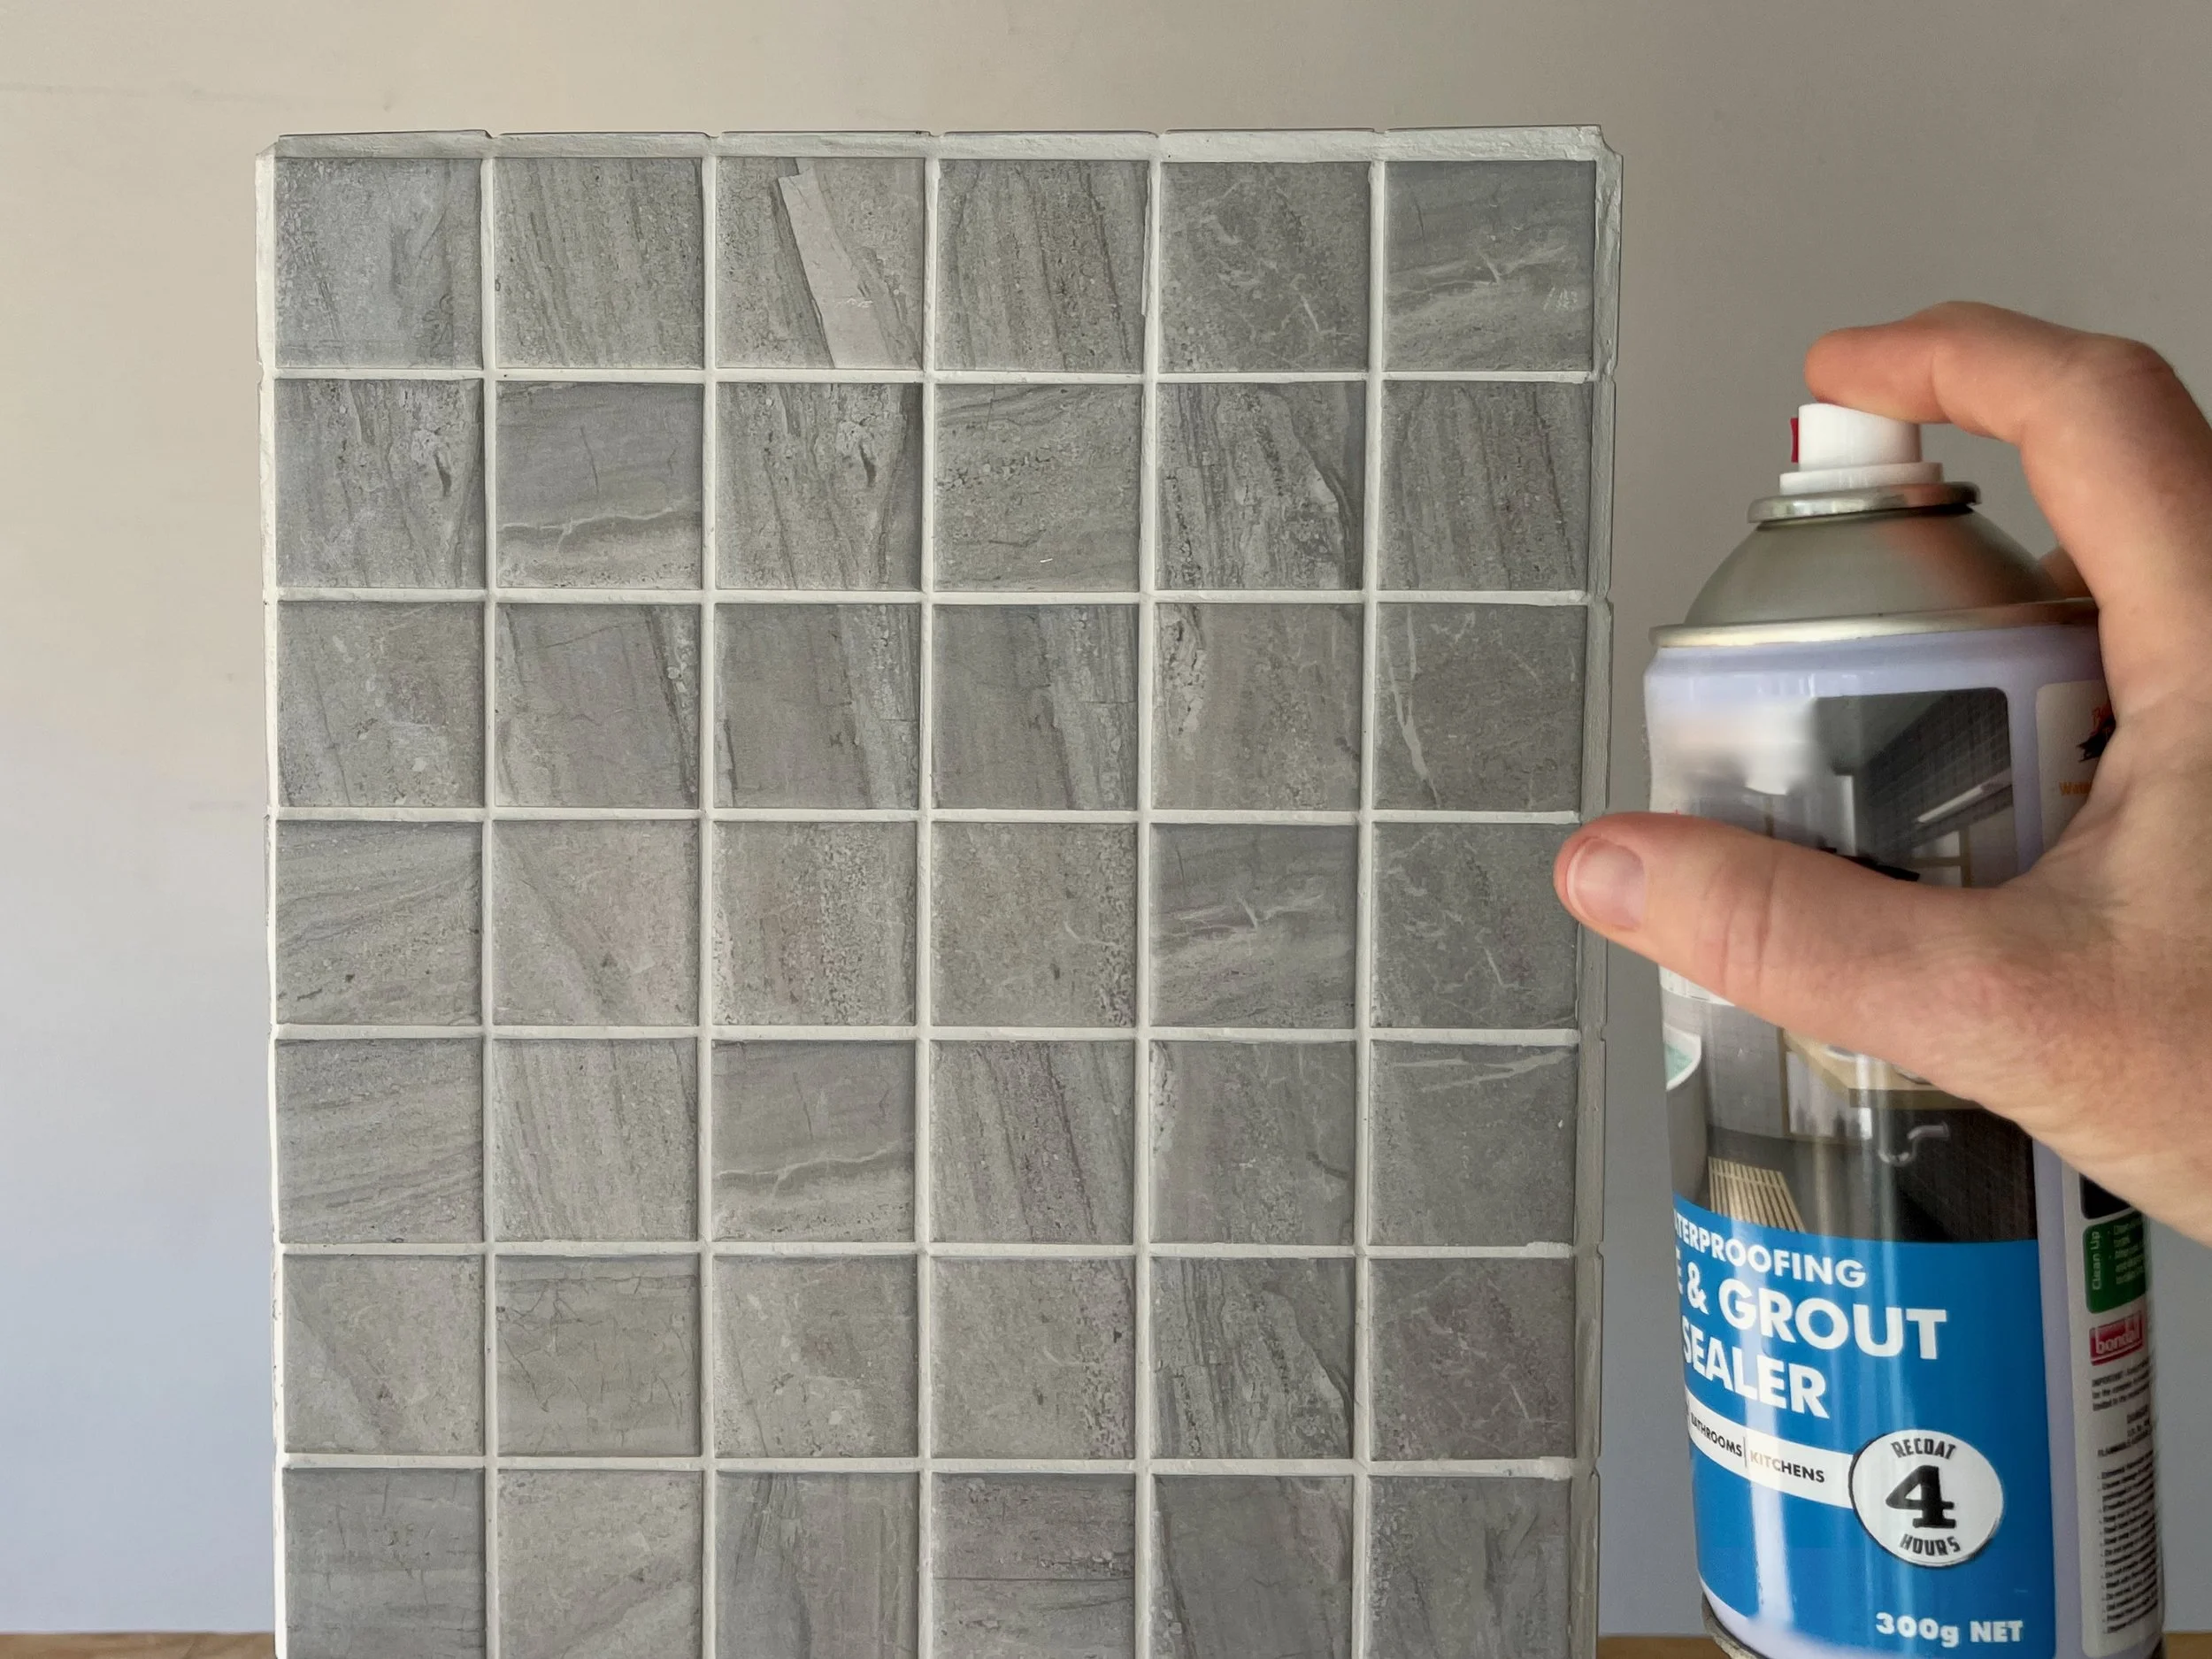
Sealing the grout is essential to protect it from staining and chipping. I chose a spray-on application to downsize the clean-up factor.
TIP While the sealer creates a protective coat, it also makes the grout feel smooth for a professional finish.
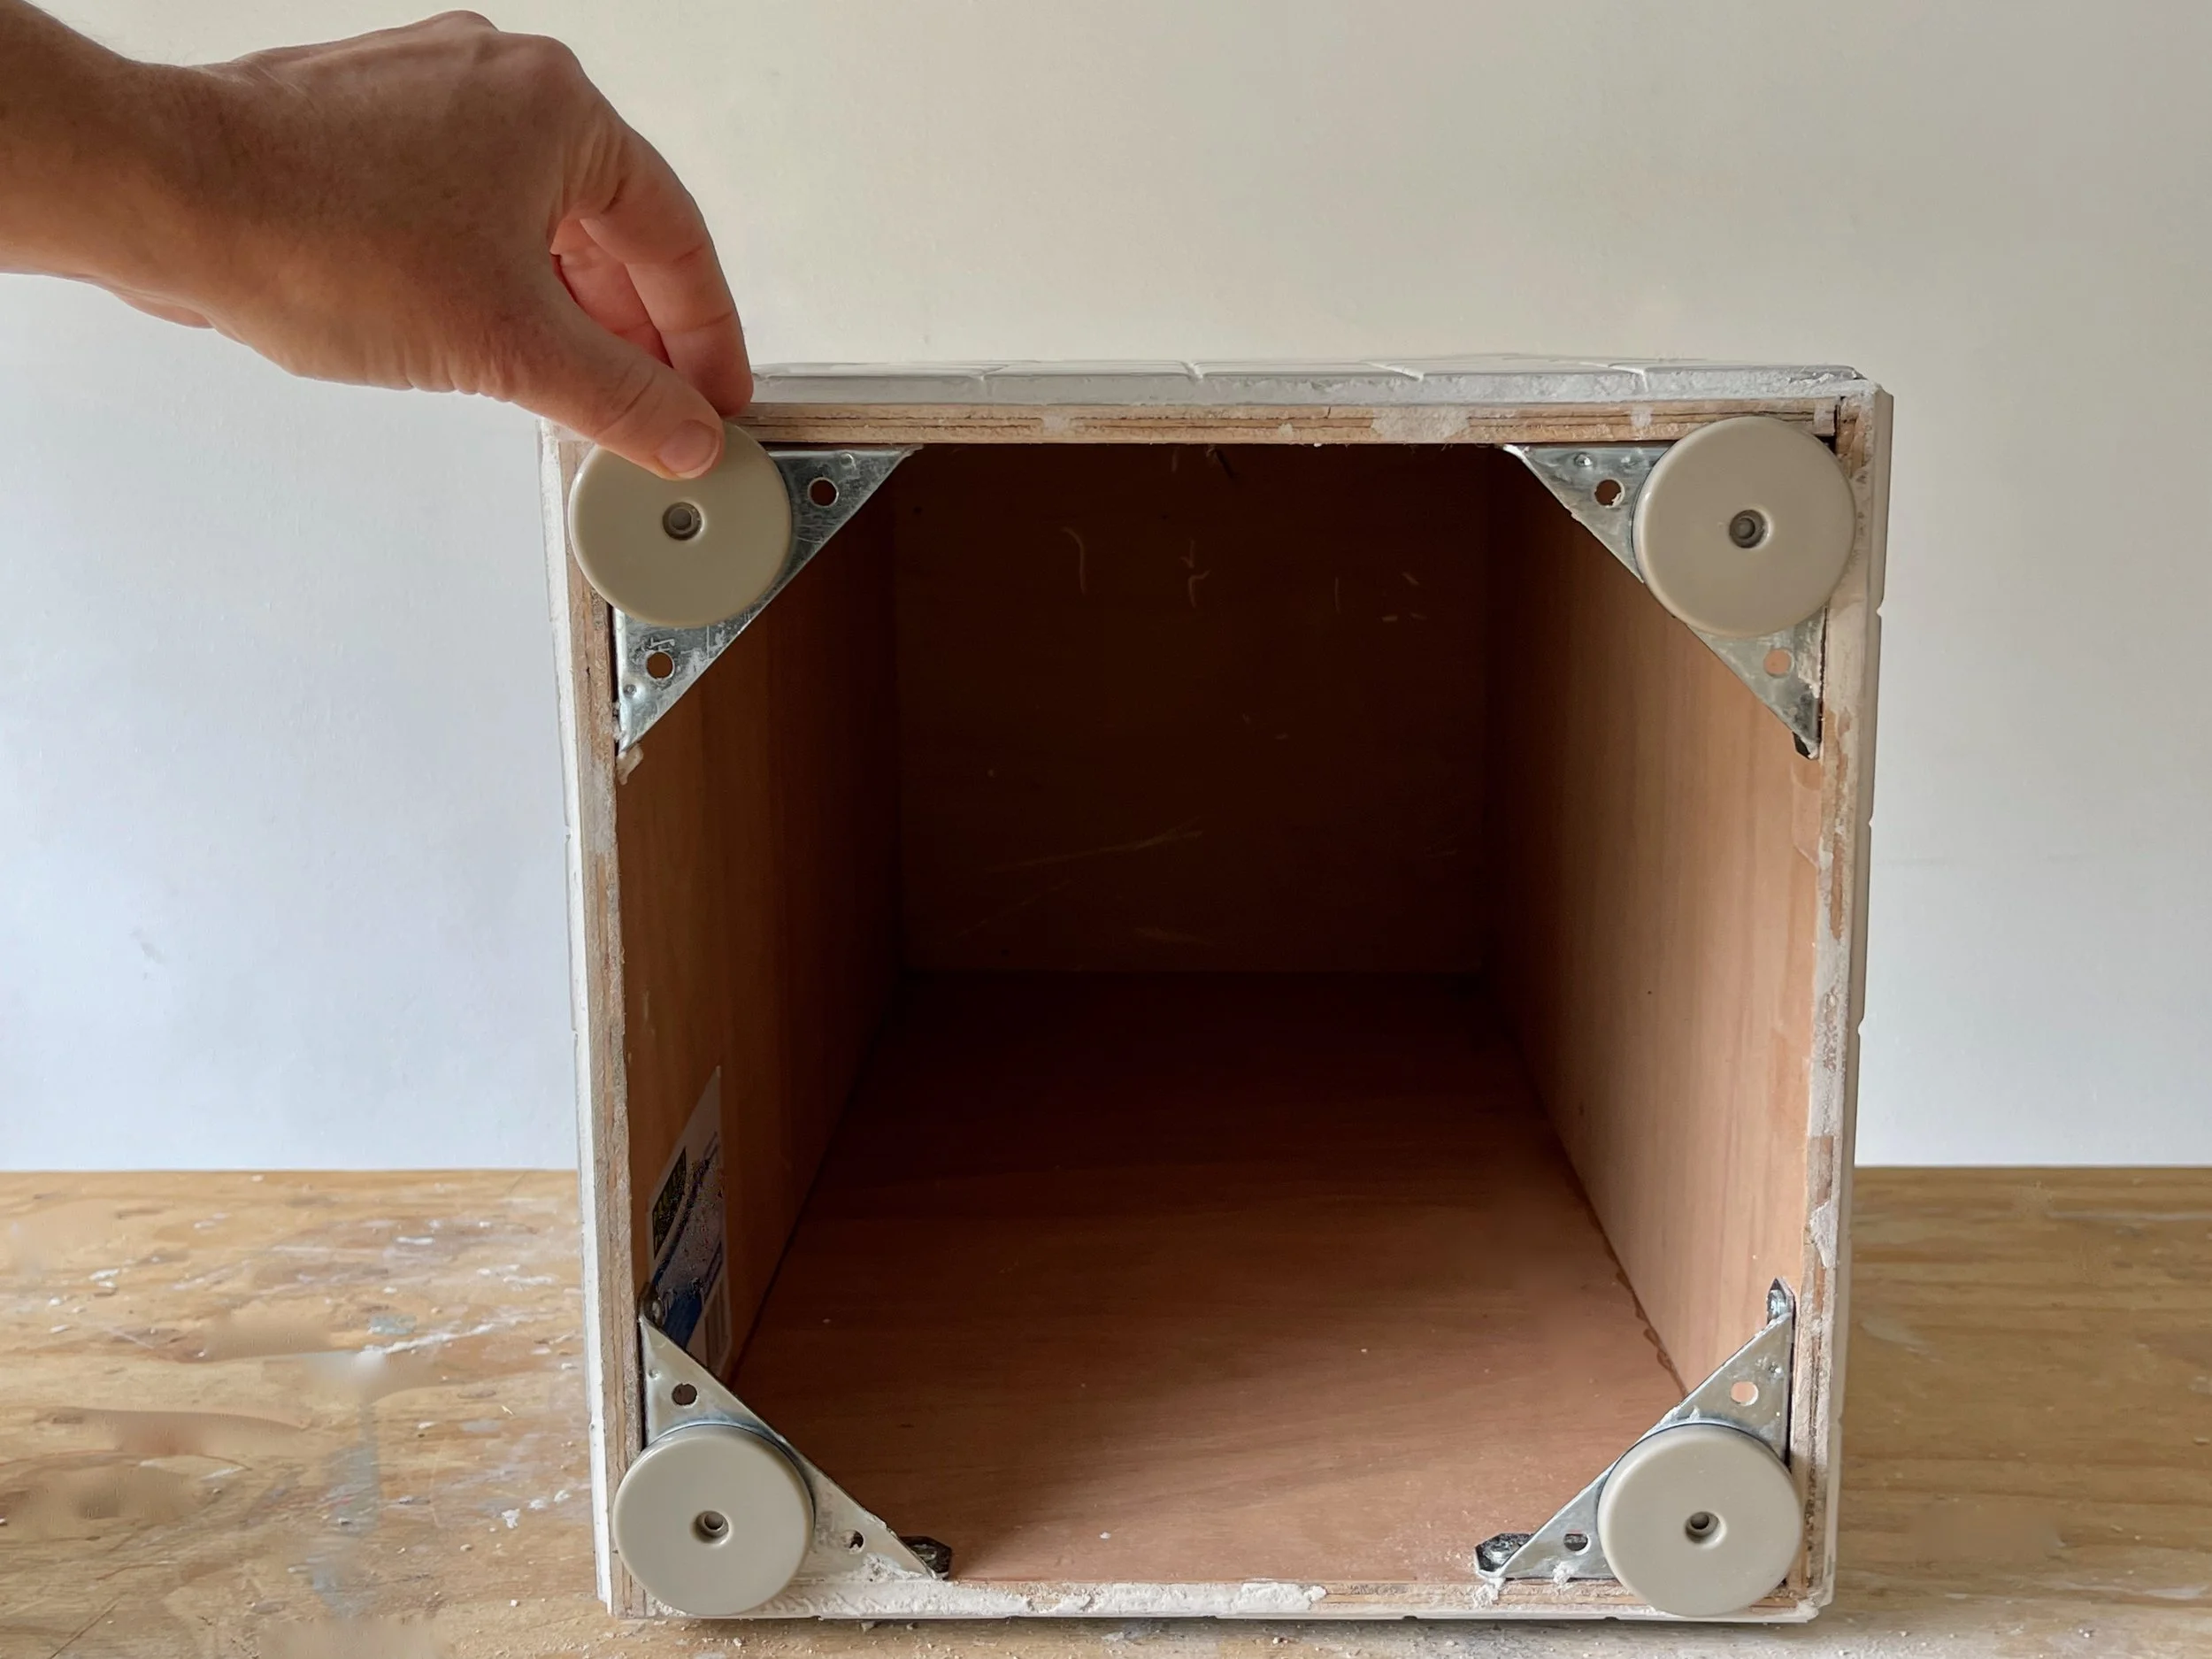
Adding 55mm self-adhesive round slide glides lifts the box slightly, adding a shadow line while preventing it from sitting in water if it rains.
TIP The tiles make the boxes quite heavy to move around so the feet also help protect the floor.
For the list of tools and materials plus more details on how to make tiled boxes, click through to the step-by-step project from page 71 of the March 2022 Bunnings Magazine.
Are you planning to try this project?
Tag me on your project and follow more of my DIY journey on Instagram for tool tips, home improvement and simple building tutorials.