7 DIY ways to personalise a wardrobe
Alun Machin
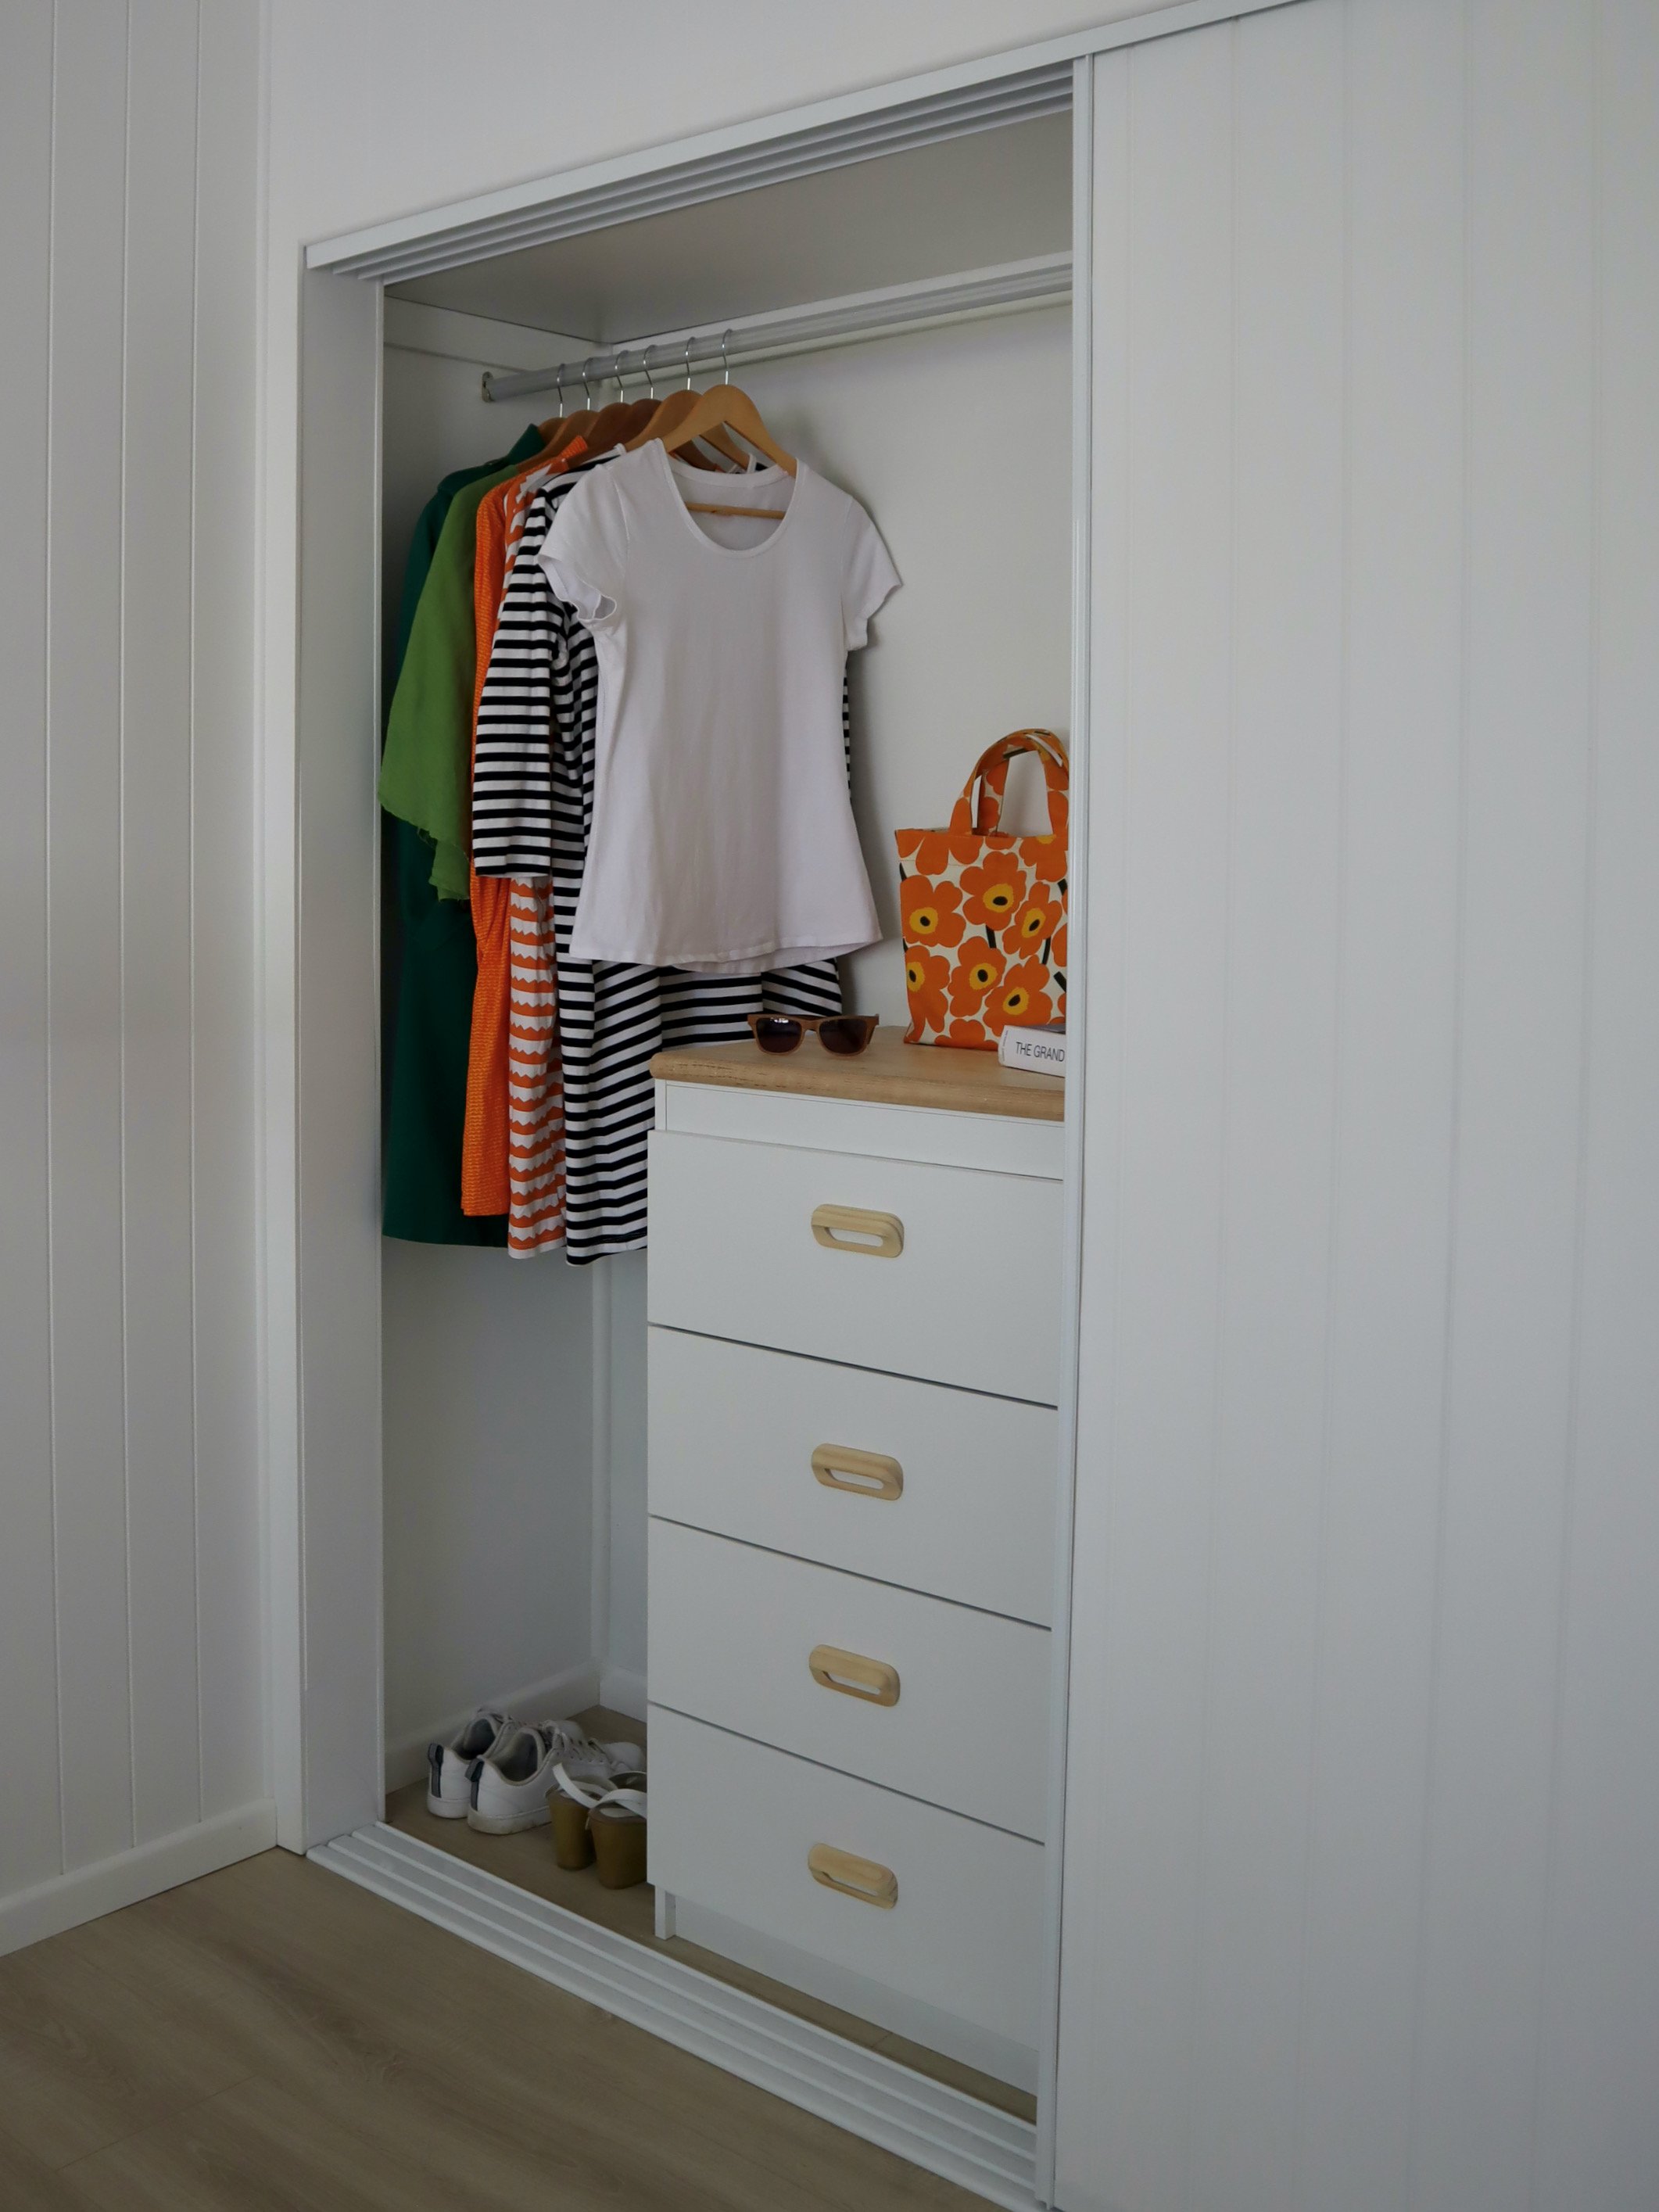
When installing this super-simple Multistore Solutions flatpack system, I came up with some handcrafted DIY elements to make it a truely personal storage space. These can be done when installing a new closet or to simply customise an existing one.
“Most wardrobes are constructed from melamine and, while I appreciate the smooth, easy-clean surfaces, adding timber features warms it up with handcrafted detail.”
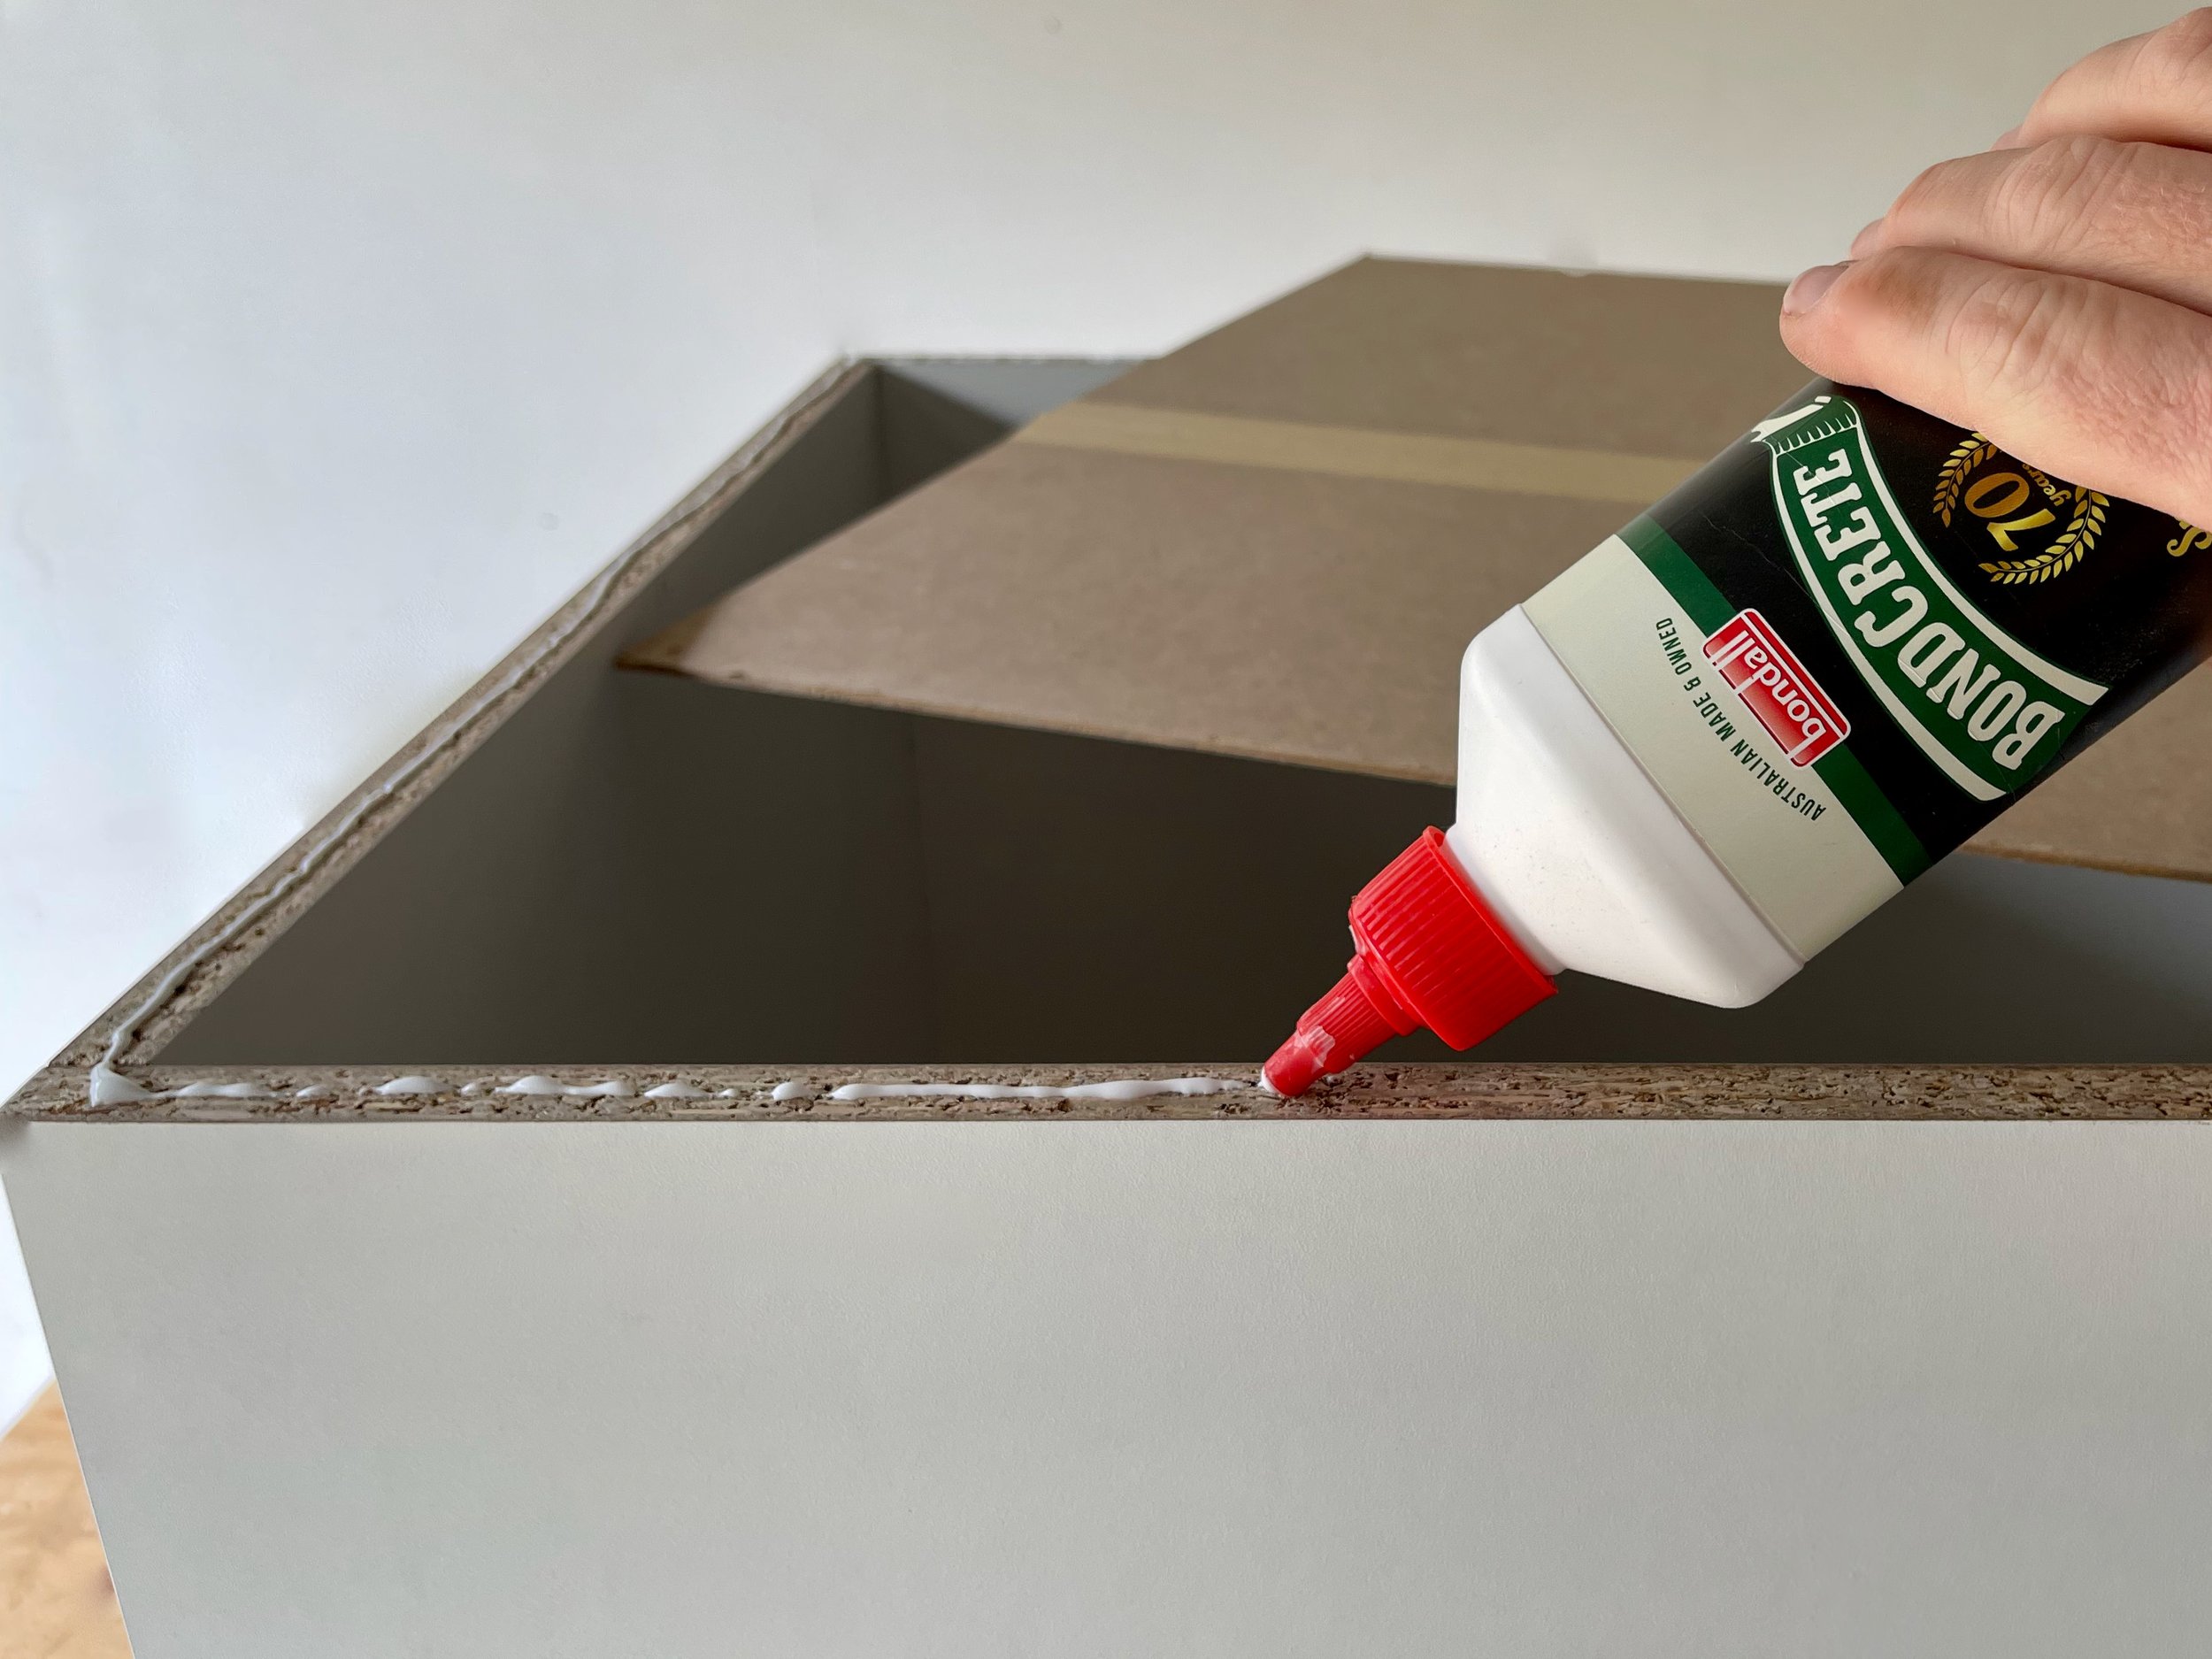
REINFORCE JOINTS
When assembling flatpack furniture, I always reinforce the raw particleboard joints with Bondcrete adhesive to prevent the wobbles and add strength. It has the perfect dry-time, staying sticky for long enough to make adjustments, but not taking more than an hour or so to cure. It also dries clear.
TIP Click through to watch my quick video with more tips for assembly that you won’t find in the supplied instructions.
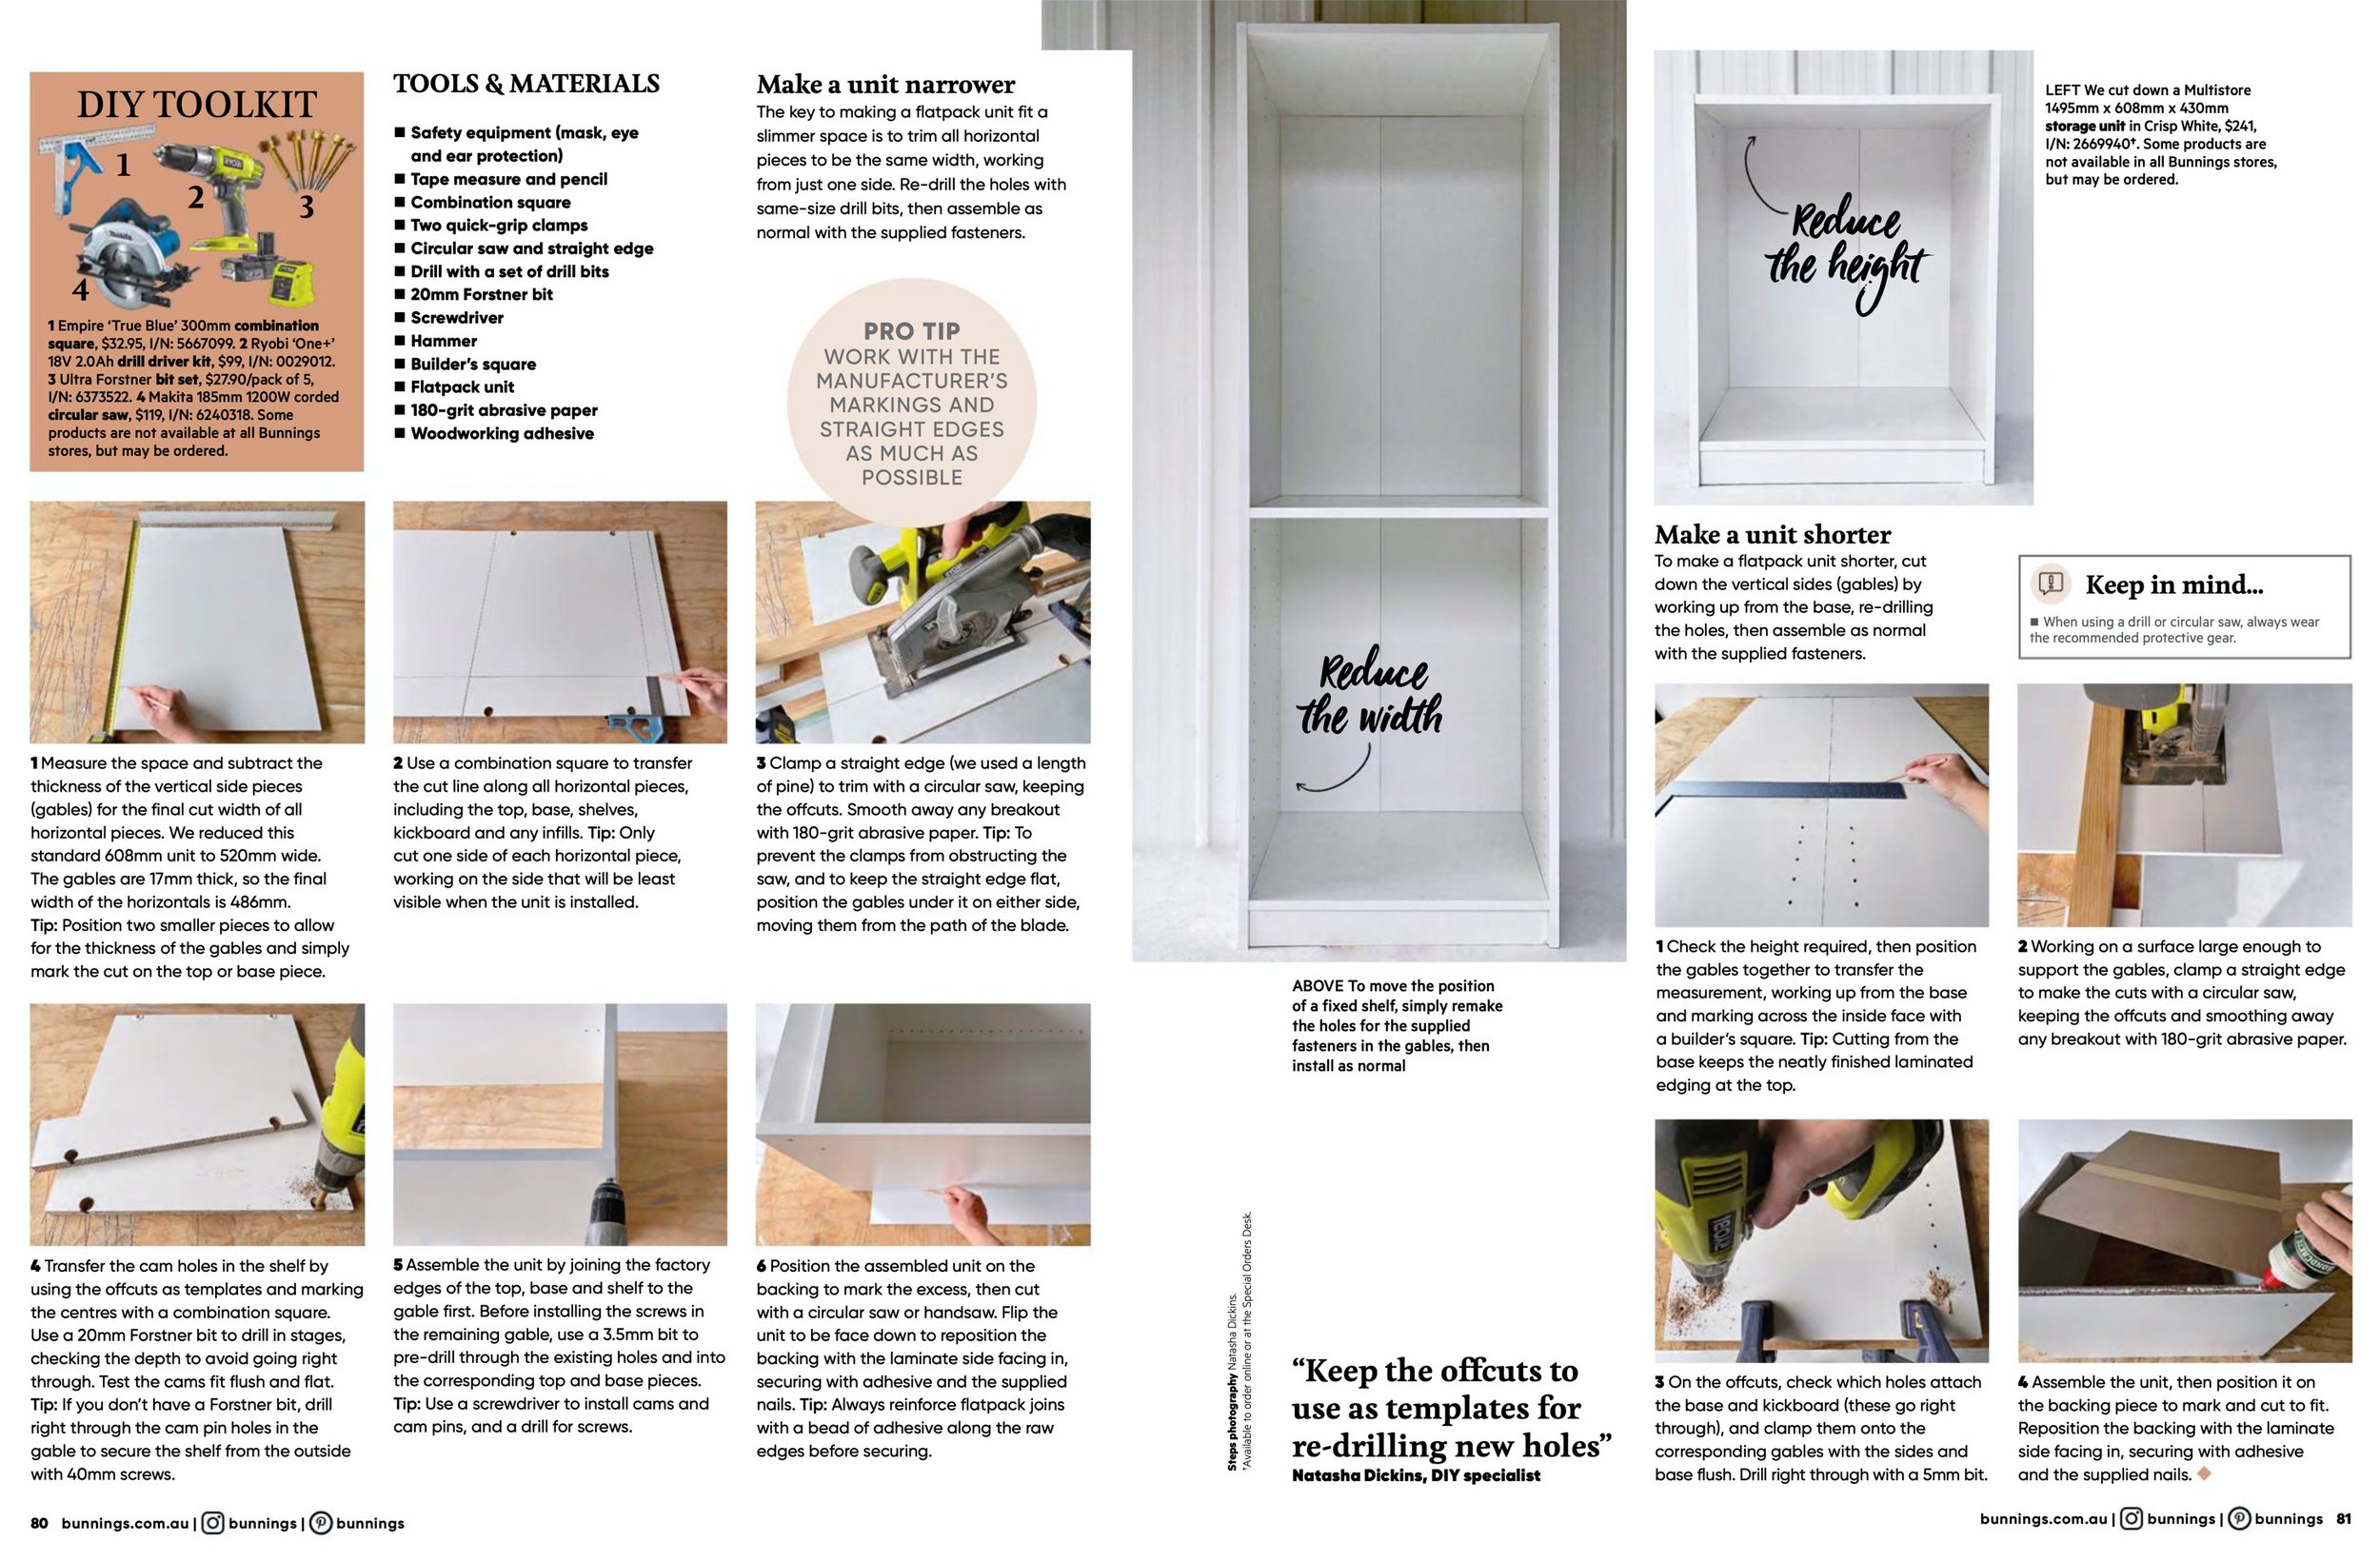
RESIZE STANDARD UNITS
When installing a new robe that doesn’t quite fit the space, it’s a simple process to resize standard flatpacks to be slimmer or lower.
TIP For more instructions on resizing a flatpack robe, click through to the full project on page 80-81 of the January 2022 Bunnings Magazine.
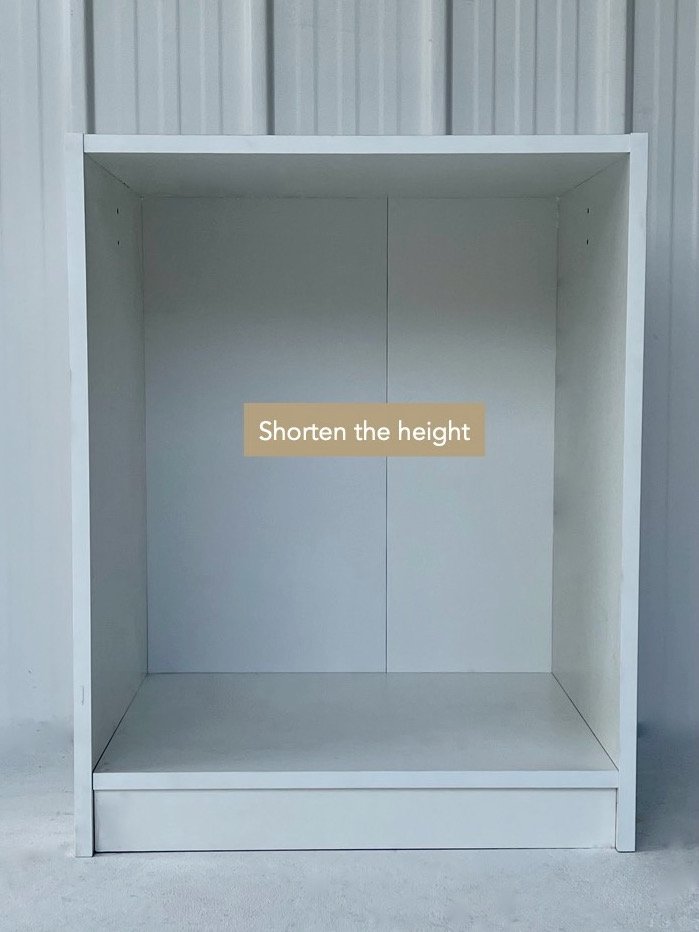
REDUCE THE HEIGHT by cutting down the vertical sides, measuring up from the base, then re-drilling holes for the base and any shelves. Keep the offcuts to use as templates for re-drilling the holes, then assemble as normal with the supplied fasteners.
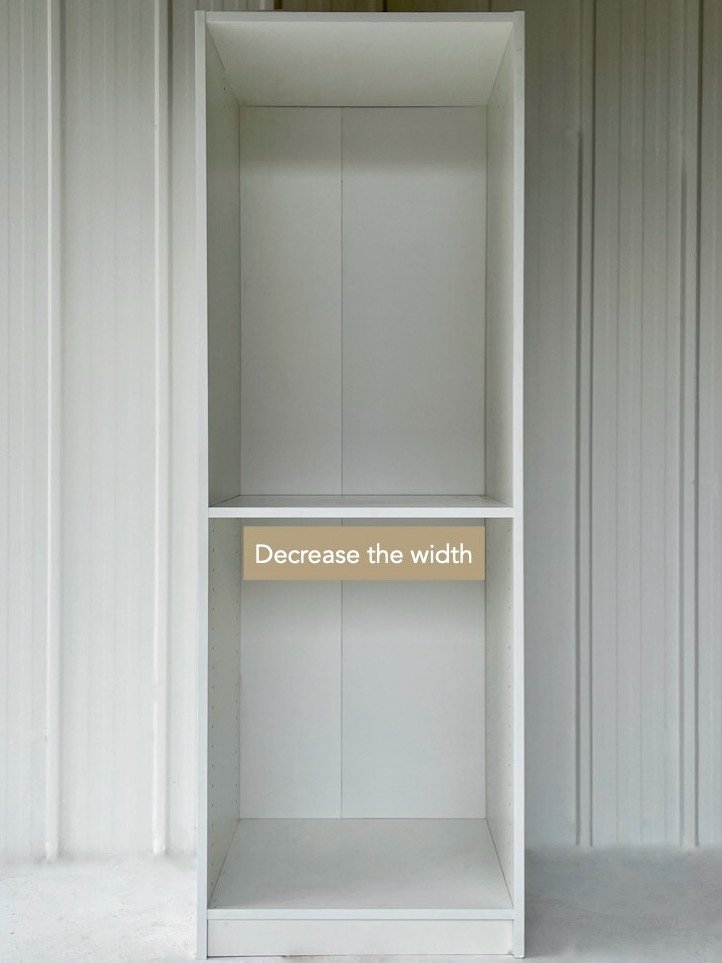
REDUCE THE WIDTH by trimming all the horizontal pieces to the same width, working from just one side. Keep the offcuts to use as templates for re-drilling the holes, then assemble as normal with the supplied fasteners.
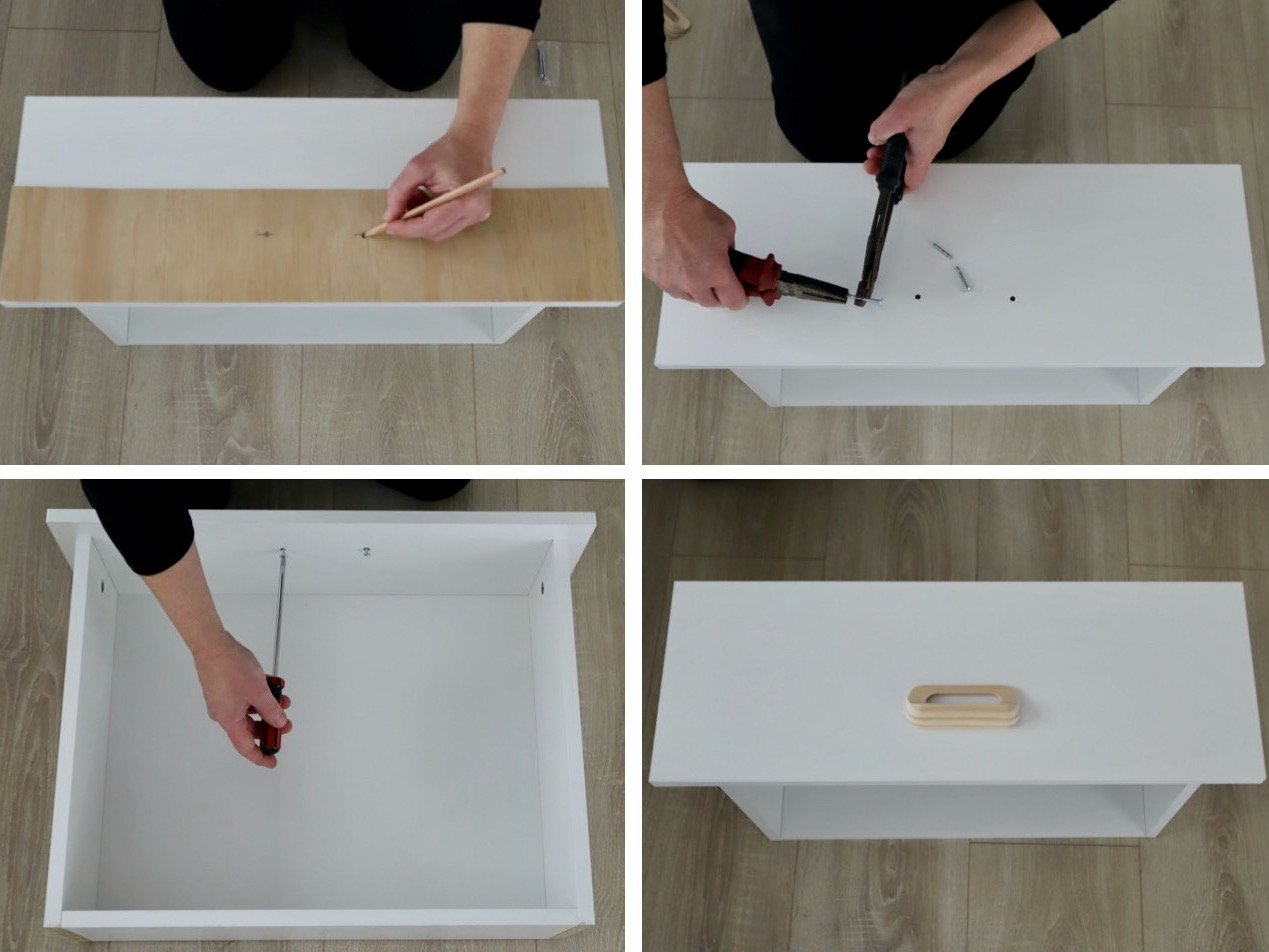
SWITCH THE HANDLES
Swapping out the supplied metal drawer handles for post-box pulls adds a little personality. I sealed them with Monocel Waterbased Clear Wood Varnish in Satin.
To ensure the handles line up, I made a template for the holes from 3mm plywood cut to the same width as the drawer fronts, and drilled right through with a 4mm bit.
I used two pairs of pliers to snap the supplied screws to fit through the drawer front, installing them with a Phillips head screwdriver.
TIP Click through to watch how I installed this robe with timber handles.
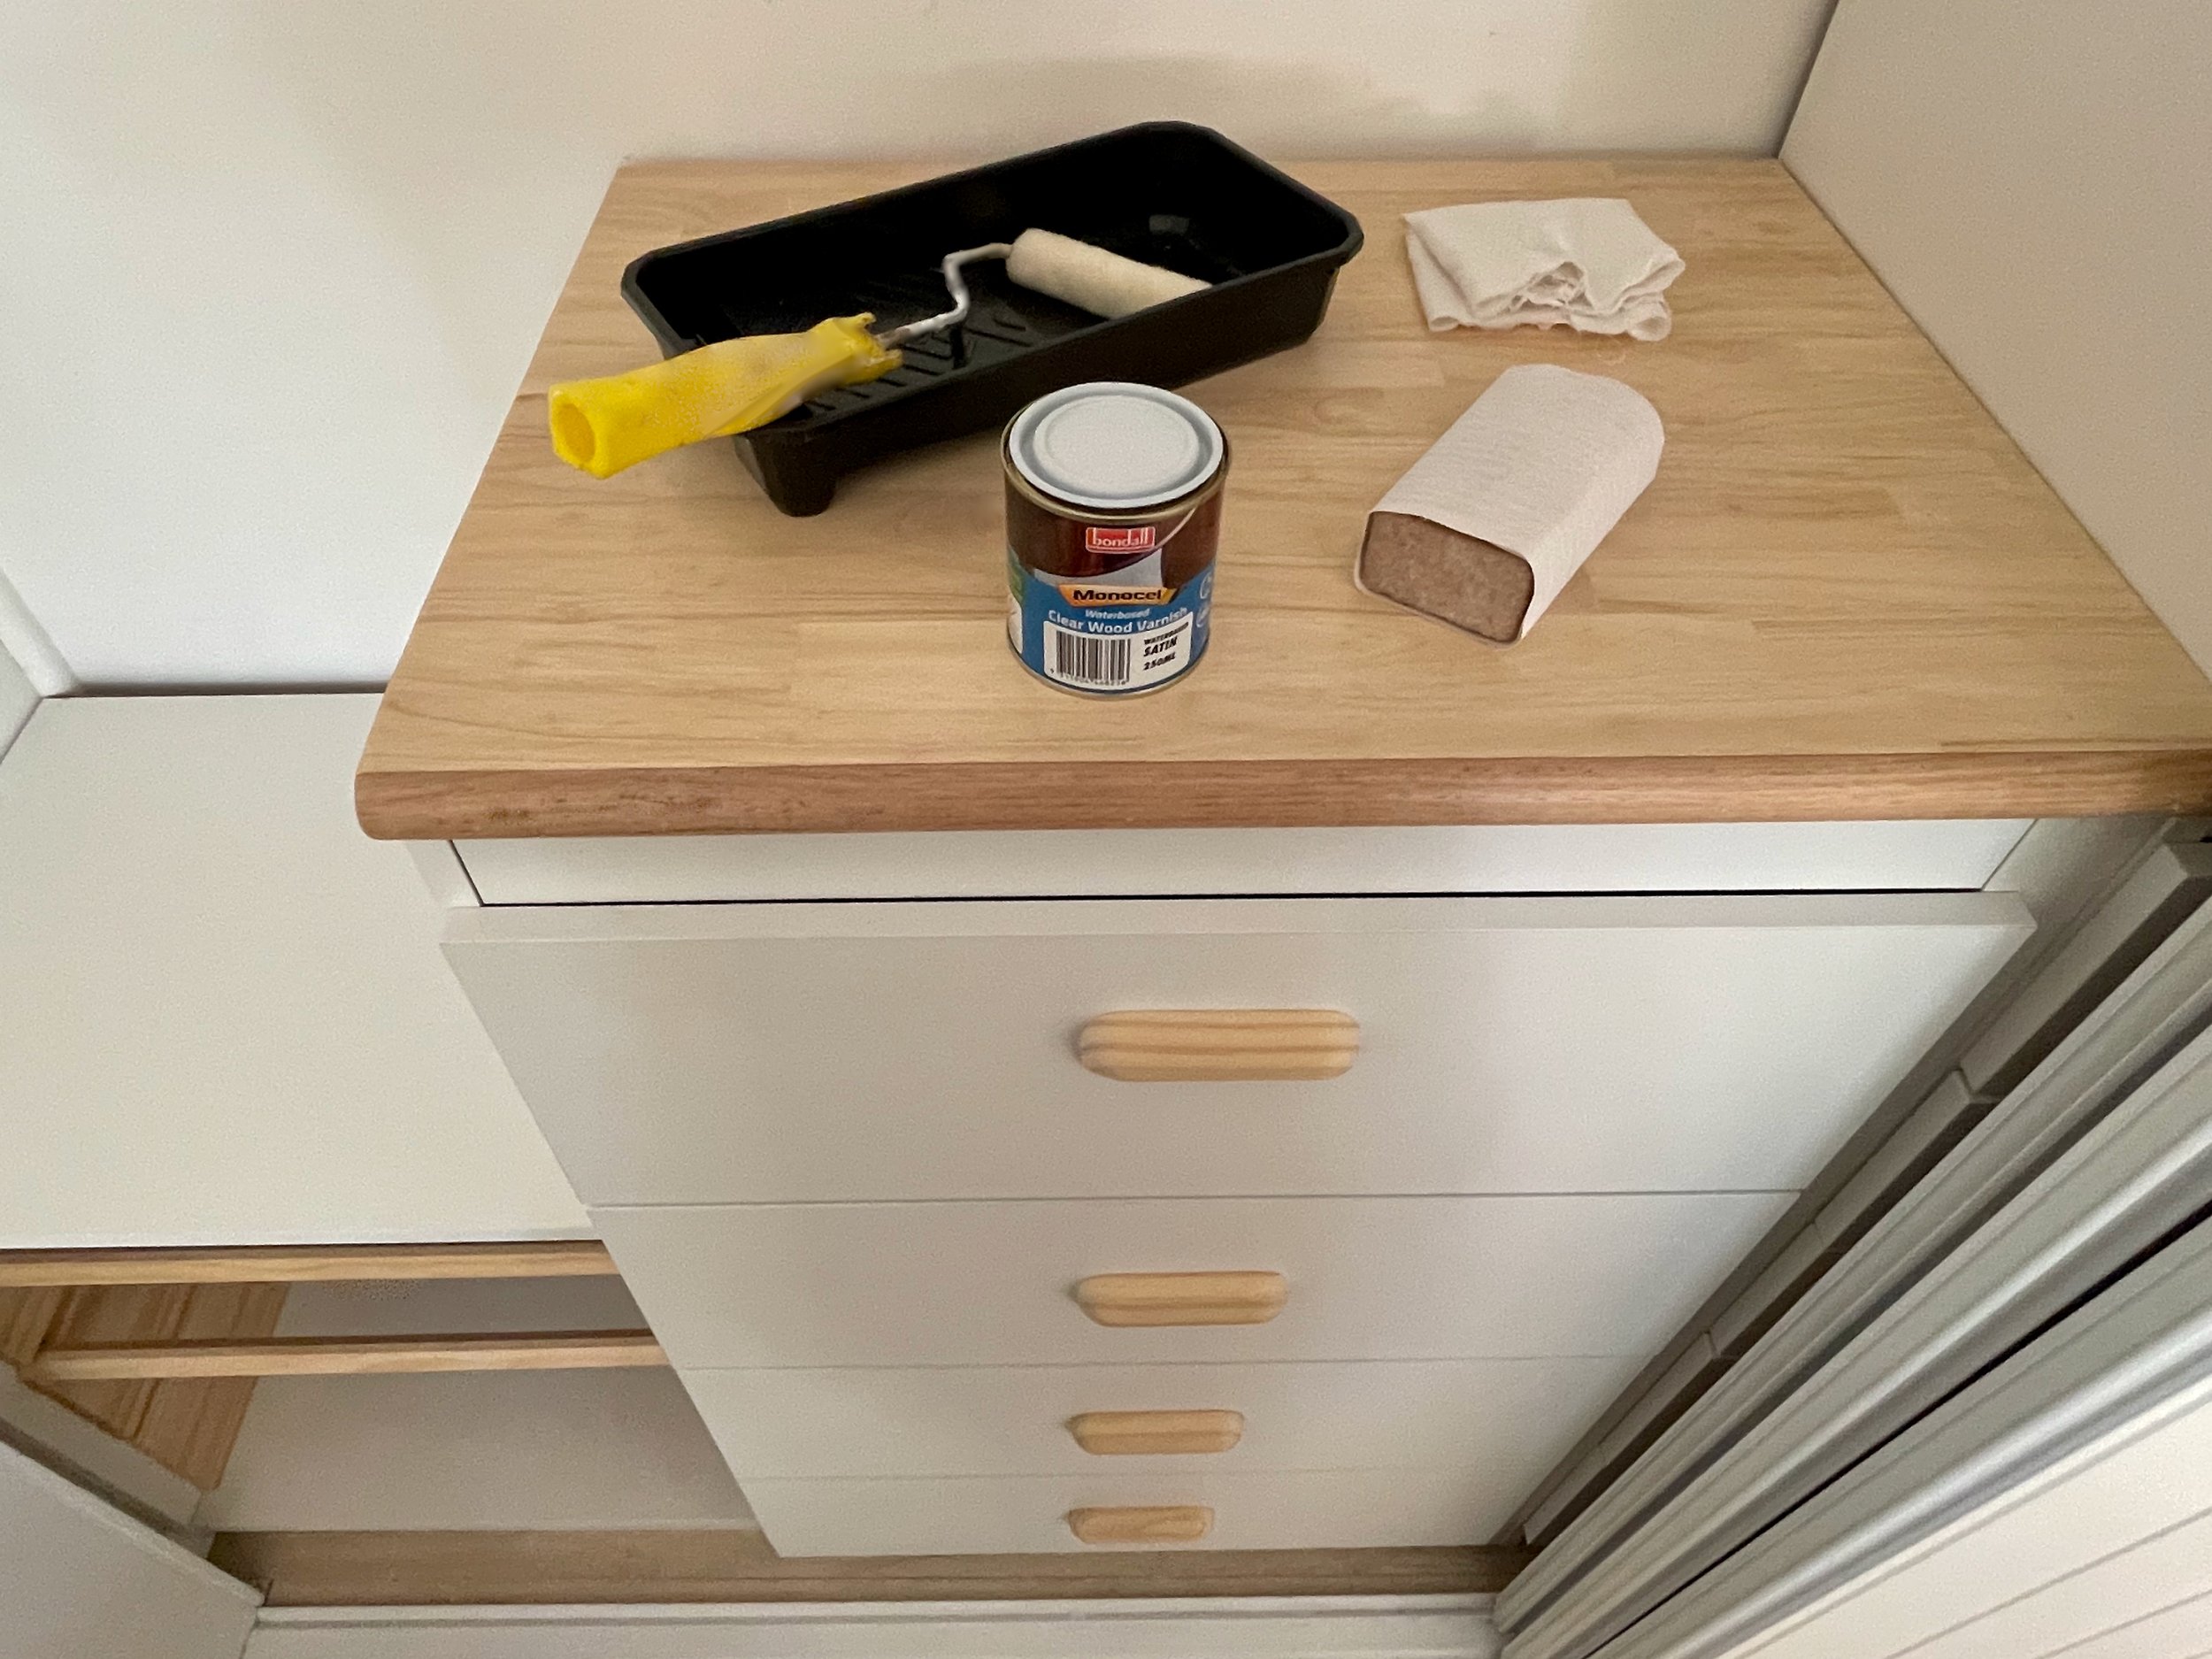
MAKE A DRESSER
To convert a drawer cabinet into a dresser, I trimmed a 600mm-wide laminated timber panel to fit over the top and nailed half-round dowel along the front to create a lip that holds it in place.
I sealed it in two coats of Monocel Waterbased Clear Wood Varnish in Satin as it dries fast without a strong odour, which is great for a closed area. The lacquer-like finish highlights the richness of the woodgrain.
TIP Before sealing, sand the surface and round-over the edges slightly with 180-grit abrasive paper, remove the dust with a damp cloth, then use a mini mohair roller to apply varnish.

CREATE HIDDEN STORAGE
A hat shelf spans the gap over the hanging rail and would normally run the full width of the units, but making it shorter frees up room for it to slide across, creating a mini attic area. Adding a wall batten prevents the shelf from bowing while acting as a support for the shelf to slide across.
TIP For a new install, choose a hat shelf the next size up from the gap. If your gap is about 1220mm, choose the Multistore 1200-1499mm kit, which also includes the hanging rail, flanges and wall batten.
For an existing robe, remove the shelf and trim it to fit over the gap, allowing it to sit over the unit by about 150mm.

INSTALL A SHOE RACK
To make stackable shoe racks, I cut 12mm-thick, 140mm-wide pine sides to fit the depth of the cabinet, and lengths of 19mm tri-quad pine moulding as rails to span the width, securing them over the sides using Bondcrete adhesive and small nails.
I’ve spaced the rails differently on each rack to cater for various types of footwear – omitting some to give clearance for boots and positioning others together to prevent heels from falling through.
TIP Three racks fit perfectly here, but you could stack more as the rails have a flat-top profile that helps keep them locked in.

Are you planning to customise a wardrobe? Share your project and follow my daily DIY journey on Instagram for more renovating and home improvement, tool tips and simple building projects.