DIY Window Screens
Natasha Dickins

Making new screens from scratch turned out to be a simple DIY process that instantly transforms my existing windows. Here’s how I did it…

My coastal home is by the beach and in a bushfire-prone area, so I chose Cyclone Stainless Steel Insect Guard for the screening. It costs more than aluminium or fibreglass mesh but is corrosion resistant and offers extra protection against embers.

BEFORE & AFTER The dusty old screens were in such a bad state that even the frames were bent out of shape, so I replaced them completely.
The new frames are made from white aluminium channel, with the mitred corners cut by hand with a hacksaw. These are joined with hidden framing corner stakes pushed into ends.
TIP If your frames are still in good nick, simply remove the old mesh and spline, give them a clean, then go straight to Step 6.
“The new mesh is almost invisible, making the windows instantly cleaner, and the breeze through the house is fresher.”
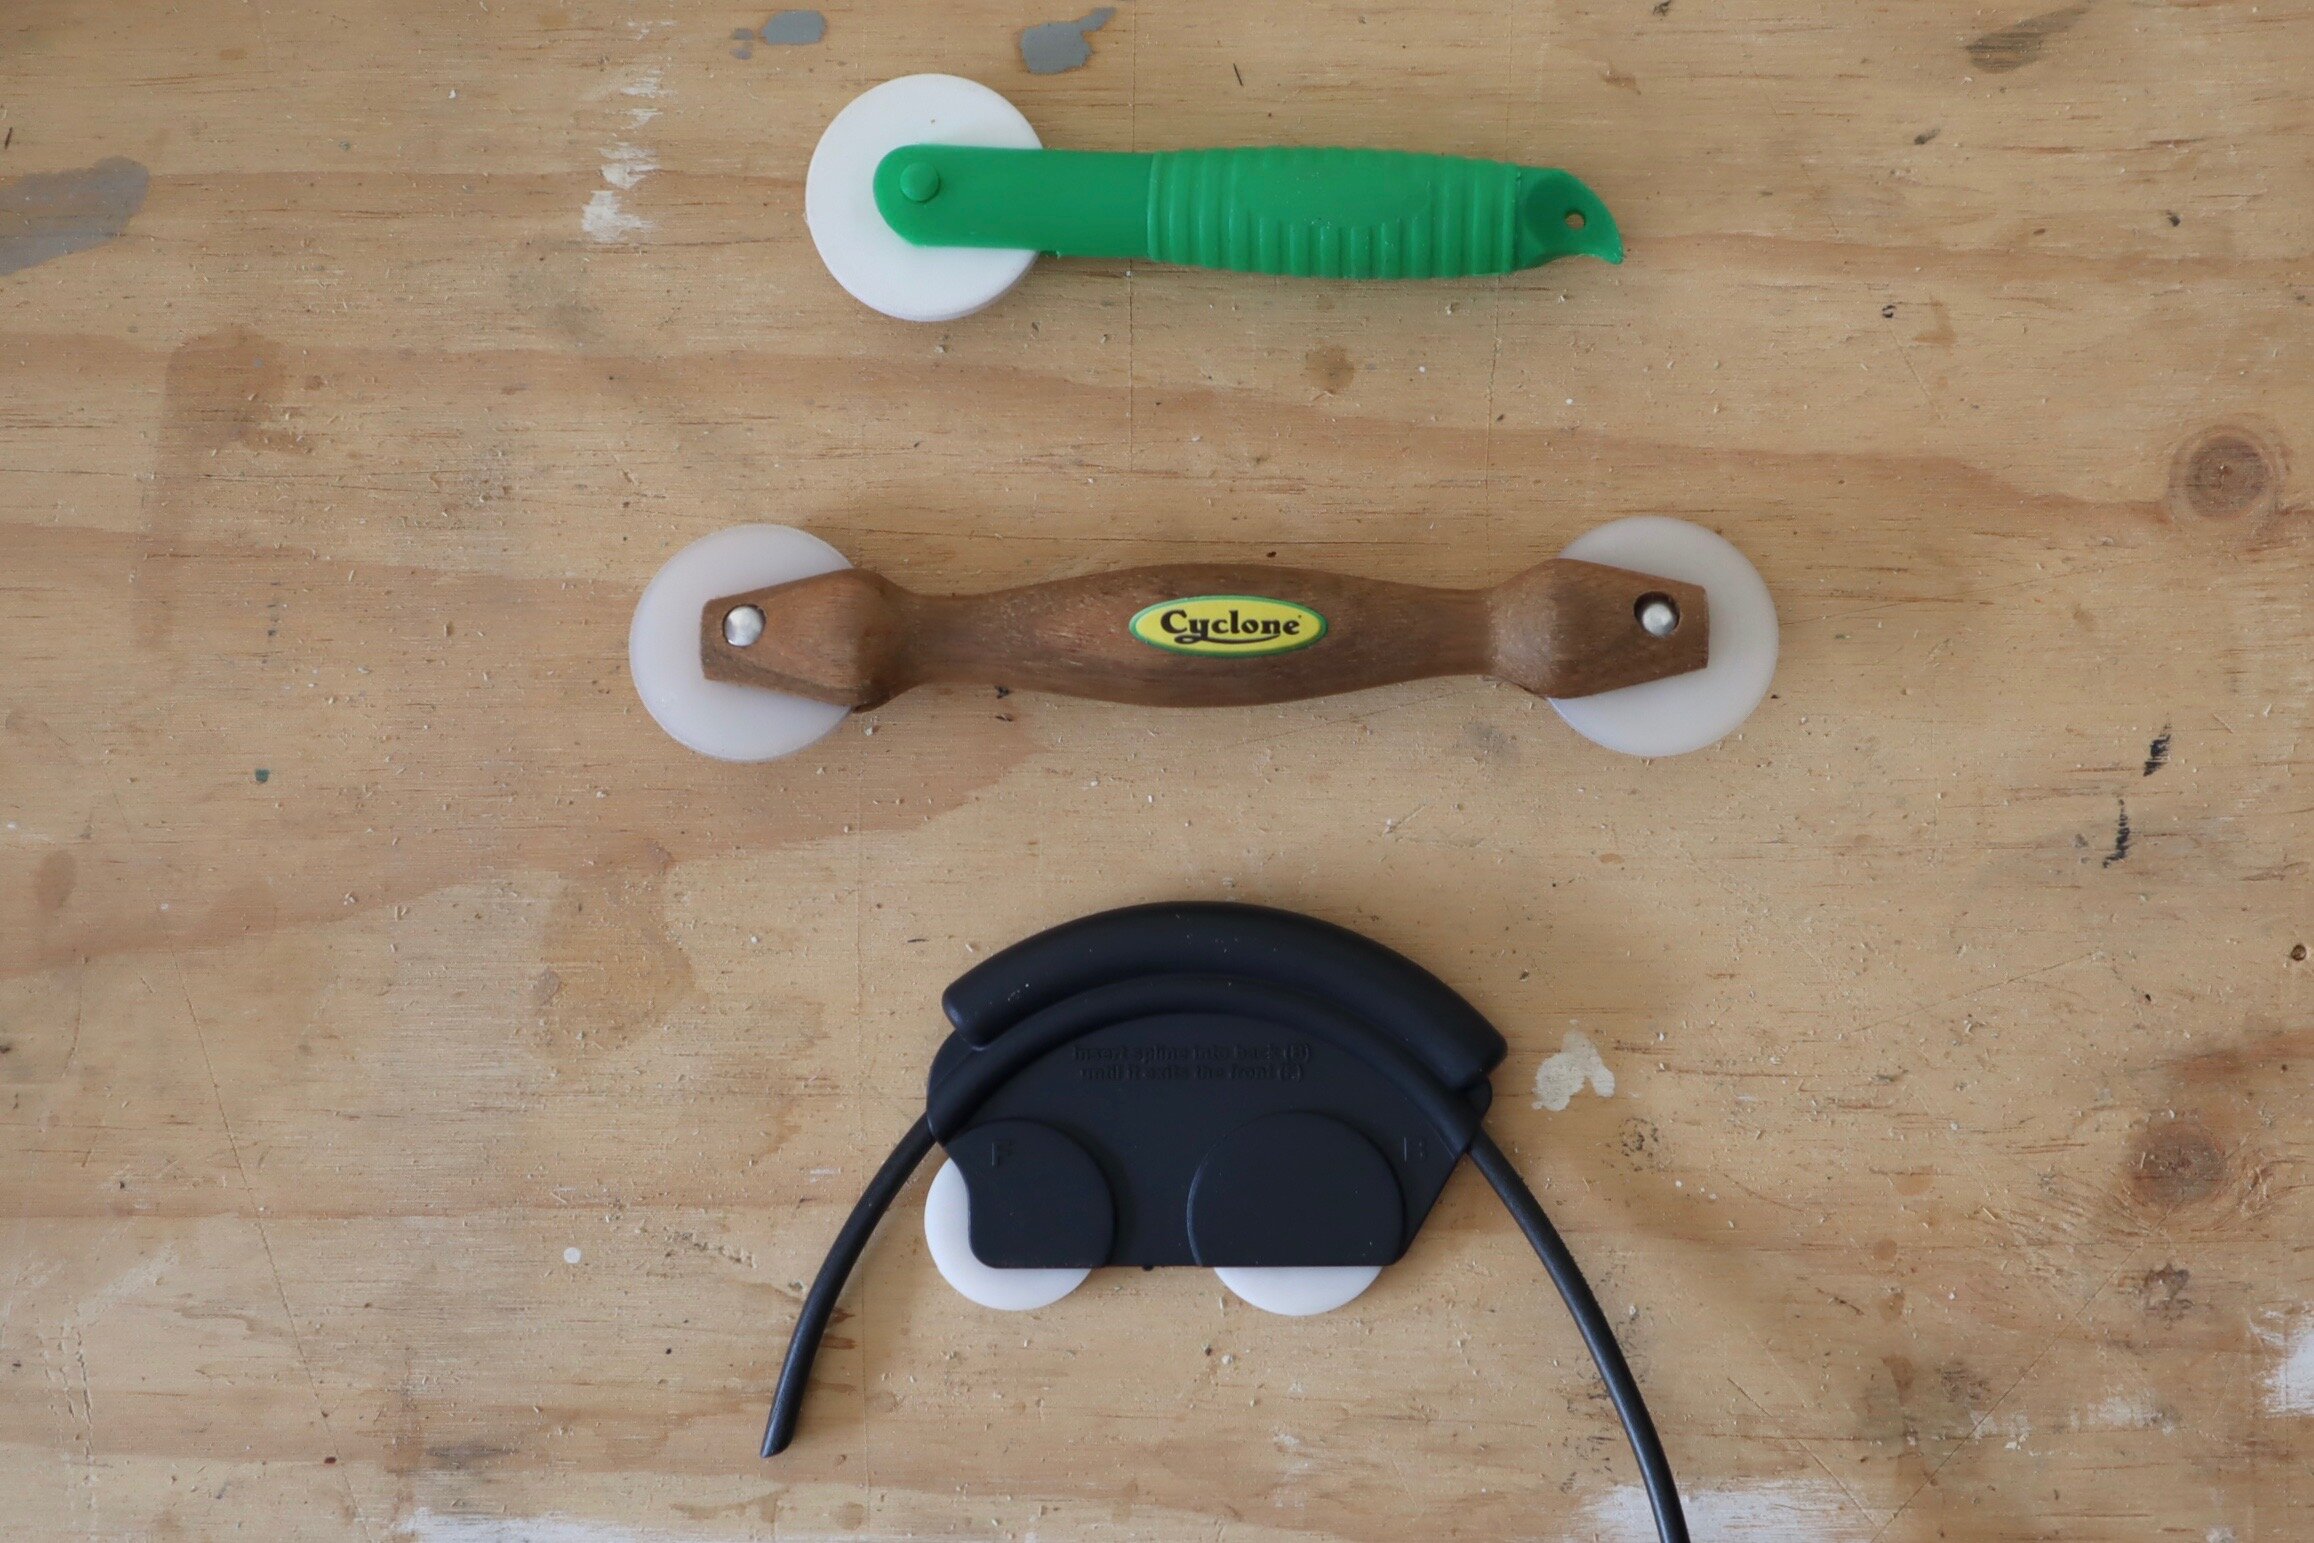
The mesh is held in the channels with foam or rubber spline that is installed with a spline roller. There are different rollers for various applications…
PLASTIC ROLLER is for most types of mesh. The parrot-beak end is used to push the spline into the corners.
TIMBER ROLLER is best for stainless steel mesh, which is stiffer than other types of mesh. The convex wheel is for creasing it before before rolling in the spline with the concave wheel at the other end.
ROLL-AND-FEED ROLLERguides the spline into the frame while it’s pushed along and is useful if you’re making up a number of screens.

I checked the measurements of the old frame while it was still in the window, then pulled it out to use as a back-up template for cutting the sides.
For one window I used a 2.1m roll of mesh plus two standard 2.4m lengths of aluminium channel for the framing, 4.5m of 5.7mm-thick foam spline, and four corner stakes.
TIP If doing more than one screen it’s worth investing in a longer 10m roll of mesh and a 13m coil of spline to avoid wastage.
SHOPPING LIST for one window
Flyscreen mitre box with screws
Two 2.5m lengths of 25mm flyscreen frame in white
One roll of Cyclone 5.7mm foam spline in black
Cyclone spline roller with concave and convex wheels
120-grit metal abrasive paper, with a sanding block
DIY TOOLS
Measuring tape
Screwdriver
Pencil
Rubber mallet
Quick-grip clamps, at least one
Scissors
Utility knife with a new blade
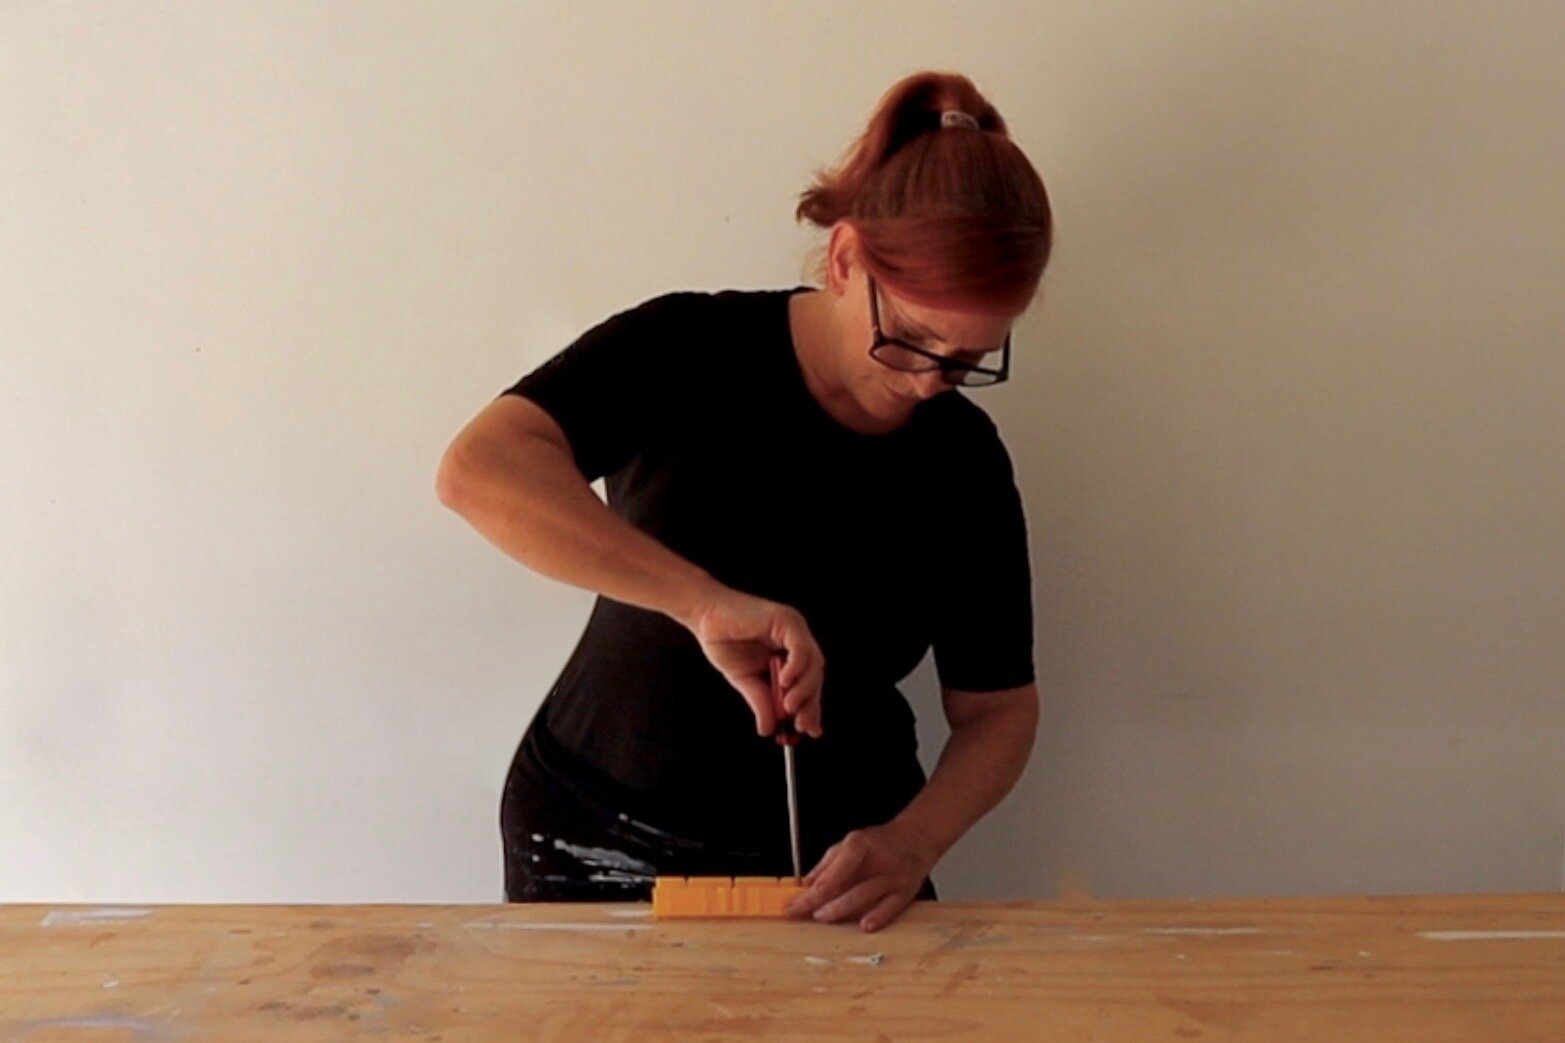
STEP 1
After clearing a flat space, I used a screwdriver to secure the small plastic mitre box near the edge of the workbench.
TIP This little plastic tool cost less than $3 and is the key to ensuring neat mitres. I bought a couple as the slots lose their shape after lots of cutting.

STEP 2
Before measuring out the first side, I placed the channel in the mitre box with the groove facing up and on the inside of the mitre to make a mitred cut close to the end with a hacksaw.
TIP Create room to use the hacksaw comfortably. Stand with your feet slightly apart and hold the saw as straight possible while moving the full length of the blade back and forward over the channel to cut right through.

STEP 3
I positioned the channel on the old frame, with the mitred cut matching one corner to measure the exact length of the side, marking the inside and outside corner at the other end with a pencil.
TIP If working with dark-coloured channel, apply masking tape where the cuts will be so the pencil marks are visible.

STEP 4
I matched the marks on the channel to the slots of the mitre box, then clamped it to the bench to hold it while cutting.
TIP Always cut a long side first – if you get it wrong, it can be cut be cut down as a shorter side. Cut a long and short side using the old frame as a template. For the remaining sides, use the new pieces as a guide for an exact match.
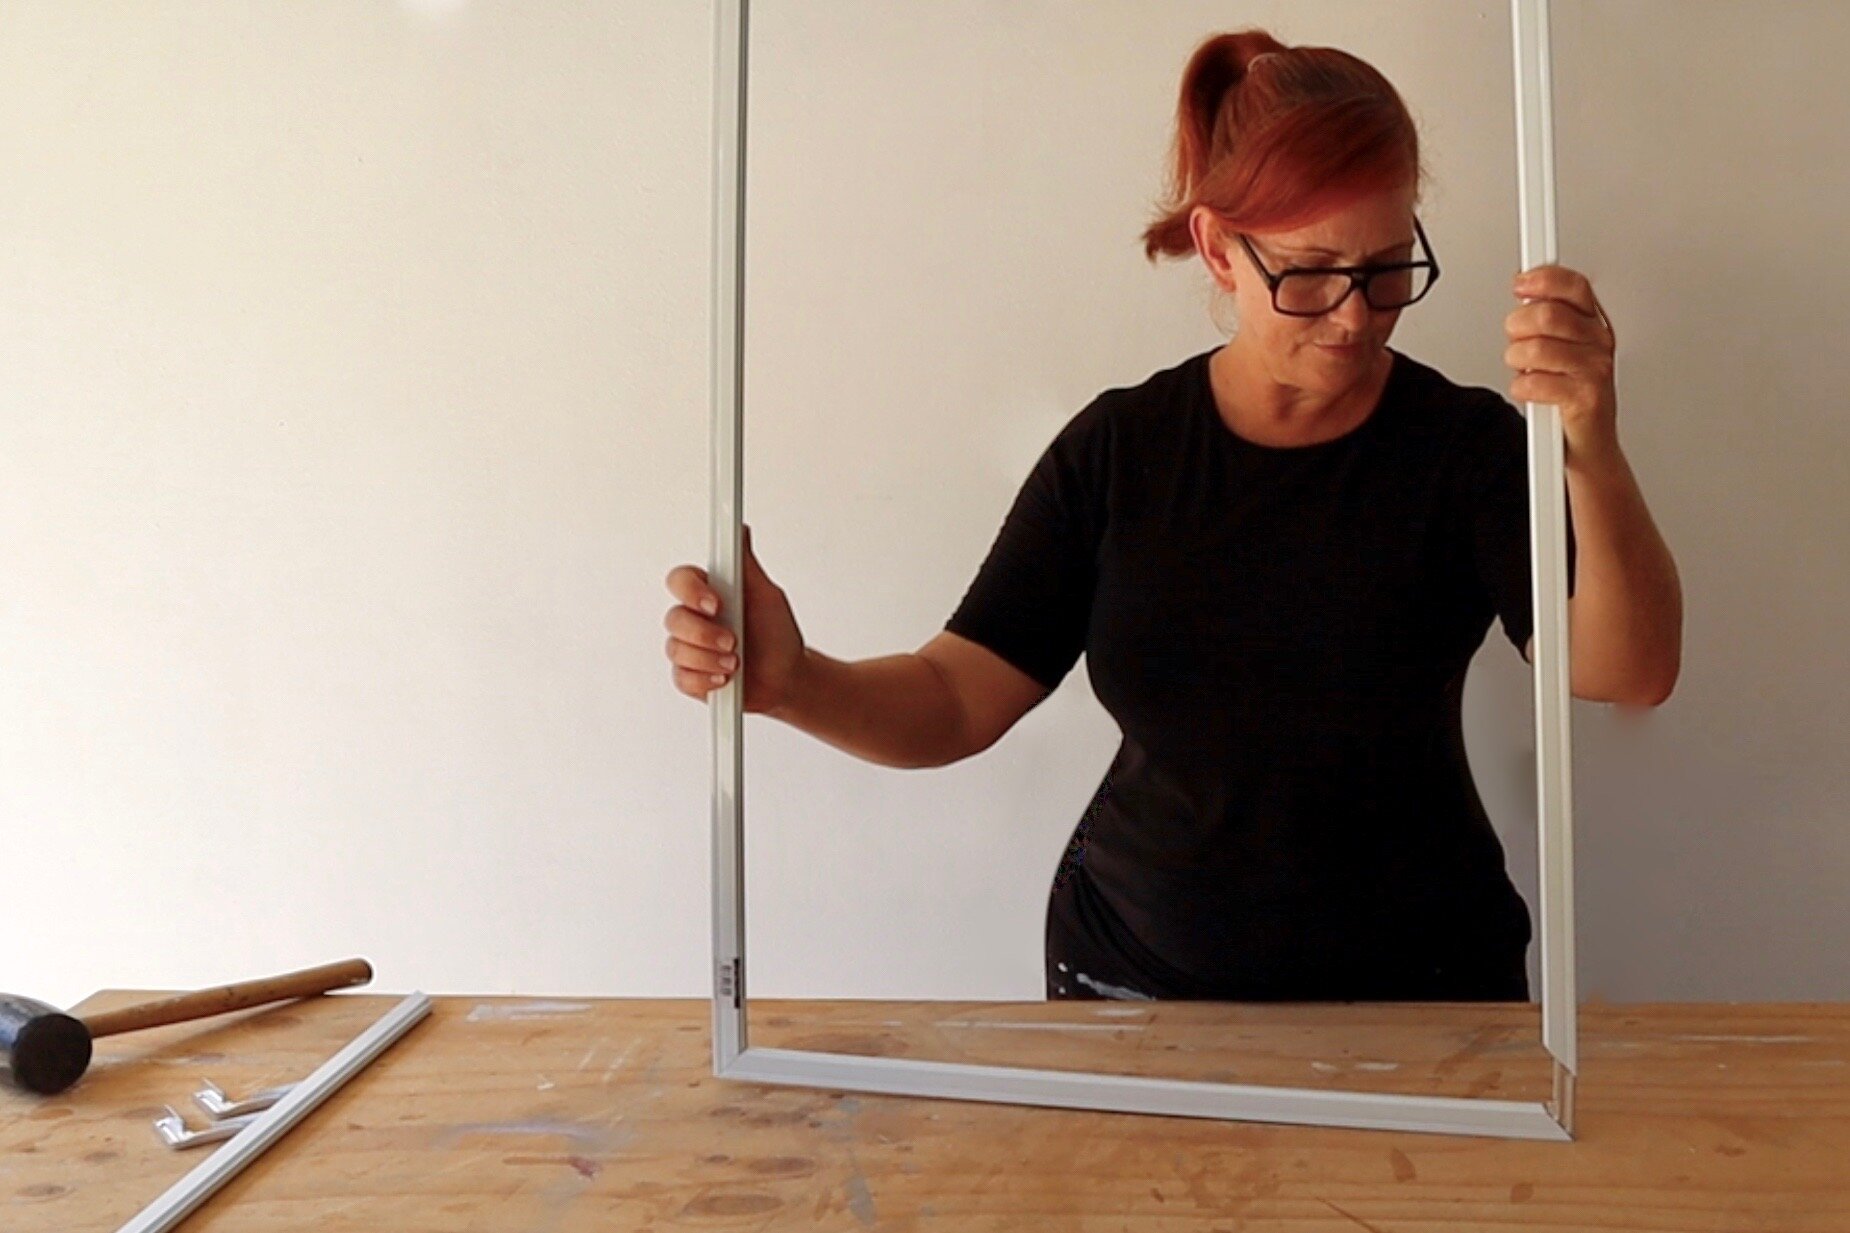
STEP 5
To assemble the frame, I pushed corner stakes into either end of a short side first, then added the longer sides, pushing down onto the workbench to close the mitres for neat corners. I added stakes to the remaining short side and pushed this down onto the frame, tapping the mitres closed with a mallet.
TIP Before assembling the frame, deburr the cuts and corners by brushing with 120-grit metal abrasive paper.
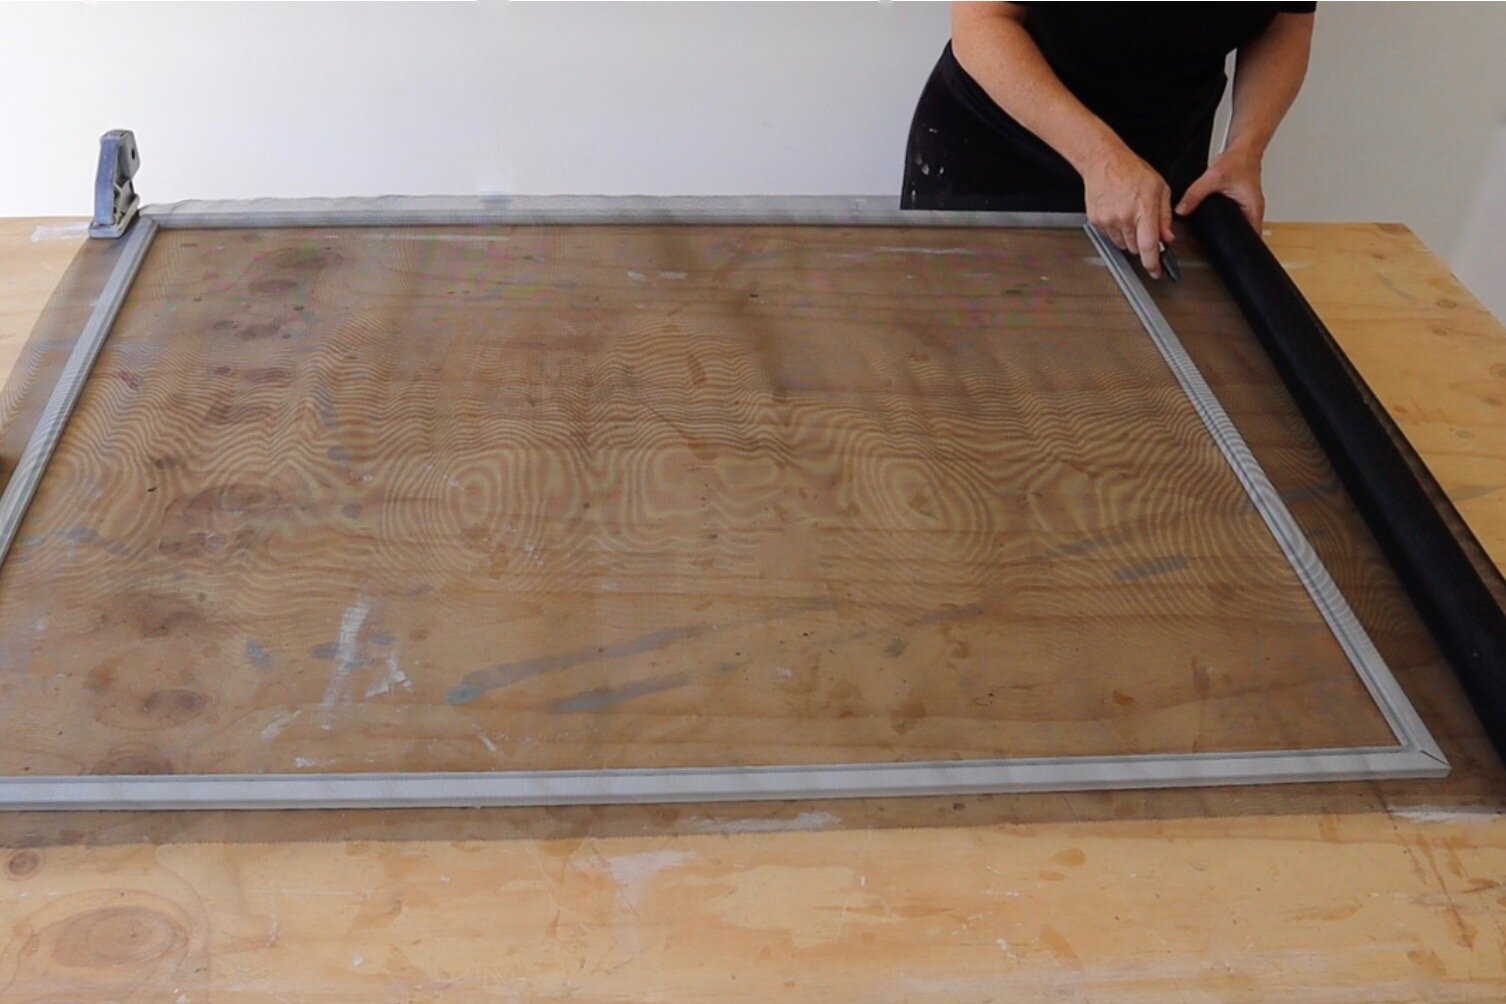
STEP 6
I positioned the frame with the groove facing up and rolled the mesh out over the top, allowing for at least 20mm clearance around all edges and clamping one end. I used a sharp utility knife to cut a straight line between the strands.
TIP Stainless steel mesh is quite stiff and can be moulded over the frame to hold it while cutting.
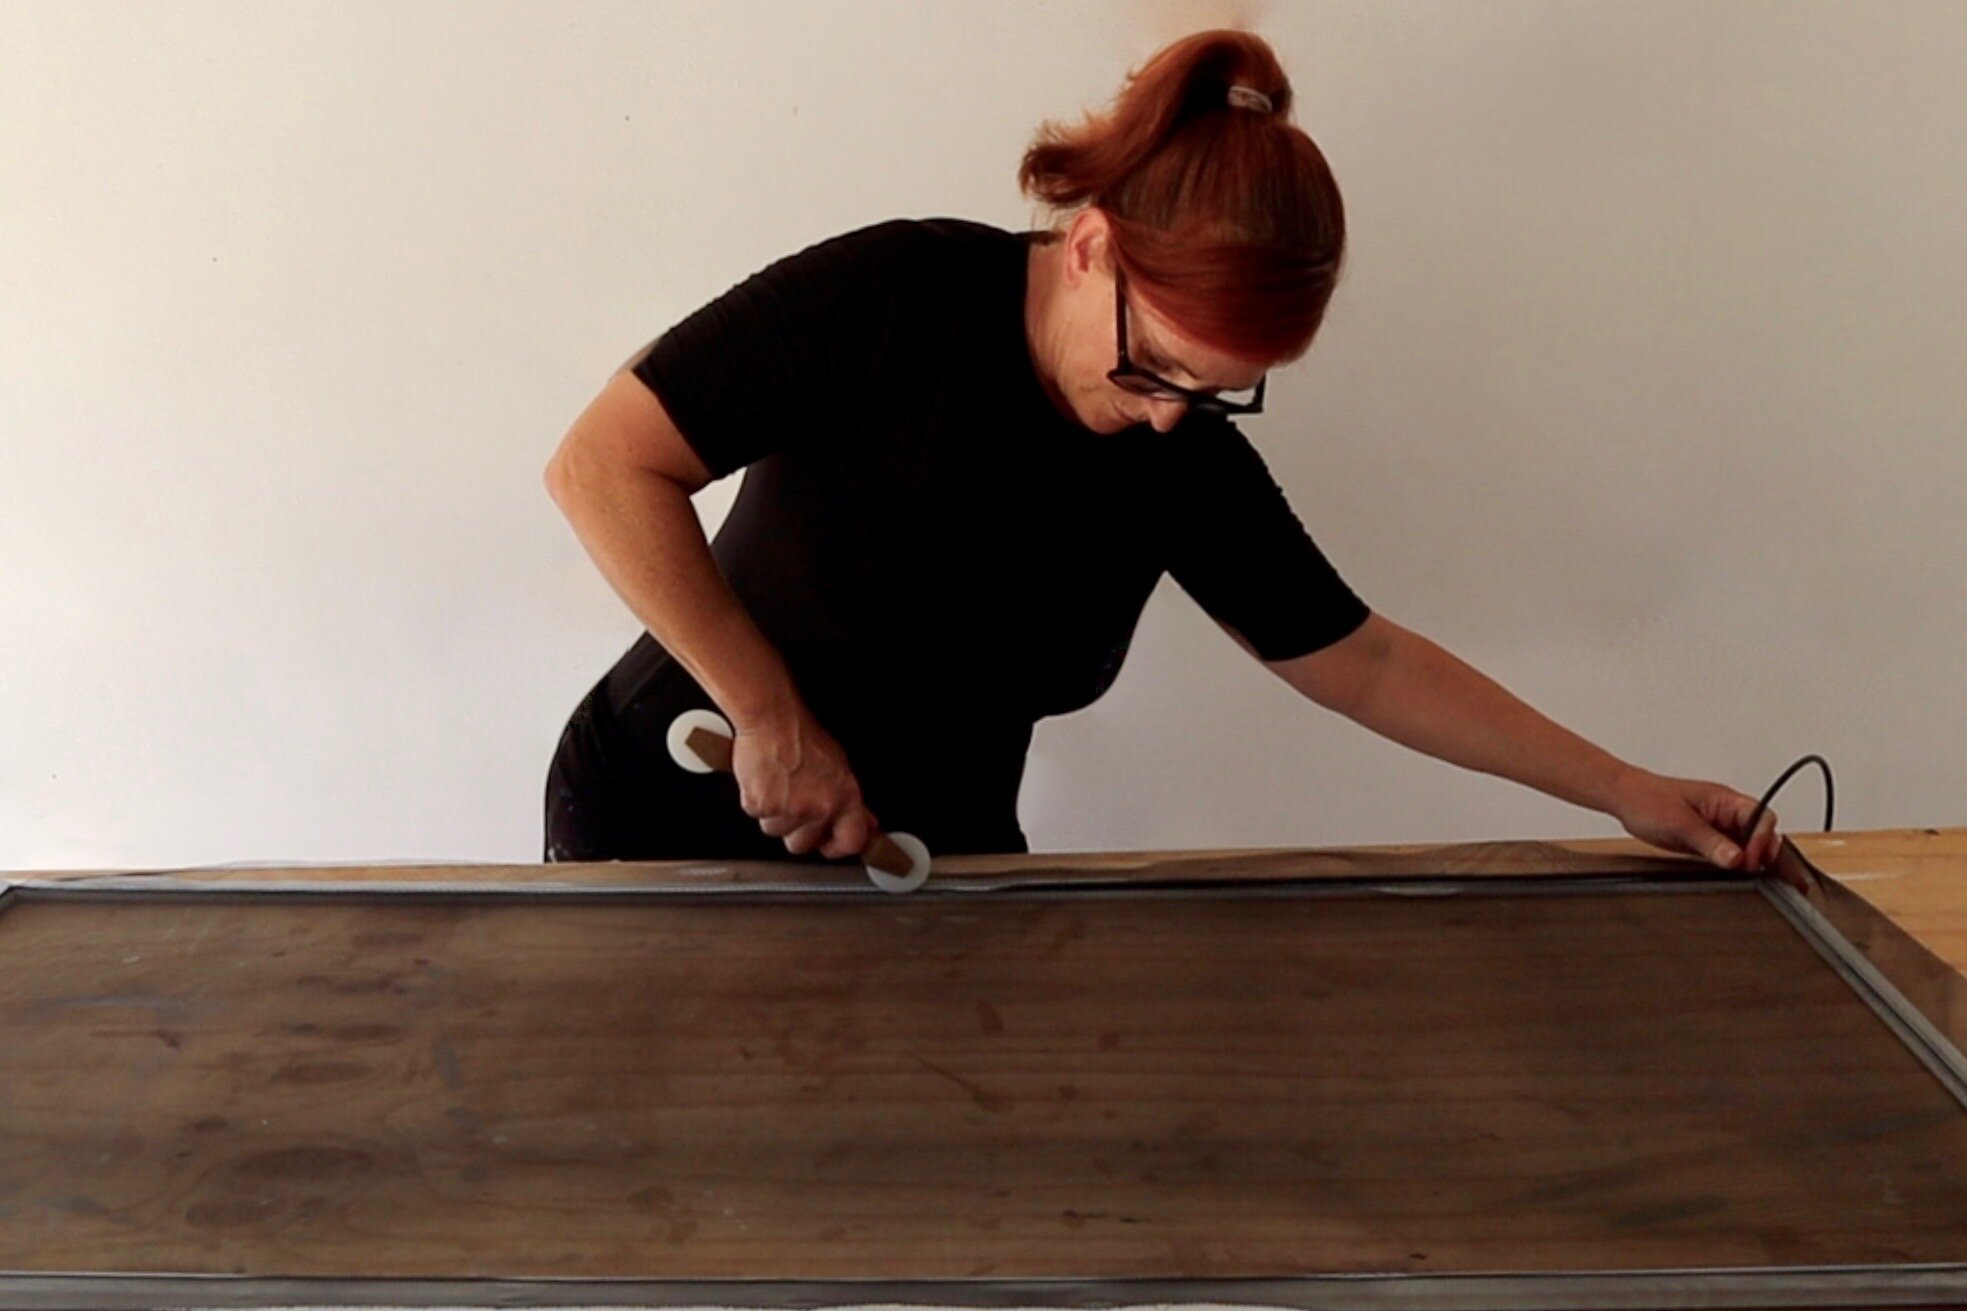
STEP 7
At the first corner, just above the groove, I folded the mesh at 45° to crease a guide for cutting with scissors to prevent it from bunching. Clamping the mesh to the bench at one end I used the convex wheel of the roller to crease into the groove, keeping the strands as straight as possible, stopping before the next corner.
TIP Work clockwise, on one side at a time, beginning each side with trimming the corner then creasing the mesh.
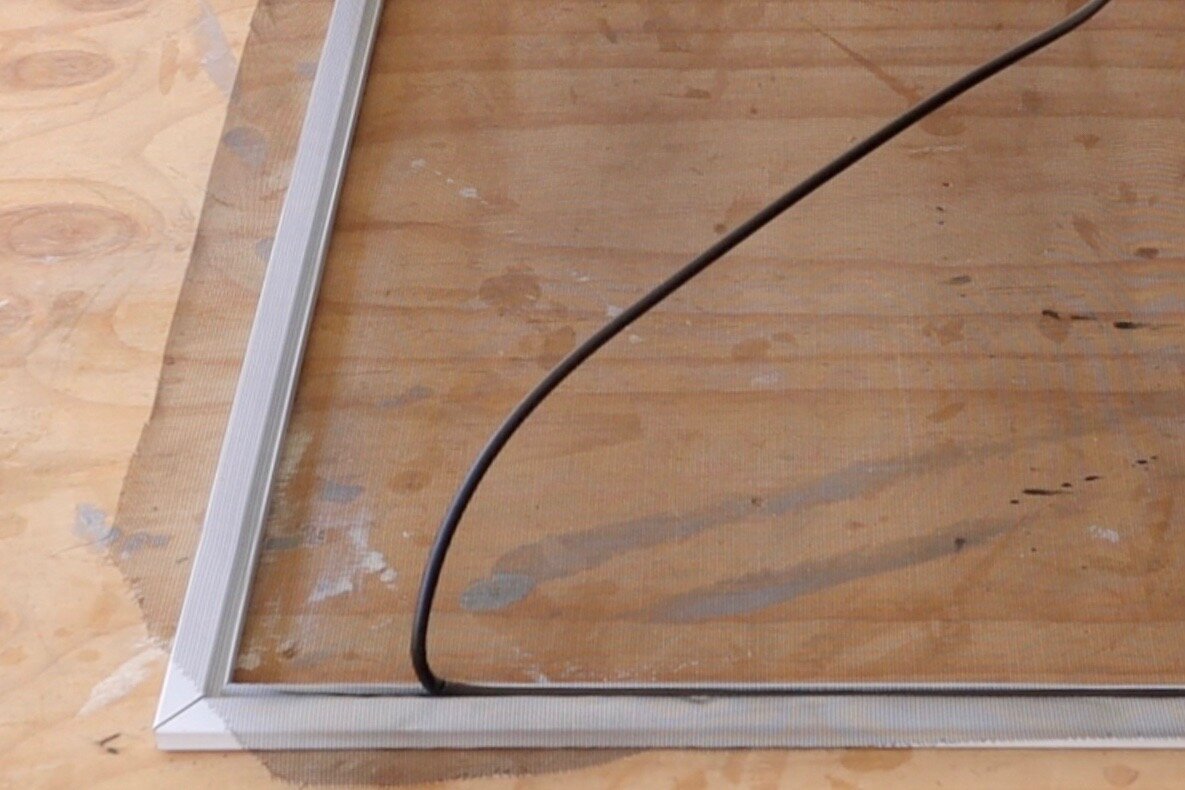
STEP 8
I pushed the beginning of the spline into the corner with the blunt end of the scissors, then held the spline over the groove while running the concave wheel of the roller over it to push down firmly, stopping about 20mm from the next corner.
TIP Pull the spline slightly to stretch and make it thinner so it pushes into the groove smoothly.

STEP 9
Trim the next corner, crease the mesh, push the spline into the corner with scissors, then smooth it into the groove with the roller, repeating for the remaining sides.
TIP At the end, avoid bunching by cutting the spline at 45° to match the corner, then push it in firmly.

STEP 10
To trim the excess mesh, cut one side at a time, holding the utility knife hormonally to run the blade around the inside, just above the spline. To finish, run the roller around the frame to check the spline is installed evenly.
TIP Protect your hands from the sharp edges of the mesh by wearing gloves. If there are visible loose strands around the spline, run a roller along the edge to push them down.

AFTER I plan to do a full window makeover later by painting the brown glass frames in a white enamel paint. But that’s another story and I quite like the look of the contrasting screens for now.

Follow my daily DIY journey on Instagram for more renovating and home improvement, tool tips and simple building projects.