Small Concrete Tables
Natasha Dickins

Call me crazy, but I love the perfect roundness and smooth finish of these concrete pavers and often conjure up new projects to hero them in. The most popular one so far has been transforming the small 300mm, medium 370mm and large 450mm sizes into a trio of low tables.
TIP They also make great plant stands!
This is the most-viewed video on my YouTube channel!
“I used pine legs in various lengths to keep the tables in proportion with the different sized pavers. They’re attached to a hidden plywood base with leg plates.”
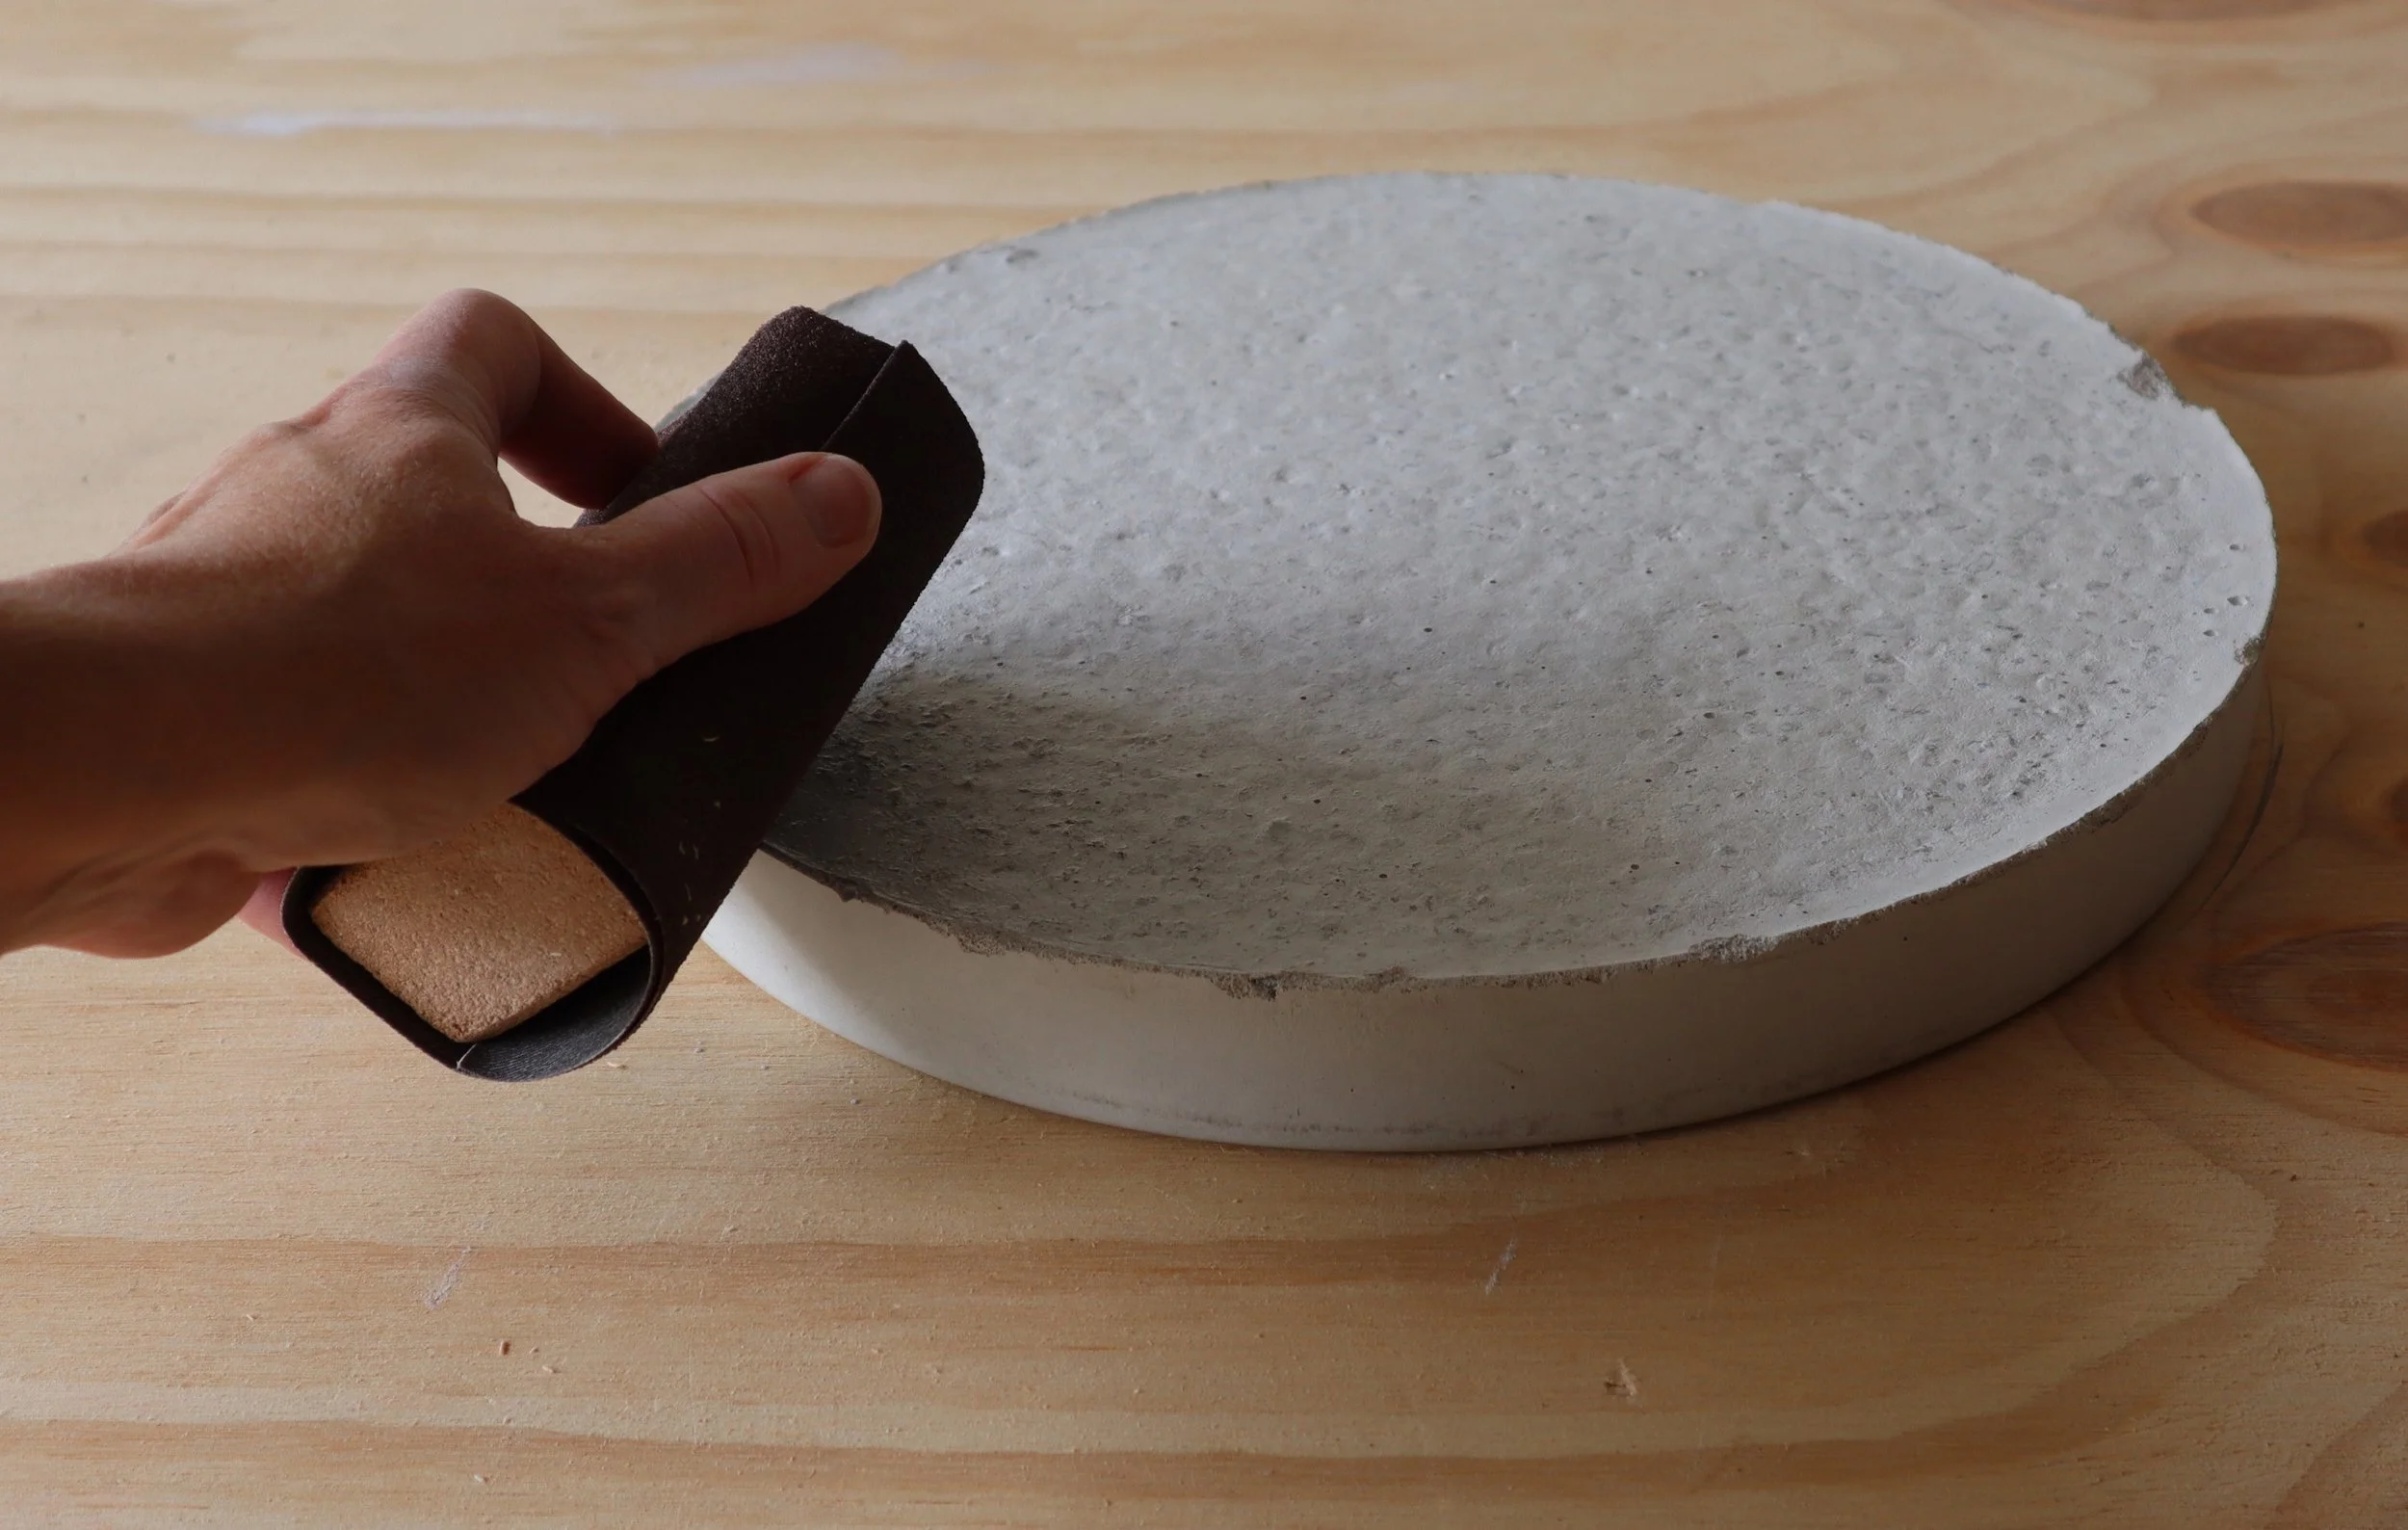
To smooth around the raw edge underneath the pavers, I sanded with 60-grit metal abrasive paper then turned them up the right way to smooth around the sides and tops with 120-grit.
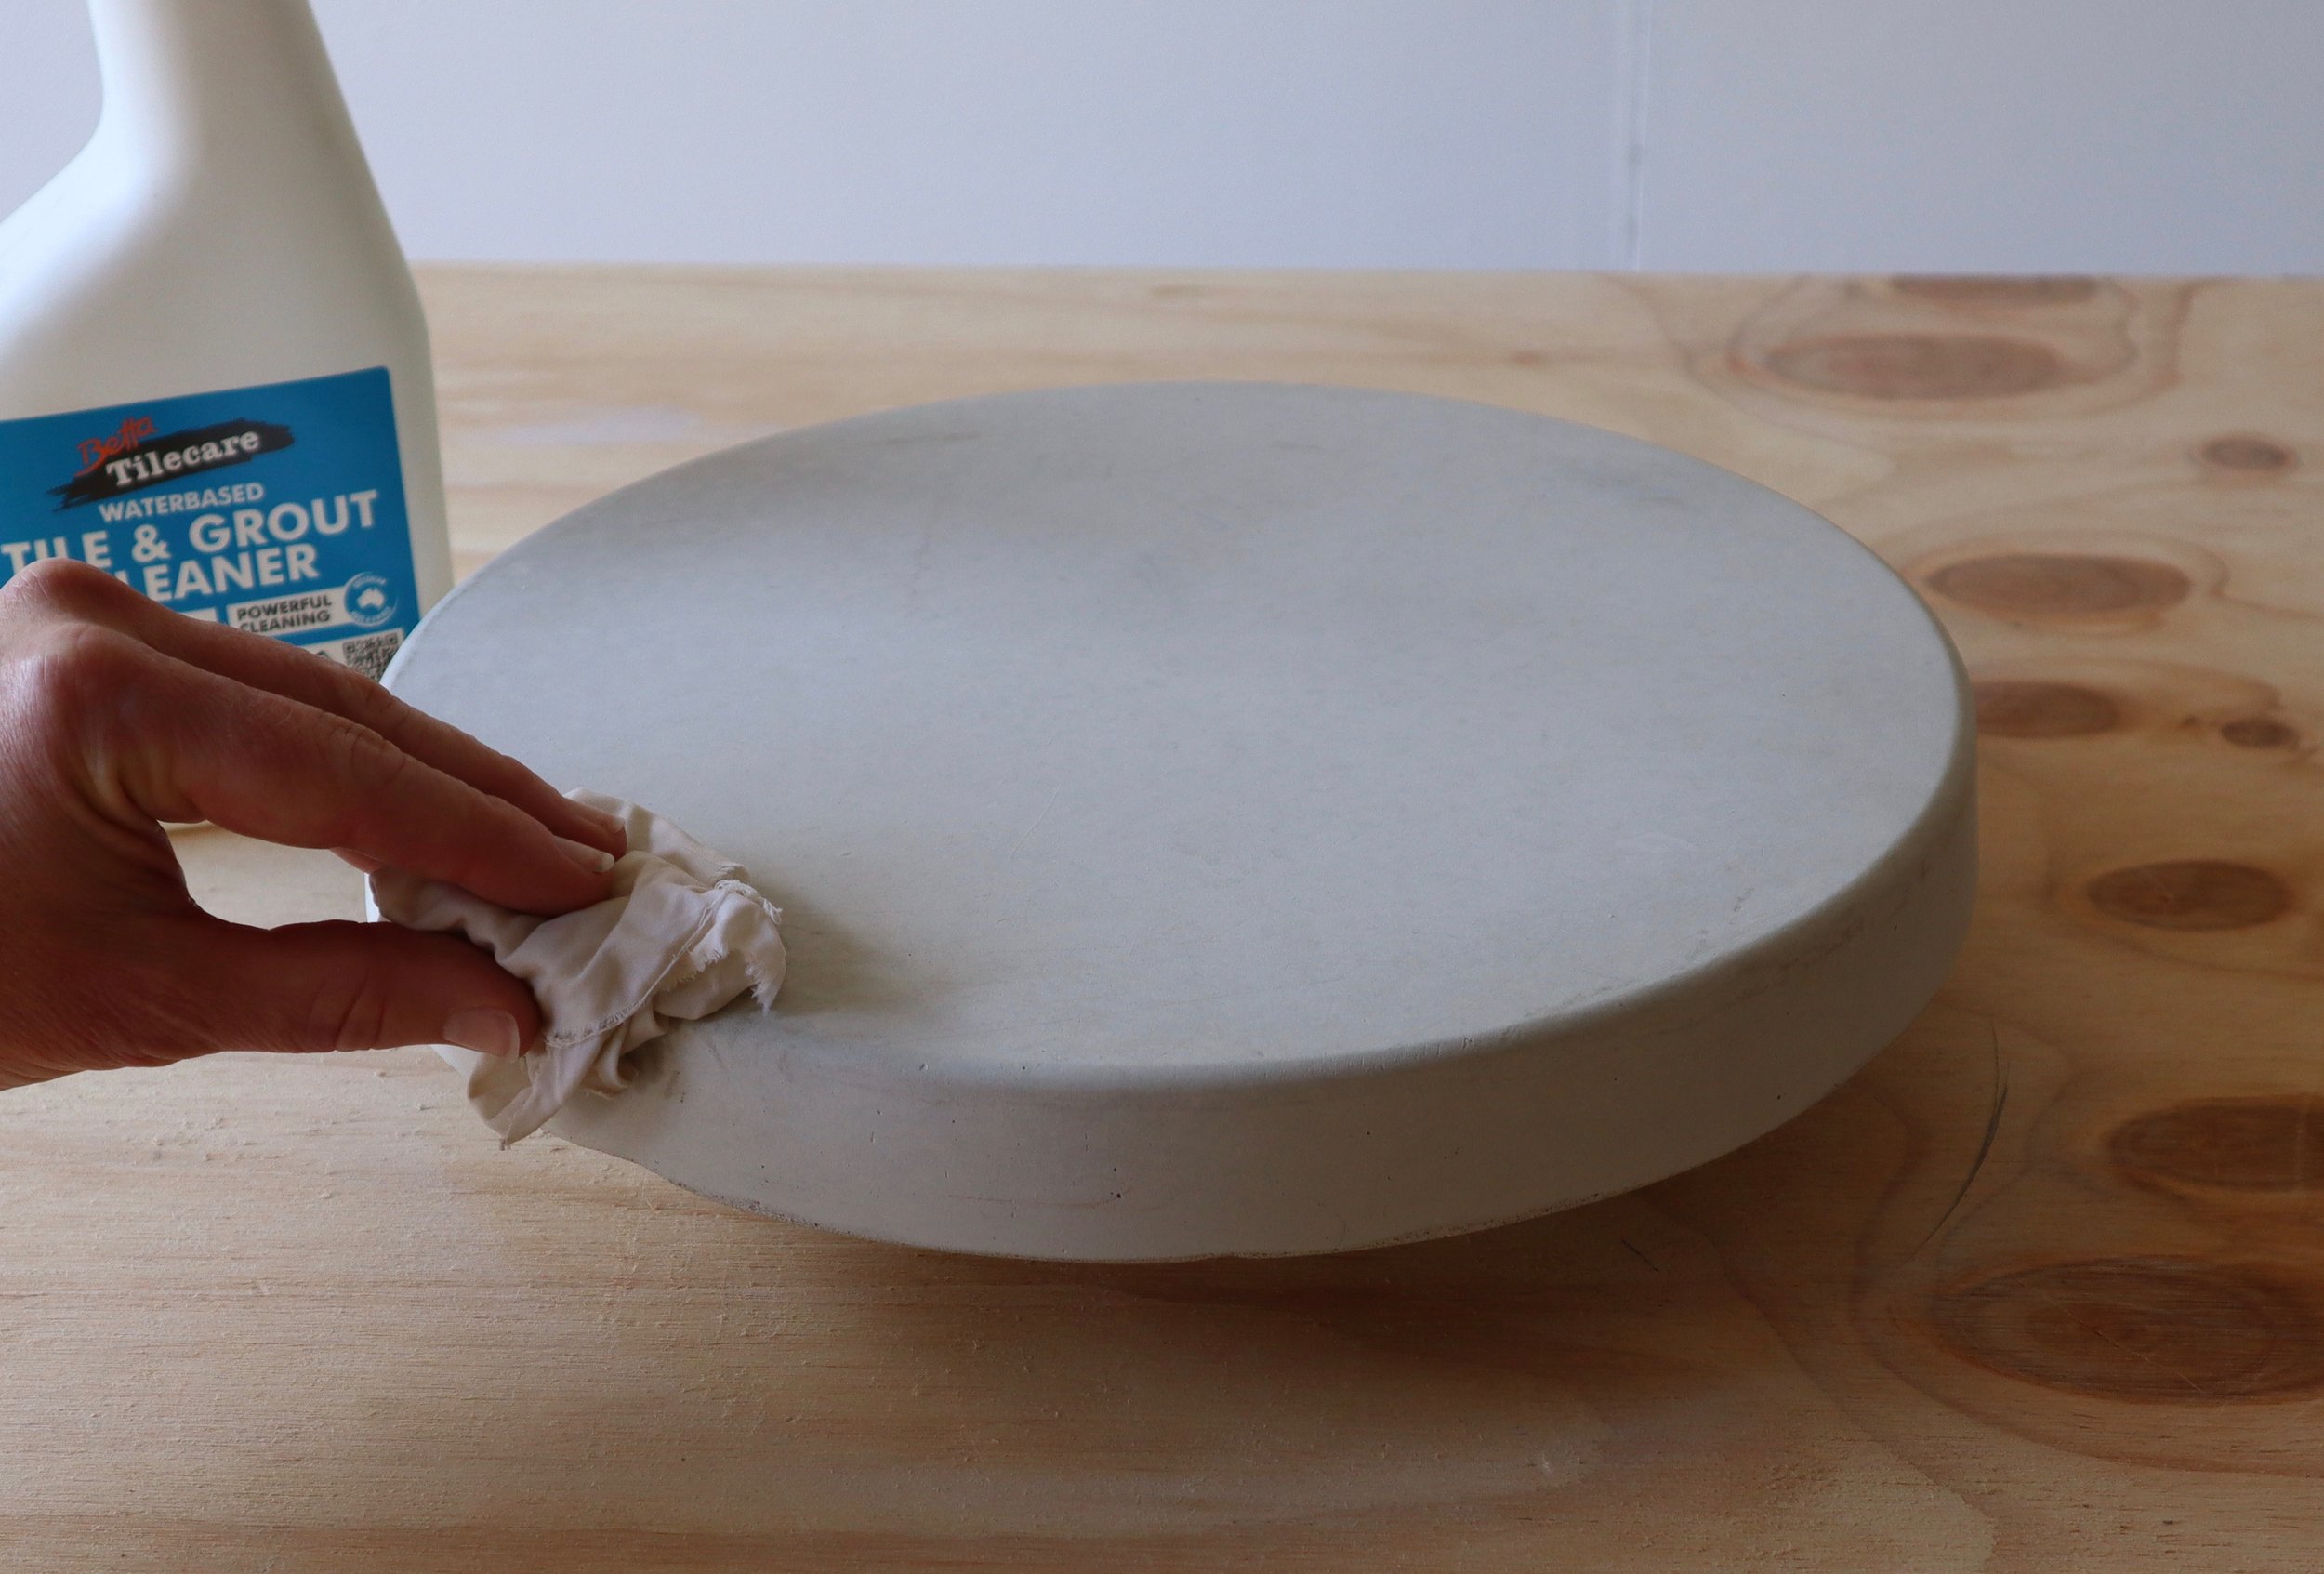
I elevated the pavers off the workbench with timber offcuts before spritzing Betta Tilecare Tile & Grout Cleaner over the top and sides, then wiping it away with a damp cloth and leaving to dry.

To create a protective surface, I used a mini roller to apply Bondall's Betta Tilecare Natural Look Sealer, leaving it to soak in for a few minutes, then applying a second and third coat, keeping the surfaces wet.
TIP This sealer is applied using a wet-on-wet technique, so three coats don’t take long. Once dry, it has a lovely smooth finish that helps protect from marks and stains.

I measured out the leg bases on 18mm-thick plywood, using a 400mm framing square to mark up a triangle each with 450mm, 370mm and 300mm sides, setting them out next to each other and 3mm apart (the width of the saw blade) to minimise the cuts.
TIP Use a protractor to mark out the corners 60°.

Working off the side of a sturdy workbench, I cut the triangles with a handsaw…

… then cut 50mm off each corner.

Using a 5/16” vertical leg plate as a template, at each corner, I positioned it 50mm in from the edges to mark the holes, then drilled the screw holes with a 2mm bit and the centre holes with a 6mm bit.
TIP The leg plates and lug screws are measured in imperial so you’ll need a 1/4” drill bit to attach them, which is about 6mm in metric.

I used a flathead bit to secure the leg plates with the supplied screws…

… and attached 150mm legs to the 300mm base, 230mm legs to the 370mm base, and 400mm legs to the 450mm base.
TIP The store-bought pine legs are 40mm in diameter and have lug screws attached. The 18mm thickness of the plywood allows for the length of the lugs. Check the legs fit the leg plates when buying them.

I centred the bases on the corresponding pavers and marked around them to apply polyurethane adhesive sealant with a caulking gun. After repositioning the bases, I clamped them to the pavers and left the adhesive to cure.

Lastly, I secured 38mm self-adhesive plastic glides into the end of each leg with the supplied screws.

The weight of the concrete adds stability but, while the base is firmly adhered to the pavers, avoid using them as stools.

So good they featured on the cover of Bunnings Magazine! Click through for a detailed tools and materials list.
To DIY a small side table with a splash of colour, check out how to make pink terrazzo.
Tag me on your project and follow more of my DIY journey on Instagram for tool tips, home improvement and simple building tutorials.