Dowelled Wine CABINET
Alun Machin

Building with great timber and drinking nice wine are two of my favourite things. Of course, they never go together unless one used is for storing the other!
To make this wine rack, I was excited to team up with Porta, who produce lovely clear pine products that come in manageable sizes. They’re also pre-sanded, so there’s not much cutting and finishing.

The Design
I designed this wine rack around a single 1200 x 600mm Porta panel. The shelving and legs are made of Porta dowel in various sizes and there’s almost no material wastage.
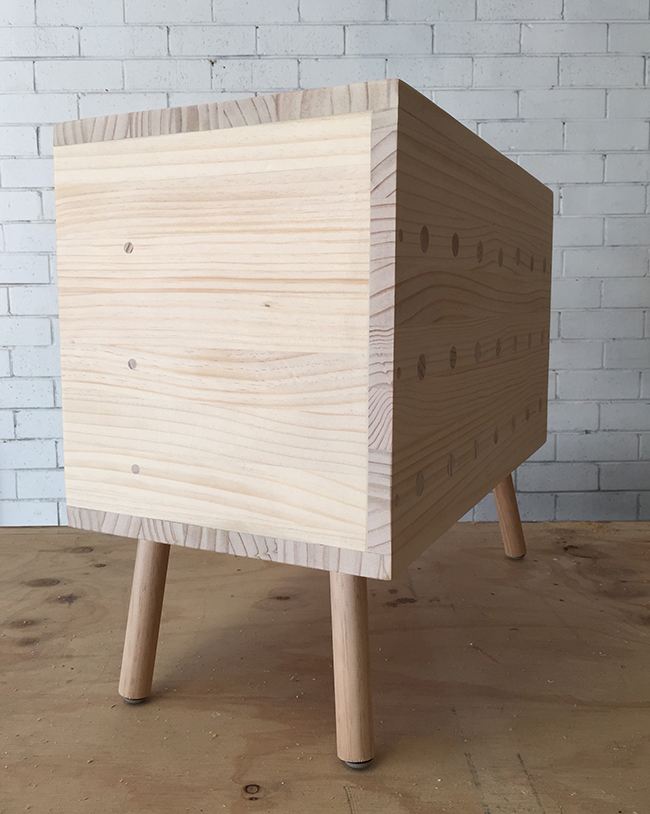
The box is 600 x 300 x 300mm and sits on elegantly angled 150mm-high legs that add personality and contribute to the midcentury vibe.

But the best feature is at the back, where you can see the dowel set-out. It holds 18 wine bottles and you can make this designer piece for around $150.

DIY Materials
1 Porta laminated pine panel 1200 x 600 x 19mm
6 Porta clear pine dowel in 1200 x 19mm diameter
3 Porta clear pine dowel 1200 8mm diameter
1 Porta clear pine dowel 1200 x 30mm diameter
4 Leggz angled leg plates
4 Leggz furniture studs, to fit the leg plates
4 Slide Glide nail-on furniture feet
40mm Buildex timber screws
250ml Boncrete adhesive

DIY Tools
circular saw or handsaw, or have the panel cut professionally
drill driver with a set of drill bits
19mm holesaw attachment and optional handheld drill press
small handsaw or multitool for cutting dowel
random orbital sander or hand-sanding block with 180-grit abrasive paper
small mallet
set square, ruler, measuring tape and pen

STEP 1 Cut the panel
Measure the panel to cut it in half lengthways then in half widthways. Keep three pieces as the top, base and back of the box. Cut the fourth piece into two 281mm-long pieces for the sides.
TIP Use a circular saw or handsaw, but if you’re not confident have the panel cut at a hardware store or timber yard for about $5 a cut.

STEP 2 Create a grid
On the back, mark a horizontal line 35mm from the bottom, a line 90mm above it, and another 90mm above that (215mm from the bottom). Mark vertical lines 60mm from the sides, then 80mm apart.
TIP If the spaces aren’t even, use a different coloured pen, find the centre then mark new lines, working outwards and adjusting the width at the edges.

STEP 3 Get the holes started
Use a drill with a 4mm bit to make shallow starter holes on the grid, in three rows of seven holes.
TIP An evenly spaced grid of holes supports the dowels, and making the starter holes helps keep the set-out accurate.

STEP 4 Drill the dowel holes
Change the drill bit to a 19mm holesaw, drill halfway through the pine then turn it over to finish the holes from the other side to avoid breakout.
TIP For about $20 each, you can buy a holesaw set and a handheld press that attaches to the drill to help keep your drilling straight.

STEP 5 Countersink pilot holes for the box
Assemble the box, measuring 10mm from the edges. Use a countersink drill bit to make pilot holes, three on each side, about 5mm deep.
TIP Pilot holes prevent timber from splitting as the screws go in, and using a two-in-one countersinking bit also creates an indent so the head sits below the surface.

STEP 6 Sand over the holes
Use a random orbital sander with 180-grit pad, or a hand-sanding block with abrasive paper to smooth over the holes.
TIP If you have breakout, wrap abrasive paper around dowel to lightly sand around the holes.

STEP 7 Cut all the dowel pieces
Cut 21 lengths of 19mm dowel to 300mm long for shelving, cut three lengths of 8mm dowel to 660mm as support rails, cut four lengths of 30mm dowel to 150mm as legs.
TIP This small Japanese saw cuts with a pulling action, rather than the push of Western saws, making it easier to work with.

STEP 8 Drill holes for the support rails
Use an 8mm drill bit to make holes in the 19mm dowel, 75mm from the ends.
TIP Drill almost all the way through then turn the dowel over to finish from the other side to avoid breakout.

STEP 9 Make holes for the support rails
On the sides, measure 94mm from the front, then mark 35mm, 125mm and 215mm from the bottom. Using the 8mm drill bit, make holes all the way through.
TIP The support rail sits under the neck of the wine bottles to prevent the dowels from spreading when they take the weight.

STEP 10 Put together the shelving system
Thread the 8mm support rails through seven pieces of 19mm dowel and into the sides of the box, with an even overhang each side.
TIP If pushing 8mm dowel through 8mm holes is a tight fit, give it a quick sand to reduce it slightly.

STEP 11 Assemble the sides and back
Dab adhesive into the holes and along the sides then position the sides and dowels, tapping them into the holes. Work quickly to turn it over and wipe away excess adhesive then secure 40mm screws through the pre-drilled holes. Use a set square to ensure each dowel is straight and leave to dry.
TIP Cover the work surface with plastic wrap to protect it from the adhesive and use a damp cloth to wipe excess from around the holes.

STEP 12 Finish making the box
Apply adhesive around the back and sides, position the base then drill 40mm screws into the countersunk holes and repeat to attach the top.
TIP Make sure the screw heads are pushed well below the surface to leave room for the dowel plugs.

STEP 13 Hide the screws
Cut leftover 8mm dowel into 10mm-long plugs, dab adhesive onto the screws then tap in the plugs, wiping away excess adhesive and leaving to dry. Trim them flush with the handsaw or a multitool.
TIP Sand over the plugs to make sure they’re completely flush and remove any cutting marks.

STEP 14 Attach the leg plates
Measure 20mm from the edges to position the plates at the corners and secure with the supplied screws. Drill into the centre holes with a 4mm drill bit, being careful not to go right through the pine.
TIP Check the plates are positioned across the corners of the box and evenly spaced before drilling.

STEP 15 Prepare the legs
Use the 8mm drill bit to make centered holes into the end of each leg, about 50mm deep, then install the stud.
TIP Insert the stud into your drill, pointy end outwards, the same way you’d use a drill bit. Then use the drill to twist the stud into the leg. Loosen the drill off the stud and repeat for the other legs.

STEP 16 Finish the legs
Twist the legs onto the plates, tightening so they angle outwards, then tap in furniture glides.
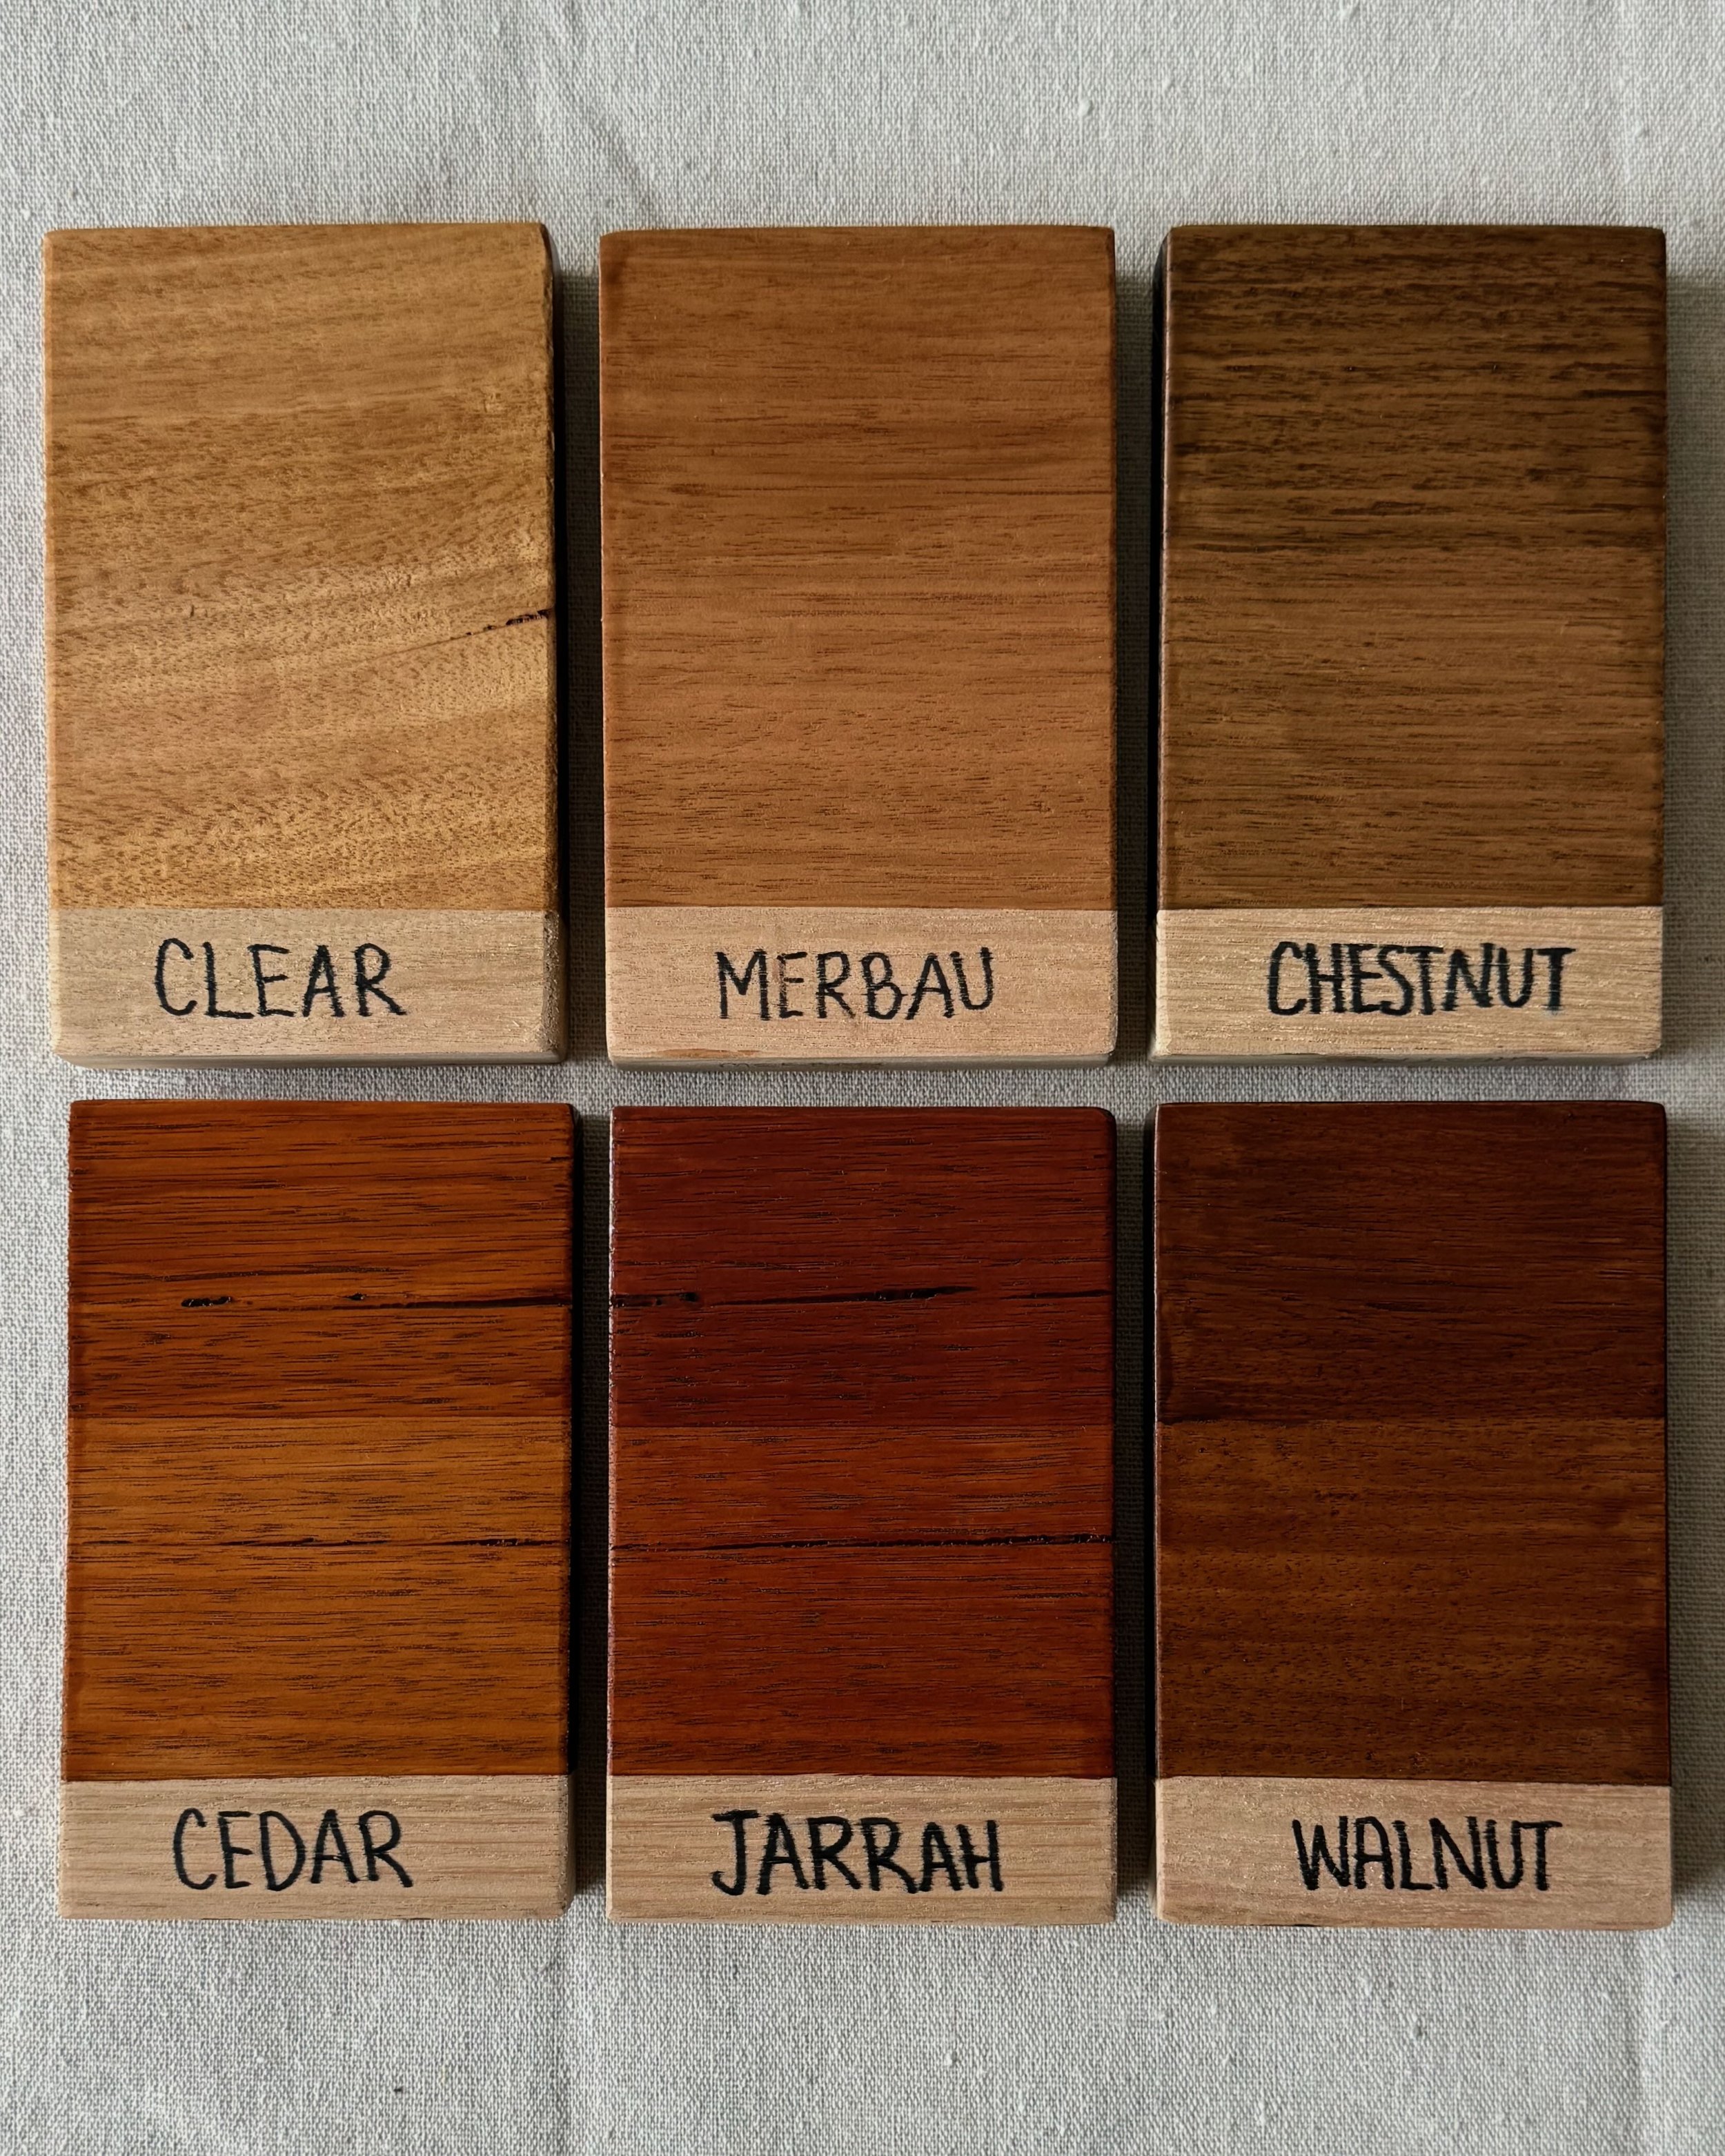
TIP You can add a protective finish by applying clear varnish, clear matt sealer, oil or buffing with a furniture wax.