Set up a workshop efficiently
Alun Machin

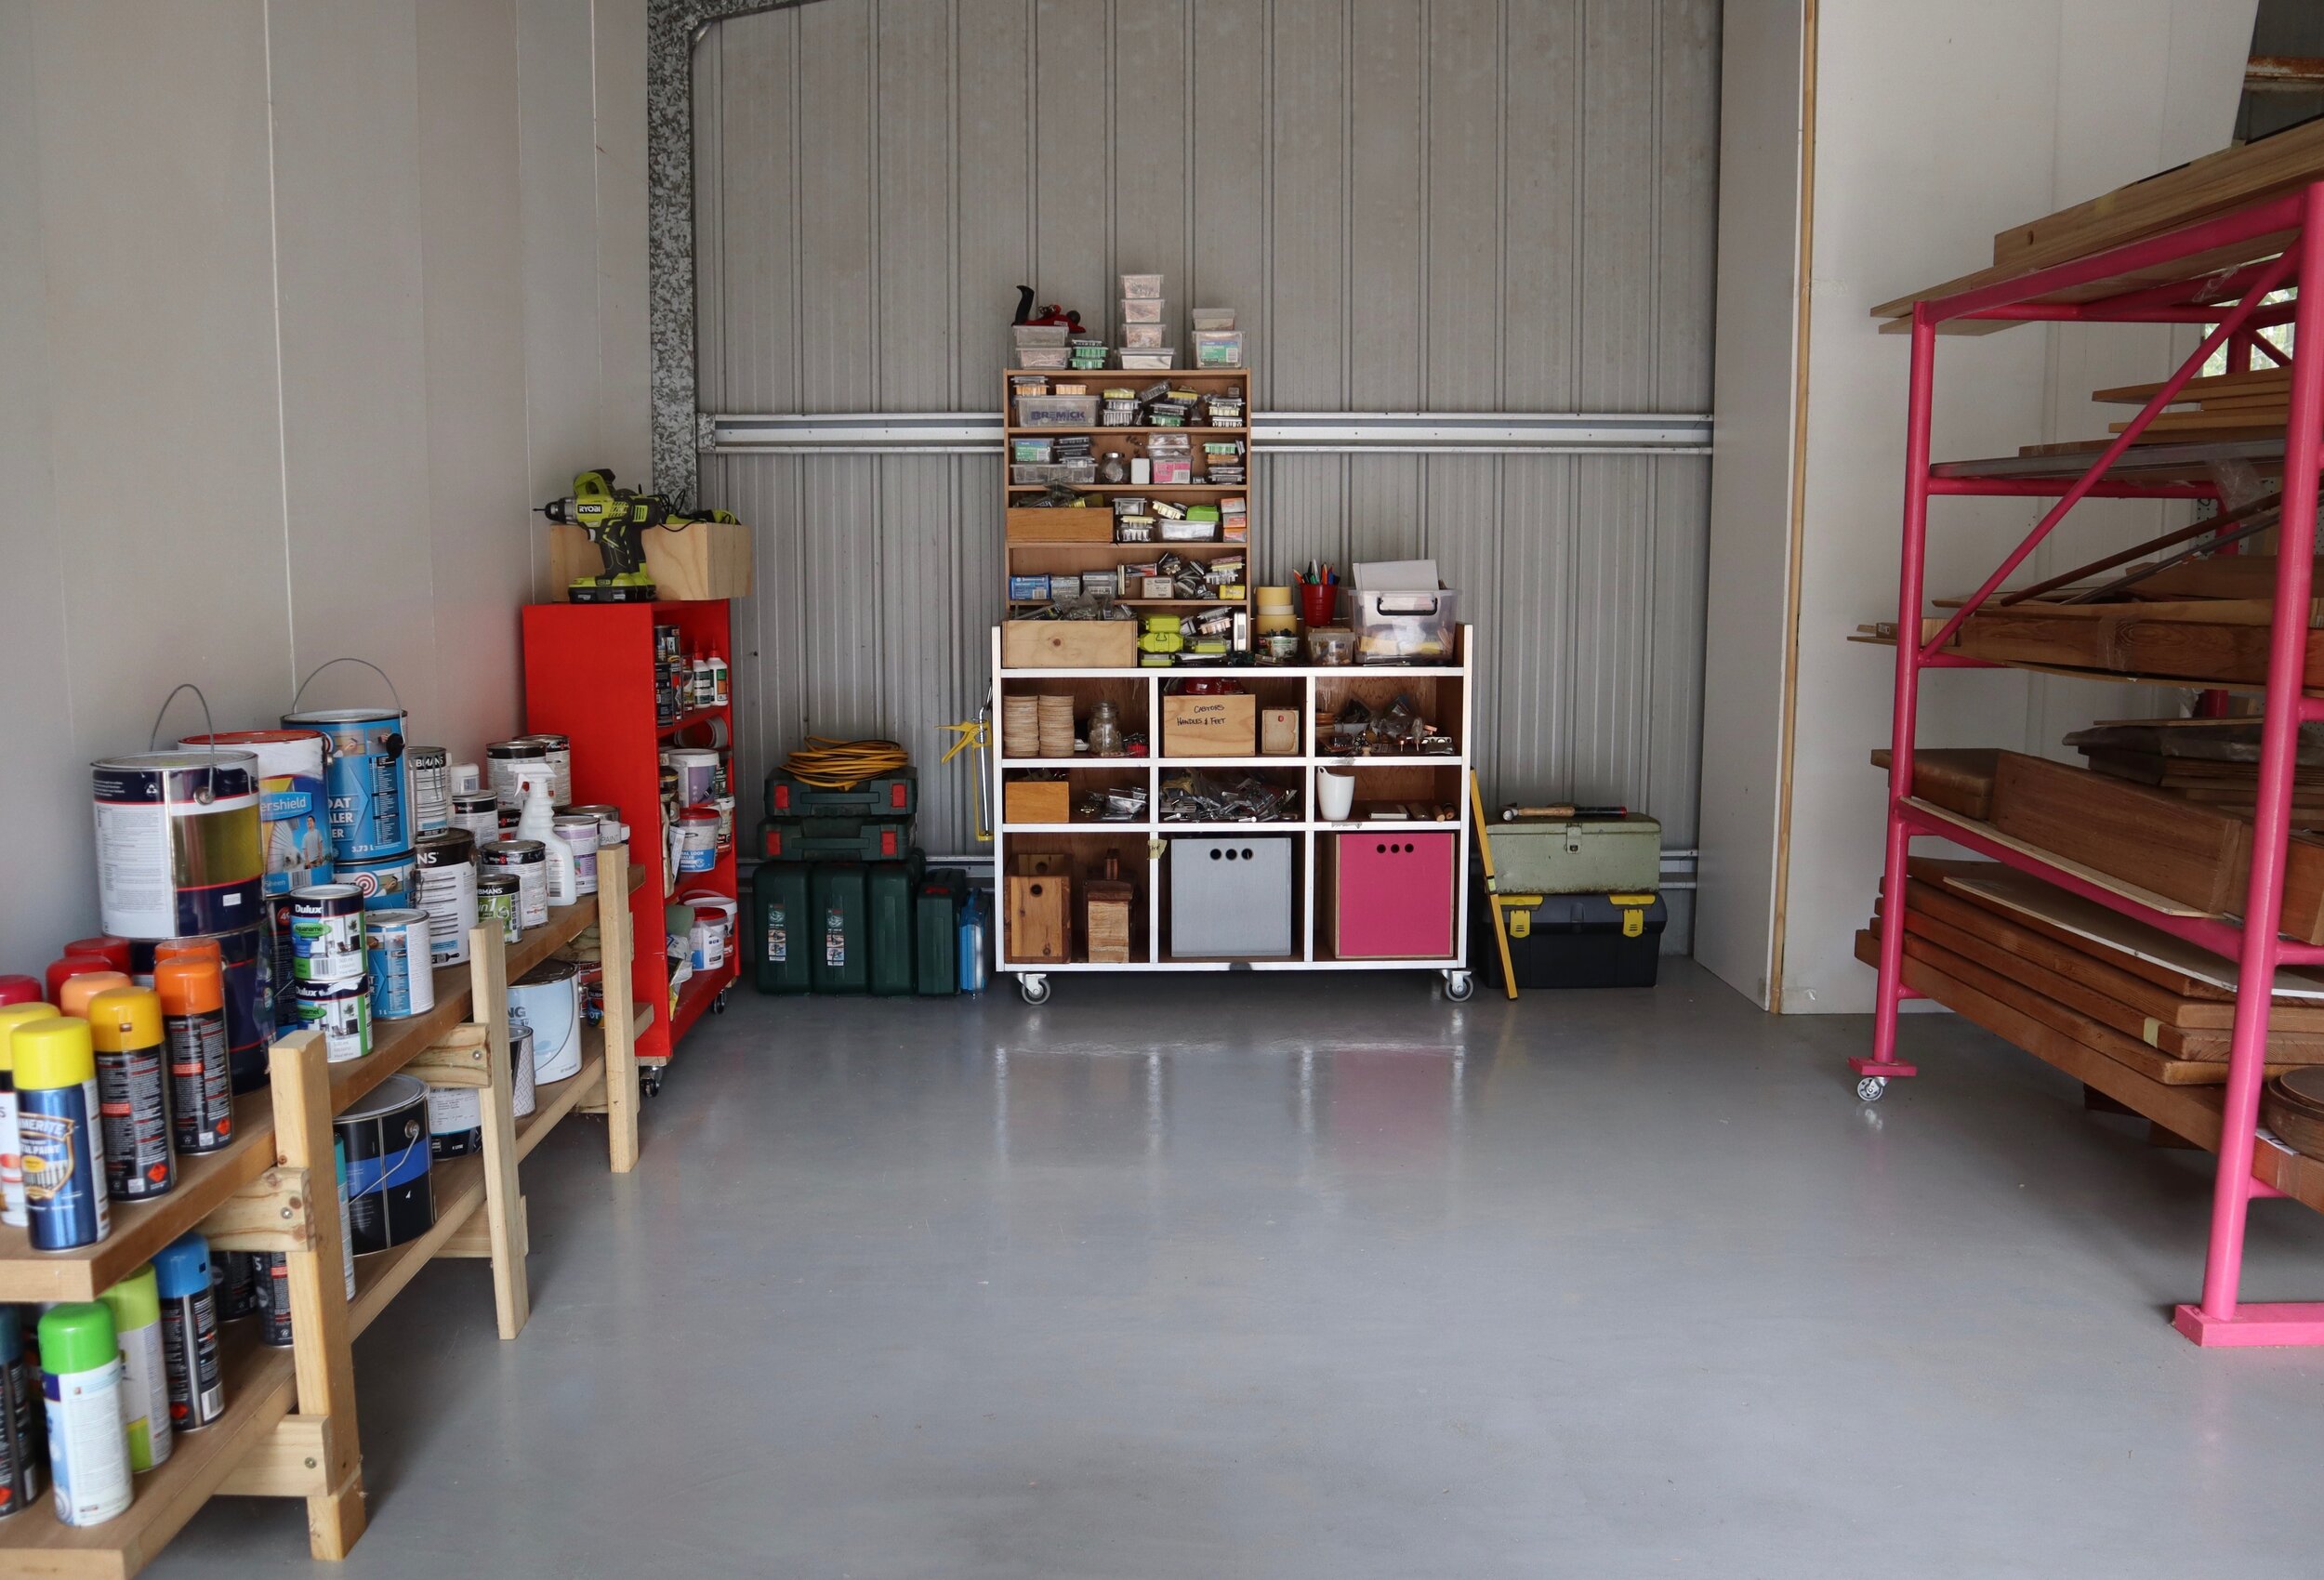
Setting out an efficient workshop begins with good storage that frees up floorspace and ensures you know where everything is.
I had a lot of stuff to organise so came up with a simple three-zone storage system that can be adapted to work for almost any DIYer’s workshop.
While every DIYer has different requirements, my solution was to set out the three main storage zones suited to an all-rounder who does home maintenance, a bit of renovating and basic woodworking.
Note that ‘storage’ doesn’t necessarily encompass the work area, which may include a workbench, lighting, rubbish bin and dust extraction.
“ I’m a neat-freak DIYer but in the workshop it’s a constant battle to keep my tools tidy and accessible, so I came up with three zoning solutions.”

The key storage zones in my workshop are for…
① DISPLAY
Organise tools and accessories for easy access
② SET OUT
Stack timber stock and building materials in open shelving
③ STORE
Pack equipment, paint, adhesives and flammables in a lockable cabinet
BEFORE
Need a countersinking bit in a hurry? It wasn’t likely with this precarious pile-up! Sure it looks neater than most workshops, but when that stash of brads and screws tumbled all over the floor it was time to make a change.
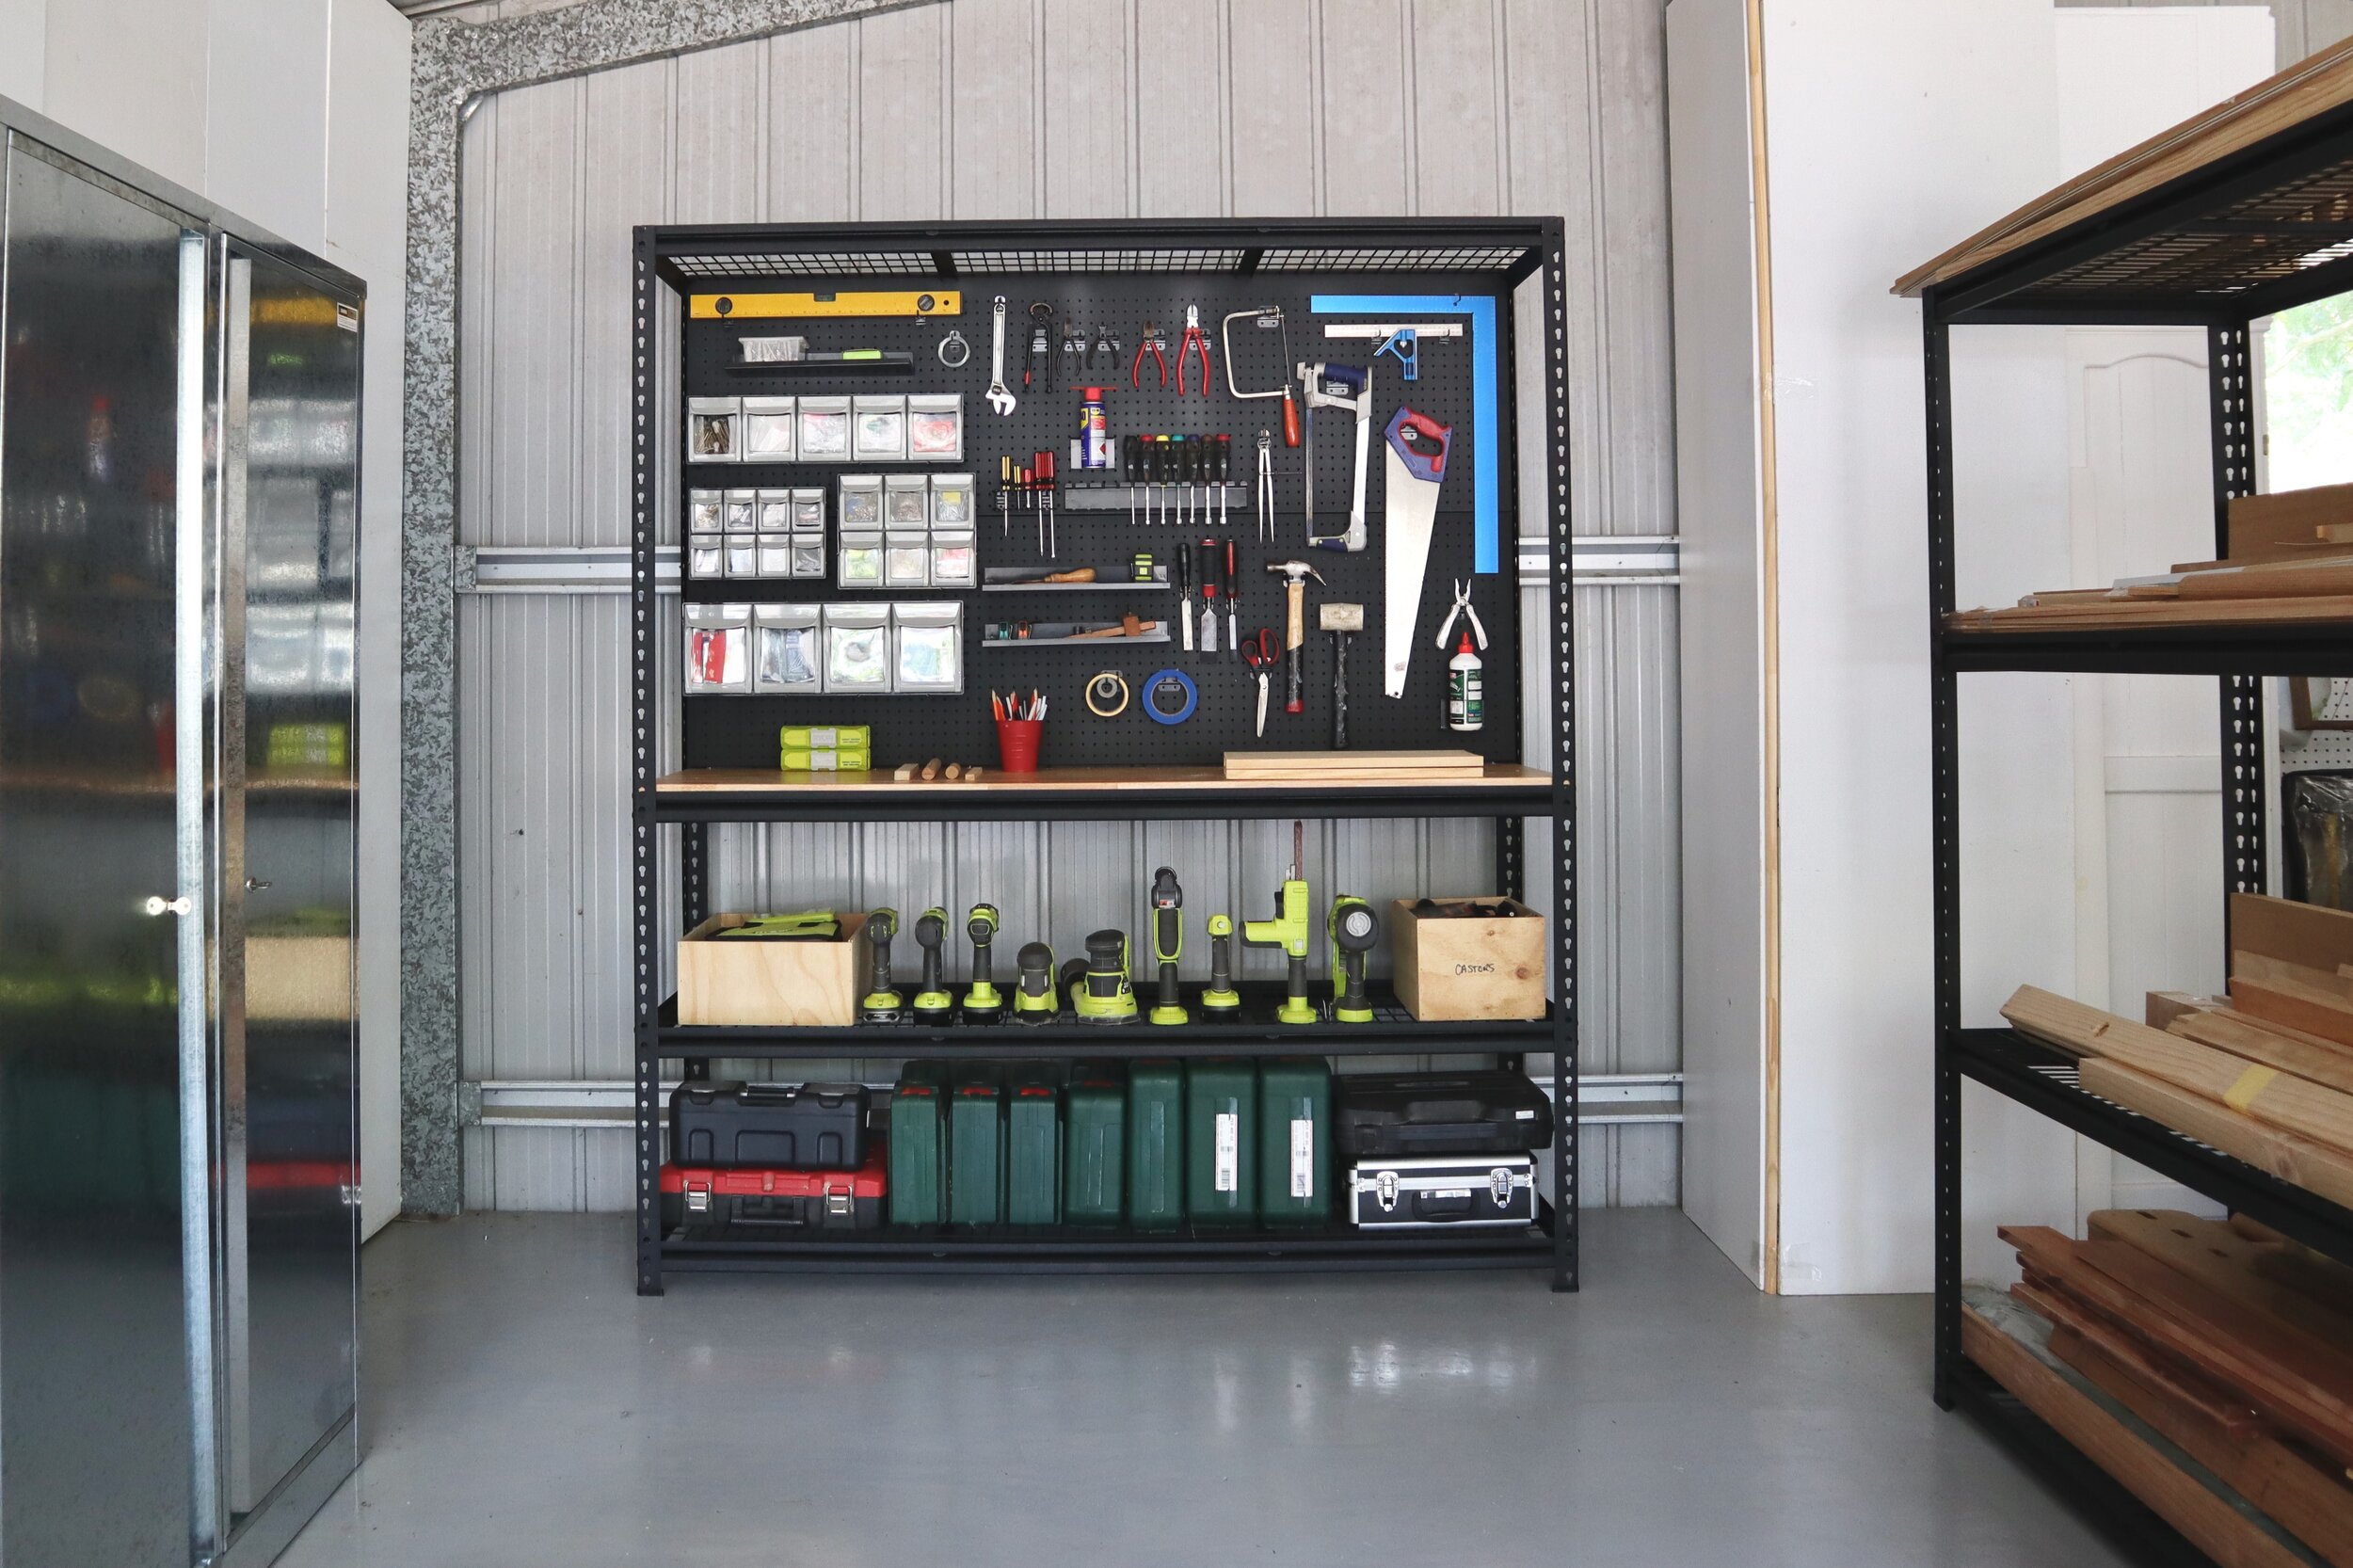
ZONE ① DISPLAY TOOLS & ACCESSORIES

This is where hand and power tools should be accessible, with accessories like drill bits, battery rechargers, sanding discs and saw blades at hand. It’s helpful to include fasteners (such as screws, nails, nuts and bolts), so you can easily match them with the right tool.

DISPLAY SOLUTION
A storage station with adjustable shelves can display cases, and a metal pegboard with different types of hooks means hand tools can be moved around. I also squeezed in a lockable four-drawer mobile cabinet to set out drill bits and hole saws plus specialty pieces for my router and accessories prone to surface rust.
STORAGE TIP For the fasteners I used compartment organisers, attaching them to the pegboard with small nuts and bolts. Call me fussy but now all the screws are in order of length and type and the nuts and bolts are organised and I can find washers instantly!

TO DIY
The Pinnacle Hardware Heavy-Duty Storage Station is the storage station of my dreams. Plus it was so easy to assemble and didn’t require any more tools than a mallet and screwdriver.
See how it’s put together…
ZONE ② SET OUT TIMBER STOCK & MATERIALS

I go through a fair bit of timber so have stacked up my stock on open shelves so it lies straight, with ventilation. If you’re renovating, store skirting and trim here, along with pipes, fencing, rolls of plastics or textiles.

SET OUT SOLUTION
This heavy-duty racking system can take the weight of whatever gets thrown onto it and the rubber feet won’t mark the floor. It’s best secured to a wall but is very stable free-standing here.
STORAGE TIP I’ve stacked heavier hardwoods at the base where they’re easiest to move. Then, working upwards, regular timber, lightweight mouldings and extra-long lengths on the top shelf so they’re out of the way.

TO DIY
Simply set out all the pieces of the Pinnacle Hardware four-tier heavy-duty adjustable shelf before you start, then tap it together, starting from the base. Use masking tape to indicate where the shelves will go so they’re straight and level.
See how it’s put together…
ZONE ③ STORE PAINT, ADHESIVES, FLAMMABLES

I like the idea of a lockable cabinet for flammables but also to store items like varnish, timber fillers, sealers and other equipment that are best kept in a cool dark place.

STORE SOLUTION
I’ve set out the adjustable shelves for bigger, heavier paint cans at the base so it’s easy to lift them out. And choosing a shiny galvanised cabinet means that when the doors are open they reflect light into the shelves for visibility.
STORAGE TIP Keep caulking guns and paint sprayers on the top of the cabinet.

TO DIY
There are lot of screws so I used an impact driver to assemble the Pinnacle Hardware metal storage cabinet. The power in the drill also helps pull the pieces together without effort.
See how it’s put together…
ZONE FOR A SMALL SPACE

If your workspace is small, or as limited as a bench, the storage zones still apply. Just downsize to install wall hooks for tool display, put up a shelf for materials and use a smaller cabinet like this lockable four-drawer mobile cabinet to store equipment.
See how I assembled the mobile four-drawer cabinet…
I researched heavy-duty racking and workbenches and ended up sourcing the entire project from Pinnacle Hardware for three good reasons…
① Found them at my local Bunnings hardware store and the prices were on-budget.
② I was working on my own and needed a system that could be assembled solo.
③ Aside from doing the job efficiently, they look great (and match my workwear)!